
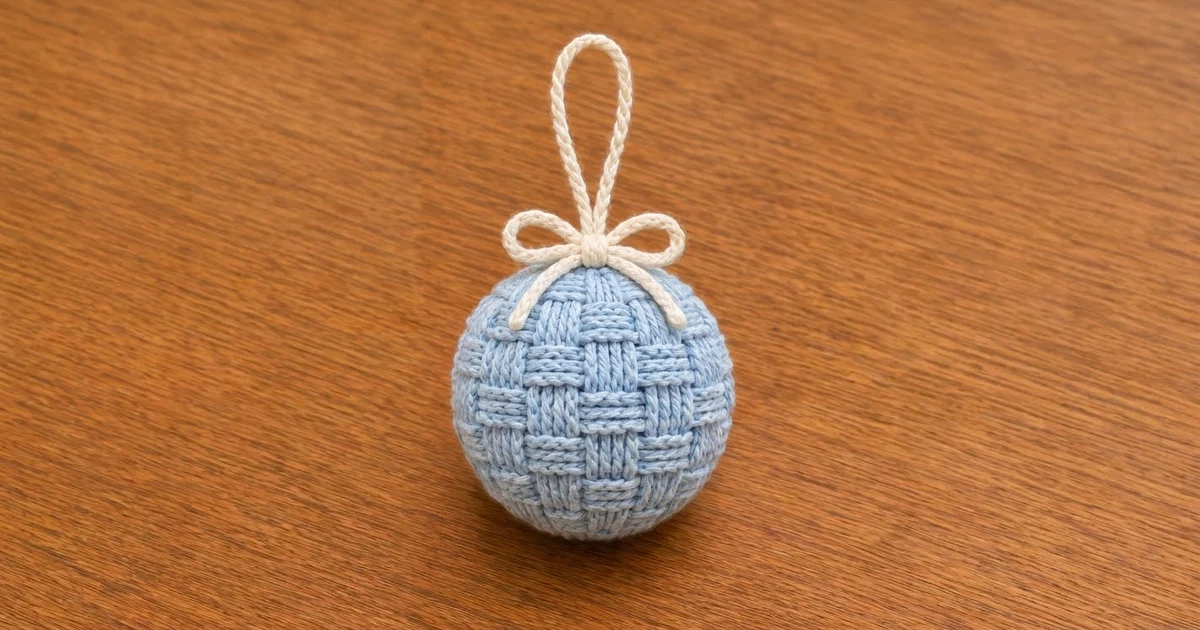
This little ornament looks woven, but you crochet it from one flat rectangle. Blocks of vertical post-stitch columns alternate with blocks of horizontal ridges in a checkerboard, so the stuffed ball looks like a tiny wicker basket. A cream cord loop and a soft bow finish the top.
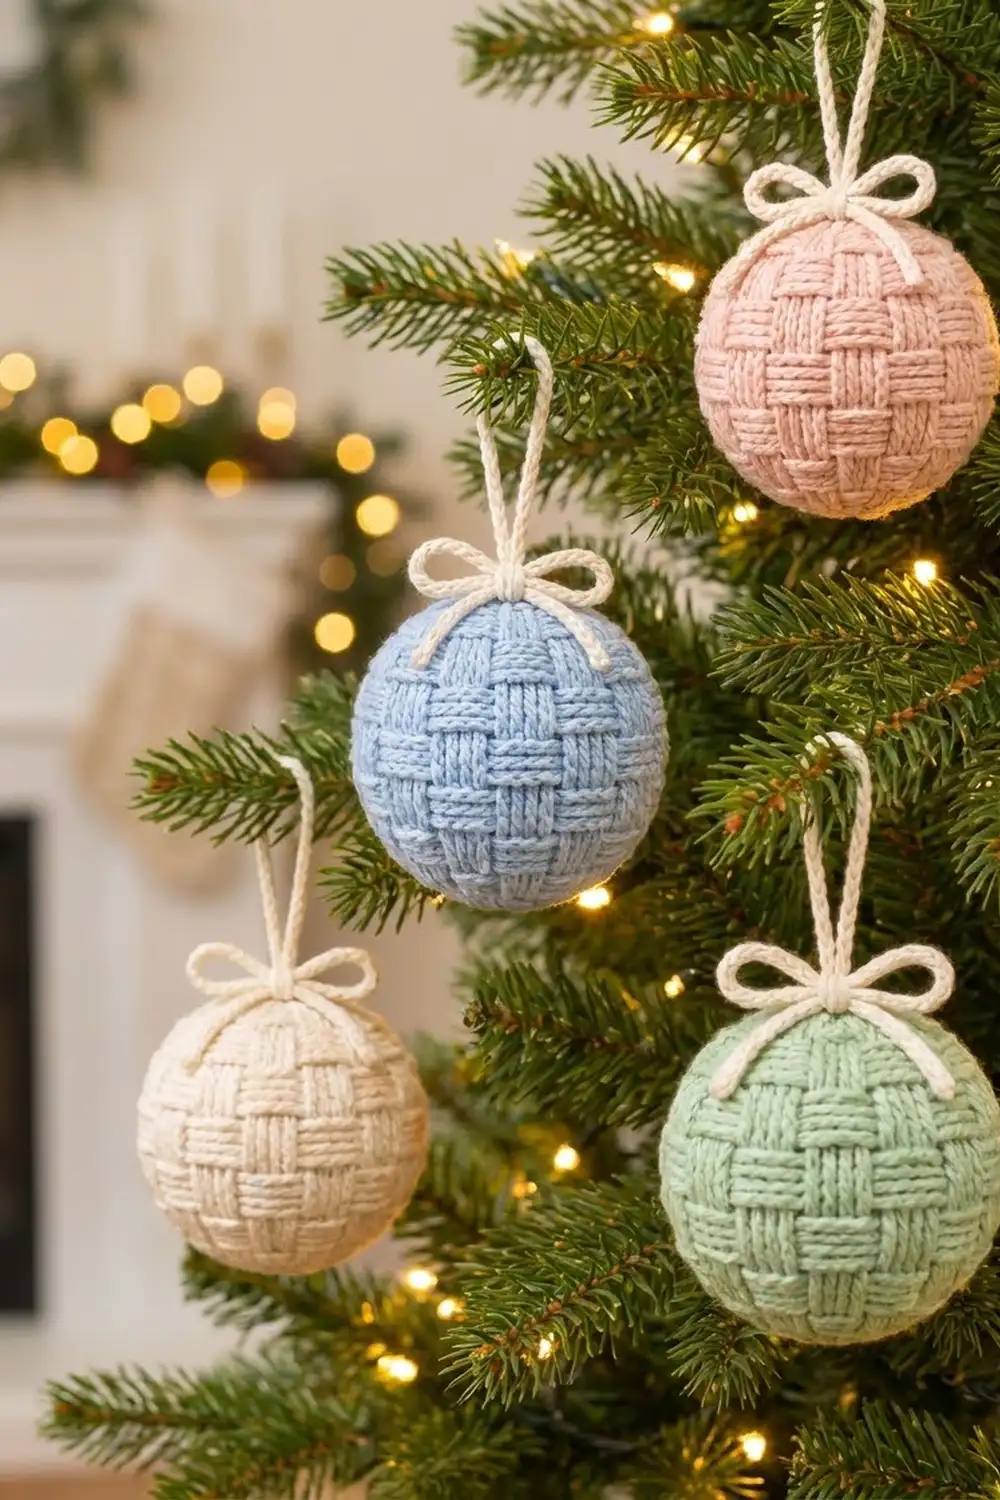
The sample is soft powder blue with a cream loop and bow. The same pattern also looks good in blush pink, cream or sage green, and a mixed set makes a calm, Scandinavian-style display on the tree. Every ornament is made the same way; only the body color changes.
This pattern uses US crochet terms. The finished ball is about 3 in (7.6 cm) across and about 9.4 in (23.9 cm) around. With the hanging loop, it is about 6 in (15.2 cm) tall.
Construction is simple. You crochet a flat basketweave panel in rows and add one round of single crochet border. Then you seam the short sides into a tube, gather the bottom, stuff it and gather the top closed. Two slip-stitch cords become the loop and the bow.
Finished Size and Construction
- Finished size: about 3 in (7.6 cm) across; 9.4 in (23.9 cm) around after stuffing
- Height with loop: about 6 in (15.2 cm)
- Skill level: Easy-intermediate (front and back post stitches)
- Terminology: US
- Yarn weight: Worsted (#4)
- Hooks: 4.5 mm (US 7) for the body; 4.0 mm (US G/6) for the cords
- Number of pieces: 1 body panel, plus 2 cords (hanging loop and bow)
- Layout: one panel, seamed into a tube and gathered at both ends
- Panel size before border: 8.5 x 4.4 in (21.6 x 11.2 cm)
- Size after border: 9 x 4.9 in (22.9 x 12.4 cm)
- Border depth: 0.25 in (0.6 cm), 1 round of sc
Materials
Choose a smooth, plied worsted yarn in cotton, a cotton blend or soft acrylic. The basketweave depends on crisp post stitches, so clear stitch definition matters. Avoid fuzzy or very splitty yarn.
- Main color (powder blue): 25 g, about 50 m
- Contrast color (cream): 8 g, about 16 m, for the loop and bow
- Polyester fiberfill: about 15 g
These quantities include a small safety margin.
Tools:
- 4.5 mm (US 7) crochet hook
- 4.0 mm (US G/6) crochet hook
- Tapestry needle
- 2 stitch markers
- Scissors
- Measuring tape or ruler
- Rust-proof pins and a blocking mat or folded towel
Abbreviations (US Terms)
- ch: chain
- sl st: slip stitch
- sc: single crochet
- dc: double crochet
- FPdc: front post double crochet
- BPdc: back post double crochet
- st(s): stitch(es)
- tch: turning chain
- RS / WS: right side / wrong side
- rep: repeat
FPdc: Yarn over and insert the hook from front to back to front around the post of the stitch below. Yarn over and pull up a loop, then [yarn over, pull through 2 loops] twice.
BPdc: Yarn over and insert the hook from back to front to back around the post of the stitch below. Yarn over and pull up a loop, then [yarn over, pull through 2 loops] twice.
Slip-stitch cord: Chain the stated number. Then sl st in the back bump of the 2nd ch from the hook and in each ch across.
Gauge and Checkpoints
Gauge: 16 sts and 10 rows = 4 in (10.2 cm) in the basketweave pattern with a 4.5 mm hook. That is 4 sts and 2.5 rows per 1 in (2.5 cm).
Make one full panel as your gauge test. It is small, and you can check it against each measurement below as you go.
Checkpoints:
- After Row 1: 34 sts, 8.5 in (21.6 cm) wide
- After Row 3: 1.2 in (3.0 cm) tall
- After Row 5: 2 in (5.1 cm) tall
- After Row 7: 2.8 in (7.1 cm) tall
- After Row 9: 3.6 in (9.1 cm) tall
- After Row 11: 4.4 in (11.2 cm) tall
- After the border: 9 x 4.9 in (22.9 x 12.4 cm)
If your panel is too big: switch to a 4.0 mm hook and start again. A larger panel makes a looser ball that needs more stuffing and shows gaps.
If your panel is too small: switch to a 5.0 mm hook. A small panel will still close, but the ball will be under 3 in (7.6 cm) and the texture will be tight.
Measure the width across the middle of the panel, not at the foundation edge.
Body Panel
Use the main color and the 4.5 mm hook.
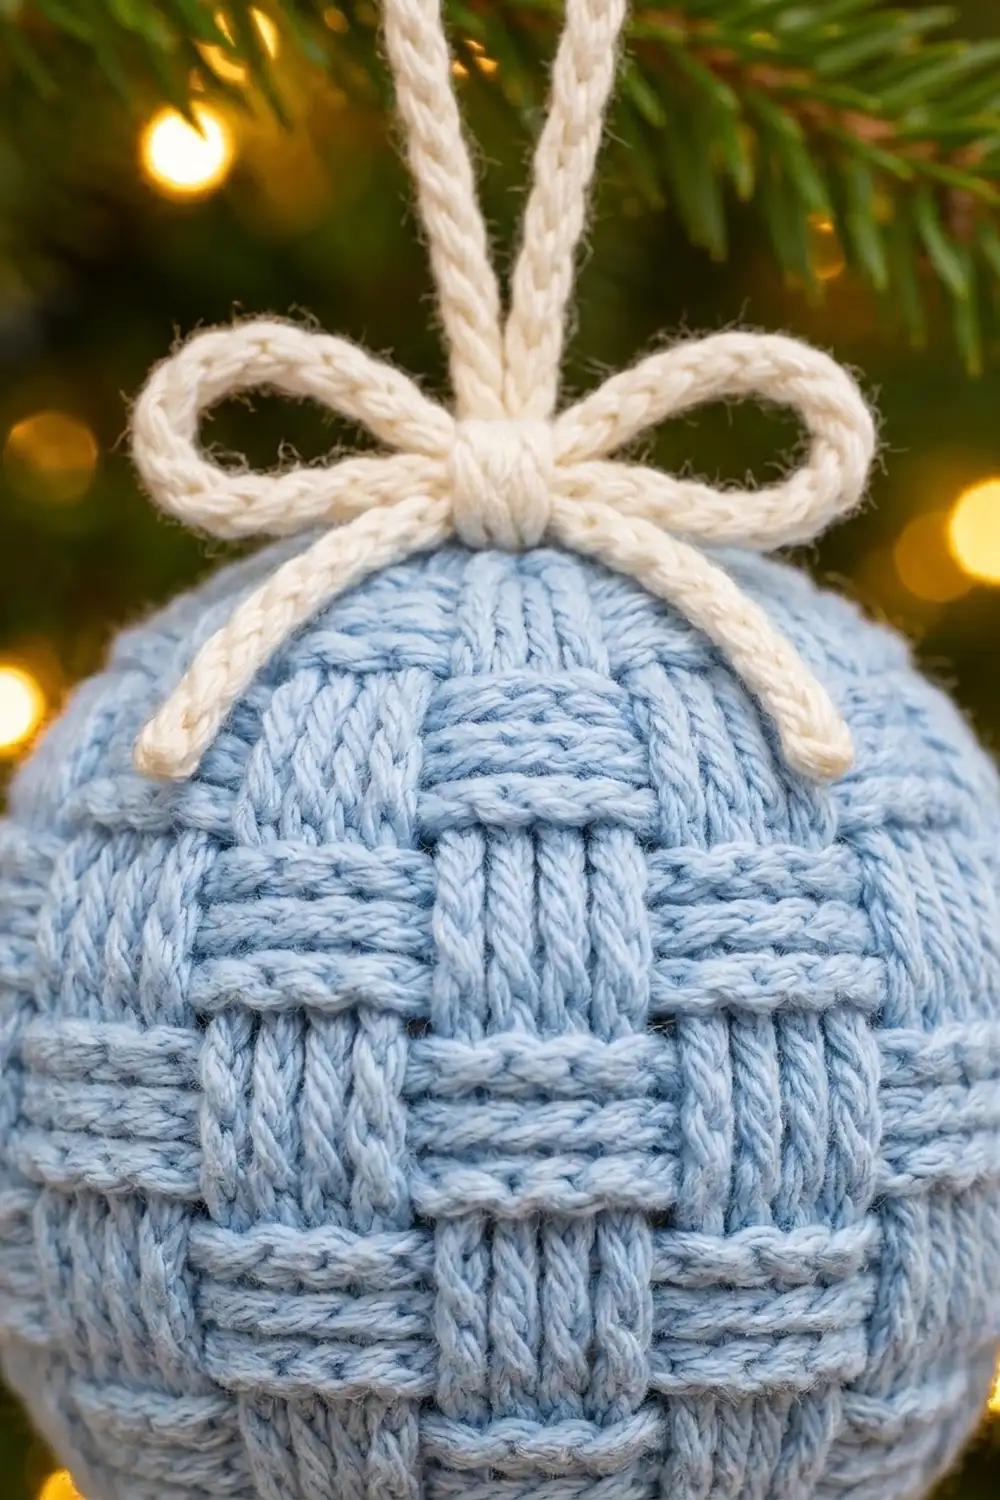
The panel has 34 sts: 1 edge dc, 8 blocks of 4 post sts (32 sts) and 1 more edge dc. The blocks switch every 2 rows, which gives 5 bands of blocks.
Row 1 (foundation): Ch 36. Dc in the 4th ch from the hook and in each ch across. Turn. (34 sts; the skipped 3 ch count as the first dc.)
Row 2 (RS): Ch 3 (counts as a dc throughout). *FPdc around the next 4 sts, BPdc around the next 4 sts; rep from * 3 more times. Dc in the top of the tch. Turn. (34 sts: 2 edge dc, 16 FPdc, 16 BPdc)
Row 3 (WS): Ch 3. *FPdc around the next 4 sts, BPdc around the next 4 sts; rep from * 3 more times. Dc in the top of the tch. Turn. (34 sts)
Row 3 reads the same as Row 2 because there are 8 blocks, an even number. On the WS you reach the last RS block first. That block was BPdc on the RS, so you work it as FPdc from the WS, which keeps it sunk in on the RS. Every block stays consistent.
Place a marker on the RS of the panel.
Row 4 (RS): Ch 3. *BPdc around the next 4 sts, FPdc around the next 4 sts; rep from * 3 more times. Dc in the top of the tch. Turn. (34 sts)
Row 5 (WS): Ch 3. *BPdc around the next 4 sts, FPdc around the next 4 sts; rep from * 3 more times. Dc in the top of the tch. Turn. (34 sts)
The blocks have now swapped: raised vertical columns sit above flat horizontal ridges, and the checkerboard begins.
Rows 6–7: Rep Rows 2–3. (34 sts in each row)
Rows 8–9: Rep Rows 4–5. (34 sts in each row)
Rows 10–11: Rep Rows 2–3. (34 sts in each row)
Do not fasten off. The panel should measure 8.5 x 4.4 in (21.6 x 11.2 cm), with 5 bands of 8 blocks each. Each block is about 1 x 0.8 in (2.5 x 2.0 cm).
Border
The border is one round of sc worked all the way around the panel. It neatens the edges, gives you clean stitches for the side seam and forms the rim you will gather at each end.
Border gauge: 4 sc per 1 in (2.5 cm) along the top and bottom edges; 2 sc per dc row along the side edges.
Round 1: Ch 1 and turn so the RS faces you. Work along the top edge (Row 11):
- 3 sc in the first st (corner), sc in the next 32 sts, 3 sc in the last st (corner).
- Rotate and work down the side edge: 2 sc in the side of each of the 11 rows. (22 sc)
- Rotate and work along the foundation edge: 3 sc in the first ch (corner), sc in the next 32 ch, 3 sc in the last ch (corner).
- Rotate and work up the second side edge: 2 sc in the side of each of the 11 rows. (22 sc)
Join with a sl st to the first sc. Fasten off, leaving a 16 in (40.6 cm) tail for seaming.
Border count: 4 corners x 3 sc = 12 sc, plus 32 + 32 + 22 + 22 = 108 sc between the corners. Total: 120 sc.
If you count each side with both corner center sts included, the top and bottom have 34 sts each and each side has 24 sts.
Why the math works: Along the top and bottom, you work 1 sc into each of the 34 sts, so the panel keeps its 8.5 in (21.6 cm) width plus the border. Along the sides, a dc row is about as tall as 2 sc, so 2 sc per row keeps the edge flat without ruffling or pulling in. The border adds 0.25 in (0.6 cm) on every side, which brings the panel to 9 x 4.9 in (22.9 x 12.4 cm).
Assembly
Seam the tube: Fold the panel with the RS facing out so the two side edges meet. Thread the long tail on a tapestry needle and whipstitch through the back loops of the 24 side sts, matching stitch to stitch: the corner center sc, the 22 side sc and the other corner center sc. Keep the tension firm but not tight, so the seam lies flat.
Checkpoint: The tube is about 9 in (22.9 cm) around and 4.9 in (12.4 cm) tall. Each open rim now has 34 sc: 32 edge sts plus 1 sc from each corner group.
Gather the bottom: Cut a 12 in (30.5 cm) length of the main color. Weave it in and out through the front loops of all 34 sc on the bottom rim. Pull it tight to close the hole completely, then knot it and weave in the end.
Stuff: Hold the tube with the open end up. Add fiberfill a little at a time, filling the bottom first. Aim for a firm, round ball that does not stretch the stitches open. About 15 g is usually right.
Gather the top: Weave a second 12 in (30.5 cm) length through the front loops of the 34 sc on the top rim. Pull it tight, add a final pinch of stuffing if needed, and close. Knot securely and hide the end inside the ball.
Hanging Loop and Bow
Use the cream yarn and the 4.0 mm hook. Cord gauge: about 5 sl sts per 1 in (2.5 cm).
Hanging loop: Ch 36. Sl st in the back bump of the 2nd ch from the hook and in each ch across. (35 sl sts, about 7 in / 17.8 cm) Fasten off, leaving 6 in (15.2 cm) tails.
Fold the cord in half to make a loop about 3.5 in (8.9 cm) long. Thread both tails through the center of the top gather, knot them inside the ball and hide the ends.
Bow: Ch 51. Sl st in the back bump of the 2nd ch from the hook and in each ch across. (50 sl sts, about 10 in / 25.4 cm) Fasten off and weave in the ends.
Wrap the bow cord once around the base of the loop and tie a neat bow about 3 in (7.6 cm) wide. Sew the knot to the top gather with a few small stitches in cream so the bow does not slide.
Final Blocking
- Before seaming, pin the bordered panel RS up to 9 x 4.9 in (22.9 x 12.4 cm).
- Mist it lightly with water until it is damp, not soaked.
- Press the blocks gently with your fingers so the vertical columns stand up and the horizontal ridges lie flat.
- Let the panel dry completely before you unpin it.
- After stuffing, steam the ball lightly from a distance if it is acrylic, or mist it if it is cotton. Shape it round with your hands and let it dry.
Final Quality-Control Checklist
- Every row has 34 sts.
- The panel shows 5 bands of 8 alternating blocks in a clear checkerboard.
- The panel before the border measures 8.5 x 4.4 in (21.6 x 11.2 cm).
- The border has 120 sc, with 3 sc in each corner.
- The panel after the border measures 9 x 4.9 in (22.9 x 12.4 cm).
- The side seam joins 24 sts to 24 sts and lies flat.
- Both gathered ends are fully closed, with no stuffing showing.
- The ball is about 3 in (7.6 cm) across and evenly round.
- The loop is securely anchored and the bow is sewn in place.
- All yarn ends are woven in and hidden.
Troubleshooting
The checkerboard looks blurry. Make sure you switch between Rows 2–3 and Rows 4–5 every 2 rows, and that each row starts and ends with a plain dc.
The panel is narrower than 8.5 in (21.6 cm). Post stitches pull the fabric in. Use a larger hook, or work the post stitches a little more loosely.
The side edges ruffle after the border. Your row ends may be shorter than 2 sc. Work 3 sc over every 2 rows instead, and keep the corners the same.
There is a hole at the top or bottom. Pull the gathering yarn tighter, or weave a second strand through the back loops and pull again.
The ball is lumpy. Take out some stuffing, pull it apart into small fluffy pieces and restuff gradually.
The bow keeps slipping. Sew the bow knot to the gather with 2–3 small stitches.
Care
Spot clean with mild soap and cool water, then reshape and let it air dry. Store it in a box with tissue paper so the ball and bow keep their shape.
Final Notes
The measurements build on each other and are easy to check. The gauge is 16 sts and 10 rows = 4 in (10.2 cm). After 11 rows, the 34-st panel measures 8.5 x 4.4 in (21.6 x 11.2 cm). The 120-st sc border brings it to 9 x 4.9 in (22.9 x 12.4 cm). Seamed, it becomes a 9 in (22.9 cm) tube. Gathered and stuffed, it becomes a 3 in (7.6 cm) ball about 9.4 in (23.9 cm) around.
If your piece matches each checkpoint, your finished ornament will match too.
Happy crocheting!