

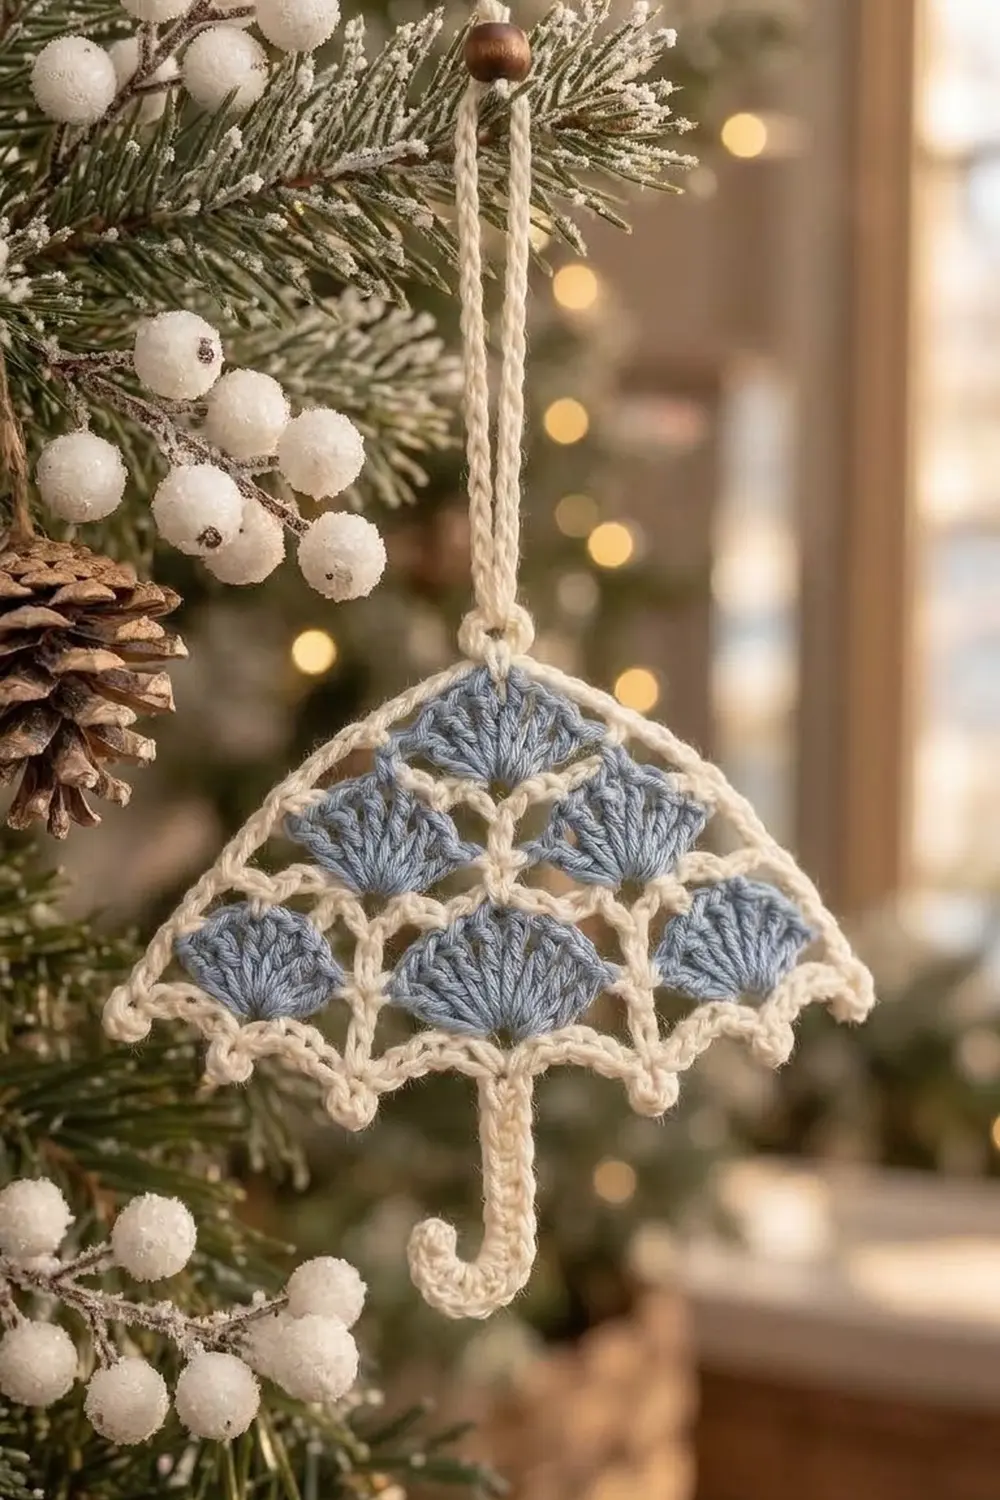
This little umbrella ornament is made for the Christmas tree. A cream lace framework forms the canopy. Five slate-blue granny square motifs sit inside it, two on top and three on the bottom, with open cream lattice between them. A scalloped picot trim finishes the lower edge.
A cream twisted cord rises from the canopy’s center point and ends in a knot at the top. A brown wooden bead sits at the very end. The look is soft, lacy, and wintry, and it suits a frosted evergreen.
The pattern uses US crochet terms. The finished ornament measures 3.7 in (9.4 cm) wide and 4.5 in (11.4 cm) tall including the cord and hanging loop. The canopy alone is 2.7 in (6.9 cm) tall at its center point.
Construction is simple. You crochet five small granny square motifs, each finished with cream lace rounds. They are joined as you go in a 3-and-2 layout. Two border rounds then shape the canopy and add the scallops. A twisted cord with a knot and bead completes it.
Finished Size and Construction
- Finished size: 3.7 in (9.4 cm) wide x 4.5 in (11.4 cm) tall, including cord and loop
- Canopy only: 3.7 in (9.4 cm) x 2.7 in (6.9 cm)
- Skill level: Intermediate (join-as-you-go, graded stitch heights)
- Terminology: US
- Yarn weight: Size 10 cotton crochet thread (Lace, #0)
- Hook: 1.75 mm steel hook (US steel 6)
- Number of pieces: 5 motifs, joined into one ornament, plus 1 twisted cord
- Layout: 3 motifs on the bottom row, 2 on the top row, offset by half a motif
- Motif size: 1.1 in (2.8 cm) square
- Size before border: 3.3 in (8.4 cm) wide x 2.2 in (5.6 cm) tall
- Border depth: 0.2 in (0.5 cm) at the sides and top, and 0.3 in (0.8 cm) at the bottom including scallops
Materials
Use mercerized cotton thread. It holds stitch definition, blocks crisply, and keeps the lace open. Avoid fuzzy or acrylic thread, because the picots and lattice will blur.
- Slate blue: about 4 g / 15 m (motif Rounds 1-2)
- Cream: about 6 g / 25 m (motif Rounds 3-4, border, cord)
Quantities include a margin of about 50% for swatching and weaving in ends.
Tools:
– 1.75 mm steel hook (US steel 6)
– Small tapestry needle (size 24)
– One 8 mm brown wooden bead with a 2.5-3 mm hole
– Needle threader or fine wire loop
– Scissors
– Rust-proof pins and a blocking mat
– Spray starch or a stiffener
– Locking stitch marker
Abbreviations (US Terms)
- ch: chain
- sl st: slip stitch
- sc: single crochet
- hdc: half double crochet
- dc: double crochet
- tr: treble crochet
- dtr: double treble crochet
- sk: skip
- sp: space
- st(s): stitch(es)
- JAYG: join-as-you-go
Picot (p): ch 3, sl st into the 3rd ch from the hook.
Side join: ch 1, sl st into the matching ch-3 loop of the neighboring motif, ch 1. This replaces one ch 3.
Corner join: in the corner sp work sc, ch 1, sl st into the neighbor’s corner loop, ch 1, sc. This replaces (sc, ch 3, sc).
Gauge and Checkpoints
Make one complete motif before anything else, and measure it flat without stretching.
- After Round 2: 0.7 in (1.8 cm) square
- After Round 3: 0.85 in (2.2 cm) square
- After Round 4: 1.1 in (2.8 cm) square, measured across the outer loops
The border is worked at about 14.5 sc per inch (5.7 sc per cm). Packing 3 sc into each ch-3 loop makes it denser than the motifs.
If your motif comes out larger than 1.1 in (2.8 cm), go down one steel size to 1.5 mm. If it is smaller, go up to 2.0 mm. A difference of 0.1 in (0.3 cm) per motif becomes 0.3 in (0.8 cm) across the bottom row, so check this before you continue.
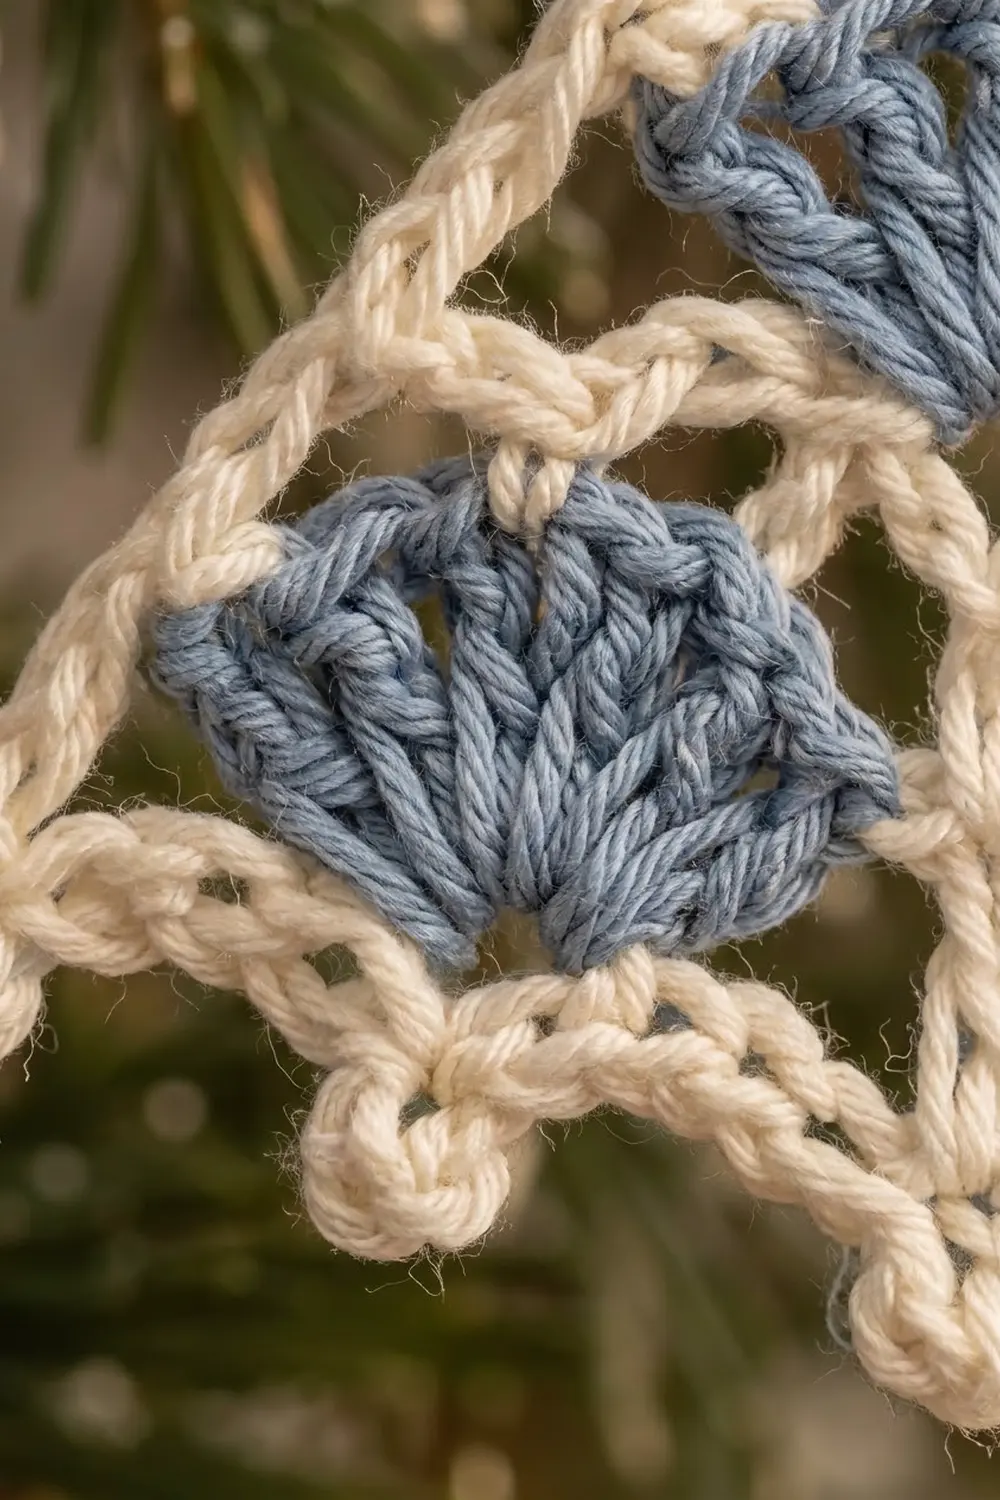
Granny Square Motif (Make 5)
Round 1 (slate blue): Ch 4, sl st to the first ch to form a ring. Ch 3 (counts as dc), 2 dc in the ring, ch 2. Work (3 dc, ch 2) 3 times in the ring. Sl st to the top of the beginning ch-3.
Count: 12 dc, 4 ch-2 corner sps.
Round 2 (slate blue): Sl st into the next 2 dc and into the corner sp. In the same sp work (ch 3, 2 dc, ch 2, 3 dc). Ch 1. In the next corner sp work (3 dc, ch 2, 3 dc), then ch 1. Repeat from * to * 2 more times. Sl st to the top of the ch-3. Fasten off.
Count: 24 dc, 4 ch-2 corner sps, 4 ch-1 side sps.
Round 3 (cream, conversion round): Join cream in any corner sp. Ch 1, then (sc, ch 2, sc) in the same sp. Sc in the next 3 dc, sc in the ch-1 sp, sc in the next 3 dc, (sc, ch 2, sc) in the corner sp. Repeat from * to * 2 more times. Sc in the next 3 dc, sc in the ch-1 sp, sc in the next 3 dc. Sl st to the first sc.
Count: 24 sc (1 per dc) + 4 sc (1 per ch-1 sp) + 8 sc (2 per corner) = 36 sc, plus 4 ch-2 corner sps. That gives 9 sc per side between corner sps.
Round 4 (cream, lace loops): Sl st into the corner sp. Ch 1, then (sc, ch 3, sc) in the same sp. Ch 3, sk 2 sc, sc in the next sc. Ch 3, sk 1 sc, sc in the next sc. Ch 3, sk 1 sc, sc in the next sc. Ch 3, sk 2 sc, (sc, ch 3, sc) in the corner sp. Repeat from * to * 2 more times. End the last repeat with ch 3, sk 2 sc, and sl st to the first sc.
Count: 16 side loops (4 per side) + 4 corner loops = 20 ch-3 loops. Each side has 6 loops counting both corner loops: 4 x 6 – 4 shared corners = 20.
The side skips (2, 1, 1, 2) use all 9 side sc: 2 + 1 + 1 + 1 + 1 + 1 + 2 = 9.
Motif 1 is worked in full. Motifs 2-5 use JAYG on Round 4.
Make All Pieces
- Slate blue: 5 motifs, Rounds 1-2
- Cream: Rounds 3-4 on all 5 motifs (Round 4 joined), 2 border rounds, 1 cord
Layout, with the top row centered over the bottom row:
ROW 1 (top):      .  BLUE(M4)  BLUE(M5)  .
ROW 2 (bottom): BLUE(M1)  BLUE(M2)  BLUE(M3)
M4 spans the right half of M1 and the left half of M2. M5 spans the right half of M2 and the left half of M3.
Joining
Method: Join as you go on Round 4. Each ch-3 loop meets exactly one ch-3 loop on the neighbor, so 4 side loops always meet 4 side loops. Corners join corner to corner. The chains between the joins form the cream openwork lattice.
- M2: Join its left side to M1’s right side. That is 2 corner joins and 4 side joins.
- M3: Join its left side to M2’s right side in the same way.
- M4: Along its bottom edge, the 2 left-half loops join the 2 right-half top loops of M1, and the 2 right-half loops join the 2 left-half top loops of M2. Leave both bottom corners of M4 unjoined for now.
- M5: Along its bottom edge, the left 2 loops join the right 2 top loops of M2, and the right 2 loops join the left 2 top loops of M3. Join its left side to M4’s right side with 4 side joins. Its bottom-left corner joins M4’s bottom-right corner, and its top-left corner joins M4’s top-right corner.
The corners of M1/M2 and M2/M3 under the top row join only to each other. They leave small open diamonds that add to the lace.
Tension: Keep each ch 1 the same size as a normal chain. Tight joins pucker the lattice, and loose joins sag.
Size checkpoint: The bottom row should measure 3.3 in (8.4 cm) wide. All five motifs together should measure 3.3 in (8.4 cm) x 2.2 in (5.6 cm). Weave in ends now.
Border
The border is worked at about 14.5 sc per inch (5.7 sc per cm) along the edge.
Border stitch rules:
– 3 sc in each free side loop.
– 2 sc in each corner loop that is part of a joined pair on the outline.
– (2 sc, ch 1, 2 sc) in each outer corner loop. Each half counts toward its own side.
– 1 sc in each inside (concave) corner loop.
With these rules, one motif side gives 2 + 12 + 2 = 16 sc.
Round 1 (cream): Join in M1’s bottom-left corner loop. Ch 1, then work around the entire outline counterclockwise using the rules above. Sl st to the first sc.
Counts per section:
– Bottom: 3 motifs x 16 = 48 sc
– M3 right side: 16 sc (1 motif side)
– Right ledge: 9 sc. This is 2 (corner half) + 6 (M3’s 2 free top loops) + 1 (M5’s concave corner).
– M5 right side: 14 sc. This is 12 + 2 (corner half).
– Top: 2 motifs x 16 = 32 sc
– M4 left side: 14 sc
– Left ledge: 9 sc
– M1 left side: 16 sc
Total: 48 + 16 + 9 + 14 + 32 + 14 + 9 + 16 = 158 sc, plus 6 ch-1 corner sps.
Checkpoint: 3.5 in (8.9 cm) x 2.4 in (6.1 cm).
Round 2 (cream, scallops and canopy shaping): Join in M1’s bottom-left ch-1 sp. Ch 1, then work (sc, p) in the same sp.
- Bottom: Sk 2 sts, 3 dc in the next st, 3 dc in the next st, sk 2 sts, (sc, p) in the next st. Repeat 7 times. The 7th (sc, p) lands in M3’s bottom-right ch-1 sp.
- M3 right side: Sc in each of the 16 sts.
- Corner: 2 sc in the ch-1 sp.
- Right ledge (9 sts): Hdc in 2 sts, dc in 2 sts, tr in 3 sts, dtr in 2 sts.
- M5 right side (14 sts): Dtr in 1 st, tr in 2 sts, dc in 2 sts, hdc in 2 sts, sc in 7 sts.
- Corner: 2 sc in the ch-1 sp.
- Top (32 sts): Sc in 8 sts, hdc in 4 sts, dc in 4 sts, ch 2 (center point), dc in 4 sts, hdc in 4 sts, sc in 8 sts.
- M4 left side (14 sts): Sc in 7 sts, hdc in 2 sts, dc in 2 sts, tr in 2 sts, dtr in 1 st.
- Left ledge (9 sts): Dtr in 2 sts, tr in 3 sts, dc in 2 sts, hdc in 2 sts.
- Corner: 2 sc in the ch-1 sp.
- M1 left side: Sc in each of the 16 sts.
Sl st to the first sc. Fasten off.
Bottom count: 8 sc with picots + 42 dc (7 scallops x 6 dc).
Upper count: 110 sts worked 1 per stitch + 8 extra sc (2 per ch-1 sp in each of 4 corners) = 118 sts, plus 1 ch-2 center point.
Why the math works: The 7-stitch scallop repeat needs 49 spaces between the two bottom corner anchors. The bottom has 48 sts plus the far corner sp, which is 49, so the scallops come out exactly symmetrical. On the sides, stitches worked into vertical edges grow outward, and stitches worked into the ledges grow upward. Grading them from dtr down to sc fills each step into a smooth slope. The dc rise at the top forms the canopy’s center point.
Checkpoint: 3.7 in (9.4 cm) x 2.7 in (6.9 cm).
Twisted Cord and Bead
- Cut 24 in (61.0 cm) of cream. Fold it in half and twist it firmly until it kinks.
- Fold it in half again and let it twist on itself. Smooth it out. The folded end becomes the hanging loop.
- Use the needle threader to pull the folded end through the bead.
- Tie an overhand knot directly under the bead. Leave a 0.2 in (0.5 cm) loop above the bead.
- Thread the cut ends through the ch-2 center point from front to back. Adjust so the cord measures 1.2 in (3.0 cm) from the canopy to the knot.
- Tie the ends securely on the back and weave them into the border.
The cord, knot, bead, and loop add 1.8 in (4.6 cm), for a total height of 4.5 in (11.4 cm).
Final Blocking
- Lightly dampen the ornament or mist it with spray starch.
- Pin it to 3.7 in (9.4 cm) wide at the bottom picots.
- Pin the center point so the canopy is 2.7 in (6.9 cm) tall.
- Pin each picot down so every scallop curves evenly.
- Open each lattice diamond with a pin tip.
- Keep the cord out of the starch and let it hang straight.
- Let it dry completely, ideally for 12 hours, before unpinning.
Final Quality-Control Checklist
- 5 slate-blue motifs: 3 on the bottom and 2 on top, centered
- Every motif is 1.1 in (2.8 cm) with 20 loops
- All lattice joins are even, with no puckers
- 7 even scallops with 8 picots
- The canopy slopes smoothly with no visible steps
- The center point is centered under the cord
- The knot sits directly under the bead
- Finished size is 3.7 in (9.4 cm) x 4.5 in (11.4 cm)
- All ends are woven in invisibly
Troubleshooting
- Motifs cup: Your Round 3 tension is too tight. Go up one steel size for the cream rounds only.
- Lattice sags: The join chains are too loose. Snug up each ch 1.
- Scallops are uneven: Recount the 48 bottom sts in Round 1. Each scallop needs exactly 7 sts.
- Steps still show: The tall stitches are too tight. Pull up the loop height on the tr and dtr.
- Edge ruffles: The border is too loose. Go down one steel size for the border only.
- Bead slips: Retie the knot tighter, or add a second overhand knot.
Care
Hand wash in cool water, reshape, and dry flat, then re-starch if needed. Keep the wooden bead out of water when you can, and spot clean it instead.
Final Notes
The measurement chain is simple to follow:
- Motif: 0.7 in (1.8 cm), then 0.85 in (2.2 cm), then 1.1 in (2.8 cm)
- Joined layout: 3.3 in (8.4 cm) x 2.2 in (5.6 cm)
- After Border Round 1: 3.5 in (8.9 cm) x 2.4 in (6.1 cm)
- After Border Round 2: 3.7 in (9.4 cm) x 2.7 in (6.9 cm)
- With the cord and bead: 4.5 in (11.4 cm) tall
Check each stage before moving on, and the ornament will finish true to size. Optional: make several in different blues for a matching set of tree ornaments.
Happy crocheting!