

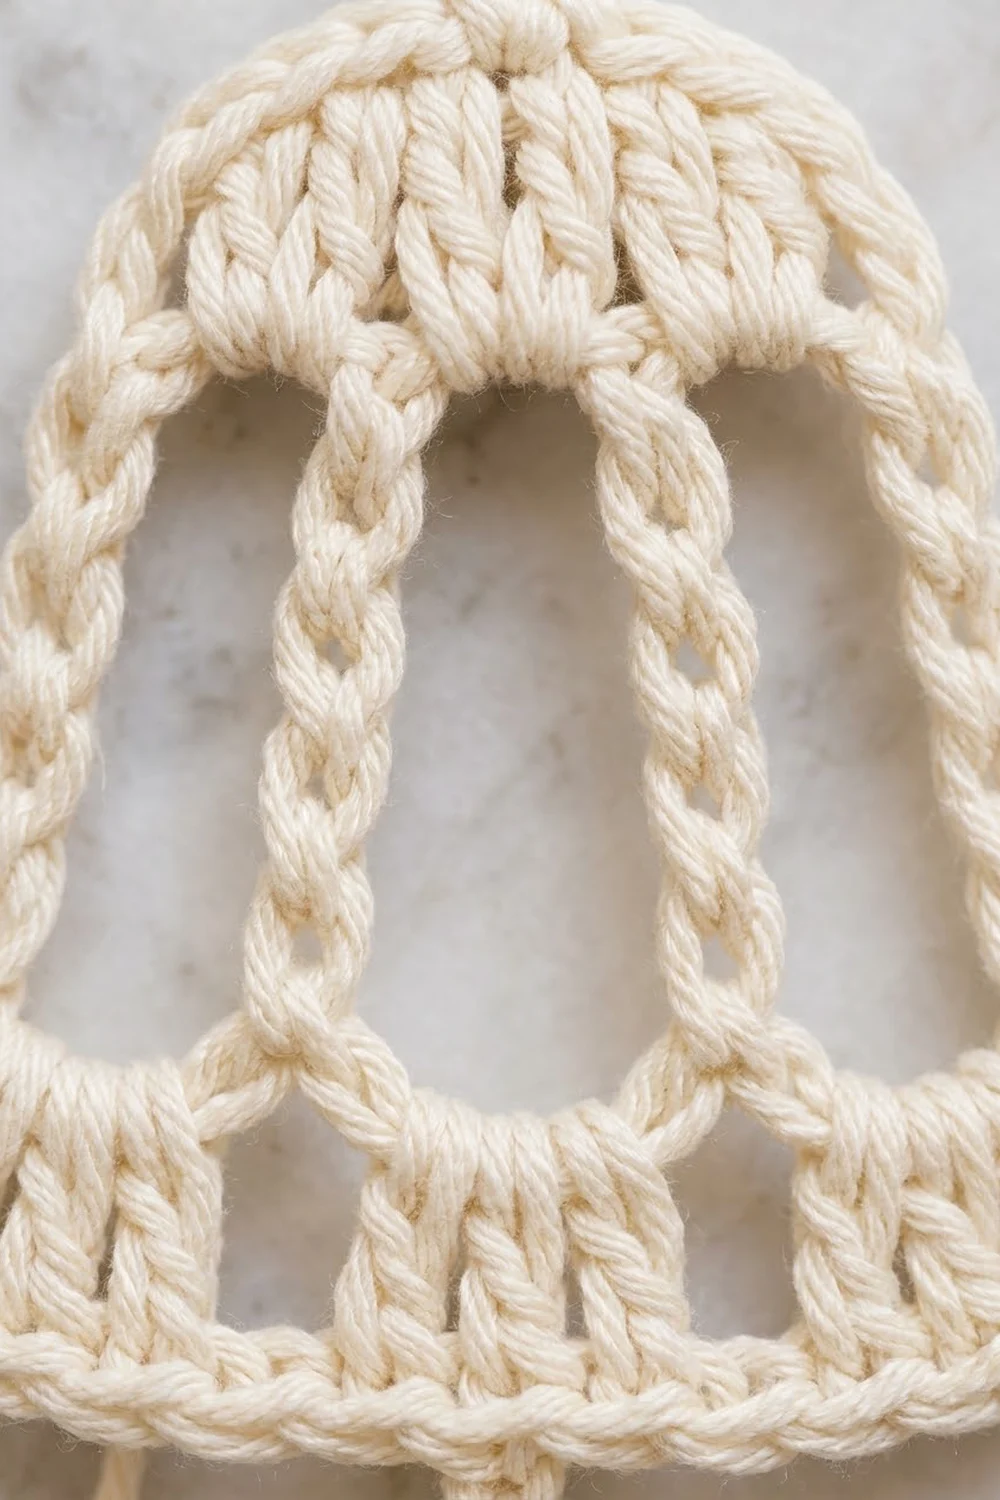
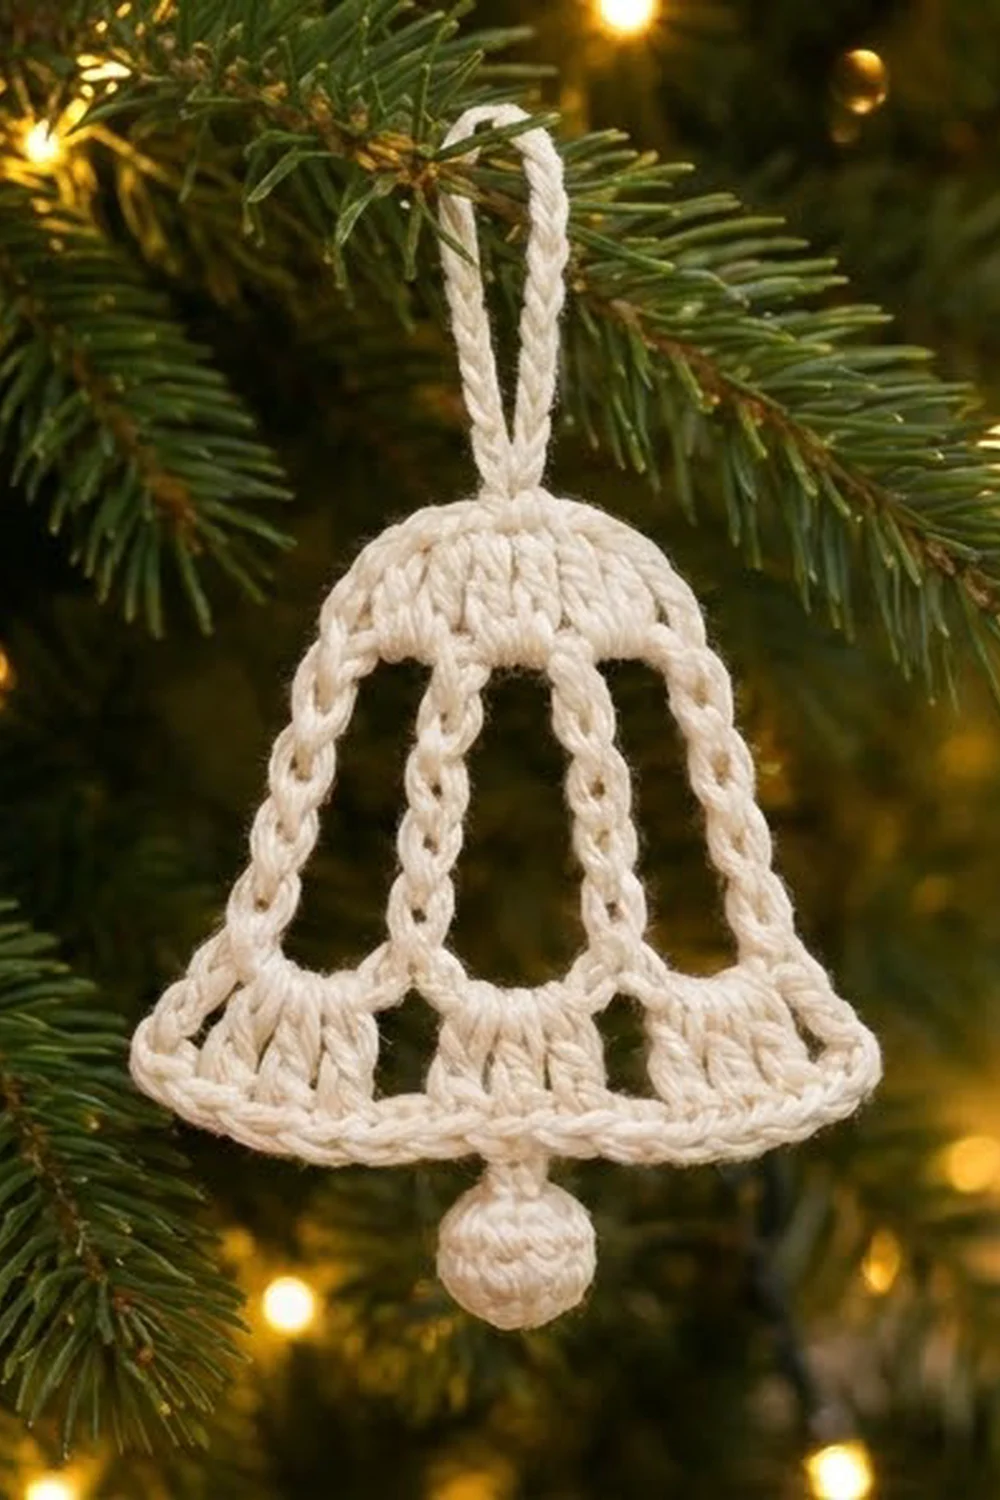
This openwork bell ornament is a single flat piece in creamy ivory cotton. It has a solid domed crown and three tall arched windows framed by corded chain columns. Below them is a band of short stitch blocks with narrow slits, then a rope-textured rim. A small round clapper hangs from the center of the rim, and a slim chain loop at the top lets it hang from a branch.
The look is simple and a little vintage, like the lace bells on an old-fashioned tree. Using one neutral color keeps the focus on the openwork. Mercerized cotton gives crisp stitch definition and blocks very flat, so the windows stay open and the columns stay straight.
The pattern uses US crochet terms. The bell body measures about 4.0 in (10.2 cm) wide at the rim and 3.5 in (8.9 cm) tall from crown to rim. With the hanging loop and clapper, the ornament is about 5.9 in (15.0 cm) long.
You work the bell top-down in turned rows. The crown widens over three double crochet rows. Next, three long chain loops form the windows. The row after that is worked into the bottom of each loop, which pulls the chains into columns. A flared row of stitch blocks and a two-row rim finish the body. The hanging loop and clapper go on last.
Finished Size and Construction
- Finished size: 4.0 in (10.2 cm) wide x 3.5 in (8.9 cm) tall (bell body only)
- Total hanging length: about 5.9 in (15.0 cm), including loop and clapper
- Skill level: Easy-intermediate
- Terminology: US crochet terms
- Yarn weight: Sport / light (#2) mercerized cotton
- Hook: 2.75 mm (C-2)
- Number of pieces: 1 bell body, plus 1 small clapper ball attached to it
- Layout: Single flat ornament, no assembly
- Piece size: 4.0 in (10.2 cm) x 3.5 in (8.9 cm)
- Size before border: about 3.7 in (9.4 cm) wide x 3.2 in (8.1 cm) tall after Row 6
- Border depth: about 0.3 in (0.8 cm), Rows 7–8
Materials
Choose a smooth, tightly plied mercerized cotton in sport weight. It shows off the corded chain columns and holds its shape after blocking. Avoid fuzzy or very soft acrylic, because the windows will sag and the rim will not stay crisp.
- Ivory / cream cotton: 10 g, about 28 m (31 yd) for one bell, including the loop and clapper
- 2.75 mm (C-2) crochet hook
- Tapestry needle
- A small pinch of fiberfill or matching yarn scraps to stuff the clapper
- Scissors
- Stitch markers (2)
- Blocking board or foam mat and rustproof pins
- Optional: spray starch or fabric stiffener
The quantities include a margin of about 20% for your test bell, tails, and one frogged row. One 50 g ball makes about four bells.
Abbreviations (US Terms)
- ch – chain
- sl st – slip stitch
- sc – single crochet
- dc – double crochet
- sc2tog – single crochet 2 together
- rev sc – reverse single crochet (crab stitch)
- st(s) – stitch(es)
- sp – space
- tch – turning chain
- RS / WS – right side / wrong side
Special stitch – reverse single crochet (rev sc): Do not turn. Work from left to right (if you are right-handed). Insert the hook into the next stitch to the right, yarn over, and pull up a loop. Yarn over again and pull through both loops. Each rev sc twists slightly, and together they form the rope-like rim.
Gauge and Checkpoints
Gauge: 13 dc = 2 in (5.1 cm) wide, and 1 dc row = 0.4 in (1.0 cm) tall. One sc row is about 0.15 in (0.4 cm) tall.
Make one full bell before you plan a set. It is small enough to serve as your gauge swatch, and it shows you how your chain tension behaves in the windows.
- Checkpoint 1 – after Row 3: The crown has 12 sts and is about 1.8 in (4.6 cm) wide at its lower edge and 1.2 in (3.0 cm) tall.
- Checkpoint 2 – after Row 5: The band has 20 sts and is about 3.1 in (7.9 cm) wide. The window columns are about 1.5 in (3.8 cm) long. The total height is about 2.9 in (7.4 cm).
- Checkpoint 3 – after Row 6: About 3.7 in (9.4 cm) wide and 3.2 in (8.1 cm) tall.
- Checkpoint 4 – after Row 8: About 4.0 in (10.2 cm) wide and 3.5 in (8.9 cm) tall.
If your bell is too big: Change to a 2.5 mm hook. Don’t shorten the window chains, or the band will no longer line up with the crown.
If your bell is too small: Change to a 3.0 mm hook. If only the windows are short, your chains are tight. Chain with a slightly looser hand, or use a hook one size larger for the Row 4 chains only.
Bell Body
Crown
Foundation: Ch 10.
Row 1 (RS): Dc in the 4th ch from hook and in each ch across. Turn. (7 dc + tch = 8 sts)
The 3 skipped ch count as the first dc. This foundation edge is the top of the bell.
Row 2 (WS): Ch 3 (counts as dc), dc in the first st, dc in each of the next 6 sts, 2 dc in the top of the tch. Turn. (10 sts)
Row 3 (RS): Ch 3 (counts as dc), dc in the first st, dc in each of the next 8 sts, 2 dc in the top of the tch. Turn. (12 sts)
Each crown row adds one stitch at each edge. The crown spreads from 8 to 10 to 12 sts and takes on its rounded dome shape. Keep your dc a steady height, since the crown is the densest part of the bell and any loose stitch shows here. Check Checkpoint 1 now.
Window Columns
For this row, number the Row 3 sts 1 to 12 from where you start. Place a marker in st 4 and in st 9 to help you count.
Row 4 (WS): Ch 1, sc in st 1, ch 24, skip sts 2–3, sc in st 4, sc in st 5, ch 24, skip sts 6–7, sc in st 8, sc in st 9, ch 24, skip sts 10–11, sc in st 12. Turn. (6 sc and 3 ch-24 loops)
Let each loop hang free. Each loop becomes one window. The pairs of sc at sts 4–5 and 8–9 anchor two chain legs side by side, which form the thick double columns between the windows. Sts 1 and 12 anchor the single outer columns.
Window Band
Each ch-24 loop has 9 chains going down, a center group of 6 chains (the 10th through 15th chains, counted from either end), and 9 chains going back up.
Row 5 (RS): Ch 1. Working into the first loop you reach, sc in each of the center 6 chains. Ch 1. Sc in each of the center 6 chains of the second loop. Ch 1. Sc in each of the center 6 chains of the third loop. Turn. (6 + 1 + 6 + 1 + 6 = 20 sts)
Before you work into each loop, check that it isn’t twisted. The 9-chain legs now stand as columns about 1.5 in (3.8 cm) long. The sc pull the bottom of each loop into a gentle curve, which gives each window its rounded lower edge. The ch-1 bridges pull neighboring legs together into the double columns. Because the band is wider than the crown, the columns flare outward. Check Checkpoint 2 now.
Skirt Blocks
Row 6 (WS): Ch 3 (counts as dc), dc in each of the next 3 sts, ch 1, dc in each of the next 4 sts; repeat from * 3 more times. Turn. (20 dc + 4 ch = 24 sts*)
This makes 5 blocks of 4 dc with a ch-1 slit between each pair. No stitches are skipped, so the 4 chains add width and make the skirt flare. The ch-1 bridges from Row 5 count as stitches, so work into them like any other st. Check Checkpoint 3 now.
Border (Rim)
The rim is the bell’s border. It has two rows, about 0.3 in (0.8 cm) deep, and goes along the bottom edge only. The crown and the outer columns get no border.
Border gauge: 13 sc = 2 in (5.1 cm), the same width per stitch as the body. The rev sc row adds no width.
Row 7 (RS): Ch 1, 2 sc in the first dc, sc in each dc and each ch-1 sp across to the last st, 2 sc in the top of the tch. Do not turn. (24 sts worked 1-per-st + 2 extra = 26 sts)
Row 8 (RS): Ch 1. Working from left to right, rev sc in each st across. (26 rev sc) Fasten off, leaving a 6 in (15.2 cm) tail.
Why the math works: Row 6 has 24 sts (20 dc + 4 ch). Row 7 places 1 sc in each of those 24 sts and adds 1 extra sc at each end, so 24 + 2 = 26. The two corner increases flare the rim tips slightly outward, like the lip of a real bell. Row 8 places exactly 1 rev sc in each of the 26 sts, so the count stays the same. At 6.5 sts per inch, 26 sts ÷ 6.5 = 4.0 in (10.2 cm), which matches the finished width.
Hanging Loop
Turn the bell so the foundation edge is at the top. The 8 foundation sts sit side by side along it.
Join yarn with a sl st into the foundation chain at the base of the 4th st. Ch 18, then sl st into the base of the 5th st. Fasten off.
The loop rises from the exact center of the crown and stands about 1.4 in (3.6 cm) tall.
Clapper Ball
Rnd 1: Make a magic ring, ch 1, and work 6 sc in the ring. Pull the ring closed. (6 sts)
Rnd 2: 2 sc in each st around. (12 sts)
Rnd 3: Sc in each st around. (12 sts)
Rnd 4: Sc in each st around. (12 sts)
Stuff firmly with a small pinch of fiberfill or yarn scraps.
Rnd 5: Sc2tog 6 times. (6 sts)
Don’t fasten off. Ch 4 for the stem. Find the center of Row 8, which is the gap between the 13th and 14th rev sc. Sl st into that spot from behind. Fasten off and weave the tail up through the stem.
The ball is about 0.6 in (1.5 cm) across. It hangs on a stem about 0.4 in (1.0 cm) long, centered under the rim.
Final Blocking
- Weave in all ends. Hide the tails inside the dense crown or rim, never along the chain columns.
- Soak the bell in cool water, then press out the extra water in a towel. Don’t wring it.
- Lay the bell RS up on a blocking mat.
- Pin the center of the crown top and both rim tips so that the rim measures 4.0 in (10.2 cm) across.
- Pin the ends of the band so it measures 3.1 in (7.9 cm) across, with the columns straight and evenly spaced.
- Check the height: it should be 3.5 in (8.9 cm) from crown top to rim edge.
- Pin each window open at its lowest curve so the arches stay rounded.
- If you want a stiff ornament, mist it with spray starch.
- Let it dry completely, about 6 to 8 hours, before you unpin it.
- Roll the clapper between your palms to round it, and straighten the hanging loop.
Final Quality-Control Checklist
- The crown has 3 dc rows with 8, 10, and 12 sts.
- There are 3 windows, 2 double columns, and 2 single outer columns.
- All the columns are the same length, about 1.5 in (3.8 cm).
- Row 5 has 20 sts, with sc only in the center 6 chains of each loop.
- The skirt has 5 blocks of 4 dc and 4 ch-1 slits.
- The rim has 26 sts, and the rev sc rope is even with no gaps.
- The bell measures 4.0 in (10.2 cm) x 3.5 in (8.9 cm).
- The hanging loop and the clapper both sit on the vertical center line.
- No tails show through the windows.
Troubleshooting
The windows are different lengths. You worked into the wrong chains on one loop. Before you work Row 5, count the 9 down-chains on each loop again.
The bell leans to one side. The Row 4 anchors are in the wrong place. Recount your skips: 2 sts each time.
The rim cups or ruffles. Cupping means Row 7 is too tight, so use a hook one size larger for the rim. Ruffling usually means you put extra sc into the ch-1 sps. Each sp gets only 1 sc.
The columns twist. A loop was twisted when you worked Row 5. Frog Row 5, untwist the loop, and work the row again.
The rev sc rim looks flat. Pull each loop up a little taller, and keep both loops on the hook at the same height before you finish the stitch.
The clapper looks lumpy. Use less stuffing and push it to the center before you work Rnd 5.
Care
Hand wash in cool water with mild soap, press dry in a towel, and reshape flat. Store the bell flat or hanging, away from heavy ornaments that could crush the columns.
Final Notes
All the measurements build on each other. Start with the 12-st crown, which should be 1.8 in (4.6 cm) wide. Next, the 20-st band should be 3.1 in (7.9 cm) wide and sit 2.9 in (7.4 cm) below the top. After that, the 24-st skirt should be 3.7 in (9.4 cm) wide, with the bell 3.2 in (8.1 cm) tall. The 26-st rim then finishes at 4.0 in (10.2 cm) wide and 3.5 in (8.9 cm) tall. With the 1.4 in (3.6 cm) loop and the clapper added, the ornament hangs about 5.9 in (15.0 cm) long. Check each stage, and every bell you make will match.
Happy crocheting!