

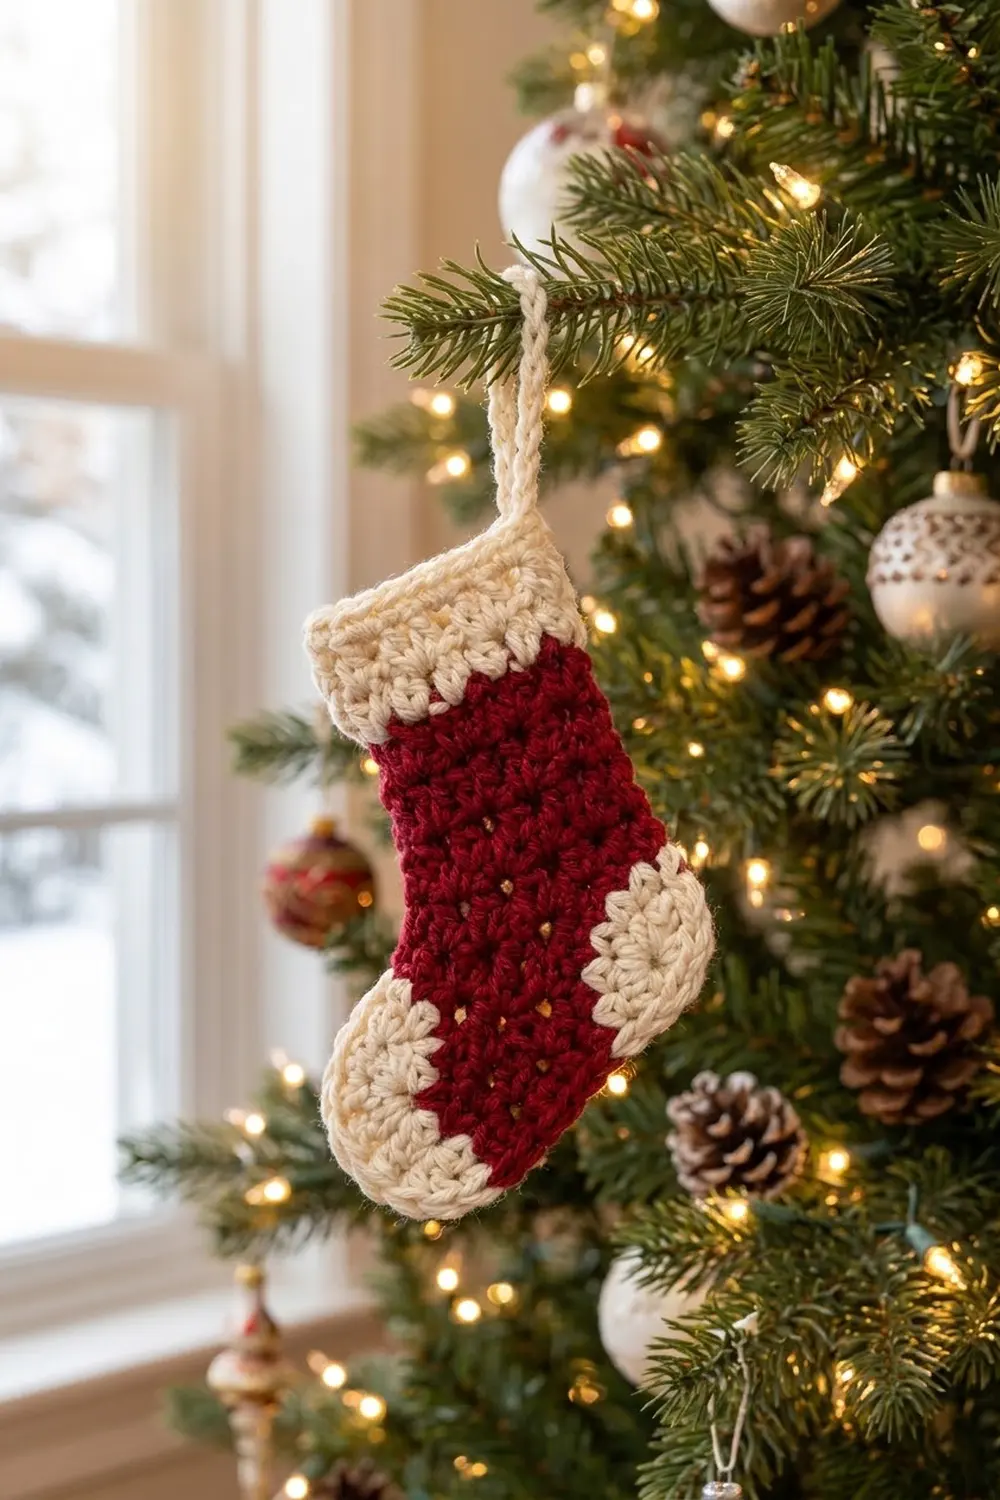
This little stocking is a flat, cheerful ornament in deep cranberry red and soft cream. The red body is worked in simple double crochet rows, which gives it an even texture with small natural gaps between the stitches. A cream cuff with a row of tiny mesh holes runs across the top, and two round cream motifs cover the heel and toe.
The style is classic, cozy Christmas: two colors, clean edges, and a rounded heel and toe that give the stocking its familiar outline. A cream chain loop at the top center lets you hang it on a tree or tie it to a gift.
The pattern uses US crochet terms. The finished stocking is 4.25 in (10.8 cm) wide across the foot and 4.75 in (12.1 cm) tall, plus a 2 in (5.1 cm) hanging loop.
The construction is simple. First you work the red body flat in rows, from the bottom of the foot up to the top of the leg. Then you switch to cream and work the cuff straight onto the last red row, adding the hanging loop at the end. Last, you make two small cream circles in the round and sew them over the heel and toe corners.
Finished Size and Construction
- Finished size: 4.25 in (10.8 cm) wide x 4.75 in (12.1 cm) tall, plus a 2 in (5.1 cm) loop
- Skill level: Easy
- Terminology: US crochet terms
- Yarn weight: Worsted weight (#4), cotton or cotton blend
- Hook: 4.0 mm (G-6)
- Number of pieces: 1 ornament, made from 3 crocheted parts (1 body with cuff, 2 appliqué circles)
- Layout: Single stocking; no grid or joining
- Piece size: Foot 3.75 in (9.5 cm) wide; leg 2.75 in (7.0 cm) wide; heel and toe circles 1.5 in (3.8 cm) across
- Size before border: Red body 3.75 in (9.5 cm) wide at the foot x 3.5 in (8.9 cm) tall
- Border depth: Cream cuff 1 in (2.5 cm) deep and 3.25 in (8.3 cm) wide
Materials
Choose a smooth worsted-weight cotton or cotton blend. Cotton holds a flat shape well and shows the cuff’s mesh holes clearly. Acrylic also works but may need firmer blocking.
- Red (cranberry): 8 g, about 14 m
- Cream: 6 g, about 10 m
These amounts include a margin of about 30 percent for tails, the hanging loop, and a test stocking. One standard ball of each color makes many stockings.
Tools:
- 4.0 mm (G-6) crochet hook
- Tapestry needle
- Scissors
- Stitch marker (optional)
- Ruler or tape measure
- Blocking mat and rust-proof pins
- Spray bottle with water
Abbreviations (US Terms)
- ch – chain
- sl st – slip stitch
- sc – single crochet
- hdc – half double crochet
- dc – double crochet
- sk – skip
- st(s) – stitch(es)
- sp – space
- RS – right side
- MR – magic ring
Special stitch – Turning ch-3: At the start of a dc row, the ch 3 counts as the first dc. Skip the stitch at the base of the chain and work your next dc into the second stitch. On the following row, work the last dc into the top (3rd ch) of this turning chain.
Gauge and Checkpoints
Gauge: 16 dc and 8 rows = 4 in (10.2 cm) in pattern. That is 4 sts and 2 rows per 1 in (2.5 cm). Each dc row is 0.5 in (1.3 cm) tall, and each sc row is 0.25 in (0.6 cm) tall.
Make one complete stocking as your test piece. The ornament is small, so it works as your gauge swatch, and you can check each stage as you go.
Checkpoints:
- After Row 3 (foot): 3.75 in (9.5 cm) wide x 1.5 in (3.8 cm) tall
- After Row 7 (leg): leg 2.75 in (7.0 cm) wide; body 3.5 in (8.9 cm) tall
- After the cuff: cuff 3.25 in (8.3 cm) wide; total height 4.5 in (11.4 cm)
- Each circle: 1 in (2.5 cm) after Rnd 1, 1.5 in (3.8 cm) after Rnd 2
If your piece is too big: go down one hook size to 3.75 mm (F-5).
If your piece is too small: go up one hook size to 4.5 mm (7).
Change the hook, not the stitch counts. All of the shaping depends on the counts staying exactly as written.
Stocking Body (Red)
You work the body flat in rows. The toe is at the end where Row 1 begins. The heel is at the slip-knot end of the foundation chain.
Foundation: With red, ch 17.
Row 1: Dc in 4th ch from hook (the 3 skipped ch count as the first dc) and in each ch across. (15 sts)
Row 2: Ch 3 (counts as dc), turn. Dc in each st across, ending with a dc in the top of the turning ch. (15 sts)
Row 3 (toe shaping): Ch 1 (does not count), turn. Sc in first st, hdc in next st, dc in each of next 13 sts, ending with a dc in the top of the turning ch. (15 sts: 1 sc, 1 hdc, 13 dc)
The sc and hdc at the start of Row 3 slope the top of the toe down toward the toe circle. Row 3 ends at the heel end.
Checkpoint: The foot measures 3.75 in (9.5 cm) wide and 1.5 in (3.8 cm) tall.
Row 4 (begin leg): Ch 3 (counts as dc), turn. Dc in each of next 10 sts. Leave the remaining 4 sts unworked. (11 sts)
The 4 unworked stitches form the top of the foot at the toe. The leg rises straight up from the heel end.
Rows 5–7: Ch 3 (counts as dc), turn. Dc in each st across, ending with a dc in the top of the turning ch. (11 sts)
On the last dc of Row 7, switch to cream on the final yarn over. Cut red, leaving a 6 in (15.2 cm) tail.
Checkpoint: The leg measures 2.75 in (7.0 cm) wide. The body measures 3.5 in (8.9 cm) from the foundation chain to the top of Row 7.
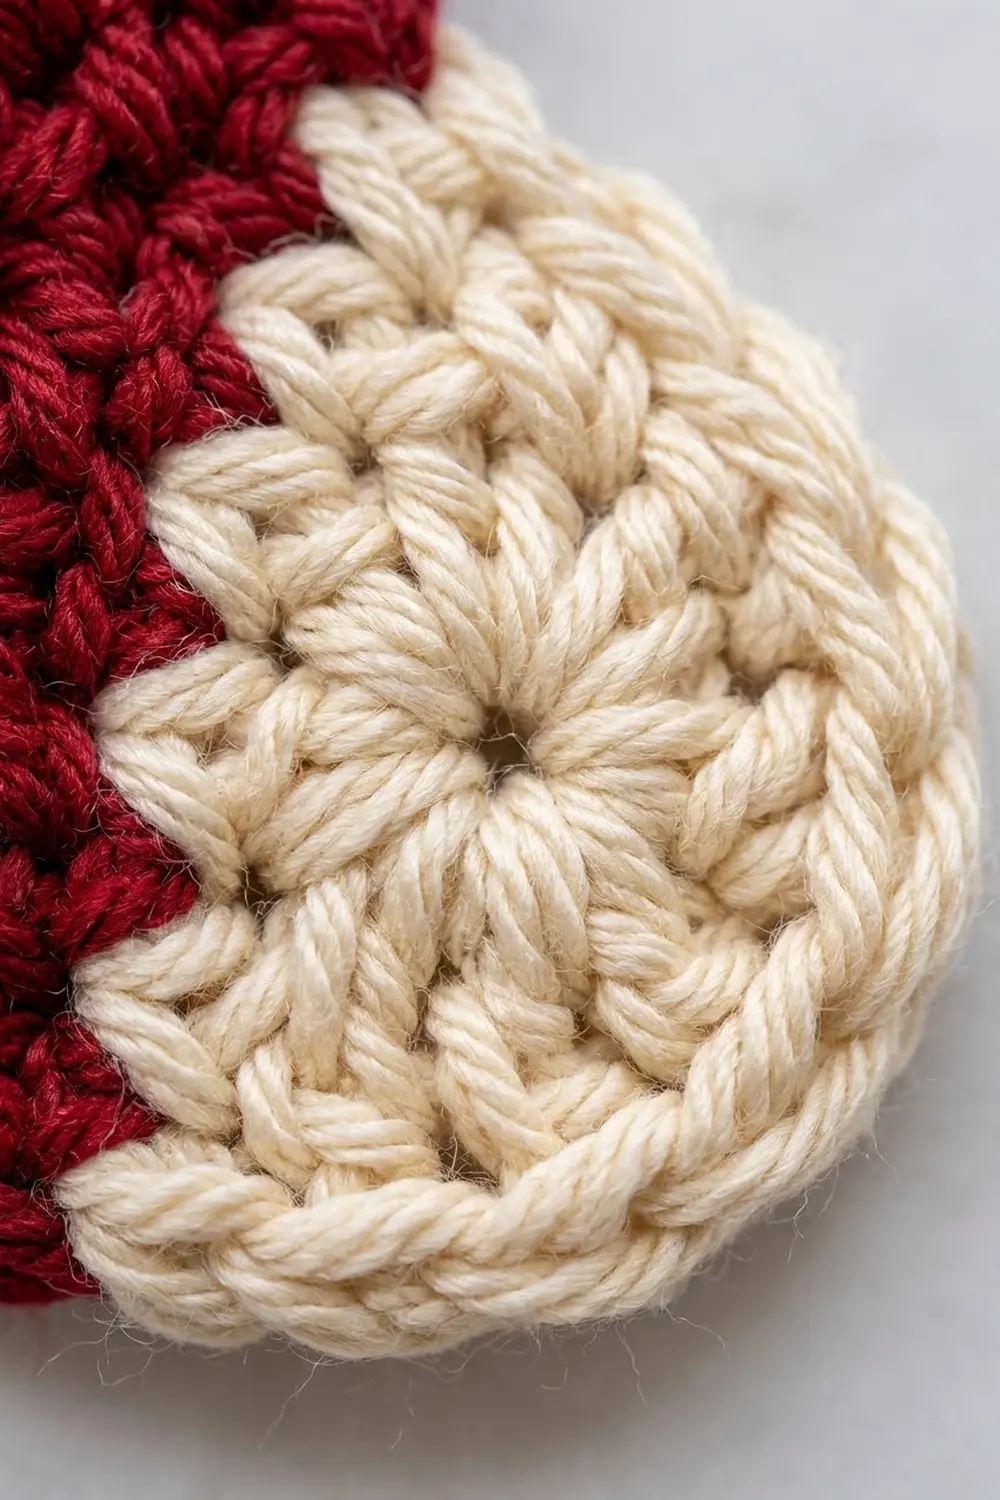
Heel and Toe Circles (Cream, Make 2)
Each circle is a small round motif with a center hole and dc “spokes,” finished with a firm round of sc.
Rnd 1: With cream, make a MR. Ch 3 (counts as dc), work 11 dc into the ring. Pull the ring tight. Sl st to the top of the ch-3 to join. (12 dc)
Checkpoint: 1 in (2.5 cm) across.
Rnd 2: Ch 1 (does not count). Work 2 sc in each st around. Sl st to first sc to join. (24 sc)
Fasten off, leaving a 12 in (30.5 cm) tail for sewing.
Checkpoint: 1.5 in (3.8 cm) across. The circle should lie flat. If it ruffles, your sc are too loose. If it cups, they are too tight.
Make a second circle the same way.
Attaching the Heel and Toe
Each circle sits on the RS of the body, covering one bottom corner. The circles extend a little past the body to round off the corners.
- Lay the body flat with the RS up.
- Heel: Place one circle so its center is 0.5 in (1.3 cm) in from the heel edge (2 sts) and 0.5 in (1.3 cm) up from the foundation chain (1 row). The circle will extend 0.25 in (0.6 cm) past the heel edge and 0.25 in (0.6 cm) past the bottom edge, which completely hides the square corner.
- Toe: Place the second circle the same way at the toe end, with its center 2 sts in from the toe edge and 1 row up.
- Pin both circles in place.
- Using the cream tail, whipstitch through the back loops of Rnd 2 into the red fabric wherever the circle overlaps the body. Space your stitches about 0.125 in (0.3 cm) apart.
- Where the circle extends past the body, sew its sc to the nearest edge stitches of the body from the wrong side. This keeps the outline firm so the circle doesn’t flap.
- Weave in the tails on the wrong side.
Border: Cuff and Hanging Loop (Cream)
On this piece, the cuff is the border. You work it straight across the top of Row 7.
Border gauge: 4 sc = 1 in (2.5 cm); 1 sc row = 0.25 in (0.6 cm); 1 dc row = 0.5 in (1.3 cm).
Row 8 (conversion row): With cream, ch 1 (does not count), turn. 2 sc in first st, sc in each of next 9 sts, 2 sc in top of turning ch. (11 sts worked 1-per-stitch + 2 extra = 13 sc)
Row 9 (mesh row): Ch 3 (counts as dc), turn. Ch 1, sk next st, dc in next st; repeat from * 6 times. (7 dc + 6 ch-1 sps = 13 sts)*
This row makes the small holes across the cuff.
Row 10: Ch 1 (does not count), turn. Sc in first dc, sc in next ch-1 sp, sc in next dc; repeat from * 6 times, working the last sc in the top of the turning ch. (13 sc)*
Hanging loop: Don’t fasten off. Sl st across to the 7th sc, which is the center stitch. Ch 24 (about 4 in / 10.2 cm of chain), then sl st back into the same center sc to form the loop. Fasten off and weave in.
Checkpoint: The cuff measures 3.25 in (8.3 cm) wide and 1 in (2.5 cm) deep. The loop is 2 in (5.1 cm) tall when the stocking hangs.
Why the math works:
- The leg has 11 sts. One extra sc at each end makes 13 sts, so the cuff sticks out 0.25 in (0.6 cm) past the leg on each side, like a real folded cuff.
- The mesh repeat is 2 sts (ch 1 + dc) after 1 starting dc: 1 + (2 x 6) = 13. The row starts and ends on a solid dc, so the holes are centered.
- Row 10 is back to exactly 13 sc, with 6 sts on each side of the 7th sc. That puts the loop in the exact center, so the stocking hangs straight.
- Height: 3 foot rows + 4 leg rows = 7 dc rows x 0.5 in = 3.5 in (8.9 cm). The cuff adds 0.25 + 0.5 + 0.25 = 1 in (2.5 cm), so the body plus cuff is 4.5 in (11.4 cm). The circles add 0.25 in (0.6 cm) at the bottom, for 4.75 in (12.1 cm) total.
- Width: 15 sts at 4 sts per inch = 3.75 in (9.5 cm). Each circle adds 0.25 in (0.6 cm) at its end, for 4.25 in (10.8 cm) total.
Final Blocking
- Weave in any remaining tails. Hide red tails in red areas and cream tails in cream areas.
- Lay the stocking RS up on the blocking mat.
- Mist it evenly until it is damp but not soaked.
- Gently pat the body to 3.75 in (9.5 cm) across the foot and 2.75 in (7.0 cm) across the leg.
- Pin the cuff to 3.25 in (8.3 cm) wide and square its corners.
- Ease each circle into a smooth round 1.5 in (3.8 cm) across.
- Check the total height: 4.75 in (12.1 cm) from the bottom of the circles to the top of the cuff.
- Lay the loop straight up from the center so it dries without a kink.
- Let it dry completely, at least 6 hours, before you unpin it.
Final Quality-Control Checklist
- Foot is 15 sts and 3.75 in (9.5 cm) wide
- Leg is 11 sts and 2.75 in (7.0 cm) wide
- Red body is 7 rows and 3.5 in (8.9 cm) tall
- Cuff is 13 sts and 3 rows, 3.25 in (8.3 cm) x 1 in (2.5 cm)
- Mesh row shows 6 evenly spaced holes
- Both circles have 24 sc and measure 1.5 in (3.8 cm)
- Heel and toe corners are fully hidden under the circles
- Loop is centered over the 7th cuff st and is 2 in (5.1 cm) tall
- No tails or red strands show through the cream areas
- Ornament lies flat and hangs straight
Troubleshooting
The leg is on the wrong side. You may have started Row 4 at the toe end. Row 4 must start at the heel end, where Row 3 finishes.
Edges are wavy or uneven. Make sure every turning ch-3 counts as a stitch and that the last dc of each row goes into its top.
Cuff is too narrow. Check that Row 8 has 2 sc in both end stitches, for 13 sc in all.
Mesh holes are uneven. Count the repeats in Row 9. You need exactly 6 ch-1 spaces.
Circles ruffle. Use a smaller hook for the circles only, or work Rnd 2 more tightly.
Red corners peek out. Move the circle slightly toward the corner, keeping its center 2 sts in and 1 row up.
Care
Hand wash in cool water with mild soap, roll in a towel to press out the water, and dry flat. Reshape to the blocked measurements while damp.
Final Notes
Every measurement in this stocking follows from the gauge. At 4 sts and 2 rows per 1 in (2.5 cm), the 15-st foot is 3.75 in (9.5 cm) and the 11-st leg is 2.75 in (7.0 cm). Seven dc rows make a 3.5 in (8.9 cm) body. The 13-st cuff is 3.25 in (8.3 cm) wide and adds 1 in (2.5 cm) of height. The 1.5 in (3.8 cm) circles round off the heel and toe. Together they make a finished ornament 4.25 in (10.8 cm) wide and 4.75 in (12.1 cm) tall, with a 2 in (5.1 cm) loop on top.
Check your gauge on the first stocking and keep the counts exact, and every stocking you make will match.
Happy crocheting!