

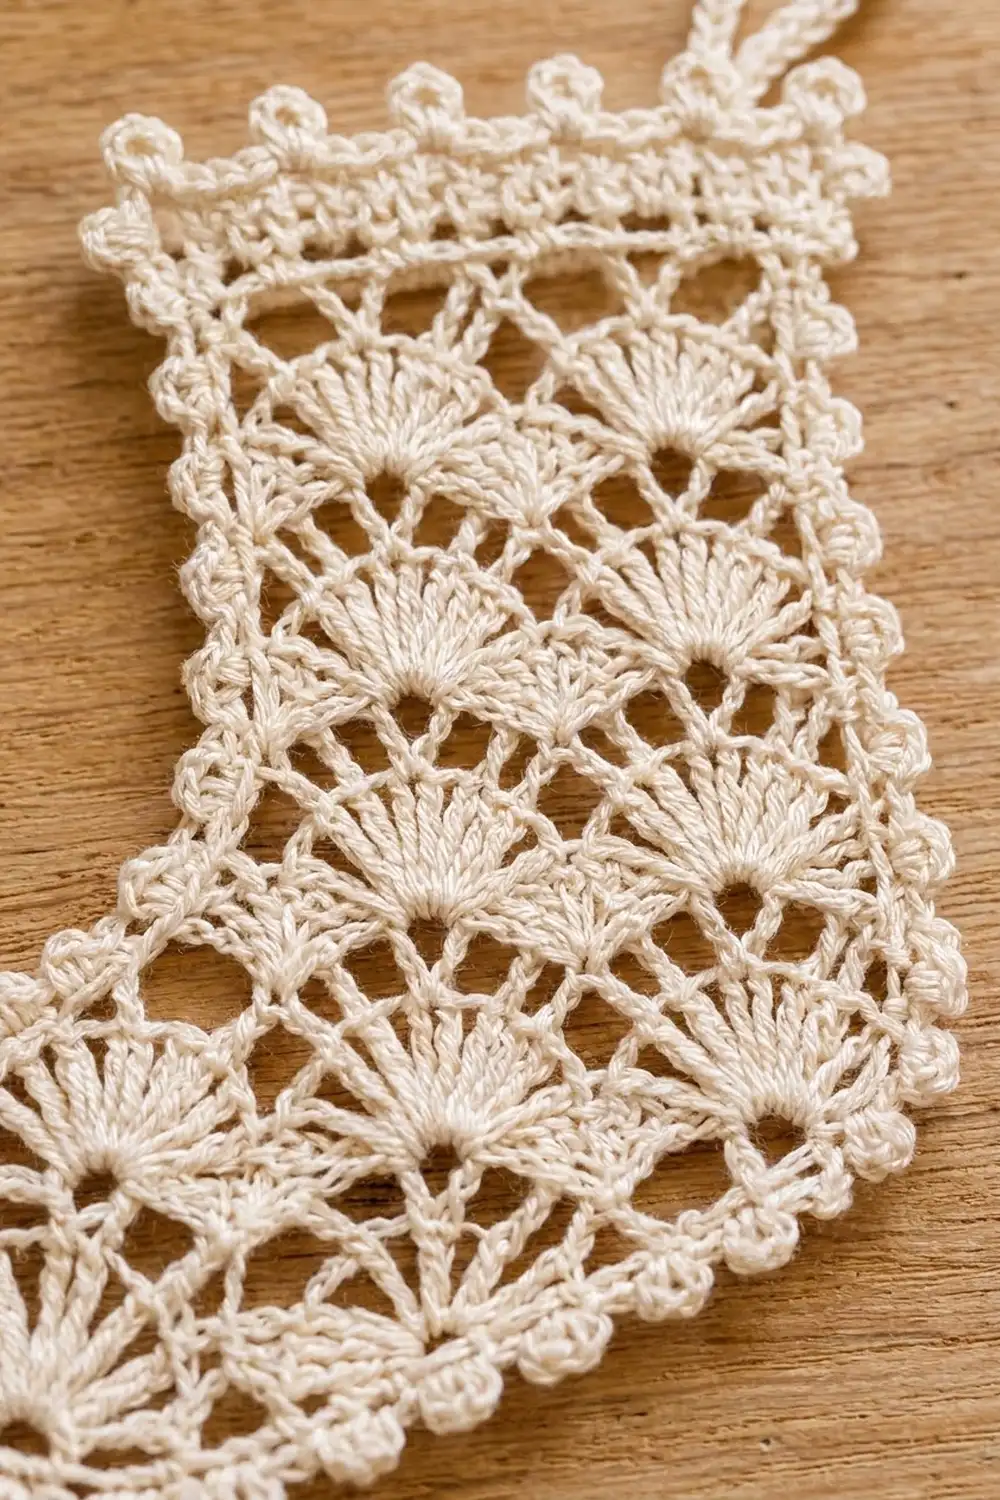
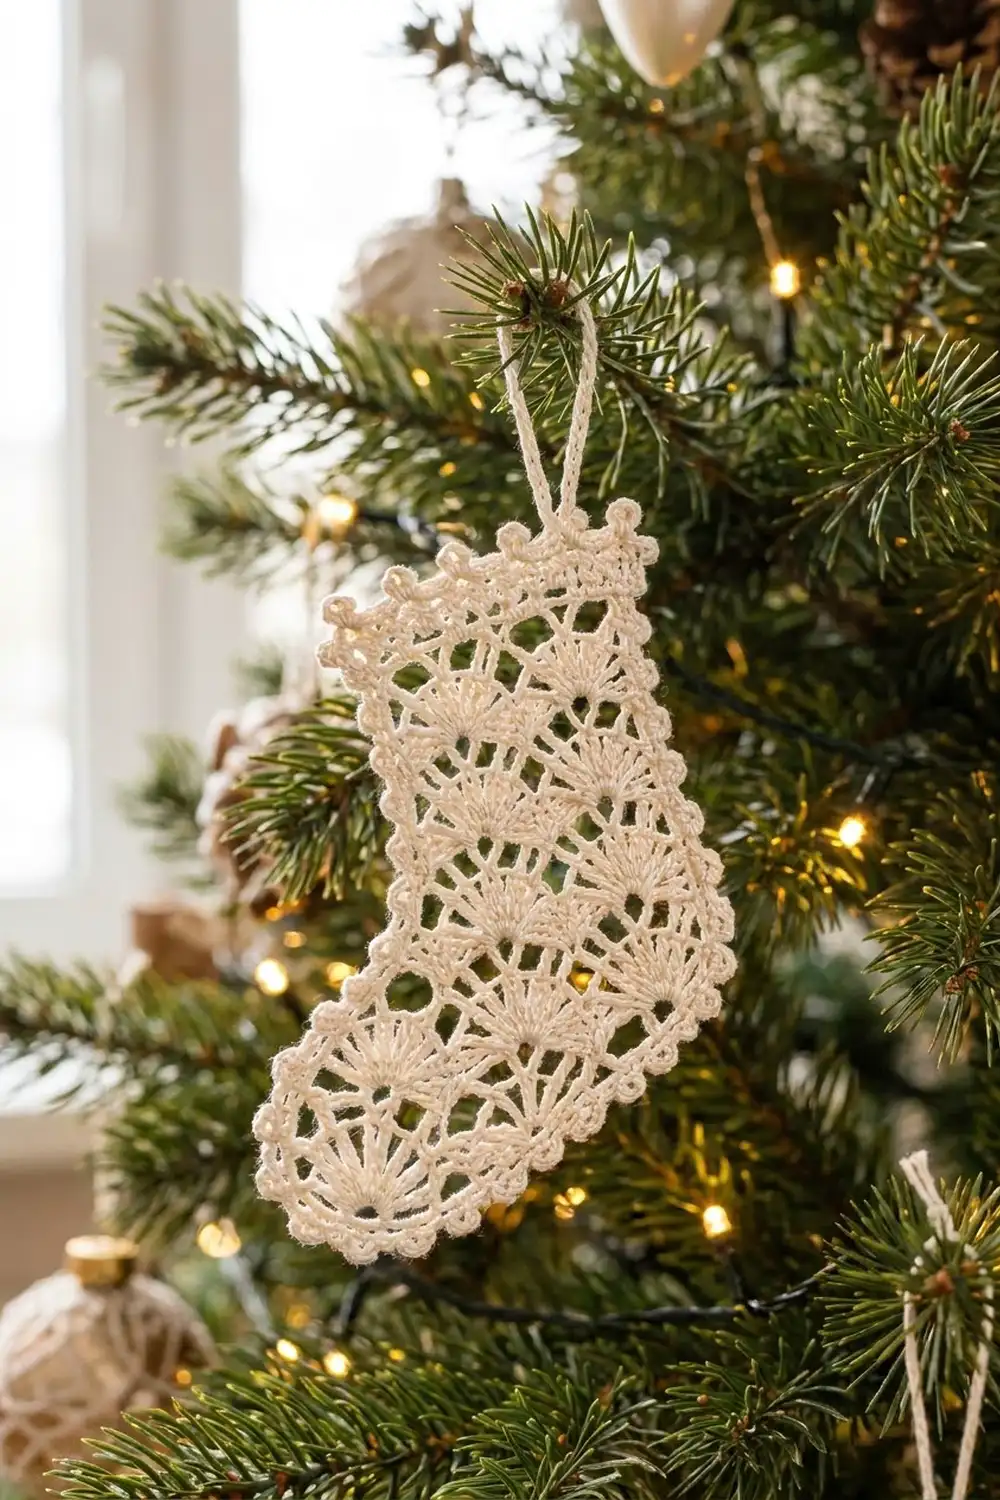
This little stocking is a flat lace ornament worked in a single color of cream cotton thread. Staggered rows of open fans cover the foot and leg. A short mesh cuff sits on top, and a crown of five bobble picots finishes the top edge. Tiny picots run all the way around the outline, and a slim chain loop at the heel-side corner lets it hang from a branch.
The style is classic thread lace. It’s airy and light, and quiet enough to repeat across a whole tree. In ivory or natural white it looks like a vintage doily shaped into a stocking. It also works well as a gift-tag topper or a card embellishment.
The pattern uses US crochet terms. The finished ornament measures about 3 3/8 in (8.6 cm) wide across the foot and 4 3/8 in (11.1 cm) tall, plus a 1 in (2.5 cm) hanging loop.
Construction is simple:
– Work the foot in flat rows from the sole up.
– Continue the leg over the heel-side stitches only, which leaves a small instep step.
– Work three cuff rows: an open mesh band, a flare row and the bobble crown.
– Outline the sides and sole with one picot edging pass.
– Finish the corner with a chain loop.
Finished Size and Construction
- Finished size: 3 3/8 in (8.6 cm) wide at the foot x 4 3/8 in (11.1 cm) tall, plus loop
- Skill level: Intermediate (thread lace, careful stitch counting)
- Terminology: US crochet terms
- Yarn weight: Lace (CYC 0), size 3 cotton crochet thread
- Hook: 2.25 mm (US B-1)
- Number of pieces: 1 (one flat, single-layer piece)
- Layout: Not applicable; single ornament
- Piece size before edging: 3 1/8 in (7.9 cm) wide at the foot x 4 1/4 in (10.8 cm) tall
- Leg width before edging: 2 3/8 in (6.0 cm)
- Edging depth: about 1/8 in (0.3 cm) along each side and the sole
Materials
Choose a firm, mercerized cotton thread in size 3. Mercerized cotton shows the fan texture crisply and takes starch well. Avoid fuzzy or acrylic blends: the open lace will blur and won’t hold its shape after blocking.
- Cream / ivory size 3 cotton thread: 10 g, about 16 m (17.5 yd)
- 2.25 mm (US B-1) crochet hook
- Tapestry needle with a small eye
- Locking stitch marker
- Rust-proof pins and a foam blocking board
- Spray starch or fabric stiffener (optional, recommended)
- Small scissors and a ruler
The quantity above includes a margin of about 20 percent for gauge checks and weaving in tails. For a set of ornaments, multiply by the number you plan to make.
Abbreviations (US Terms)
- ch: chain
- sl st: slip stitch
- sc: single crochet
- dc: double crochet
- sk: skip
- st(s): stitch(es)
- sp: space
- rep: repeat
Special stitches
- Fan: 7 dc in the same st. The center (4th) dc is the target for the next row.
- Half fan (row start): ch 3 (counts as dc), 3 dc in the same st = 4 dc.
- Half fan (row end): 4 dc in the same st.
- Picot: ch 3, sl st in the front loop and left leg of the sc just made.
- Cluster (cl): *yarn over, insert hook in st, pull up a loop, yarn over and draw through 2 loops; rep from * 2 more times in the same st, yarn over and draw through all 4 loops.
- Bobble picot: cl, ch 3, sl st in the top of the cl just made.
Counting rule: every sc, every dc and every single chain counts as 1 st. A ch-2 sp is 2 sts.
Gauge and Checkpoints
Gauge:
– 12 sts (2 fan repeats) = 1 1/2 in (3.8 cm) wide
– 4 pattern rows = 3/4 in (1.9 cm) tall
Check gauge on the real piece. Work Rows 1–4, then measure before going further. This is quicker than a separate swatch and tells you exactly how your ornament will turn out.
Checkpoints
- After Row 4: 3 1/8 in (7.9 cm) wide x 3/4 in (1.9 cm) tall.
- After Row 8 (foot done): 3 1/8 in (7.9 cm) wide x 1 1/2 in (3.8 cm) tall.
- After Row 20 (leg done): leg 2 3/8 in (6.0 cm) wide; total height 3 3/4 in (9.5 cm).
- After Row 23 (cuff done): cuff 2 5/8 in (6.7 cm) wide; total height 4 1/4 in (10.8 cm).
- After edging: 3 3/8 in (8.6 cm) x 4 3/8 in (11.1 cm).
If your piece is the wrong size:
– Too big: go down to a 2.0 mm hook.
– Too small: go up to a 2.5 mm hook.
– Width right but height off: check that each fan uses 7 full dc and that your turning chains aren’t too loose or too tight.
A small difference is fine for an ornament. Even so, keep the edging counts as written so the outline lies flat.
Pattern Repeat Overview
The lace is a 4-row repeat over a multiple of 6 sts + 1. “n” is the number of repeats: 4 for the foot and 3 for the leg.
- Row A (fan row): n fans and n + 1 sc.
- Row B (lattice row): n + 1 dc, n sc, 2n ch-2 sps = 6n + 1 sts.
- Row C (offset fan row): 2 half fans, n − 1 full fans, n sc.
- Row D (lattice row): n + 1 sc, n dc, 2n ch-2 sps = 6n + 1 sts.
Row C shifts the fans half a repeat. That’s what creates the staggered, brick-like fans across the stocking.
Foot
Place a marker in the first st of Row 1. That edge is the heel edge. Odd rows start at the heel edge and even rows start at the toe edge.
Foundation: Ch 26.
Row 1 (Row A): Sc in 2nd ch from hook, *sk 2 ch, fan in next ch, sk 2 ch, sc in next ch; rep from * 3 more times, turn. (4 fans, 5 sc; the row covers 25 ch.)
Row 2 (Row B): Ch 5 (counts as dc + ch 2), sc in center dc of next fan, ch 2, dc in next sc; *ch 2, sc in center dc of next fan, ch 2, dc in next sc; rep from * 2 more times, turn. (5 dc, 4 sc, 8 ch-2 sps = 25 sts.)
Row 3 (Row C): Half fan in first dc, *sc in next sc, fan in next dc; rep from * 2 more times, sc in next sc, half fan (4 dc) in 3rd ch of turning ch-5, turn. (2 half fans, 3 fans, 4 sc.)
Row 4 (Row D): Ch 1, sc in first dc, *ch 2, dc in next sc, ch 2, sc in center dc of next fan; rep from * 3 more times, working the last sc in top of turning ch-3, turn. (5 sc, 4 dc, 8 ch-2 sps = 25 sts.)
Row 5 (Row A): Ch 1, sc in first sc, *sk 2 ch, fan in next dc, sk 2 ch, sc in next sc; rep from * 3 more times, turn. (4 fans, 5 sc.)
Rows 6–8: Rep Rows 2–4. Row 8 ends at the heel edge with 25 sts. Do not fasten off.
Checkpoint: 3 1/8 in (7.9 cm) wide x 1 1/2 in (3.8 cm) tall.
Leg
The leg uses only the first 19 sts of Row 8, counted from the heel edge. The last 6 sts at the toe end (ch 2, dc, ch 2, sc) stay unworked and form the instep step.
Row 9 (Row A, n = 3): Ch 1, sc in first sc, *sk 2 ch, fan in next dc, sk 2 ch, sc in next sc; rep from * 2 more times, turn. (3 fans, 4 sc; 6 sts of Row 8 left unworked.)
Row 10 (Row B): Ch 5, sc in center dc of next fan, ch 2, dc in next sc; *ch 2, sc in center dc of next fan, ch 2, dc in next sc; rep from * once more, turn. (4 dc, 3 sc, 6 ch-2 sps = 19 sts.)
Row 11 (Row C): Half fan in first dc, *sc in next sc, fan in next dc; rep from * once more, sc in next sc, half fan in 3rd ch of turning ch-5, turn. (2 half fans, 2 fans, 3 sc.)
Row 12 (Row D): Ch 1, sc in first dc, *ch 2, dc in next sc, ch 2, sc in center dc of next fan; rep from * 2 more times, working the last sc in top of turning ch-3, turn. (4 sc, 3 dc, 6 ch-2 sps = 19 sts.)
Rows 13–20: Rep Rows 9–12 twice. Work each Row A into the Row D below it, as in Row 5. Row 20 has 19 sts.
Checkpoint: leg 2 3/8 in (6.0 cm) wide; total height 3 3/4 in (9.5 cm).
Cuff
Row 21 (conversion row): Ch 4 (counts as dc + ch 1), sk next st, dc in next st, *ch 1, sk next st, dc in next st; rep from * 7 more times, turn. (19 sts worked 1 per existing st + 0 added = 19 sts: 10 dc, 9 ch-1 sps.)
Row 22 (flare row): Ch 1, 2 sc in first dc, sc in each ch-1 sp and dc across to turning ch, 2 sc in 3rd ch of turning ch-4, turn. (19 sts worked 1 per st + 2 added = 21 sc.)
Row 23 (bobble crown): Ch 1, sc in first sc, *sk 1 sc, bobble picot in next sc, sk 1 sc, sc in next sc; rep from * 4 more times. (5 bobble picots, 6 sc; 1 + 5 x 4 = 21 sts used.) Do not turn and do not fasten off.
Checkpoint: cuff 2 5/8 in (6.7 cm) wide; total height 4 1/4 in (10.8 cm).
Border (Picot Edging)
The edging is one continuous pass. It runs down the toe side, around the sole and up the heel side. The bobble crown already finishes the cuff top, so the edging stops at both top corners.
Border gauge:
– Sole and instep: 1 sc per st.
– Side edges: 7 sc per 4 pattern rows. Work 2 sc in each Row A, B and C row end, and 1 sc in each Row D row end. That’s about 9 sc per 1 in (2.5 cm).
Edging pass: Rotate the piece to work down the toe-side edge. Work sc in the order below, making a picot after every 3rd sc:
- Front leg edge: 26 sc. Work 5 in the cuff row ends (2 in Row 23, 1 in Row 22, 2 in Row 21), then 21 down Rows 20–9.
- Instep: sc in each of the first 5 unworked sts of Row 8, then 3 sc in the last st (the toe top corner) = 8 sc.
- Toe edge: 14 sc down Rows 8–1.
- Toe bottom corner: 3 sc in the first foundation ch = 3 sc.
- Sole: sc in each of the next 23 foundation ch = 23 sc.
- Heel bottom corner: 3 sc in the last foundation ch = 3 sc.
- Heel edge: 40 sc. Work 35 up Rows 1–20, then 5 in the cuff row ends.
Total: 26 + 8 + 14 + 3 + 23 + 3 + 40 = 117 sc, 39 picots.
Why the math works:
– Horizontal edges take 1 sc per st. The 25 foundation ch become 3 + 23 + 3, with each corner st counted once. The 6 instep sts become 5 + 3.
– Side edges follow the 7-per-4-rows rule. The foot is 2 repeats (14 sc), the leg is 3 repeats (21 sc) and the full heel edge is 5 repeats (35 sc). This spacing matches the row height, so the sides don’t ruffle or pull in.
– Corners and picots: the 3-sc corners round off the toe and heel. Because 117 divides evenly by 3, the last picot falls exactly at the heel-side top corner.
Hanging loop: At the heel-side top corner, ch 20, then sl st in the same st as the last sc. Fasten off.
Final Blocking
- Weave in all ends through the back of the sc edging, not through the lace.
- Soak the ornament in cool water for 10 minutes, then press out the water in a towel.
- Dip it in fabric stiffener now, or plan to spray starch it once it’s pinned.
- Pin it to the foam board at 3 3/8 in (8.6 cm) wide x 4 3/8 in (11.1 cm) tall.
- Pin each bobble picot on the cuff upright and straighten the top edge.
- Open each fan so its 7 dc spread evenly, and pin the toe and heel curves smooth.
- Pin the loop straight at 1 in (2.5 cm) long.
- Let it dry completely, at least 12 hours, before you unpin it.
Final Quality-Control Checklist
- Each foot row has 25 sts and each leg row has 19 sts.
- Every fan has 7 dc and every half fan has 4 dc.
- The fans are staggered, with each Row C fan centered over a lattice dc.
- Exactly 6 sts of Row 8 are left for the instep.
- The cuff has 19 sts in Row 21, 21 sc in Row 22 and 5 bobble picots in Row 23.
- The edging has 117 sc and 39 picots.
- The finished size is 3 3/8 in (8.6 cm) x 4 3/8 in (11.1 cm), plus a 1 in (2.5 cm) loop.
- All tails are secure and invisible from the front.
Troubleshooting
Fans look crowded or curl: your dc are tight. Go up a hook size or loosen your yarn-overs.
Row counts drift: recount, remembering that each chain counts as 1 st. Most errors come from working the last st into the wrong part of the turning chain.
Instep step is on the wrong side: Row 9 must start at the heel edge. Check your Row 1 marker before you begin the leg.
Edges ripple: you’re adding extra sc along the sides. Stick to 7 sc per 4 rows.
Edges pull in: you’re skipping row ends. Add the missing sc, and keep 3 sc in each outer corner.
Bobble picots lean or flop: keep the ch-3 snug and pin each picot upright while blocking.
Picots don’t end at the corner: your edging total isn’t 117. Recount section by section against the list.
Care
Hand wash in cool water with mild soap, press dry in a towel and re-block flat. Re-starch if the ornament softens over time.
Final Notes
Here’s the measurement chain from start to finish:
– Foot: 25 sts, 3 1/8 in (7.9 cm) wide; 8 rows, 1 1/2 in (3.8 cm) tall.
– Leg: 19 sts, 2 3/8 in (6.0 cm) wide; 12 rows, 2 1/4 in (5.7 cm) tall.
– Cuff: adds 1/2 in (1.3 cm), bringing the piece to 4 1/4 in (10.8 cm).
– Edging: adds 1/8 in (0.3 cm) along each side and the sole, for a finished 3 3/8 in (8.6 cm) x 4 3/8 in (11.1 cm).
Measure at each checkpoint and the ornament will come out true to size.
Happy crocheting!