
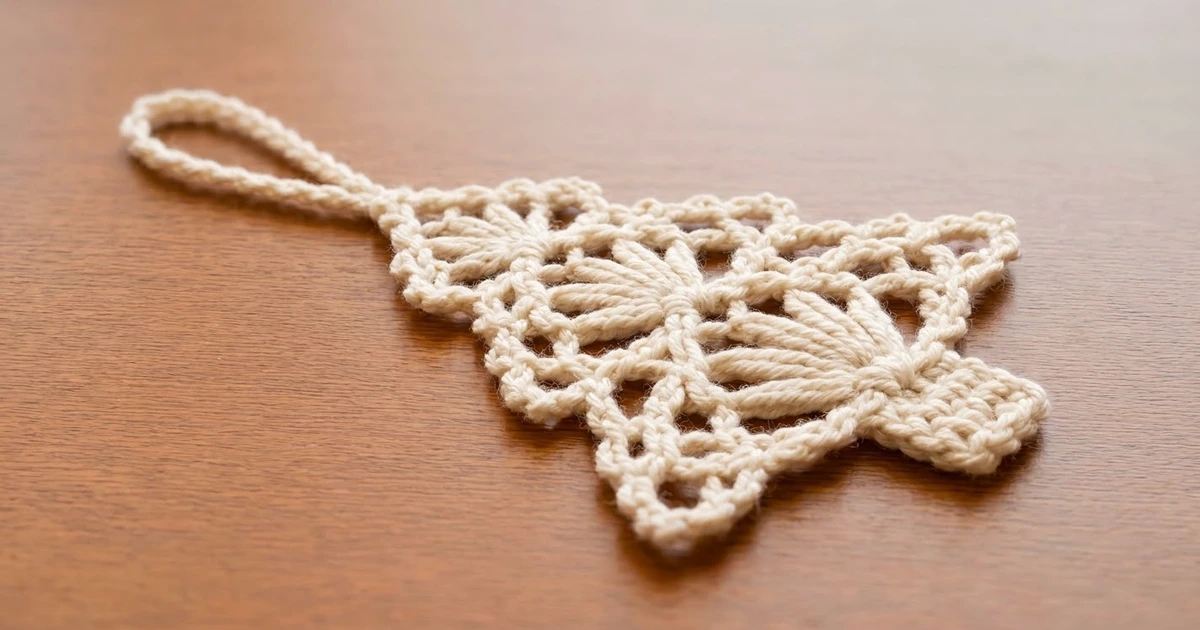
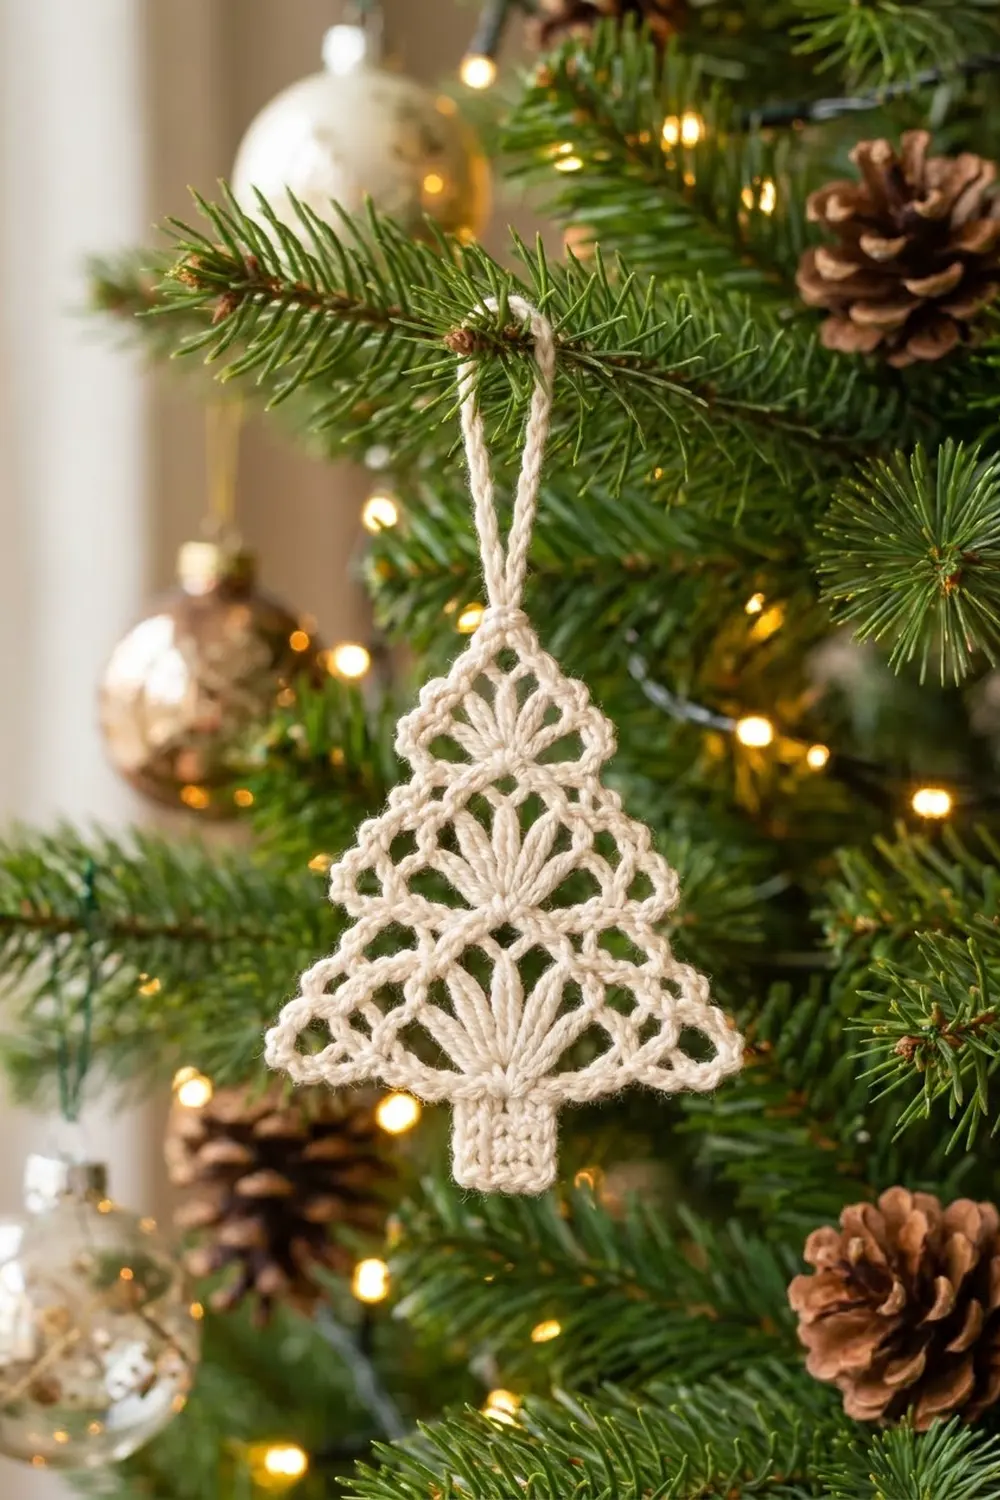
This lace Christmas tree ornament has three tiers. In the middle of each tier, a fan of tall treble stitches opens upward like a frosted bough. Open chain loops surround each fan, small picots trim the outline, and a solid little trunk and a simple chain hanging loop finish the tree.
The sample is made in one color, a soft cream cotton, which gives it the look of an heirloom or snowflake. It also works well in white, pale gold, or a muted sage. Smooth, tightly plied yarn gives the clearest stitch definition. All instructions use US crochet terms.
The finished ornament measures about 5 in (12.7 cm) wide and 5.5 in (14.0 cm) tall including the trunk. The hanging loop adds about 2.5 in (6.4 cm).
The tree is worked flat in rows from the bottom edge up. Every tier is two or three rows of mesh with one central fan. The rows narrow steadily to a point. Next comes one round of picot border around the triangle, then the trunk, worked down from the bottom border. The hanging loop is added last.
Finished Size and Construction
- Finished size: 5 in (12.7 cm) wide × 5.5 in (14.0 cm) tall, plus a 2.5 in (6.4 cm) hanging loop
- Skill level: Intermediate (lace rows, counting chain spaces)
- Terminology: US crochet terms
- Yarn weight: DK (light worsted / #3), cotton or cotton blend
- Hook: 3.5 mm (E-4)
- Number of pieces: 1 (single piece)
- Layout: One triangular tree with three stacked tiers, a trunk, and a hanging loop
- Tree body before border: 4.5 in (11.4 cm) wide × 4.25 in (10.8 cm) tall
- Border depth: about 0.25 in (0.6 cm) on every edge
- Trunk: 0.9 in (2.3 cm) wide × 0.75 in (1.9 cm) tall
Materials
Yarn: Use a smooth DK cotton or cotton blend in cream. Mercerized cotton shows off the fans best and keeps its shape on the tree. Avoid fuzzy or very soft acrylics, because the open mesh will droop and the picots will blur.
- Cream: 8 g, about 20 m (22 yd)
The quantity includes a margin for the gauge swatch, the hanging loop, and weaving in ends. A single ornament uses well under 8 g.
Tools:
- 3.5 mm (E-4) crochet hook
- Tapestry needle
- Scissors
- Stitch markers (2)
- Blocking mat and rust-proof pins
- Spray bottle with water
- Optional: liquid fabric stiffener, diluted 1:1 with water
Abbreviations (US Terms)
- ch – chain
- sl st – slip stitch
- sc – single crochet
- tr – treble crochet (yarn over twice, insert hook, pull up a loop, [yarn over, pull through 2 loops] 3 times)
- sk – skip
- sp – space
- st(s) – stitch(es)
- RS – right side
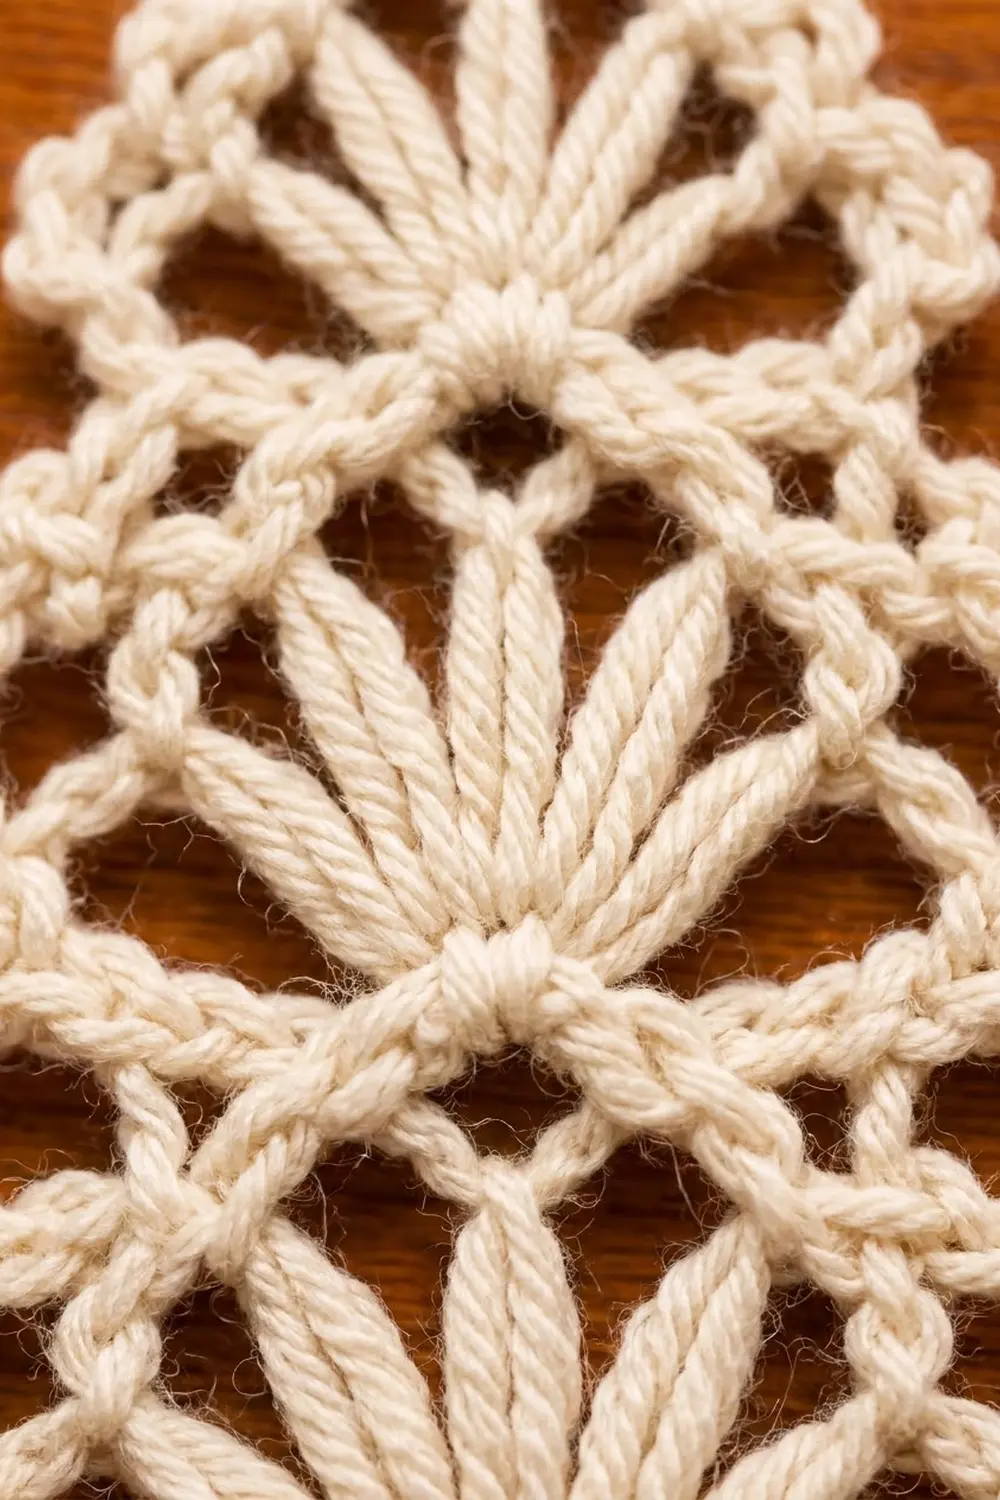
Special stitch – Fan: Work 7 tr into the same space. Each fan has 7 tr. Its 4th tr is the center tr, which is used as an anchor in the next row.
Picot group: (sc, ch 3, sc) in the same stitch or space.
Gauge and Checkpoints
Gauge: 22 sc = 4 in (10.2 cm) with a 3.5 mm hook.
Lace stretches, so check your gauge on the solid base row. Make a test tree first. It’s small and quick, and it tells you whether your yarn and hook will give the planned size.
Checkpoints:
- After Row 1: The 25-sc base measures 4.5 in (11.4 cm).
- After Row 4 (Tier 1 done): Height is about 1.75 in (4.4 cm).
- After Row 7 (Tier 2 done): Height is about 3 in (7.6 cm).
- After Row 10 (Tier 3 done): Height is about 4.25 in (10.8 cm).
- After border: 5 in (12.7 cm) wide × 4.75 in (12.1 cm) tall.
- After trunk: 5.5 in (14.0 cm) total height.
If your base is too wide: Go down one hook size (3.25 mm). If it is too narrow: Go up one size (3.75 mm). Each row of loops builds on the base, so fixing the base fixes the whole tree.
Tree Body
Number the base stitches from 1 to 25 so you can find the center (st 13) easily. The tree is symmetrical, and the fan always sits in the exact middle of its row.
Tier 1
Foundation: Ch 26.
Row 1 (RS): Sc in 2nd ch from hook and in each ch across. Turn. (25 sc)
Place a marker in st 13, the center stitch.
Row 2 (fan row): Ch 1. Sc in st 1, [ch 5, sk 3 sts, sc in next st] 2 times (sc now in sts 5 and 9). Ch 2, sk 3 sts, Fan in st 13, ch 2, sk 3 sts, sc in st 17, [ch 5, sk 3 sts, sc in next st] 2 times (sc in sts 21 and 25). Turn.
(6 sc, 4 ch-5 loops, 2 ch-2 sps, 1 Fan)
Row 3: Sl st in first 3 ch of first ch-5 loop, ch 1, sc in same loop. Ch 5, sc in next ch-5 loop. Ch 5, sc in next ch-2 sp. Ch 5, sk 3 tr, sc in center (4th) tr of Fan. Ch 5, sc in next ch-2 sp. Ch 5, sc in next ch-5 loop. Ch 5, sc in last ch-5 loop. Turn.
(7 sc, 6 ch-5 loops)
The two loops anchored in the center tr frame the top of the fan, and the fan spreads out between them.
Row 4: Sl st in first 3 ch of first loop, ch 1, sc in same loop, [ch 5, sc in next loop] 5 times. Turn.
(6 sc, 5 ch-5 loops)
The 3rd loop is now the center loop. Place a marker in it.
Tier 2
Row 5 (fan row): Sl st in first 3 ch of first loop, ch 1, sc in same loop. Ch 5, sc in next loop. Ch 2, Fan in center loop, ch 2. Sc in next loop, ch 5, sc in last loop. Turn.
(4 sc, 2 ch-5 loops, 2 ch-2 sps, 1 Fan)
Row 6: Sl st in first 3 ch of first ch-5 loop, ch 1, sc in same loop. Ch 5, sc in next ch-2 sp. Ch 5, sk 3 tr, sc in center tr. Ch 5, sc in next ch-2 sp. Ch 5, sc in last ch-5 loop. Turn.
(5 sc, 4 ch-5 loops)
Row 7: Sl st in first 3 ch of first loop, ch 1, sc in same loop, [ch 5, sc in next loop] 3 times. Turn.
(4 sc, 3 ch-5 loops)
The 2nd loop is the center loop.
Tier 3
Row 8 (fan row): Sl st in first 3 ch of first loop, ch 1, sc in same loop. Ch 2, Fan in center loop, ch 2, sc in last loop. Turn.
(2 sc, 2 ch-2 sps, 1 Fan)
Row 9: Ch 1, sc in first ch-2 sp. Ch 5, sk 3 tr, sc in center tr. Ch 5, sc in last ch-2 sp. Turn.
(3 sc, 2 ch-5 loops)
Row 10 (tip): Sl st in first 3 ch of first loop, ch 1, sc in same loop, ch 3, sc in last loop.
(2 sc, 1 ch-3 tip sp)
Fasten off and weave in the starting tail.
Checkpoint: The tree body is 4.5 in (11.4 cm) wide at the base and 4.25 in (10.8 cm) tall. Each tier’s fan sits directly above the one below it.
Border
Border gauge: One picot group adds about 0.25 in (0.6 cm) beyond the edge. Keep the ch-3 picots snug but not tight. They should stand out as small, even bumps.
Each side’s count below already includes its corner stitches.
Round 1: With RS facing, turn the tree so the base edge is on top. Join yarn in the free loop of foundation st 1 at the right-hand corner.
Base side:
– Picot group in st 1 (corner).
– [Sk 1 st, picot group… no; instead: ch 3, sk 1 st, sc in next st] 4 times. This places sc in sts 3, 5, 7, and 9.
– Sc in each of sts 10 through 17 (8 sc).
– [Ch 3, sk 1 st, sc in next st] 3 times. This places sc in sts 19, 21, and 23.
– Ch 3, sk 1 st, picot group in st 25 (corner).
Base count: 19 sc and 10 ch-3 loops: 2 corner picot groups (4 sc, 2 loops), 6 single sc (sts 3, 5, 7, 19, 21, 23), the solid run of 9 sc in sts 9–17, and 8 base loops.
The solid center (sts 9–17) is where the trunk will attach.
First slanted side: Work 1 picot group into the end of each row from Row 2 through Row 9.
(8 picot groups = 16 sc, 8 loops)
Tip: Work (sc, ch 3, sc, ch 3, sc) in the ch-3 tip sp of Row 10.
(3 sc, 2 loops)
Second slanted side: Work 1 picot group into the end of each row from Row 9 down to Row 2.
(8 picot groups = 16 sc, 8 loops)
Sl st to the first sc of the round. Fasten off.
Round total: 19 + 16 + 3 + 16 = 54 sc, and 10 + 8 + 2 + 8 = 28 ch-3 picots.
Why the math works: The base has 25 stitches. The pattern uses 19 of them (sts 1, 3, 5, 7, 9–17, 19, 21, 23, 25) and skips 6 (sts 2, 4, 6, 18, 20, 22, 24 sit under loops). That gives 4 loops on each side of a solid center that lines up exactly with the trunk. Both slanted sides have 8 rows each, so the picots mirror perfectly. The corner groups pull the base corners into neat points.
Checkpoint: 5 in (12.7 cm) wide × 4.75 in (12.1 cm) tall.
Trunk
The trunk is worked down from the solid center of the base border.
Row 1: With RS facing and the base on top, join yarn in the border sc in st 11. Ch 1, sc in the same st and in each of the next 4 sc (sts 11–15). Turn. (5 sc)
Rows 2–5: Ch 1, sc in each sc across. Turn. (5 sc)
Fasten off after Row 5.
Checkpoint: The trunk is 0.9 in (2.3 cm) wide × 0.75 in (1.9 cm) tall, centered under the middle fan. Total height is now 5.5 in (14.0 cm).
Hanging Loop
Join yarn in the center ch-3 picot at the tip. Ch 30, then sl st in the same picot. Fasten off.
The loop hangs about 2.5 in (6.4 cm) above the tip. If you want a thicker cord, like the one in the photo, sl st back along the 30 ch before joining.
Final Blocking
- Weave in all ends along the solid stitches: the base row, the trunk, or the back of a fan. Don’t weave through chain loops, because the tails will show.
- Mist the ornament until it is evenly damp. For a firm ornament, dip it in diluted fabric stiffener instead and squeeze out the excess.
- Lay it face up on the blocking mat.
- Pin the two base corners 5 in (12.7 cm) apart.
- Pin the tip so the height from the base border to the tip picot is 4.75 in (12.1 cm).
- Open each fan so its 7 tr spread evenly, and pin the center tr straight up.
- Pin each ch-5 loop open into a smooth arch, working from the center out.
- Pin out every picot along the sides and base.
- Pin the trunk square, at 0.9 in (2.3 cm) × 0.75 in (1.9 cm).
- Let it dry completely, about 6–12 hours, before you unpin it.
Final Quality-Control Checklist
- The base is 4.5 in (11.4 cm) wide before the border and 5 in (12.7 cm) after it.
- There are three fans, each with exactly 7 tr, stacked straight up the center.
- Row counts: Row 2 has 6 sc, Row 3 has 6 loops, Row 4 has 5 loops, Row 6 has 4 loops, Row 7 has 3 loops, Row 9 has 2 loops, and Row 10 ends in 1 tip sp.
- The border has 54 sc and 28 picots in total, with 8 picot groups on each slanted side.
- The trunk is 5 sc wide, 5 rows tall, and centered under the fans.
- The hanging loop is anchored securely in the center tip picot.
- No ends are visible from the front.
Troubleshooting
The fans cup or ruffle. Your tr stitches are too loose for the ch-2 spaces. Shorten the yarn-over loops, or change ch 2 to ch 3 on either side of each fan.
The fans aren’t centered. You probably miscounted the loops on a narrowing row. Recount the loops before each fan row: Row 4 should have 5 and Row 7 should have 3.
The sides look ragged. The sl sts at the start of each row are too loose. Work them firmly, and always sl st through exactly 3 ch.
The base edge curls up. The foundation chain is too tight. Chain with a hook one size larger, then switch back for Row 1.
The picots disappear. Pull the ch-3 snug, and pin each picot out during blocking.
The trunk is off-center. Join in st 11 exactly. Count from the corner, or check against the marker you placed in st 13.
Care
Hand wash in cool water with mild soap, press out the water in a towel, and reblock flat. If you used stiffener, you’ll need to reapply it after washing.
Final Notes
The size of this tree comes down to a chain of measurements. A 25-sc base at 22 sc = 4 in (10.2 cm) gives a 4.5 in (11.4 cm) width. Three tiers of narrowing loops bring the tree to 4.25 in (10.8 cm) tall. A 0.25 in (0.6 cm) picot border brings it to 5 in (12.7 cm) × 4.75 in (12.1 cm). The 0.75 in (1.9 cm) trunk finishes it at 5.5 in (14.0 cm) tall. If you check the base, the fans stay centered and everything else falls into place.
Make one, then a dozen for gift toppers and the tree.
Happy crocheting!