
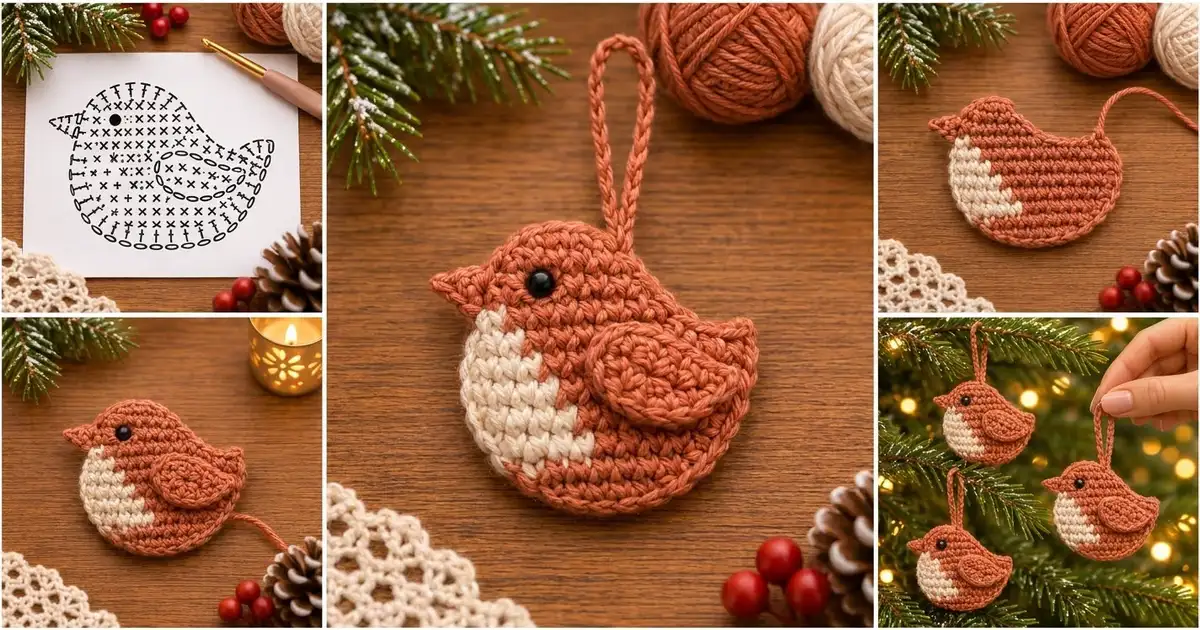
This little robin is a flat, sturdy Christmas ornament with a warm rust body, a soft cream breast, and a rounded wing that sits on top for a bit of dimension. A tiny pointed beak, a shiny black eye, and a perky tail give it plenty of character in a very small space.
The style is simple and cozy. The body is worked in tight single crochet, so the fabric stays firm and holds its shape on the tree. A single rust edging round outlines the whole bird and frames the cream breast neatly.
This pattern uses US crochet terms. The finished ornament measures 4 in (10.2 cm) wide without the beak, 4.4 in (11.2 cm) including the beak, and 3.5 in (8.9 cm) tall without the hanging loop.
Construction is straightforward. You work the body in rows from the bottom up, with intarsia color changes for the breast. Then you split the top into a head section and a tail section. A border round adds the beak. Last, you make the wing separately, sew it on, add the eye, and chain the hanging loop.
Finished Size and Construction
- Finished size: 4 in (10.2 cm) wide x 3.5 in (8.9 cm) tall; 4.4 in (11.2 cm) wide with the beak
- Skill level: Easy-intermediate (simple intarsia and shaping)
- Terminology: US crochet terms
- Yarn weight: DK (weight 3)
- Hook: 3.5 mm (E/4)
- Number of pieces: 1 body plus 1 wing appliqué and a chain loop
- Layout: Single ornament, with no grid or assembly
- Body size before border: 3.6 in (9.1 cm) wide x 3.1 in (7.9 cm) tall
- Border depth: 0.2 in (0.5 cm) on every edge
- Wing size: 2 in (5.1 cm) long x 1.25 in (3.2 cm) wide
- Hanging loop: 2 in (5.1 cm) tall
Materials
Yarn: Use a smooth DK cotton or cotton blend at about 230 m per 100 g. Cotton gives clear stitch definition and keeps the ornament flat. A soft acrylic DK also works, but it may need firmer blocking.
- Color A, Rust: 10 g / 23 m (body, border, wing, loop)
- Color B, Cream: 3 g / 7 m (breast)
These quantities include a margin of about 25% for your gauge swatch and for weaving in ends.
Tools:
– 3.5 mm (E/4) crochet hook
– One 6 mm black bead, or black embroidery floss for a French-knot eye
– Sewing needle and black thread (for the bead)
– Tapestry needle
– Scissors
– Stitch markers
– Blocking mat and rust-proof pins
– Spray bottle with water
Abbreviations (US Terms)
- ch: chain
- sl st: slip stitch
- sc: single crochet
- hdc: half double crochet
- dc: double crochet
- sc2tog: single crochet 2 together
- st(s): stitch(es)
- RS / WS: right side / wrong side
- R / T: body or head row / tail row
Special technique: intarsia color change. Work the last sc before the color change until 2 loops remain on the hook. Drop the old color, then pull the new color through to finish the stitch. Keep the cream and rust as separate strands and do not carry yarn across the back. On WS rows, bring the dropped yarn to the WS side of the work.
Gauge and Checkpoints
Gauge: 20 sc and 22 rows = 4 in (10.2 cm) in sc worked in rows. That works out to 5 sts and 5.5 rows per inch.
Before you make the full ornament, test one body to Row 5 and measure it.
Checkpoints:
– After Row 5 (18 sts): 3.6 in (9.1 cm) wide x 0.9 in (2.3 cm) tall
– After Row 11: 2 in (5.1 cm) tall
– After Row 17 (top of head): 3.1 in (7.9 cm) tall
– After the border: 4 in (10.2 cm) wide x 3.5 in (8.9 cm) tall
If your piece is too big, go down to a 3.25 mm hook. If it is too small, go up to a 3.75 mm hook. Small differences are fine for an ornament, but a loose gauge makes the bird floppy, so lean toward tight.
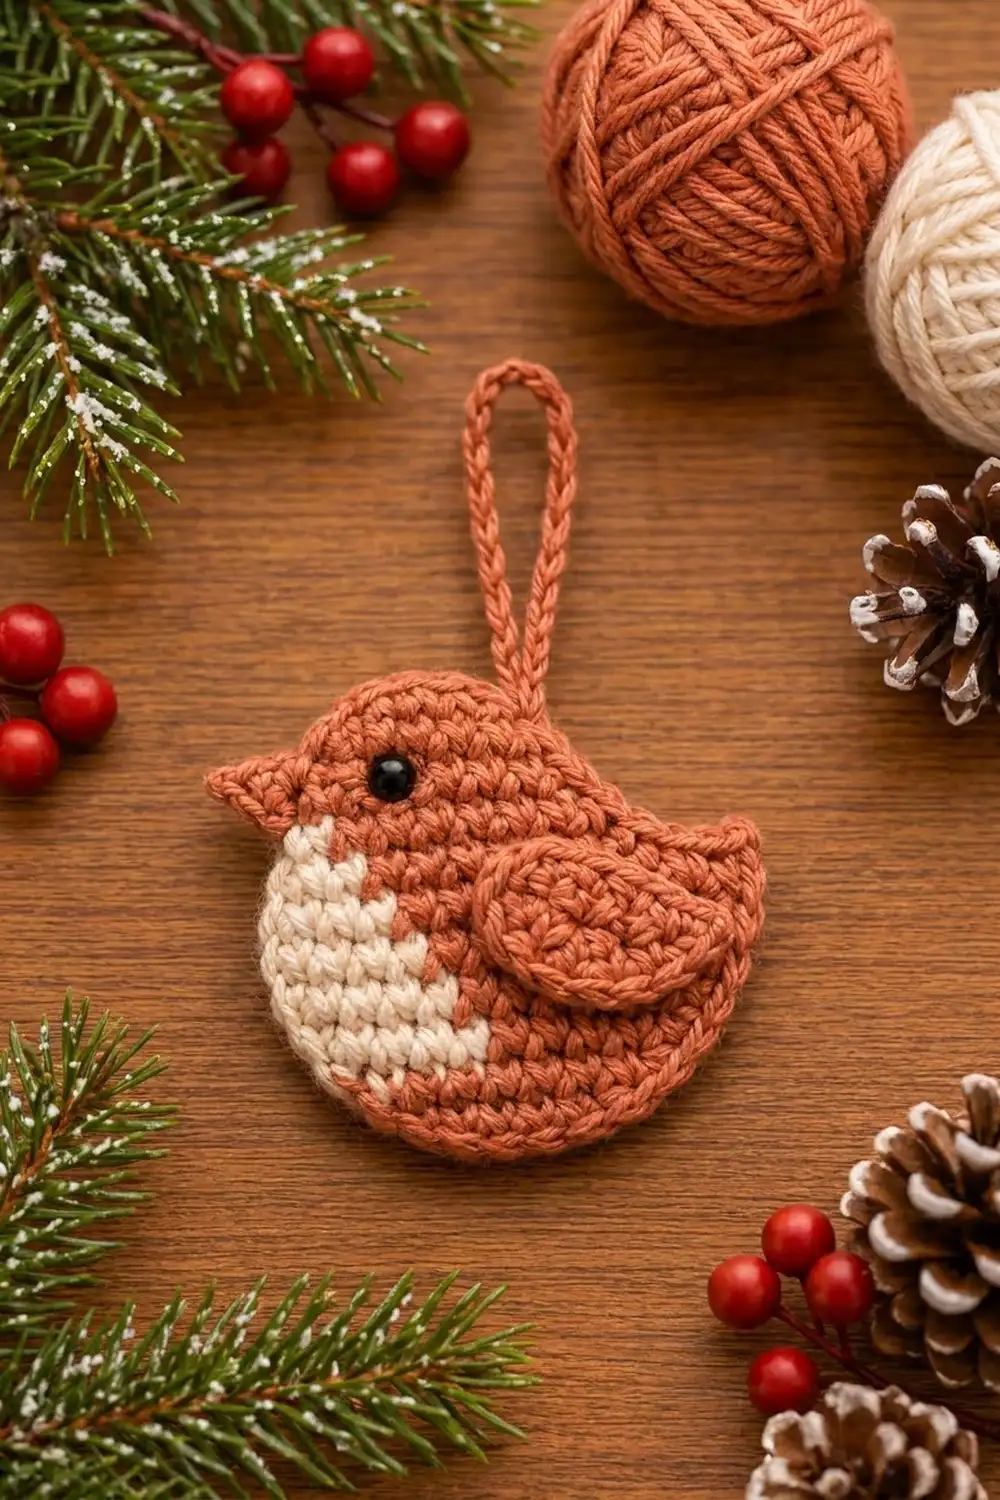
Body
Work in rows. Ch 1 at the start of each row does not count as a stitch. On RS rows you work from the tail toward the breast, and on WS rows from the breast toward the tail. The breast always sits at the front (left) edge when the RS faces you.
Row 1 (RS): With A, ch 11. Sc in 2nd ch from hook and in each ch across. Turn. (10 sts)
Row 2 (WS): Ch 1, 2 sc in first st, sc in next 8 sts, 2 sc in last st. Turn. (12 sts)
Row 3 (RS): Ch 1. With A, 2 sc in first st, sc in next 8 sts. Change to B. With B, sc in next 2 sts, 2 sc in last st. Turn. (14 sts: 10 A, 4 B)
Row 4 (WS): Ch 1. With B, 2 sc in first st, sc in next 3 sts. Change to A. With A, sc in next 9 sts, 2 sc in last st. Turn. (16 sts: 5 B, 11 A)
Row 5 (RS): Ch 1. With A, 2 sc in first st, sc in next 10 sts. Change to B. With B, sc in next 4 sts, 2 sc in last st. Turn. (18 sts: 12 A, 6 B)
Check that the piece is 3.6 in (9.1 cm) wide.
Row 6 (WS): Ch 1. With B, sc 6. With A, sc 12. Turn. (18 sts)
Row 7 (RS): Ch 1. With A, sc 12. With B, sc 6. Turn. (18 sts)
Row 8 (WS): Ch 1. With B, sc 7. With A, sc 11. Turn. (18 sts)
Row 9 (RS): Ch 1. With A, sc 11. With B, sc 7. Turn. (18 sts)
Row 10 (WS): Ch 1. With B, sc 6. With A, sc 12. Turn. (18 sts)
Row 11 (RS): Ch 1. With A, sc 12. With B, sc 6. Turn. (18 sts)
The bulge in Rows 8–9 gives the breast its slightly irregular, rounded back edge. The piece should now measure 2 in (5.1 cm) tall.
Head (worked over the front 9 sts)
Row 12 (WS): Ch 1. With B, sc 5. With A, sc 4. Turn, leaving the remaining 9 sts unworked. (9 sts: 5 B, 4 A)
Row 13 (RS): Ch 1. With A, sc 5. With B, sc 4. Turn. (9 sts)
Row 14 (WS): Ch 1. With B, sc 3. With A, sc 6. Turn. (9 sts)
Fasten off B and continue in A only.
Row 15 (RS): Ch 1, sc2tog, sc in next 7 sts. Turn. (8 sts)
Row 16 (WS): Ch 1, sc2tog, sc in next 4 sts, sc2tog. Turn. (6 sts)
Row 17 (RS): Ch 1, sc2tog, sc in next 2 sts, sc2tog. (4 sts)
Fasten off. The head section is 1.8 in (4.6 cm) wide at its base, and the body now measures 3.1 in (7.9 cm) tall.
Tail (worked over the last 5 sts)
Of the 9 unworked sts in Row 11, the 4 next to the head stay unworked to form the back dip, which is 0.8 in (2 cm) wide. The tail uses the last 5 sts at the tail edge.
Row T1 (RS): With RS facing, join A in the last st of Row 11 at the tail edge. Ch 1, sc in the same st and in the next 4 sts. Turn. (5 sts)
Row T2 (WS): Ch 1, sc2tog (inner edge), sc in next 3 sts. Turn. (4 sts)
Row T3 (RS): Ch 1, sc in next 2 sts, sc2tog (inner edge). (3 sts)
Fasten off. Because you only decrease on the inner edge, the tail leans outward and upward. It is 1 in (2.5 cm) wide at its base.
Weave in all color-change tails along same-color stitches on the WS before you work the border.
Wing Appliqué
Rnd 1: With A, ch 8. Sc in 2nd ch from hook, hdc in next ch, dc in next 3 ch, hdc in next ch, 5 hdc in last ch (rounded end). Working along the underside of the chain: hdc in next ch, dc in next 3 ch, hdc in next ch, sc in last ch. Ch 2 (pointed tip), then sl st to the first sc. (17 sts + ch-2 tip)
Rnd 2: Ch 1, sc in each of next 6 sts, 2 sc in each of next 5 sts, sc in each of next 6 sts, (sc, ch 2, sc) in ch-2 tip. Sl st to the first sc. (24 sc + ch-2 tip)
This round is (17 sts worked 1 per stitch) + (5 increases in the rounded end) + (2 sc in the tip) = 24 sc. The tight sc round forms the raised outline.
Fasten off, leaving a 12 in (30.5 cm) tail for sewing. The wing measures 2 in (5.1 cm) x 1.25 in (3.2 cm).
Border
Border gauge: One sc round adds 0.2 in (0.5 cm) to each edge. That takes the body from 3.6 in (9.1 cm) to 4 in (10.2 cm) wide, and from 3.1 in (7.9 cm) to 3.5 in (8.9 cm) tall.
Rnd 1 (RS): Use A. Work 1 sc in each stitch and 1 sc in each row end, with extra stitches only where listed. Work counterclockwise.
Join A in the underside of the first foundation ch at the tail end, ch 1, then work:
- Bottom: sc in each of 10 foundation ch = 10
- Front lower curve (Row ends 1–5): sc in each row end, working 2 sc in the Row 3 end = 5 + 1 = 6
- Front side (Row ends 6–11): 6
- Head front (Row ends 12–17): sc in the Row 12, 13, 14, and 15 ends. Beak: ch 4, sl st in 2nd ch from hook, sc in next ch, hdc in next ch. Sc in the Row 16 and 17 ends. Row-end sc = 6 (plus the beak)
- Head top (4 sts of Row 17): 2 sc in first st, sc in next 2 sts, 2 sc in last st = 4 + 2 = 6
- Head back (Row ends 17–12): 6
- Back dip (4 unworked sts of Row 11): 4
- Tail inner edge (T1–T3 ends): 3
- Tail top (3 sts of T3): sc in next 2 sts, 3 sc in last st (tail tip) = 3 + 2 = 5
- Tail outer edge (T3–T1 ends): 3
- Tail side (Row ends 11–6): 6
- Tail lower curve (Row ends 5–1): 2 sc in the Row 3 end = 5 + 1 = 6
Sl st to the first sc.
Total: 67 sc, plus the 3 beak stitches (sl st, sc, hdc) worked on the ch-4.
Why the math works: Each side of the lower body has 11 rows (Rows 1–11). That is 5 curved row ends plus 6 straight ones, each taking 1 sc. The head side has 6 rows and the tail has 3. The extra stitches go only where the edge turns outward: 1 at each lower curve, 2 at the head top, and 2 at the tail tip. That makes 6 extras in all, so the 61 one-per-edge stitches + 6 extras = 67. Without those extras the curves would cup, and with more of them the edge would ruffle.
Hanging Loop
Join A in the 2nd border sc of the back dip. Ch 20, then sl st in the 3rd border sc of the dip. Fasten off. The loop stands about 2 in (5.1 cm) tall.
Assembly Details
- Eye: Sew the 6 mm bead on Row 16, 2 sts in from the front border, so it sits just above the beak. Or work a French knot there with 3 wraps of black floss.
- Wing: Pin the wing with its rounded end toward the breast. It should overlap the cream patch’s back edge by about 0.25 in (0.6 cm), cover Rows 6–12, and have its tip angled up toward the tail. Whipstitch through the back loops of the Rnd 2 outline only, so the raised edge stays visible.
Final Blocking
- Weave in all remaining ends on the WS.
- Lightly mist the ornament with water until it is damp, not soaked.
- Place it RS up on the blocking mat.
- Pin the bottom curve first, making sure the width is 4 in (10.2 cm).
- Pin the top of the head so the total height is 3.5 in (8.9 cm).
- Pin the beak tip and the tail tip outward to sharpen their points.
- Smooth the wing flat with your fingers. Do not pin through it.
- Let it dry completely. That takes about 2–4 hours.
- Unpin and check the measurements again.
Final Quality-Control Checklist
- Body before border is 3.6 in (9.1 cm) x 3.1 in (7.9 cm)
- Border has 67 sc plus the beak
- The ornament is 4 in (10.2 cm) x 3.5 in (8.9 cm), and 4.4 in (11.2 cm) wide with the beak
- No cream shows through the rust edging
- There are no holes at the intarsia color changes
- The back dip is visible between the head and the tail
- The wing sits flat with its tip toward the tail
- The eye is secure and level with the beak
- The loop is centered in the dip and the bird hangs level
Troubleshooting
Holes where the colors meet: Twist the two yarns once at each change on WS rows, and pull the new color snug.
Cream peeks through the rust: Make the color change on the last yarn-over of the previous stitch, not at the start of the next one.
Edges cup inward: Check that you added the extra border stitches at both curves, the head top, and the tail tip.
Edges ruffle: Your border tension is looser than your body tension. Go down 0.25 mm for the border only.
Tail points straight up instead of outward: Make sure both tail decreases are on the inner edge (next to the dip).
Bird hangs tilted: Move the loop one stitch toward the heavier side.
Beak looks floppy: Work the beak stitches firmly, and pin the tip while blocking.
Care
Hand wash in cool water with mild soap, press out the water in a towel, and dry flat. Store flat so the beak and tail keep their points.
Final Notes
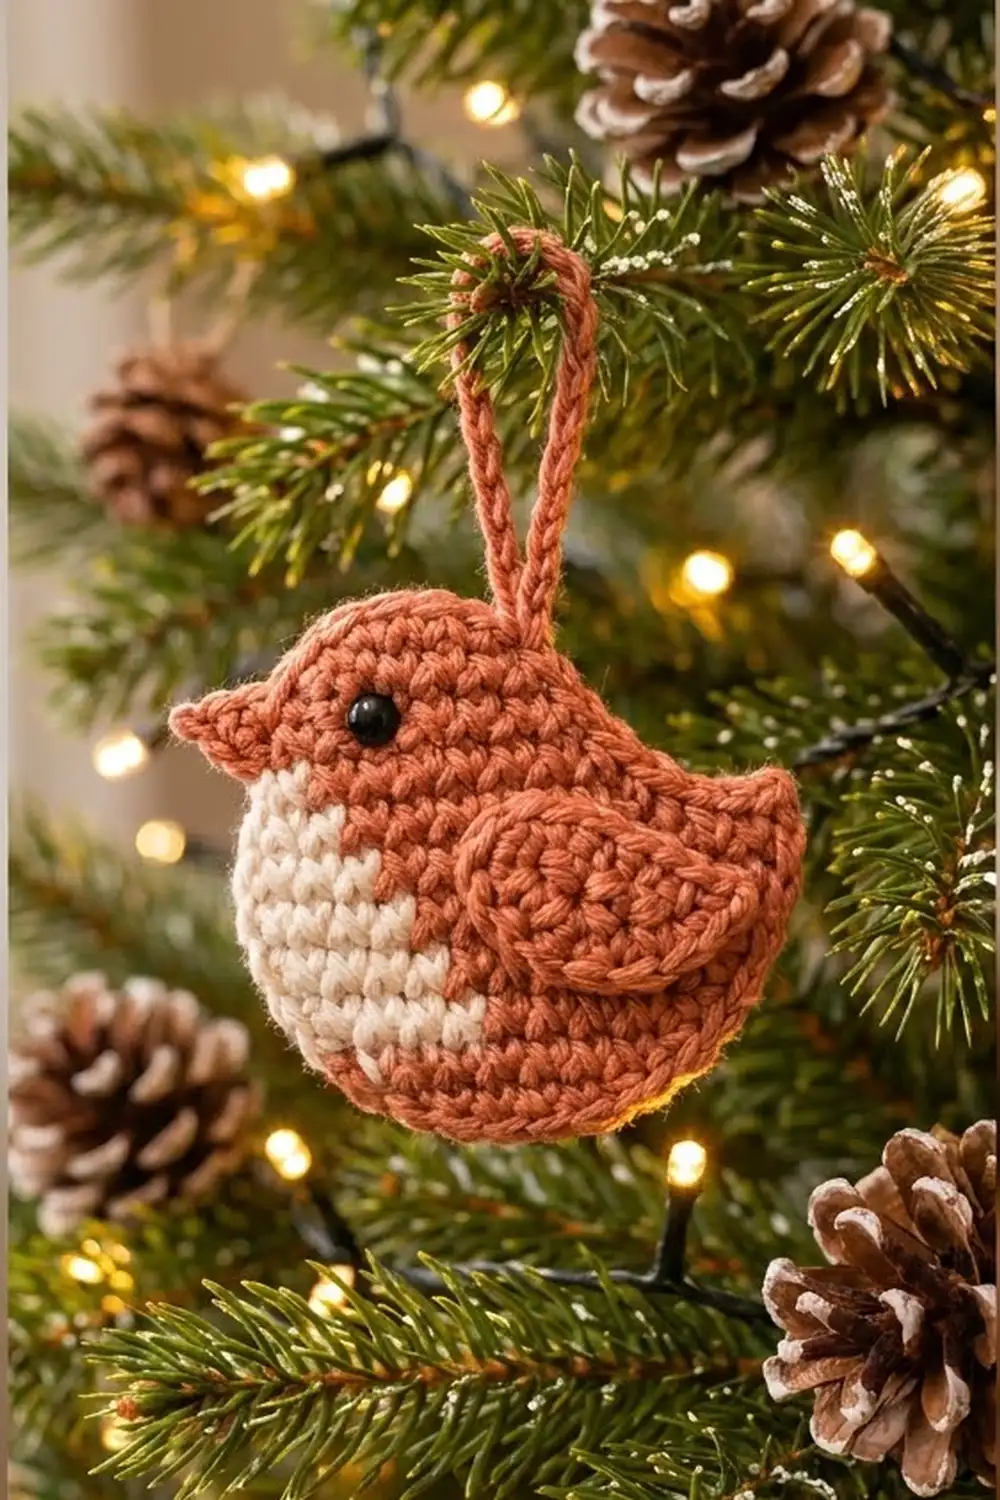
The size of the robin builds up in a clear chain of measurements. Your gauge of 5 sts and 5.5 rows per inch gives a body of 18 sts at 3.6 in (9.1 cm) wide. Seventeen rows make it 3.1 in (7.9 cm) tall. The 67-stitch border adds 0.2 in (0.5 cm) on every edge, for a finished size of 4 in (10.2 cm) x 3.5 in (8.9 cm). The beak brings the width to 4.4 in (11.2 cm). If you check at Row 5, Row 11, Row 17, and after the border, every robin you make will match.
Happy crocheting!