

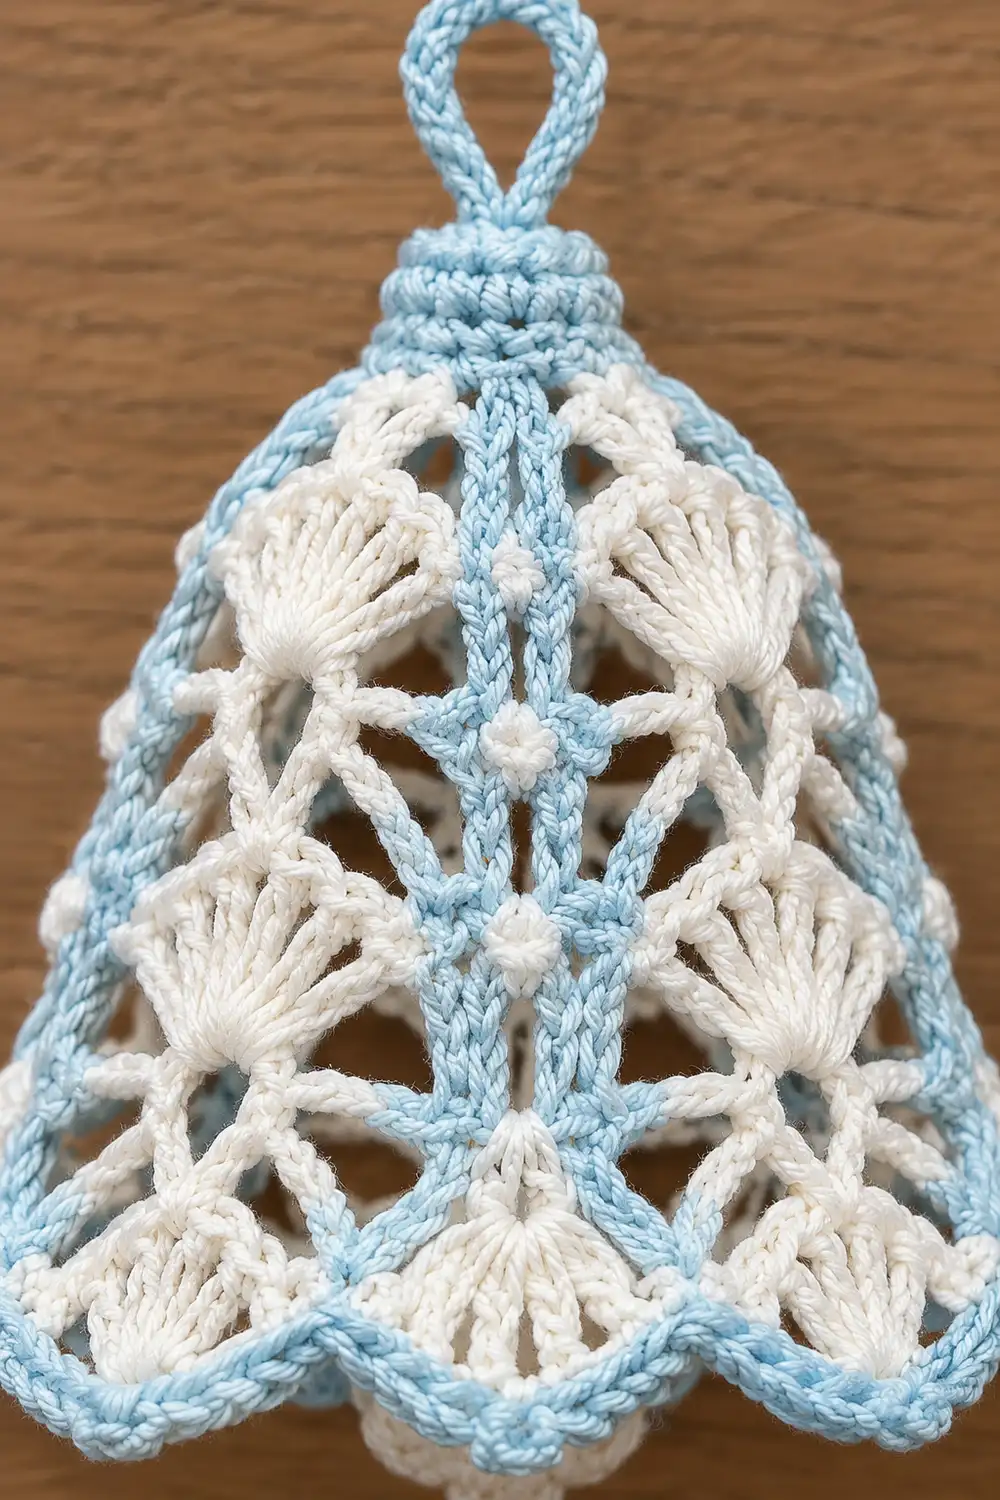
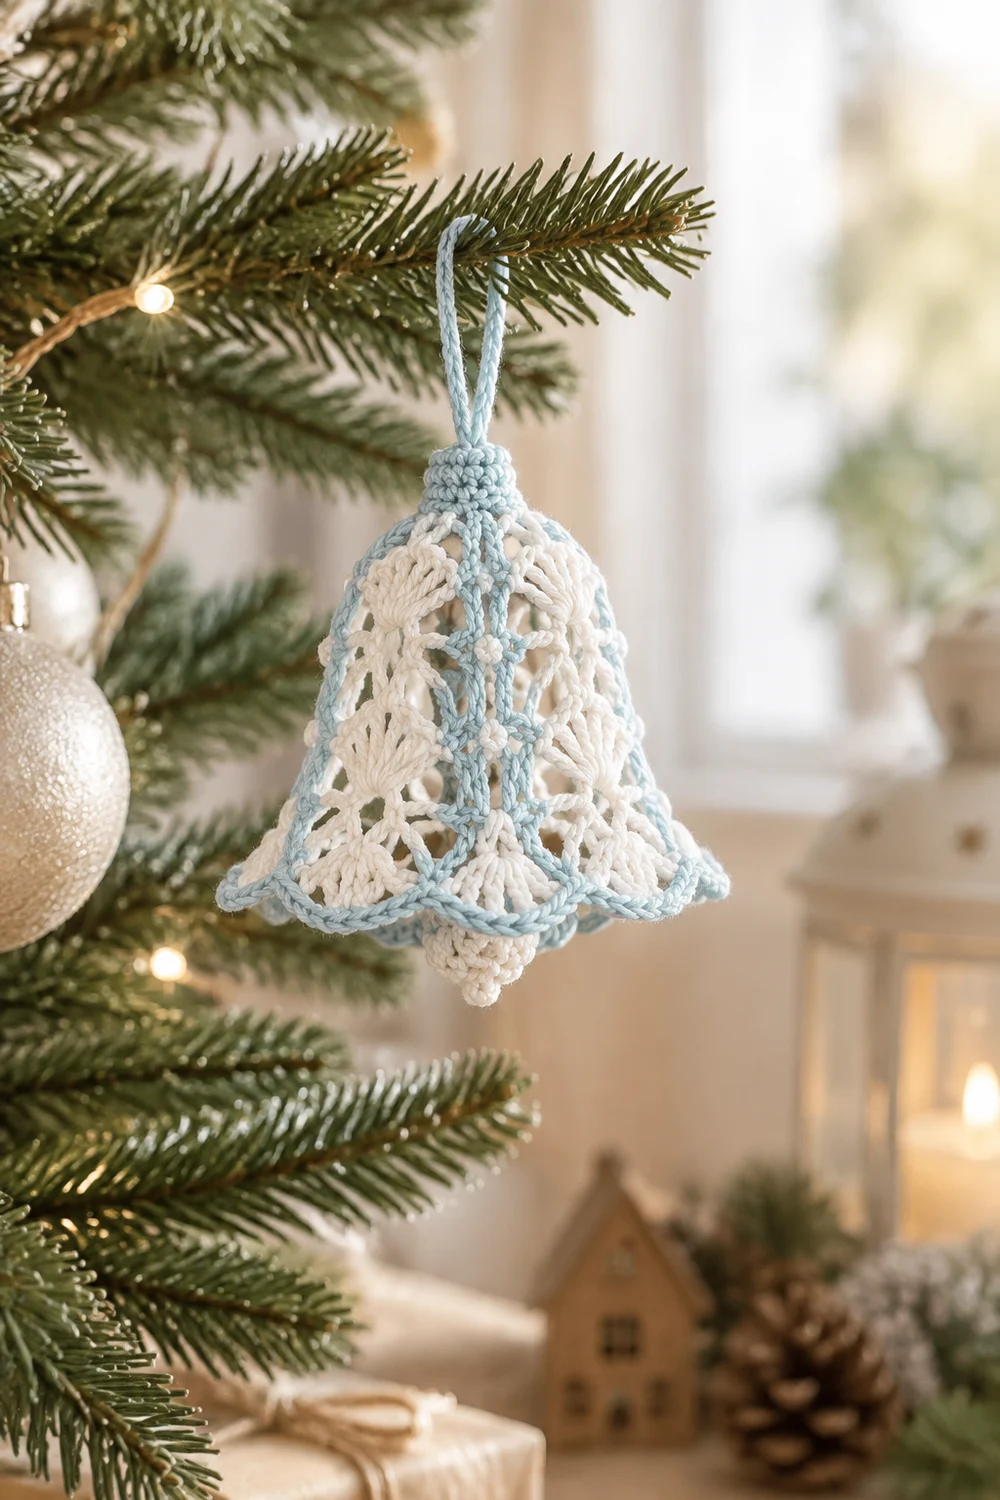
This little bell is a delicate lace ornament in two soft colors: pale sky blue and cream. The rounded dome top tapers to a pointed bottom. Cream shell stitches and open chain spaces form a filigree body, and a light blue outline frames the whole shape.
The widest point of the bell carries a blue scallop trim with a picot at the center tip. A small blue collar sits at the top, and a crocheted loop above it lets the bell hang from a tree, a gift tag, or a window hook.
This pattern uses US crochet terms throughout. The finished bell body measures 2.5 in (6.4 cm) tall and 2.5 in (6.4 cm) wide at its widest point. The hanging loop adds 0.5 in (1.3 cm), so the total height is 3 in (7.6 cm).
The bell is one flat piece. You work it in turned rows from a small ring at the top. Each row curves around the one before it like a nested U, so the piece forms a dome at the top and fans out toward the bottom. A short cream point is added at the bottom center. Two blue border rounds come next, then a blue collar and the hanging loop.
Finished Size and Construction
- Finished size: 2.5 in (6.4 cm) tall × 2.5 in (6.4 cm) wide, plus a 0.5 in (1.3 cm) loop. Total height is 3 in (7.6 cm).
- Skill level: Intermediate
- Terminology: US
- Yarn weight: Size 10 cotton crochet thread
- Hook: 1.75 mm (US steel 6)
- Number of pieces: 1
- Layout: Single flat bell motif
- Piece size: Same as the finished size above
- Size before border: 2 in (5.1 cm) wide × 2 in (5.1 cm) tall, measured from the top of the ring to the point tip
- Border depth: about 0.25 in (0.6 cm) on each side and along the scallops. The collar adds about 0.3 in (0.8 cm) at the top.
Materials
Use a mercerized cotton size 10 thread. It gives crisp shells and blocks well. Cotton holds starch better than acrylic, so the lace keeps its shape.
- Cream / off-white: 4 g, about 31 m. Used for the body rows and the center point.
- Light blue / pale sky blue: 3 g, about 23 m. Used for the border, collar and loop.
Both quantities include a small margin for your gauge swatch and weaving in ends.
Tools:
– 1.75 mm (US steel 6) crochet hook
– Fine tapestry needle
– Small scissors
– 2 stitch markers
– Blocking mat or foam board, plus rust-proof pins
– Spray starch or fabric stiffener
– Ruler or tape measure
Abbreviations (US Terms)
- ch: chain
- sl st: slip stitch
- sc: single crochet
- hdc: half double crochet
- dc: double crochet
- tr: treble crochet
- st(s): stitch(es)
- sp: space
- sk: skip
Special stitches:
– Shell: 5 dc in the same st or sp.
– V-st: (dc, ch 2, dc) in the same st.
– Edge V: (tr, ch 2, tr) in the same st. It is used only at row ends.
– Picot: ch 4, sl st in the 4th ch from the hook.
Gauge and Checkpoints
Test your gauge before making the full bell. Work Rows 1–3 as a swatch.
Gauge: 10 sc = 1 in (2.5 cm) in thread. After Row 3, the 3-shell row measures 1 in (2.5 cm) across from end to end.
Checkpoints:
– After Row 3: 1 in (2.5 cm) across.
– After Row 5: 1.5 in (3.8 cm) across.
– After Row 7: 2 in (5.1 cm) across. The piece is 1.75 in (4.4 cm) from the ring top to the bottom center.
– After the center point: 2 in (5.1 cm) × 2 in (5.1 cm).
– After the border and collar: 2.5 in (6.4 cm) × 2.5 in (6.4 cm).
If your swatch is too big, change to a 1.5 mm hook. If it is too small, change to a 2 mm hook. Measure again before you continue. Blocking opens the lace slightly, so measure while the piece is lightly stretched flat.
Body (Cream)
Turn at the end of every row. The rows curve around the ring, so lay the work flat now and then to check that it is not cupping.
Row 1: Ch 6 and sl st to the first ch to form a ring. Ch 3 (counts as dc), then work 10 dc in the ring. Use only the lower half of the ring. Turn.
(11 dc)
Row 2: Ch 5 (counts as dc + ch 2). Sk the next dc and dc in the next dc. [Ch 2, sk the next dc, dc in the next dc] 4 times. The last dc goes in the top of the turning ch-3. Turn.
(6 dc, 5 ch-2 sps)
Row 3: Ch 1 and sc in the first dc. Work a shell in the next ch-2 sp. [Sc in the next ch-2 sp, shell in the next ch-2 sp] twice. Sc in the 3rd ch of the turning ch-5. Turn.
(3 shells and 4 sc = 19 sts)
Row 4: Ch 6 (counts as tr + ch 2), then tr in the first sc. This makes the first edge V. [Ch 1, V-st in the center (3rd) dc of the next shell, ch 1, V-st in the next sc] twice. Ch 1, V-st in the center dc of the next shell, ch 1, then work an edge V in the last sc. Turn.
(7 V-sts in total: 2 edge Vs and 5 dc V-sts, for 4 tr + 10 dc = 14 sts. There are 6 ch-1 sps.)
Row 5: Ch 1 and sc in the first tr. Work a shell in the next ch-2 sp. [Sc in the next V-st ch-2 sp, shell in the next V-st ch-2 sp] 3 times. Sc in the 4th ch of the turning ch-6. Skip all ch-1 sps in this row. Turn.
(4 shells and 5 sc = 25 sts)
Row 6: Ch 6 (counts as tr + ch 2), then tr in the first sc. [Ch 1, V-st in the center dc of the next shell, ch 1, V-st in the next sc] 3 times. Ch 1, V-st in the center dc of the next shell, ch 1, then work an edge V in the last sc. Turn.
(9 V-sts in total: 2 edge Vs and 7 dc V-sts, for 4 tr + 14 dc = 18 sts. There are 8 ch-1 sps.)
Row 7: Ch 1 and sc in the first tr. Work a shell in the next ch-2 sp. [Sc in the next V-st ch-2 sp, shell in the next V-st ch-2 sp] 4 times. Sc in the 4th ch of the turning ch-6. Skip all ch-1 sps. Fasten off.
(5 shells and 6 sc = 31 sts)
How the growth works: Each shell row places shells over the sc of the row before and over both edge Vs. The tall tr edge Vs extend the row ends, which shapes the rounded shoulders. As a result, each shell row adds exactly one shell: 3, then 4, then 5. The 3rd shell of Row 7 (sts 14–18) sits on the center line, because its center dc is st 16 of 31.
Center point: Join cream with a sl st in the first dc of the 3rd (center) shell of Row 7. Work in this order:
1. Sc in the same dc and hdc in the next dc.
2. Work (dc, ch 3, dc) in the center dc.
3. Hdc in the next dc and sc in the last dc of the shell.
4. Sl st in the next sc. Fasten off.
(6 sts and 1 ch-3 tip sp)
This short wedge creates the pointed bottom.
Border (Light Blue)
Border gauge: The border uses the same 10 sc per 1 in (2.5 cm) as your gauge check.
Work into row ends at a ratio that matches each row’s height:
– 1 sc per sc row end
– 2 sc per dc row end
– 3 sc per tr row end
Applied to Rows 1–7, this gives 2 + 2 + 1 + 3 + 1 + 3 + 1 = 13 sc per side.
Round 1: Join blue in the first sc of Row 7, at a lower corner. Work in this order:
1. Ch 1. Sc in the same st and in each of the next 12 sts of Row 7 (13 sc).
2. Sc in each of the first 3 sts of the center point (16 sc so far).
3. Work (sc, ch 2, sc) in the ch-3 tip sp.
4. Sc in each of the last 3 point sts. Then sc in each of the last 13 sts of Row 7, working the first of these through the sl st (16 sc).
5. Ch 1 for the corner.
6. Work 13 sc up the side row ends and 8 sc into the open upper half of the ring.
7. Work 13 sc down the other side row ends, then ch 1 for the corner.
8. Join with a sl st to the first sc.
Round 1 counts per side:
– Bottom: 16 + 2 tip sc + 16 = 34 sc, plus a ch-2 tip
– Each side: 13 sc
– Top: 8 sc
– Total: 68 sc, 2 ch-1 corner sps and 1 ch-2 tip sp
At gauge, the bottom measures 3.4 in (8.6 cm) along its curve. Each side measures 1.3 in (3.3 cm), and the top measures 0.8 in (2.0 cm).
Round 2 (scallop trim): Sl st into the corner ch-1 sp just before the first sc of Round 1. Ch 1 and sc in the same sp.
First half of the bottom: [Sk 1 sc, 5 dc in the next sc, sk 1 sc, sc in the next sc] 4 times. This uses all 16 sc of the first half.
Tip: Sk the next sc. In the ch-2 tip sp, work (sc, picot, sc). Sk the next sc.
Second half of the bottom: Sc in the next sc. [Sk 1 sc, 5 dc in the next sc, sk 1 sc, sc in the next sc] 3 times. Then sk 1 sc, 5 dc in the next sc, sk 1 sc, and sc in the corner ch-1 sp. This uses all 16 sc of the second half.
Sides and top: Sc in each of the 13 side sc, the 8 top sc and the other 13 side sc. Join with a sl st to the first sc. Do not fasten off yet if you plan to start the collar right away. Otherwise, fasten off.
Round 2 counts per side:
– Bottom: 8 scallops (40 dc) and 12 sc, plus 1 picot
– Each side: 13 sc
– Top: 8 sc
Why the math works: Each scallop uses exactly 4 sc. Each half of the bottom has 16 sc, and 16 ÷ 4 = 4 scallops, so the two halves mirror each other. The 2 tip sc are skipped on purpose to frame the picot. The sides and top are plain sc, so there is no repeat to match there.
Collar: Join blue in the first of the 8 top sc of Round 2.
Rows C1–C3: Ch 1 and sc in each of the 8 sc. Turn after each row.
(8 sc per row)
Row C4: Ch 1 and sc in the first 4 sc. Make the hanging loop:
1. Ch 15 and sl st in the last sc made to form the loop.
2. Work 22 sc into the loop to cover it.
3. Sl st in the same sc.
Sc in the remaining 4 sc. Fasten off.
(8 sc plus the covered loop)
The loop stands 0.5 in (1.3 cm) above the collar. The collar is about 0.3 in (0.8 cm) deep.
Final Blocking
- Weave in all ends along the blue outline, where they will not show through the lace.
- Soak the bell in cool water for 5 minutes. Press out the water in a towel. Do not wring.
- Pin it flat on a mat to 2.5 in (6.4 cm) wide and 2.5 in (6.4 cm) tall. The loop is not included in these measurements.
- Pin the center dc of each scallop, the picot tip and both lower corners.
- Open each shell so the 5 dc fan out evenly. Keep the chain spaces open.
- Spray with starch or brush on stiffener. Let it dry fully, for at least 12 hours.
- Unpin, then check the measurements and the symmetry.
Final Quality-Control Checklist
- Row 7 has 5 shells and 6 sc (31 sts).
- The center point is centered on the 3rd shell.
- Round 1 has 34 bottom sc and 13 sc on each side.
- Each half of the bottom has 4 matching scallops.
- The picot sits exactly at the bottom tip.
- The collar is 8 sc wide and centered over the ring.
- The loop is firm and centered over the collar.
- The finished body measures 2.5 in (6.4 cm) × 2.5 in (6.4 cm).
- No ends show through the lace.
Troubleshooting
The body cups or curls: Your tension is too tight on the shell rows. Go up 0.25 mm in hook size or loosen the dc. Blocking can fix mild cupping.
The body ruffles: Your tension is too loose, or you worked shells into the ch-1 sps. Shells go only into V-st ch-2 sps.
The side counts do not match 13: Recount your row ends using the 1-2-3 ratio (sc, dc and tr row ends). Both sides must match.
The scallops do not land evenly: Check that Round 1 has exactly 16 sc on each half. Do not count the 2 tip sc.
The point leans to one side: You joined in the wrong shell. Count to the 3rd shell, at sts 14–18.
The loop flops over: Pack the 22 sc tightly, or add 2 more sc.
Care
Hand wash in cool water and lay flat to dry. Re-starch if needed, and store the bell flat in tissue paper.
Final Notes
Follow the measurement chain step by step:
– Gauge: 10 sc = 1 in (2.5 cm), and Row 3 measures 1 in (2.5 cm) across.
– Row 5: 1.5 in (3.8 cm) across.
– Row 7: 2 in (5.1 cm) across.
– With the point: 2 in (5.1 cm) × 2 in (5.1 cm).
– After the border and collar: 2.5 in (6.4 cm) × 2.5 in (6.4 cm).
– With the loop: 3 in (7.6 cm) tall.
If each checkpoint matches, the finished bell will match too.
Happy crocheting!