

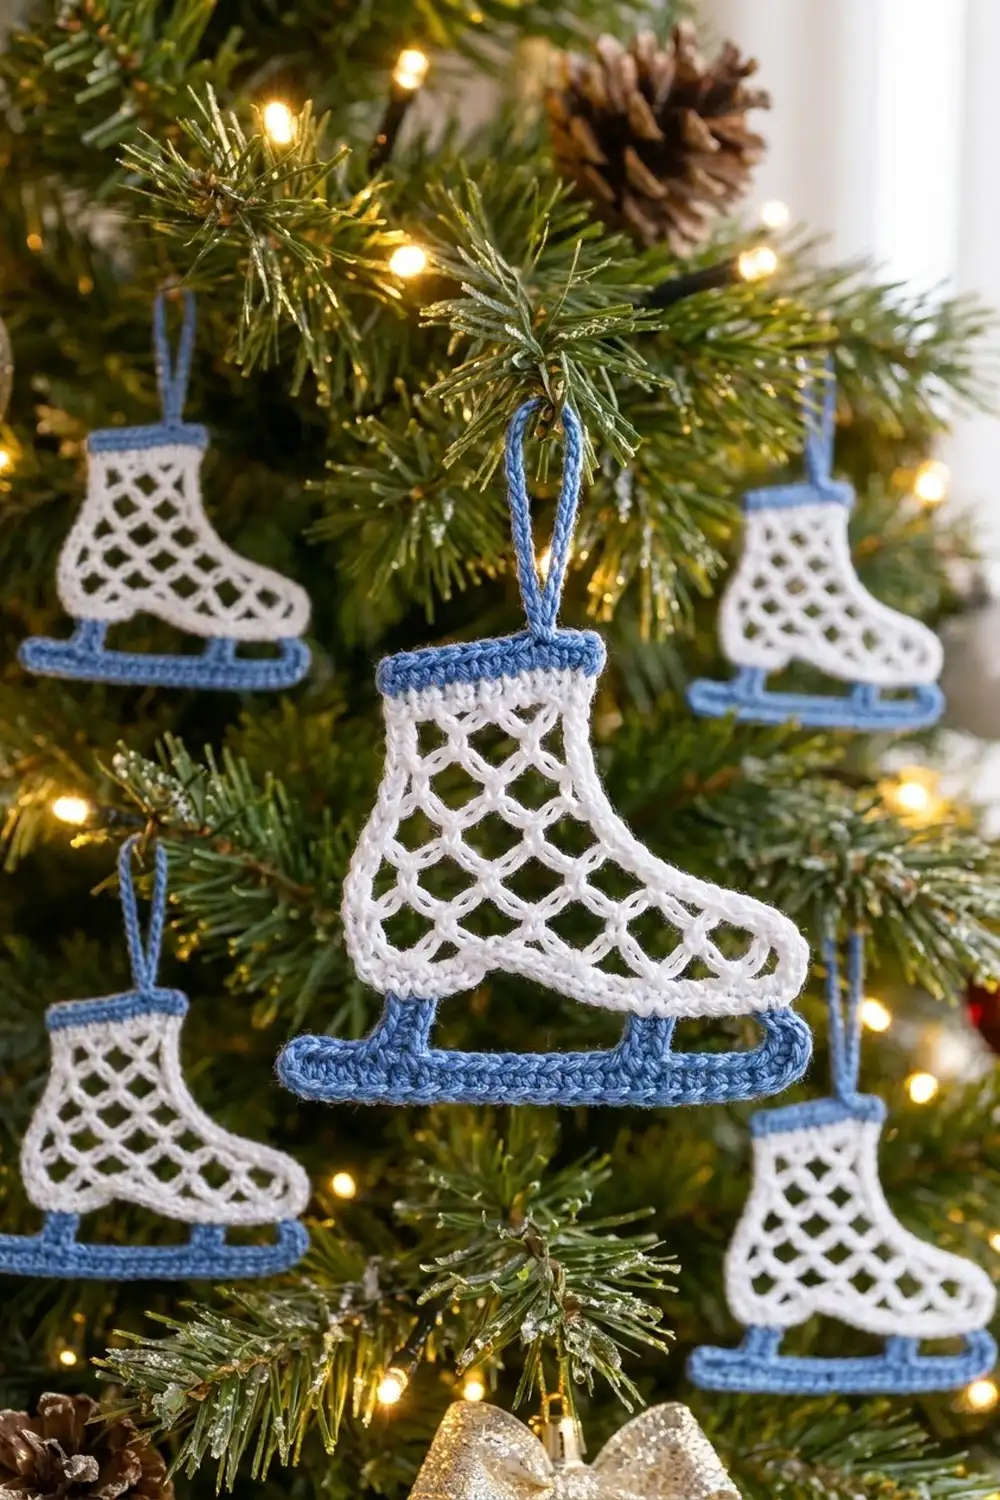
This ice skate ornament has a white fishnet-mesh boot, a solid blue cuff, two short blue struts and a long blue blade with a toe that curls up. It’s light, lacy and quick to make, and it looks good hanging on a tree or tied to a gift.
The palette is just two colors: crisp white for the boot and a medium cornflower blue for the cuff, hanging loop, struts and blade. A tidy white single-crochet outline keeps the mesh edges clean and makes the boot shape easy to see.
This pattern uses US crochet terms. The finished ornament measures about 4 1/4 in wide x 3 7/8 in tall (10.8 x 9.8 cm), plus a 1 in (2.5 cm) hanging loop.
The skate is made in one piece from the bottom up. You crochet the blade as an oval, work the two struts up from its top edge, and then start the white boot straight across the strut tops. The boot is shaped mesh, finished with a white outline, a blue cuff and a hanging loop.
Finished Size and Construction
- Finished size: 4 1/4 in wide x 3 7/8 in tall (10.8 x 9.8 cm), plus a 1 in (2.5 cm) loop
- Skill level: Intermediate (shaped mesh, working into a project already in progress)
- Terminology: US
- Yarn weight: Size 3 crochet thread (light fingering)
- Hook: 2.25 mm (B-1)
- Number of pieces: 1
- Layout: Single motif, no joining
- Piece size: 4 1/4 x 3 7/8 in (10.8 x 9.8 cm)
- Size before border: 4 1/4 x 3 1/2 in (10.8 x 8.9 cm), measured blade bottom to the top of Row 11
- Border depth: White outline 1/8 in (0.3 cm); blue cuff 3/8 in (1.0 cm)
Materials
Use mercerized cotton thread in size 3. It holds its shape, makes crisp mesh and blocks flat. Avoid fuzzy or very stretchy fibers, because the open mesh will sag.
- White: 5 g (about 22 m), for the boot mesh, sole row and outline
- Blue: 4 g (about 18 m), for the blade, struts, cuff and loop
These quantities include a margin for swatching and weaving in ends.
Tools:
– 2.25 mm (B-1) crochet hook
– Tapestry needle
– Scissors
– Rustproof pins and a blocking board
– Spray bottle or light starch (optional)
– Ruler or tape measure
Abbreviations (US Terms)
- ch – chain
- sl st – slip stitch
- sc – single crochet
- hdc – half double crochet
- sk – skip
- st(s) – stitch(es)
- rep – repeat
- Rnd/Row – round/row
Special stitch: mesh loop. A mesh loop is a ch-5 anchored by a sc. Each mesh loop covers 3 sc of width. A “turning loop” is a ch 5 made at the start of a row, and it counts as the first mesh loop of that row.
Gauge and Checkpoints
Gauge: 8 sc and 8 sc rows = 1 in (2.5 cm). In mesh, one loop spans 3/8 in (1.0 cm) and 4 mesh rows = 1 in (2.5 cm).
Before you start, make a test swatch: ch 17, then work 8 rows of 16 sc. It should measure 2 in (5.1 cm) wide.
Checkpoints:
– Blade after Rnd 2: 4 1/4 in (10.8 cm) long and 1/2 in (1.3 cm) tall
– Each strut: 1/2 in (1.3 cm) wide x 1/2 in (1.3 cm) tall
– Sole row (Row 1): 3 1/2 in (8.9 cm) long
– Boot after Row 11: 2 1/2 in (6.4 cm) tall, with the top edge 2 in (5.1 cm) wide
– Finished cuff: 2 1/4 in (5.7 cm) wide
If your piece runs large, go down to a 2.0 mm hook. If it runs small, go up to a 2.5 mm hook. Check the blade before you continue, because every later count lines up with it.
Blade (Blue)
Rnd 1: Ch 33. Sc in the 2nd ch from the hook and in each of the next 30 ch (31 sc). These are the top-edge sts, worked from heel to toe. Work 3 sc in the last ch (toe end). Rotate the work and sc in each of the next 30 ch along the other side of the chain (bottom edge). Work 2 sc in the same ch as the first sc (heel end). Join with sl st to the first sc. (66 sc)
Rnd 2 (toe lift): Ch 1. Sc in each of the 31 top sts. At the toe, work 2 hdc in each of the next 3 sts. Sc in each of the 30 bottom sts. At the heel, work 2 sc in each of the last 2 sts. Join with sl st. (66 sts worked once + 5 extra = 71 sts)
The 6 hdc at the toe are taller than the sc around them, so the toe end lifts. Blocking turns this into the curl. Fasten off.
Number the 31 top sts of Rnd 2 from 1 to 31, starting at the heel end.
Checkpoint: The blade is 4 1/4 in (10.8 cm) long and 1/2 in (1.3 cm) tall.
Struts (Blue)
Strut A (heel):
– Row 1: Join blue in top st 4. Ch 1, then sc in the same st and in each of the next 3 sts (sts 4–7). (4 sc)
– Rows 2–4: Ch 1, turn, sc in each st across. (4 sc)
Fasten off.
Strut B (front): Work the same as Strut A over top sts 22–25. Fasten off.
The gap between the struts is sts 8–21, which is 14 sts, or 1 3/4 in (4.4 cm).
Checkpoint: Each strut is 1/2 in (1.3 cm) square.
Boot (White)
Foundation: Make a slip knot with white and ch 2. These 2 chains hang free as the heel overhang. Sc in each of the 4 sts across the top of Strut A, working toward the toe. Ch 14 for the gap. Sc in each of the 4 sts across the top of Strut B. Ch 5.
Row 1 (sole): Sc in the 2nd ch from the hook and in each of the next 3 ch (4). Sc in each of the 4 foundation sc on Strut B, then sc in each of the 14 gap ch. Sc in each of the 4 foundation sc on Strut A, then sc in each of the 2 heel ch. (28 sc)
This row runs from toe to heel. It matches blade sts 2–29 exactly: 2 overhang, 4 strut, 14 gap, 4 strut, 4 toe.
Checkpoint: Row 1 is 3 1/2 in (8.9 cm) long.
Row 2 (heel to toe): Ch 1, turn. Sc in the first sc, then ch 5, sk 2 sc, sc in the next sc. Rep from * 8 more times. (9 loops)
The math: 1 + (9 x 3) = 28 sts used.
Row 3 (toe to heel): Ch 5 (turning loop), turn. Sc in the first loop, then ch 5, sc in the next loop 8 times. (9 loops)
Instep Shaping
All decreases happen at the toe edge, so the heel edge stays straight.
- Row 4 (heel to toe): Ch 5, turn. Sc in the first loop, then ch 5, sc in the next loop 7 times. Leave the last (toe) loop unworked. (8 loops)
- Row 5 (toe to heel): Turn. Sl st in each of the first 3 ch of the first loop. Ch 5, sc in the next loop, then ch 5, sc in the next loop 6 times. (7 loops)
- Row 6 (heel to toe): Ch 5, turn. Sc in the first loop, then ch 5, sc in the next loop 5 times. Leave the last loop unworked. (6 loops)
- Row 7 (toe to heel): Turn. Sl st in each of the first 3 ch. Ch 5, sc in the next loop, then ch 5, sc in the next loop 4 times. (5 loops)
Shaft
- Rows 8–10: Ch 5, turn. Sc in the first loop, then ch 5, sc in the next loop 4 times. (5 loops each row) Row 10 ends at the front of the shaft.
- Row 11 (top edge, front to heel): Ch 1, turn. Sc in the first sc, then work 3 sc in each of the 5 loops. (1 + 15 = 16 sc)
Do not fasten off.
Checkpoint: Row 11 is 2 in (5.1 cm) wide. The boot measures 2 1/2 in (6.4 cm) from Row 1 to Row 11. The full piece is 3 1/2 in (8.9 cm) tall.
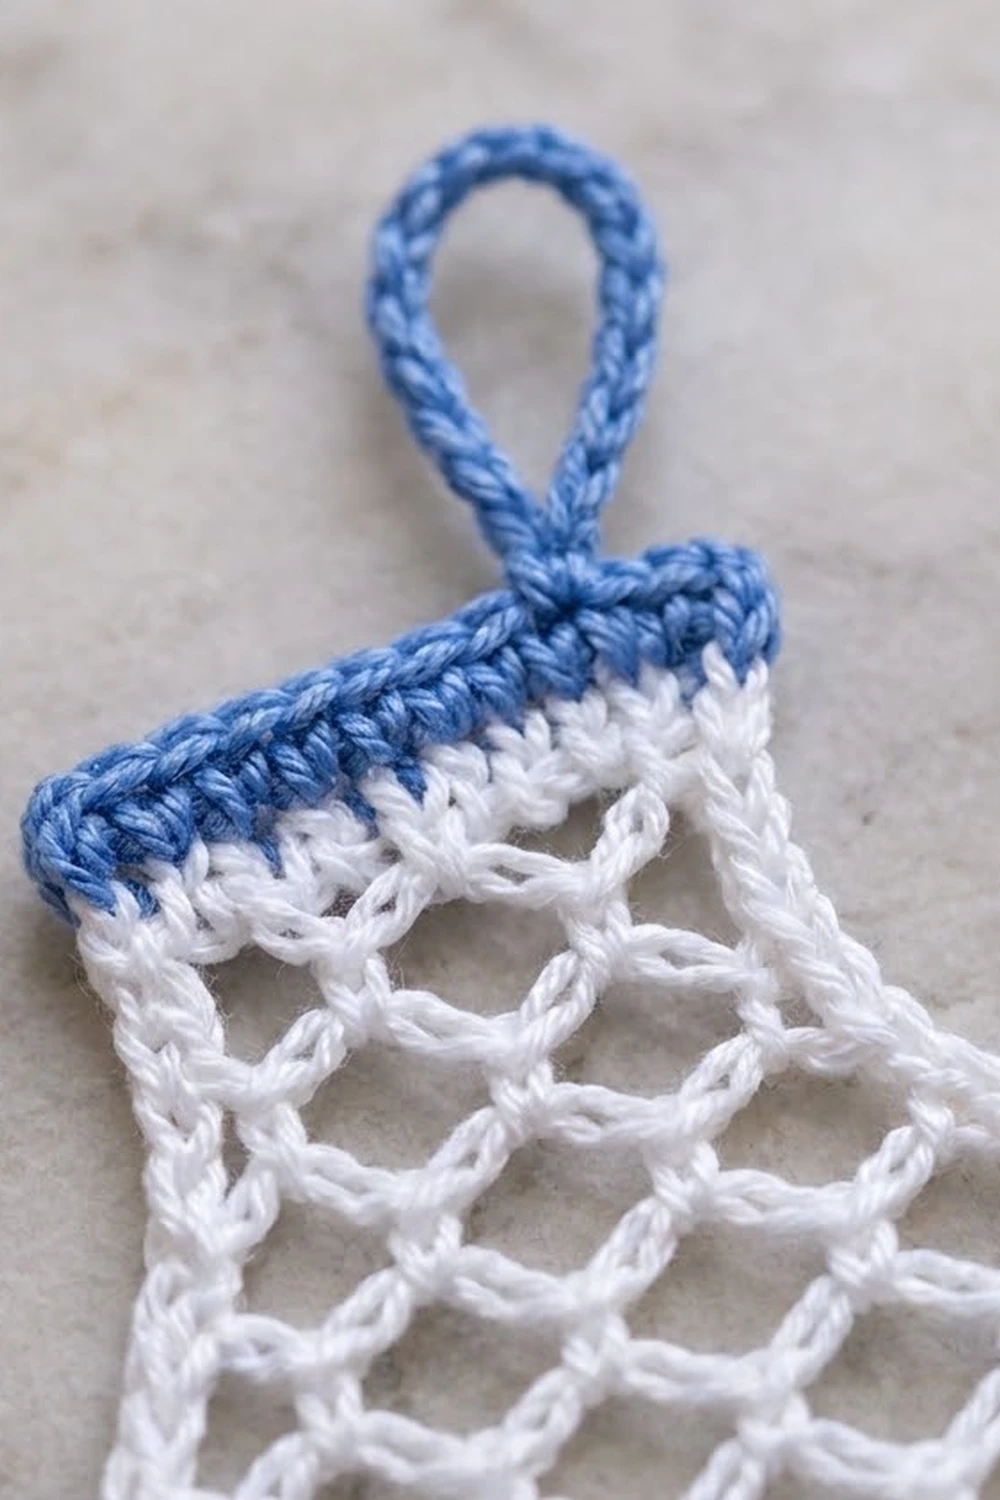
Border: Outline, Cuff and Loop
Border gauge is the same as the main gauge: 8 sc = 1 in (2.5 cm). Spacing rule: work 2 sc per mesh row-end and 1 sc per solid sc row-end. Work 3 sc into any loop on the edge.
Outline, heel side (white): You are at the top heel corner. Ch 1 and rotate the work. Work down the heel edge: 1 sc in the end of Row 11, 2 sc per row along Rows 10–2, then 1 sc in the end of Row 1. (1 + 18 + 1 = 20 sc) Fasten off.
The math: the heel is 2 1/2 in (6.4 cm) tall, and 2 1/2 in x 8 sc per inch = 20 sc.
Outline, front side (white): Join white at the toe end of Row 1. Work up the front edge in three sections:
– Toe: 5 sc. That is 1 sc in Row 1, 1 sc in Row 2, and 3 sc in the Row 3 turning loop. This section is 5/8 in (1.6 cm).
– Instep slope: 14 sc along the stepped edge of Rows 4–7. This section is 1.8 in (4.6 cm) on the diagonal.
– Shaft front: 7 sc up Rows 8–11. This section is 7/8 in (2.2 cm).
Front side total: 26 sc. Fasten off.
The math: the slope rises 1 in (2.5 cm) over 1 1/2 in (3.8 cm), which works out to about 1.8 in (4.6 cm). At 8 sc per inch, that is 14 sc.
Cuff (blue):
– Row 1: Join blue in the top sc of the heel outline. Sc in that st, sc in each of the 16 sts of Row 11, then sc in the top sc of the front outline. (1 + 16 + 1 = 18 sc)
– Rows 2–3: Ch 1, turn, sc in each st. (18 sc)
Fasten off.
Checkpoint: The cuff is 2 1/4 in (5.7 cm) wide (18 ÷ 8) and 3/8 in (1.0 cm) tall.
Hanging loop (blue): Join blue in st 9 of cuff Row 3. Ch 16, then sl st in st 10. Work 22 sc into the ch-16 space and sl st to the first sc. Fasten off.
Checkpoint: The loop stands 1 in (2.5 cm) tall.
The total height adds up like this: blade 1/2 in + struts 1/2 in + boot 2 1/2 in + cuff 3/8 in = 3 7/8 in (9.8 cm).
Final Blocking
- Weave in all ends along solid sc areas, not through the mesh.
- Wet the ornament and press out the extra water in a towel.
- Pin it flat, right side up, at 4 1/4 x 3 7/8 in (10.8 x 9.8 cm).
- Put one pin in the center of every mesh loop, and open each loop into a diamond.
- Pin the heel edge straight and the instep as a smooth curve.
- Gently lift the blade toe and pin it into a curl. Pin both struts so they stand straight.
- Mist with light starch if you’d like a firmer ornament.
- Leave it to dry completely before you unpin.
Final Quality-Control Checklist
- Blade Rnd 2 has 71 sts, and the toe curls up.
- Struts are 4 sc x 4 rows and sit over sts 4–7 and 22–25.
- Row 1 has 28 sc.
- Mesh loop counts are 9, 9, 8, 7, 6, 5, 5, 5, 5.
- Row 11 has 16 sc.
- The outline has 20 sc on the heel side and 26 sc on the front side.
- The cuff has 18 sc in every row.
- The loop is centered over sts 9–10.
- All ends are hidden and the piece lies flat.
Troubleshooting
- The boot leans toward the toe. You decreased at the heel edge by mistake. All decreases should be on Rows 4–7 at the toe edge.
- The mesh looks stretched or uneven. Keep every ch-5 the same length, and block each loop with a pin.
- The toe doesn’t curl. Check that you worked 2 hdc in each of the 3 toe sts, then re-block with starch.
- The struts tilt. Count the gap again. It must be exactly 14 ch.
- The outline ruffles. You worked too many sc, so space them out more. If the outline puckers, add a st.
- The cuff is narrower than the boot. Make sure you worked into both outline corner sts.
Care
Hand wash in cool water and lay flat to dry. Reshape and re-starch as needed, and store flat between seasons.
Final Notes
Each stage sets up the next one. The 66 sts of blade Rnd 1 become 71 in Rnd 2. Two struts of 4 sts sit 14 sts apart. Those numbers set the 28-st sole row, which becomes 9 mesh loops. The instep shaping takes that down to 5 loops, which become the 16 sc of Row 11. The outline and an 18-st cuff finish a single skate at 4 1/4 x 3 7/8 in (10.8 x 9.8 cm). Measure at every checkpoint and the shape will come out right.
Happy crocheting!