

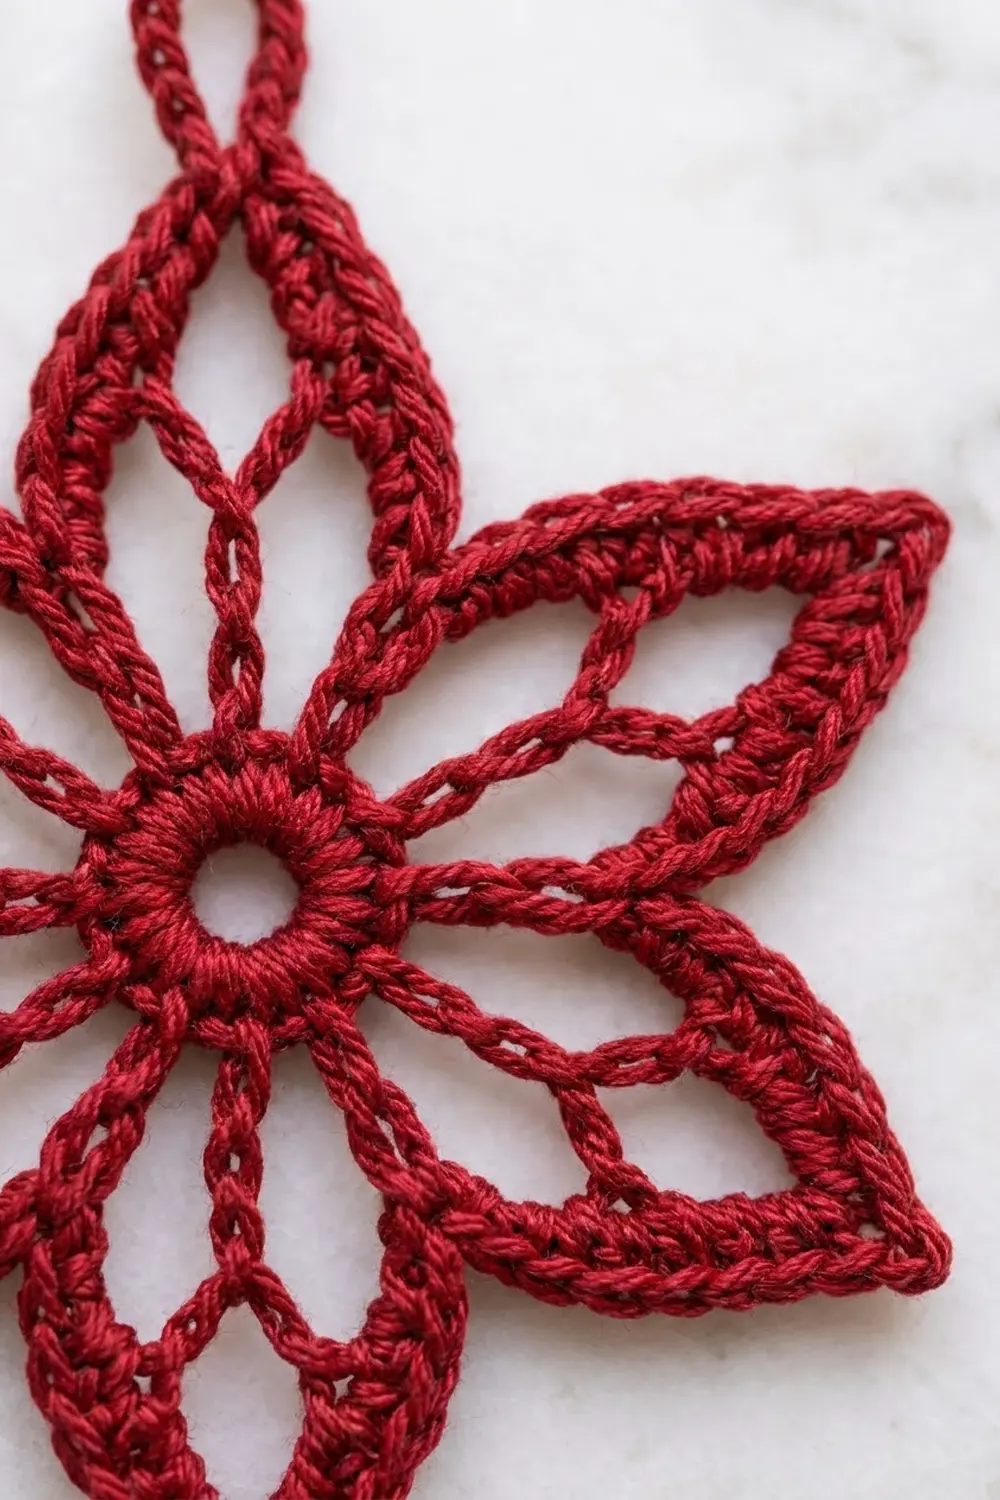
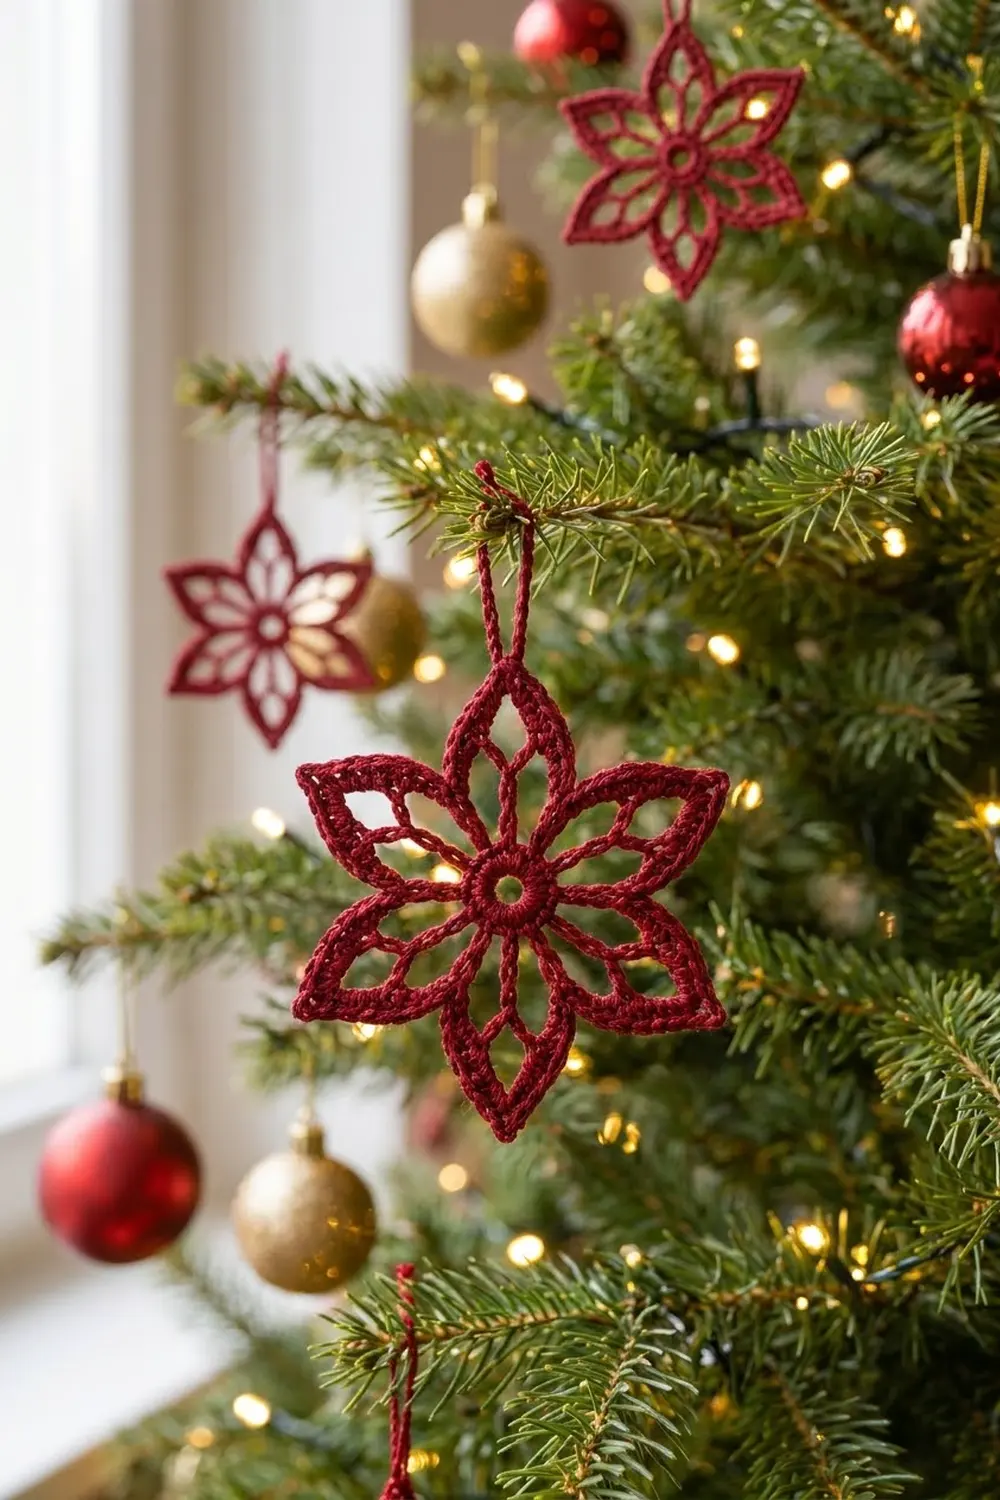
The Ruby Star Lace Ornament is a six-pointed lace star in deep cranberry red. Each pointed petal has a solid single crochet outline, a chain “vein” running down its center, and two open lace windows on either side of that vein. A small round hole sits in the middle, and a short covered hanging loop at one tip makes it ready for the tree.
The design uses one color only. Worked in a smooth mercerized cotton thread, the stitches show up sharp and clear, and the piece reads like a frosty snowflake, a poinsettia, or a classic Scandinavian star, depending on where you hang it.
This pattern uses US crochet terms. The finished ornament measures 4.5 in (11.4 cm) from tip to opposite tip, not counting the hanging loop. The loop adds about 1.25 in (3.2 cm).
The ornament is made as a single piece in four rounds. You start with a ring of single crochet, add six chain spines and twelve chain loops, build a pointed outline that links everything together, and then cover that outline with a firm round of single crochet. The hanging loop is added last.
Finished Size and Construction
- Finished size: 4.5 in (11.4 cm) tip to tip; hanging loop about 1.25 in (3.2 cm) long
- Skill level: Intermediate (chain lace, working around chain loops)
- Terminology: US crochet terms
- Yarn weight: Size 3 crochet thread (light fingering)
- Hook: 2.25 mm (US B-1)
- Number of pieces: 1
- Layout: Single motif, six petals around a center ring
- Piece size: 4.5 in (11.4 cm) tip to tip
- Size before border (after Rnd 3): 4.25 in (10.8 cm) tip to tip
- Border depth (Rnd 4): about 0.125 in (0.3 cm) on each edge
Materials
Yarn advice: Pick a mercerized cotton crochet thread in size 3. It has a slight sheen, the stitches hold their shape, and it takes stiffener well. Acrylic thread will work, but the points will be softer and harder to block. Stay away from fuzzy or very splitty fibers, because they hide the lace openings.
- Deep red (cranberry): 10 g, about 40 m (44 yd)
That amount covers one ornament plus the hanging loop. It includes a margin for your gauge swatch and for a tighter or looser hand. If you are making a set, plan on about 8 g (32 m) per extra ornament after the first.
Tools:
- 2.25 mm (US B-1) crochet hook
- Tapestry needle with a small eye
- Scissors
- Rustproof pins and a foam blocking board
- Fabric stiffener, or a 1:1 mix of white glue and water (optional)
- Ruler or tape measure
Abbreviations (US Terms)
- ch – chain
- sl st – slip stitch
- sc – single crochet
- sk – skip
- sp – space
- st(s) – stitch(es)
- Rnd – round
Special stitch – Spine: Ch 13. Sl st in the 2nd ch from the hook and in each of the next 11 ch, which brings you back to the base. That makes 12 sl sts. The unworked ch at the top is the tip chain, and you will work into it in Rnd 3.
Gauge and Checkpoints
Gauge: 8 sc = 1 in (2.5 cm) in size 3 thread with a 2.25 mm hook.
Gauge isn’t critical for an ornament, but it does decide the final size and how much thread you use. Make the first ornament, block it, and measure it before you start a set.
Checkpoints:
- After Rnd 1: The ring measures 0.75 in (1.9 cm) across, with a center hole of about 0.25 in (0.6 cm).
- After Rnd 2: Lay the piece flat. The spines reach about 3.75 in (9.5 cm) from tip to opposite tip.
- After Rnd 3: The outline reaches 4.25 in (10.8 cm) tip to tip.
- After Rnd 4: 4.5 in (11.4 cm) tip to tip, before blocking.
If your ornament is too big (over 4.75 in / 12.1 cm), go down to a 2.0 mm hook, or tighten your chains. Loose chains are the most common reason for oversized lace.
If your ornament is too small (under 4.25 in / 10.8 cm after Rnd 4), go up to a 2.5 mm hook. Don’t add chains to the loops, because that changes the shape of the petals.
Pattern
Start with a slip knot on the hook.
Rnd 1: Center Ring
Ch 8 and sl st in the first ch to form a ring.
Ch 1, then work 24 sc into the ring. Sl st in the first sc to join.
Stitch count: 24 sc.
Pack the stitches evenly around the ring so the center hole stays round. Think of the ring as 6 groups of 4 sc. Each group becomes one petal.
Rnd 2: Spines and Inner Loops
This round makes the six center veins and the twelve chain loops that turn into the lace windows.
Ch 1 and sc in the same st as the join. This is the first valley sc.
Ch 10, sk the next sc. In the next sc, work (sc, Spine, sc). Ch 10, sk the next sc, then sc in the next sc (valley sc). Repeat from * to * 5 more times. On the last repeat, leave out the final valley sc and sl st in the first sc instead.
Stitch count: 18 sc (6 valley sc + 12 spine-base sc), 12 ch-10 loops, and 6 Spines.
How it looks: Each group of 4 sc from Rnd 1 now has a valley sc, a ch-10 loop, a Spine standing straight out, and a second ch-10 loop. The two loops beside each Spine form the inner windows of that petal, and the Spine runs between them as the center vein.
Lay the piece flat and spread the Spines evenly before you go on. Check that each Spine has 12 sl sts and that no Spine is twisted.
Rnd 3: Pointed Outline
This round shapes each petal into a point. It attaches the outer edge to both inner loops and to the tip of the Spine, so the windows close up.
You should be at the first valley sc. Ch 1 and sc in the same st.
Ch 6, then sc into the next ch-10 loop, working around the center of the loop (loop A). Ch 7 and work (sc, ch 2, sc) in the tip chain of the Spine. Ch 7, then sc into the next ch-10 loop, working around its center (loop B). Ch 6 and sc in the next valley sc. Repeat from * to * 5 more times. On the last repeat, leave out the final valley sc and sl st in the first sc instead.
Don’t work into the spine-base sc from Rnd 2. The outline goes past them on the outside.
Stitch count: 30 sc (5 per petal: 1 valley sc, 1 in loop A, 2 at the tip, 1 in loop B), plus 12 ch-6 spaces, 12 ch-7 spaces, and 6 ch-2 tip spaces.
Per petal edge (valley to tip, not counting the valley sc): 6 ch + 1 sc + 7 ch + 1 tip sc = 15 sts. Each petal has 2 edges, so 30 edge sts per petal and 180 edge sts in total.
How it looks: Every petal is now a pointed shape. Where the sc grabs each ch-10 loop, it pulls the loop outward into a crossbar, and that splits the petal into narrow leaf-shaped openings around the Spine. The valleys between petals come to a V at the valley sc.
Border (Rnd 4: Outline Cover)
The last round covers every outline chain with single crochet. That gives the star its solid, rope-like edge and sharp points.
Border gauge: 8 sc = 1 in (2.5 cm) along the edge. Each petal edge works up to 18 sc and measures about 2.25 in (5.7 cm) long after blocking.
You should be at the first valley sc. Ch 1 and sk the valley sc (the join sits here).
Work 7 sc in the ch-6 sp, sc in the next sc, 8 sc in the ch-7 sp, sc in the next tip sc, (sc, ch 3, sc) in the ch-2 tip sp, sc in the next tip sc, 8 sc in the ch-7 sp, sc in the next sc, 7 sc in the ch-6 sp, then sk the valley sc. Repeat from * to * 5 more times. Sl st in the first sc to join.
Fasten off, leaving a 6 in (15.2 cm) tail.
Stitch count per edge: 7 + 1 + 8 + 1 + 1 = 18 sc. That count includes the 1 tip sc worked into the ch-2 space, which is that edge’s corner stitch.
Stitch count per petal: 2 edges × 18 sc = 36 sc, plus 1 ch-3 point.
Round total: (180 sts worked 1-per-existing-st) + (36 extra sts) = 216 sc, plus 6 ch-3 points.
Why the math works: Each petal edge has 15 sts from Rnd 3. In Rnd 4 you work 1 sc per existing st along that edge (6 + 1 + 7 + 1 = 15). You then add 1 extra sc in the ch-6 sp, 1 extra sc in the ch-7 sp, and 1 sc in the tip space, so 3 extra per edge. That gives 15 + 3 = 18 per edge. Twelve edges × 3 extra = 36 extra sts, and 180 + 36 = 216. The extra stitches let the edge lie flat as it curves out to the point. Skipping the valley sc keeps the V between petals sharp, and the ch-3 at each tip gives a crisp point without a bump.
Hanging Loop
Join the thread with a sl st in the ch-3 space at any tip. Ch 20 and sl st in the same ch-3 space to make the loop. Ch 1, work 26 sc around the ch-20 loop, then sl st in the ch-3 space. Fasten off.
The covered loop is about 1.25 in (3.2 cm) long. It’s firm enough to stand up a little above the star.
Weave in all ends along the solid outline, where they won’t show through the lace.
Final Blocking
- Wet the ornament. Soak it in cool water for a few minutes, then press out the water in a towel. Don’t wring it.
- Add stiffener (optional). Dip it in fabric stiffener or the glue mix, then squeeze out the extra so no film is left across the openings.
- Pin the center. Put one pin through the center hole so it stays round, about 0.25 in (0.6 cm) across.
- Pin the six tips. Pin each ch-3 point out to a circle 4.5 in (11.4 cm) across. Use a drawn circle or a ruler to space the tips 60 degrees apart.
- Pin the six valleys. Push each valley in toward the center to sharpen the V.
- Open the windows. Use a pin or a toothpick to open each leaf-shaped window and straighten each Spine so it runs from the ring to the tip.
- Shape the loop. Pin the hanging loop straight up from its tip so it dries upright.
- Dry fully. Leave it pinned for at least 12 hours, or 24 hours if you used stiffener. Take out the pins only when the piece is completely dry.
Final Quality-Control Checklist
- The ornament measures 4.5 in (11.4 cm) tip to tip.
- There are six even petals, each with a straight center Spine.
- Each petal has two clear lace windows beside its Spine.
- Each petal edge has 18 sc, and each petal has 36 sc in total.
- All six tips come to a point, with a ch-3 at each one.
- The valleys are sharp Vs, not rounded.
- The center hole is round and about 0.25 in (0.6 cm) across.
- The hanging loop is firmly covered, about 1.25 in (3.2 cm) long, and centered on a tip.
- All ends are woven into the solid outline and trimmed close.
Troubleshooting
Petals are cupping or curling up. Your Rnd 3 chains are probably too tight. Redo the round with slightly looser chains, or go up 0.25 mm in hook size for that round only.
Edges are ruffling. You may have worked extra sc into the chain spaces in Rnd 4. Recount: each edge should have exactly 18 sc.
Spines are wavy. Sl sts pull tight. Work the Spine sl sts loosely, or block with a pin at each tip and let it dry fully.
Windows are closed up. In Rnd 3, make sure the sc goes around the center of each ch-10 loop, not near its base.
Center hole is too big or lumpy. Use a magic ring instead of the ch-8 ring and pull it snug after Rnd 1, leaving a 0.25 in (0.6 cm) opening.
Points are blunt. Check that you worked the ch-3 at each tip in Rnd 4. Pin the points hard while blocking.
Loop leans to one side. Join it in the center of the ch-3 space, and pin it straight while it dries.
Care
Dust the ornament gently, or hand-wash it in cool water and reshape it while damp. Store it flat in tissue paper so the points don’t get crushed.
Final Notes
Here is the full measurement chain. The Rnd 1 ring of 24 sc measures 0.75 in (1.9 cm) across. Rnd 2 has 18 sc, 12 ch-10 loops, and 6 Spines, and spreads to 3.75 in (9.5 cm) at the Spine tips. Rnd 3 has 30 sc and 15 sts on each petal edge, and reaches 4.25 in (10.8 cm). Rnd 4 adds 3 sts to each edge for 18 sc per edge and 216 sc in total, and brings the star to its finished 4.5 in (11.4 cm). The 1.25 in (3.2 cm) covered loop finishes it.
Check your first ornament against each of these numbers, and every one after it will match. Once you know the rhythm, these stars work up fast and make lovely gift toppers, tree ornaments, or window hangings.
Happy crocheting!