

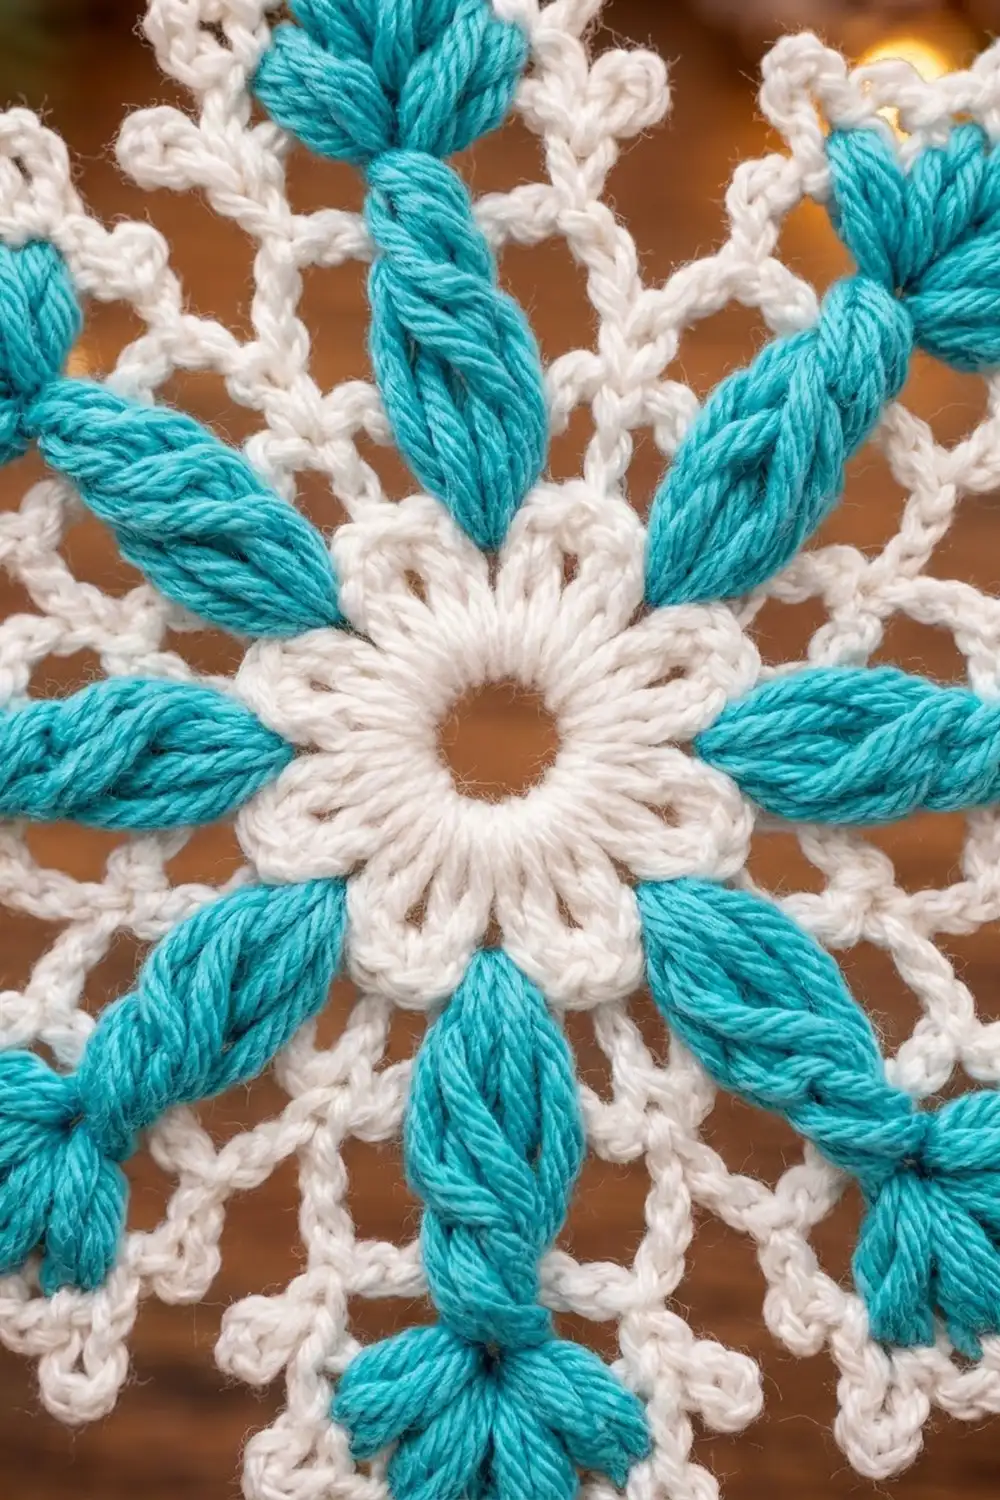
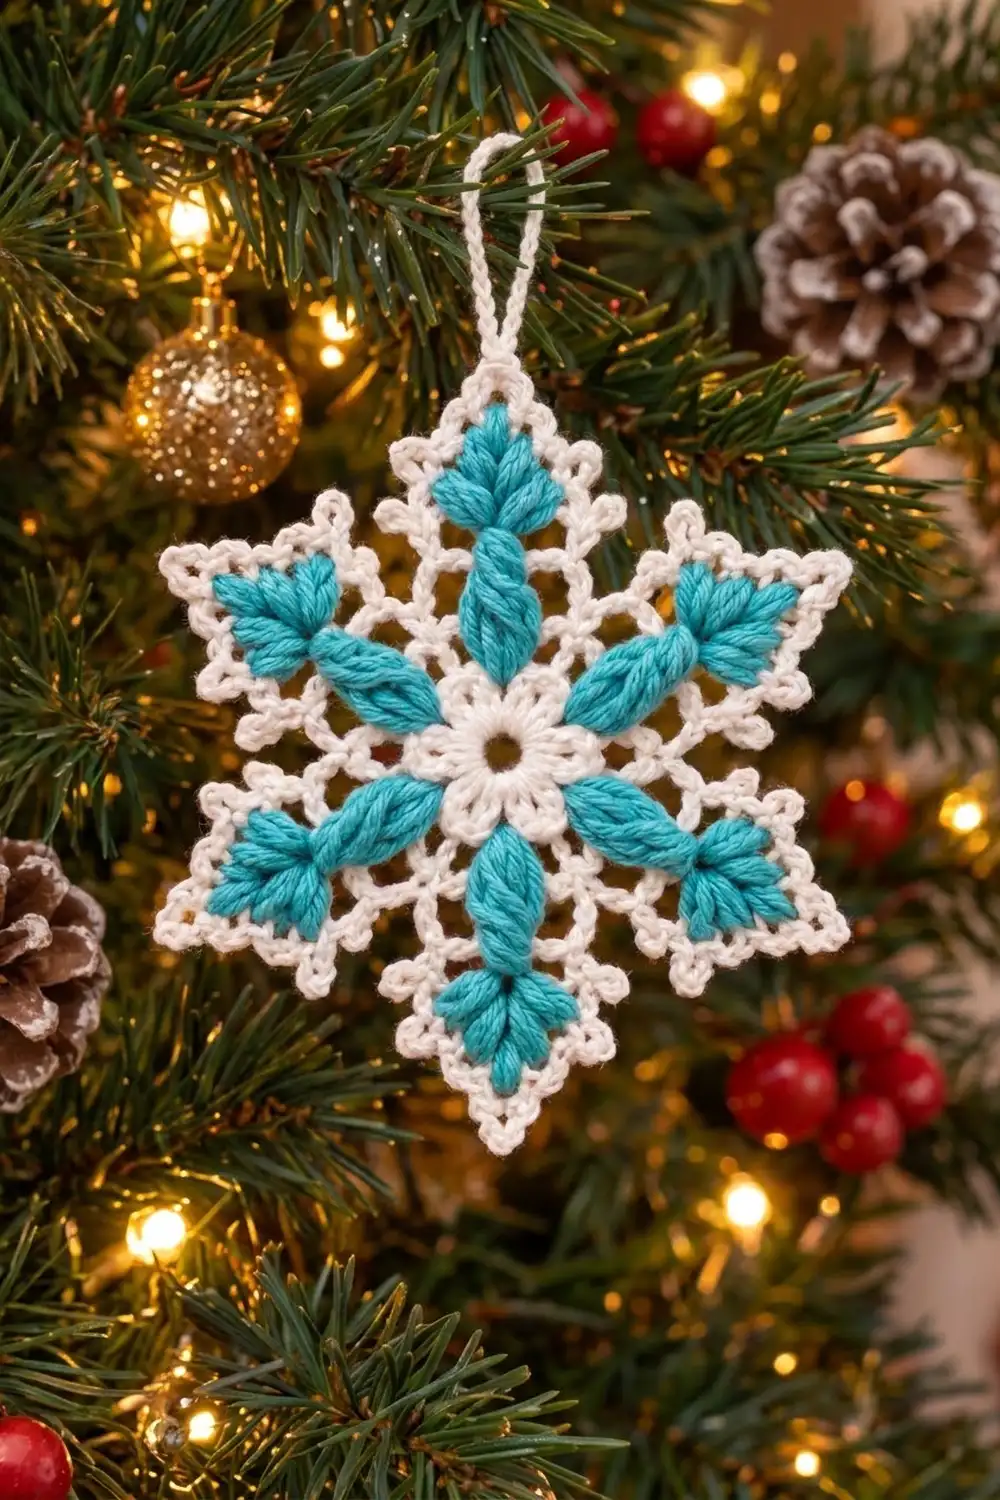
The Frosted Lagoon Snowflake is a six-pointed lace ornament in crisp white with bright turquoise puff stitches. Each arm has a long, twisted turquoise spoke that ends in a three-leaf fan. A frosty picot edge outlines the star shape.
The design pairs a classic white lace snowflake with a bold pop of color. It looks wintry without being plain, and it stands out well against green branches. It also makes a nice gift-tag topper.
The pattern uses US crochet terms. The finished ornament measures 5.5 in (14.0 cm) from point to point, not counting the hanging loop.
You’ll work the white center flower and the lace arm frame first. Then you’ll add the turquoise puffs onto the frame, one arm at a time. Two white rounds of mesh and single crochet build the star outline. The last round is a picot border with a hanging loop at the top point.
Finished Size and Construction
- Finished size: 5.5 in (14.0 cm) point to point
- Skill level: Intermediate (puff stitches, chain-loop placement)
- Terminology: US crochet terms
- Yarn weight: Sport (#2) cotton
- Hook: 3.0 mm (US C/2–D/3)
- Number of pieces: 1 (a single motif)
- Layout: One six-pointed snowflake, worked in the round
- Piece size before border: 4.75 in (12.1 cm) point to point
- Border depth: 0.375 in (1.0 cm) per point
- Hanging loop: about 1 in (2.5 cm) tall
Materials
Yarn: Use a smooth, mercerized sport-weight cotton for clean stitch definition and crisp picots. Cotton blocks well and holds the star points sharply. Avoid fuzzy yarns, because they blur the lace.
- White (Color A): 10 g, about 30 m
- Turquoise (Color B): 5 g, about 15 m
These quantities include a margin of about 25% for swatching and weaving in ends.
Tools:
- 3.0 mm crochet hook
- Tapestry needle
- Scissors
- Rust-proof pins
- Foam blocking mat
- Spray bottle with water
- Optional: fabric stiffener or starch spray
Abbreviations (US Terms)
- ch – chain
- sl st – slip stitch
- sc – single crochet
- hdc – half double crochet
- dc – double crochet
- sp(s) – space(s)
- st(s) – stitch(es)
- yo – yarn over
- rep – repeat
Special stitches:
- Long Puff (LP): (Yo, insert hook in the indicated st, yo, pull up a loop to 0.75 in (1.9 cm)) 5 times. Yo and draw through all 11 loops on the hook, then ch 1 to lock.
- Puff Stitch (PS): (Yo, insert hook in the indicated sp, yo, pull up a loop to 0.375 in (1.0 cm)) 4 times. Yo and draw through all 9 loops on the hook, then ch 1 to lock.
- Picot: Ch 3, sl st in the 3rd ch from the hook.
Gauge and Checkpoints
Gauge: 26 sc and 28 rows = 4 in (10.2 cm) in sport cotton with a 3.0 mm hook.
This is a single ornament, so the best gauge test is to make the white center (Rounds 1–3) and measure it before going further.
Checkpoints:
- After Round 2: 1 in (2.5 cm) across
- After Round 3: 1.5 in (3.8 cm) across, measured petal tip to petal tip
- After Round 4: 3.75 in (9.5 cm) across, measured arm tip to opposite arm tip
- After Round 7: 4.75 in (12.1 cm) point to point
- After Round 8 and blocking: 5.5 in (14.0 cm) point to point
If you’re too big: Switch to a 2.75 mm hook, or keep your chain spaces snugger.
If you’re too small: Switch to a 3.25 mm hook, or pull the puff loops up to their full stated height.
A difference of 0.125 in (0.3 cm) at Round 3 becomes about 0.5 in (1.3 cm) by the final round, so correct it early.
Pattern
Center Flower (White)
Round 1: With Color A, make a magic ring. Ch 3 (counts as dc), then work 11 dc in the ring. Pull the ring closed, leaving a small center hole. Sl st in the top of the beginning ch-3. (12 dc)
Round 2: Ch 3 (counts as dc), dc in the same st, then work 2 dc in each st around. Sl st in the top of the beginning ch-3. (24 dc)
Checkpoint: 1 in (2.5 cm) across.
Round 3 (petals): Ch 1. *Sc in the next st, then (hdc, dc, hdc) in the next st; rep from * 11 more times. Sl st in the first sc.
This is a conversion round: 12 sc (1 per st in every other st) + 12 shells of 3 sts (worked in the alternating sts) = 48 sts, forming 12 petals.
Checkpoint: 1.5 in (3.8 cm) across.
Number the petals 1 to 12. Odd-numbered petals become the arm petals, and even-numbered petals are the between petals.
Arm Frame (White)
Round 4: Sl st in the next hdc and the next dc, so you’re in the center dc of Petal 1. Ch 1 and sc in the same dc. This is the arm-base sc.
*Arm: Ch 4 for the spine. [Ch 5, sl st in the last spine ch] 3 times. This makes three ch-5 tip loops (in working order: left, center, right). Sl st in each of the 4 spine ch back toward the center, then sl st in the arm-base sc.
Ch 4, sc in the center dc of the next between petal, ch 4, sc in the center dc of the next arm petal (the new arm-base sc). Rep from * 5 more times, but omit the final sc on the last repeat. Sl st in the first sc to join, then fasten off.
Count: 6 arms (each with a double-strand spine of 4 ch and 3 ch-5 tip loops), 12 sc (6 arm-base and 6 between), and 12 ch-4 sps.
Checkpoint: 3.75 in (9.5 cm) from arm tip to opposite arm tip.
Turquoise Puffs (Worked Arm by Arm)
Round 5: Work this round on each of the 6 arms separately.
- Join Color B with a sl st in an arm-base sc. Ch 1.
- Work 1 LP in the same sc, laying each long loop up along the spine so the loops cover both spine strands. Before closing the puff, give the hook a half turn clockwise. This creates the twisted spoke.
- Sl st around the spine at the junction where the tip loops meet. This anchors the top of the LP.
- Work 1 PS in the left tip loop, 1 PS in the center tip loop, and 1 PS in the right tip loop. Each puff should sit flat against the white loop.
- Sl st at the junction and fasten off, leaving a 6 in (15.2 cm) tail.
Repeat on all 6 arms. Count: 6 LP + 18 PS = 24 puffs, giving each arm one spoke and a three-leaf fan.
Weave the turquoise tails along the back of the white spine so they’re hidden.
Lace Mesh (White)
Round 6: Join Color A with a sl st in the center tip loop of any arm, working over the base of the puff. Ch 1, then (sc, ch 3, sc) in the same loop for a point.
*Ch 3, sc in the right tip loop. Ch 3, sc in the next ch-4 sp. Ch 3, sc in the next ch-4 sp. Ch 3, sc in the left tip loop of the next arm. Ch 3, then (sc, ch 3, sc) in the center tip loop. Rep from * around, but omit the final point on the last repeat. Sl st in the first sc to join.
Each section from point to point has 5 ch-3 sps. The two sc in the ch-4 sps sit low, forming the V-shaped valley between arms.
Count: 36 sc, 30 ch-3 mesh sps, and 6 ch-3 point sps.
Round 7 (solid outline): Sl st into the first ch-3 point sp. Ch 1, then (2 sc, ch 2, 2 sc) in the same sp. *Work 3 sc in each of the next 5 ch-3 sps, then (2 sc, ch 2, 2 sc) in the next ch-3 point sp. Rep from * around, but omit the final point on the last repeat. Sl st in the first sc to join.
This is a conversion round:
- Mesh: 30 sps × 3 sc (1 sc per ch) = 90 sc
- Points: 6 sps × 3 sc (1 per ch) = 18 sc, plus 6 extra sc (1 per point) = 24 sc
- Total: 90 + 24 = 114 sc, plus 6 ch-2 corner sps
Per side: From one ch-2 corner to the next, each side has 2 + 15 + 2 = 19 sc. The ch-2 corner sp is not included in the 19, so corner sts aren’t counted twice.
Checkpoint: 4.75 in (12.1 cm) point to point.
Border
Border gauge: The border works 1 sc into each Round 7 sc, at the same 26 sc per 4 in (10.2 cm) gauge. The picots stand outward, adding about 0.375 in (1.0 cm) at each point.
Round 8 (picot edge): Sl st into the ch-2 corner sp at the point you want at the top. Ch 1, then work (sc, ch 12, sc) in the same sp. This makes the hanging loop.
*Sc in the next 2 sc, then work a picot. (Sc in the next 3 sc, picot) 5 times. Sc in the next 2 sc. Then work (sc, ch 3, sc) in the next ch-2 corner sp. Rep from * around, but on the final repeat, omit the last corner, since it was worked at the start. Sl st in the first sc to join and fasten off.
Per side: 2 + (5 × 3) + 2 = 19 sc, with 6 picots spaced evenly. Each side has 2 sc before the first picot and 2 sc after the last, so the pattern is symmetrical.
Per corner: 2 sc plus 1 ch-3 point loop (or the ch-12 hanging loop at the top).
Totals: 6 × 19 = 114 sc along the sides + 6 × 2 = 12 corner sc = 126 sc, plus 36 picots, 5 ch-3 point loops, and 1 ch-12 hanging loop.
Why the math works: The sides take exactly 1 sc per Round 7 sc (19 into 19), so the edges stay flat with no ruffling or cupping. The only added stitches are the 2 sc per corner, which turn the points. The picots are chains rather than stitches worked into the fabric, so they add texture without changing the edge length.
Checkpoint: about 5.5 in (14.0 cm) point to point before blocking.
Final Blocking
- Weave in all remaining white tails along the sc outline.
- Spritz the ornament with water until it’s evenly damp, or soak it and press out the extra water in a towel.
- Lay it face up on the blocking mat. Center the flower and gently open the center hole.
- Pin each of the 6 points at 2.75 in (7.0 cm) from the center, which gives 5.5 in (14.0 cm) point to point.
- Pin each valley so all 6 are the same depth.
- Shape the picots with your fingertip so they point outward.
- Lift the LP spokes slightly so they stay rounded and twisted, and fluff the leaf puffs.
- If you’re using stiffener, apply it now, avoiding heavy buildup on the puffs.
- Let it dry completely before unpinning, usually 6–12 hours.
Final Quality-Control Checklist
- Point to point measures 5.5 in (14.0 cm)
- All 6 points are equal and the valleys match
- Each arm has 1 twisted LP spoke and 3 leaf puffs
- No turquoise tails show on the front
- Round 7 has 114 sc and Round 8 has 126 sc
- Every side has 6 picots
- The hanging loop is centered on the top point and measures about 1 in (2.5 cm)
- The center hole is open and round
Troubleshooting
Spokes look flat or thin: Pull every LP loop up to the full 0.75 in (1.9 cm), and add the half twist before closing.
Puffs come apart: Always ch 1 to lock each puff.
Edges ruffle: You probably added extra sc in the mesh. Recount to 19 sc per side.
Edges cup: Your border tension is too tight. Go up a hook size for Round 8 only.
Points are uneven: Check that every point in Round 7 has (2 sc, ch 2, 2 sc), then reblock.
Valleys are too shallow: Make sure the Round 6 sc went into the ch-4 sps, not around the between-petal sc.
Center won’t close: Snug the magic ring tightly before joining Round 1.
Care
Hand wash in cool water with mild soap, press out the water in a towel, and reshape it flat to dry. If you used stiffener, it will need to be reapplied after washing.
Final Notes
Here’s the measurement chain:
- 12-dc ring
- 1 in (2.5 cm) after Round 2
- 1.5 in (3.8 cm) flower after Round 3
- 3.75 in (9.5 cm) arm frame after Round 4
- 4.75 in (12.1 cm) outline after Round 7, with 19 sc per side
- 5.5 in (14.0 cm) blocked ornament after the 126-sc picot border
If each checkpoint matches, the snowflake will come out right.
Happy crocheting!