

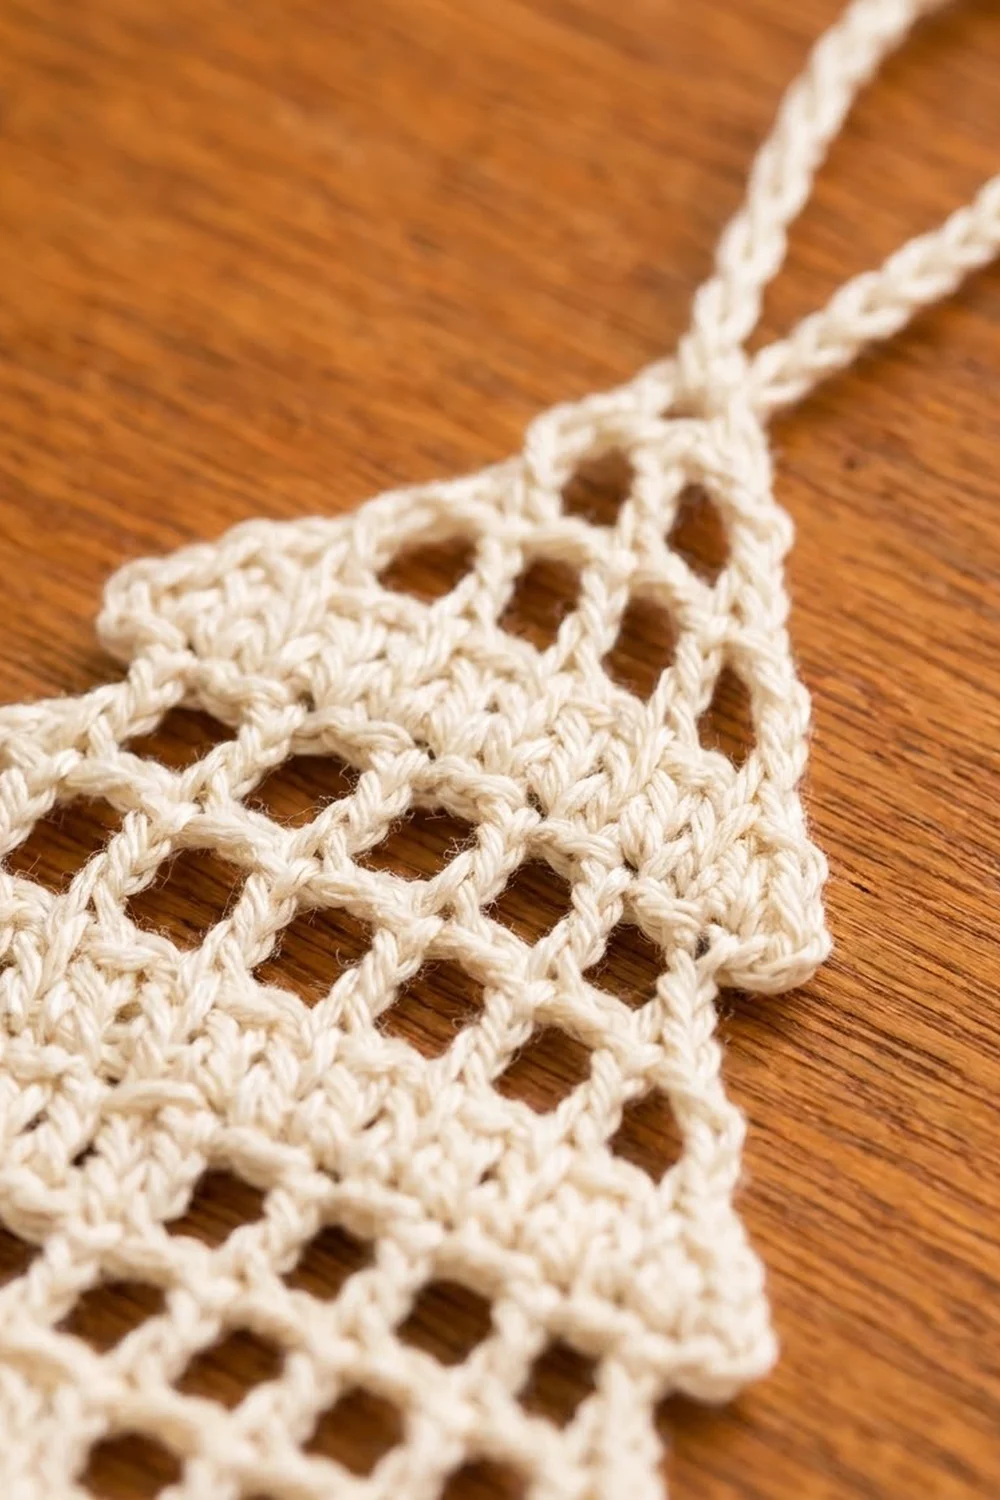
This tree ornament uses open filet squares broken up by solid “snow line” bands. It’s worked in one cream cotton, so the stitch pattern carries the design, and it looks clean against dark branches and twinkle lights.
The pattern uses US crochet terms throughout. The finished ornament measures about 4.75 in (12.1 cm) wide and 5.92 in (15.0 cm) tall, not counting the hanging loop. The loop adds about 2 in (5.1 cm).
You crochet the tree in rows from the bottom up. There are four tiers, and each one starts with a solid double crochet band that steps outward, followed by mesh rows that step inward. Then you work a small single crochet trunk into the bottom of the first row, outline the whole silhouette with one round of single crochet, and finish with a corded loop at the peak.
You only make one piece, so there’s no joining.
Finished Size and Construction
- Finished size: 4.75 in (12.1 cm) wide × 5.92 in (15.0 cm) tall, plus a 2 in (5.1 cm) loop
- Skill level: Easy-intermediate (filet increases and decreases)
- Terminology: US
- Yarn weight: Sport (#2) cotton
- Hook: 3.25 mm (US D/3)
- Number of pieces: 1
- Layout: Single tree worked in rows, with the trunk worked directly into the base
- Tree body (Rows 1–14): 4.5 in (11.4 cm) wide × 4.67 in (11.9 cm) tall
- Trunk: 1.17 in (3.0 cm) wide × 1 in (2.5 cm) tall
- Size before border: 4.5 in (11.4 cm) × 5.67 in (14.4 cm)
- Border depth: 0.125 in (0.3 cm) on every edge
Materials
Yarn: Choose a smooth, tightly plied sport-weight cotton. Mercerized cotton gives crisp, square holes and a slight sheen. Matte cotton looks softer and more rustic. Avoid fuzzy or very stretchy fibers, because they blur the mesh.
- Natural/cream: 10 g, about 30 m (33 yd)
These quantities include a margin for your gauge test and for weaving in ends. The ornament itself uses about 6 g.
Tools:
- 3.25 mm (US D/3) crochet hook
- Tapestry needle
- Scissors
- 2 stitch markers
- Blocking mat with a 1 in (2.5 cm) grid, plus rust-proof pins
- Spray bottle, and fabric stiffener or spray starch (optional)
Abbreviations (US Terms)
- ch: chain
- sl st: slip stitch
- sc: single crochet
- dc: double crochet
- sk: skip
- sp: space
- st(s): stitch(es)
- rep: repeat
- RS: right side
Special terms
- Mesh: One ch-1 sp plus the dc beside it. A row of n meshes has 2n + 1 sts, including the edge dc. When you count, each ch-1 sp counts as 1 st.
- Band: A row of solid dc, worked 1 dc into every dc and every ch-1 sp of the row below.
- Step decrease (2 sts each end): Turn. Sl st in the first dc, the next ch-1 sp (or dc), and the next dc, so you’re 2 sts in. At the other end, stop 2 sts early and leave them unworked.
- Beginning increase (2 sts): Ch 4, then dc in the 4th ch from hook. The skipped ch-3 counts as the first new st, and the dc counts as the second.
- Edge-dc increase (Edc): Yo, insert hook into the base of the last dc you made (the lower 2 strands), yo and pull up a loop, yo and draw through 1 loop (this makes the “chain” for the next one), then [yo, draw through 2 loops] twice. Work the next Edc into the “chain” at the base of the Edc you just made.
Gauge and Checkpoints
Gauge in filet mesh: 6 sts (3 meshes) and 3 dc rows = 1 in (2.5 cm). Each open square is about 0.33 in (0.8 cm) on a side.
Gauge in sc: 6 sts and 6 rows = 1 in (2.5 cm).
Test first: Work Rows 1–5 of the pattern and measure before going any further.
- After Row 1: 4.5 in (11.4 cm) wide.
- After Row 5: 1.67 in (4.2 cm) tall, and Row 5 is 3.83 in (9.7 cm) wide.
- After Row 8: 2.67 in (6.8 cm) tall, and Row 8 is 3.17 in (8.1 cm) wide.
- After Row 11: 3.67 in (9.3 cm) tall, and Row 11 is 2.5 in (6.4 cm) wide.
- After Row 14: 4.67 in (11.9 cm) tall, and the peak is 0.5 in (1.3 cm) wide.
Too big? Go down 0.25 mm. Tighten the ch-1 spaces especially, because loose chains make the squares wider than they are tall.
Too small? Go up 0.25 mm, or pull up the dc loops slightly taller so the squares open out.
Tree Body
Ch 29.
Row 1 (Band, Tier 1): Dc in 4th ch from hook and in each ch across. Turn. (27 sts; the skipped ch-3 counts as a dc.)
Row 2 (Mesh): Ch 4 (counts as dc + ch 1), sk next dc, dc in next dc. Ch 1, sk next dc, dc in next dc. Rep from * across, working the last dc in the top of the turning ch. Turn. (13 meshes, 27 sts.)
Row 3 (Mesh, step decrease): Sl st in the first dc, ch-1 sp and next dc. Ch 4 (counts as dc + ch 1), sk ch-1 sp, dc in next dc. Ch 1, sk ch-1 sp, dc in next dc. Rep from * until 2 sts remain. Leave them unworked and turn. (11 meshes, 23 sts.)
Row 4 (Mesh, step decrease): Rep Row 3. (9 meshes, 19 sts.)
Row 5 (Band, Tier 2): Work a beginning increase (2 sts). Dc in the edge dc, then dc in each ch-1 sp and dc across, ending in the 3rd ch of the turning ch. Work 2 Edc. Turn. (2 + 19 + 2 = 23 sts.)
This is a growth row. The band reaches 2 sts past the mesh below it on each side, which makes the stepped “snow ledge.”
Row 6 (Mesh, step decrease): Sl st in the first 3 dc. Ch 4, sk next dc, dc in next dc. Ch 1, sk next dc, dc in next dc. Rep from * until 2 sts remain, then turn. (9 meshes, 19 sts.)
Row 7 (Mesh, step decrease): Rep Row 3. (7 meshes, 15 sts.)
Row 8 (Band, Tier 3): Rep Row 5. (2 + 15 + 2 = 19 sts.)
Row 9: Rep Row 6. (7 meshes, 15 sts.)
Row 10: Rep Row 3. (5 meshes, 11 sts.)
Row 11 (Band, Tier 4): Rep Row 5. (2 + 11 + 2 = 15 sts.)
Row 12: Rep Row 6. (5 meshes, 11 sts.)
Row 13: Rep Row 3. (3 meshes, 7 sts.)
Row 14 (Peak): Rep Row 3. (1 mesh, 3 sts: dc, ch-1 sp, dc.) Fasten off.
Here’s every row width in one place: 27, 27, 23, 19, 23, 19, 15, 19, 15, 11, 15, 11, 7, 3. The tree has 14 rows, and at 3 rows per inch that’s 4.67 in (11.9 cm) tall.
Trunk
Turn the tree upside down so the foundation chain is on top. Count 27 sts along the free loops and place markers in sts 11 and 17. That leaves 10 sts free on each side, so the trunk sits dead center.
Row 1: Join yarn with a sl st in the free loop at st 11. Ch 1, then sc in the same loop and in each free loop through st 17. Turn. (7 sc.)
Rows 2–6: Ch 1, sc in each sc across. Turn. (7 sc each row.)
At the end of Row 6, fasten off and weave in the end. The trunk should measure 1.17 in (3.0 cm) × 1 in (2.5 cm). The whole piece now measures 4.5 in (11.4 cm) × 5.67 in (14.4 cm).
Border
Border gauge: 6 sc = 1 in (2.5 cm), which matches the body gauge on every edge. Use these rules:
- Horizontal edges (exposed step tops, band undersides, foundation loops, trunk bottom): 1 sc per st.
- Dc row-ends: 2 sc per row. Each dc row is 0.33 in (0.8 cm) tall, and 2 sc span 0.33 in.
- Sc row-ends on the trunk: 1 sc per row.
- Outer (convex) corners: 2 sc in the corner st. That’s the regular sc plus 1 extra.
- Inner corners: No extra sts.
Round 1: With RS facing, join yarn with a standing sc in the ch-1 sp of Row 14 (top center). Work 2 sc in the next dc (the top corner), then work down the first side edge as follows:
- R14 end: 2 sc.
- R13 step: sc in the first exposed st, 2 sc in the outer dc (3 sc). R13 end: 2 sc.
- R12: step 3 sc, end 2 sc.
- R11: step 3 sc, end 2 sc. On the band underside, 2 sc in the outer st, then sc in the next st (3 sc).
- R10 end: 2 sc.
- R9: step 3 sc, end 2 sc.
- R8: step 3 sc, end 2 sc, underside 3 sc.
- R7 end: 2 sc.
- R6: step 3 sc, end 2 sc.
- R5: step 3 sc, end 2 sc, underside 3 sc.
- R4 end: 2 sc.
- R3: step 3 sc, end 2 sc.
- R2: step 3 sc, end 2 sc.
- R1 end: 2 sc.
- Bottom: 2 sc in the corner free loop, then sc in the next 9 free loops, up to the trunk (11 sc).
- Trunk side: 6 sc.
That completes the first side: the extra top-corner sc + the 81 sc listed + the extra trunk-corner sc (made in the next step) = 83 sc. Here’s the breakdown: 28 row-end sc + 24 horizontal sc + 10 bottom sc + 6 trunk sc + 15 corner extras = 83.
Trunk bottom: Work 2 sc in the first st, sc in the next 5 sts, and 2 sc in the last st. The regular sc total 7, and the 2 extras belong to the side edges.
Second side edge: Mirror the first side, working upward. That’s 6 sc along the trunk, 11 sc along the bottom, then each row in reverse order (R1 up to R14). Finish with 2 sc in the last dc of Row 14 (the top corner). (83 sc.)
Sl st in the first sc to join. Round total: 3 (top) + 83 + 7 (trunk) + 83 = 176 sc.
Why the math works: Every edge gets 6 sc per inch, and the body is also 6 sts or 6 sc-rows per inch on those same edges. Straight edges stay flat. The single extra sc at each of the 30 outer corners lets the corner turn crisply without ruffling the edges between them.
Hanging loop: Don’t fasten off. Ch 28, which is about 4 in (10.2 cm). Sl st into the same top-center sc to form the loop. Sl st in each ch around the loop, then sl st in the top-center sc again. Fasten off. The cording makes the loop firm, and it stands about 2 in (5.1 cm) tall.
Final Blocking
- Weave in all ends along the border, following the sc row, so they don’t show through the open squares.
- Soak the ornament in cool water for 5 minutes, or spray it until damp. If you’re using stiffener, dip it now.
- Press out the excess water in a towel. Don’t wring it.
- Lay it on the grid mat, RS up. Pin the bottom edge straight at 4.75 in (12.1 cm) wide.
- Pin the center line vertically so the trunk and peak line up.
- Pin each tier’s outer band corners level and symmetrical. The overall height is 5.92 in (15.0 cm).
- Nudge each open square into shape with a blunt needle.
- Lay the loop straight up and pin it at the top.
- Let it dry completely, about 6–12 hours, before you unpin.
Final Quality-Control Checklist
- [ ] Row counts read 27, 27, 23, 19, 23, 19, 15, 19, 15, 11, 15, 11, 7, 3
- [ ] There are 4 solid bands, each stepping out 2 sts past the row below on both sides
- [ ] The trunk has 7 sc and 6 rows and is centered under sts 11–17
- [ ] The border totals 176 sc, with 83 on each side edge
- [ ] Every outer corner has 2 sc, and no edge cups or ruffles
- [ ] The open squares are even and roughly 0.33 in (0.8 cm)
- [ ] It measures 4.75 in (12.1 cm) × 5.92 in (15.0 cm), and the loop is centered
- [ ] All ends are hidden in the border
Troubleshooting
- The tree leans to one side: You skipped a step decrease at one end. Count the row; it should match the list above.
- The band ledges are uneven: Make sure both Edc are worked into the base of the previous st, not into the row below.
- The squares look like rectangles: If they’re too tall, draw the first dc loop up shorter. If they’re too wide, tighten your chains.
- The border ruffles: Use 2 sc per dc row-end, not 3.
- The border pulls in: Check that every outer corner got its extra sc.
- The trunk is off-center: Remove it and recount the free loops from both ends. You should have 10 free loops on each side.
- The loop flops over: Add stiffener, or work a second round of sl sts on the loop.
Care
Hand wash in cool water with mild soap. Reshape the ornament, pin it flat to dry, and re-stiffen if needed. Store it flat or hang it by its loop so the stepped edges stay crisp.

Final Notes
Here’s the measurement chain from start to finish:
- Gauge: 6 sts and 3 dc rows = 1 in (2.5 cm).
- Base: 27 sts gives a 4.5 in (11.4 cm) base.
- Tree body: 14 rows bring the body to 4.67 in (11.9 cm).
- Trunk: A 7 × 6 sc trunk adds 1 in (2.5 cm), for a total of 5.67 in (14.4 cm).
- Border: A 176-sc border adds 0.125 in (0.3 cm) on each side, so the finished ornament is 4.75 in (12.1 cm) × 5.92 in (15.0 cm).
If you check your gauge after Row 5 and recount the border corners before joining, everything else follows. Make one for your own tree, and maybe a few more for gift toppers.
Happy crocheting!