

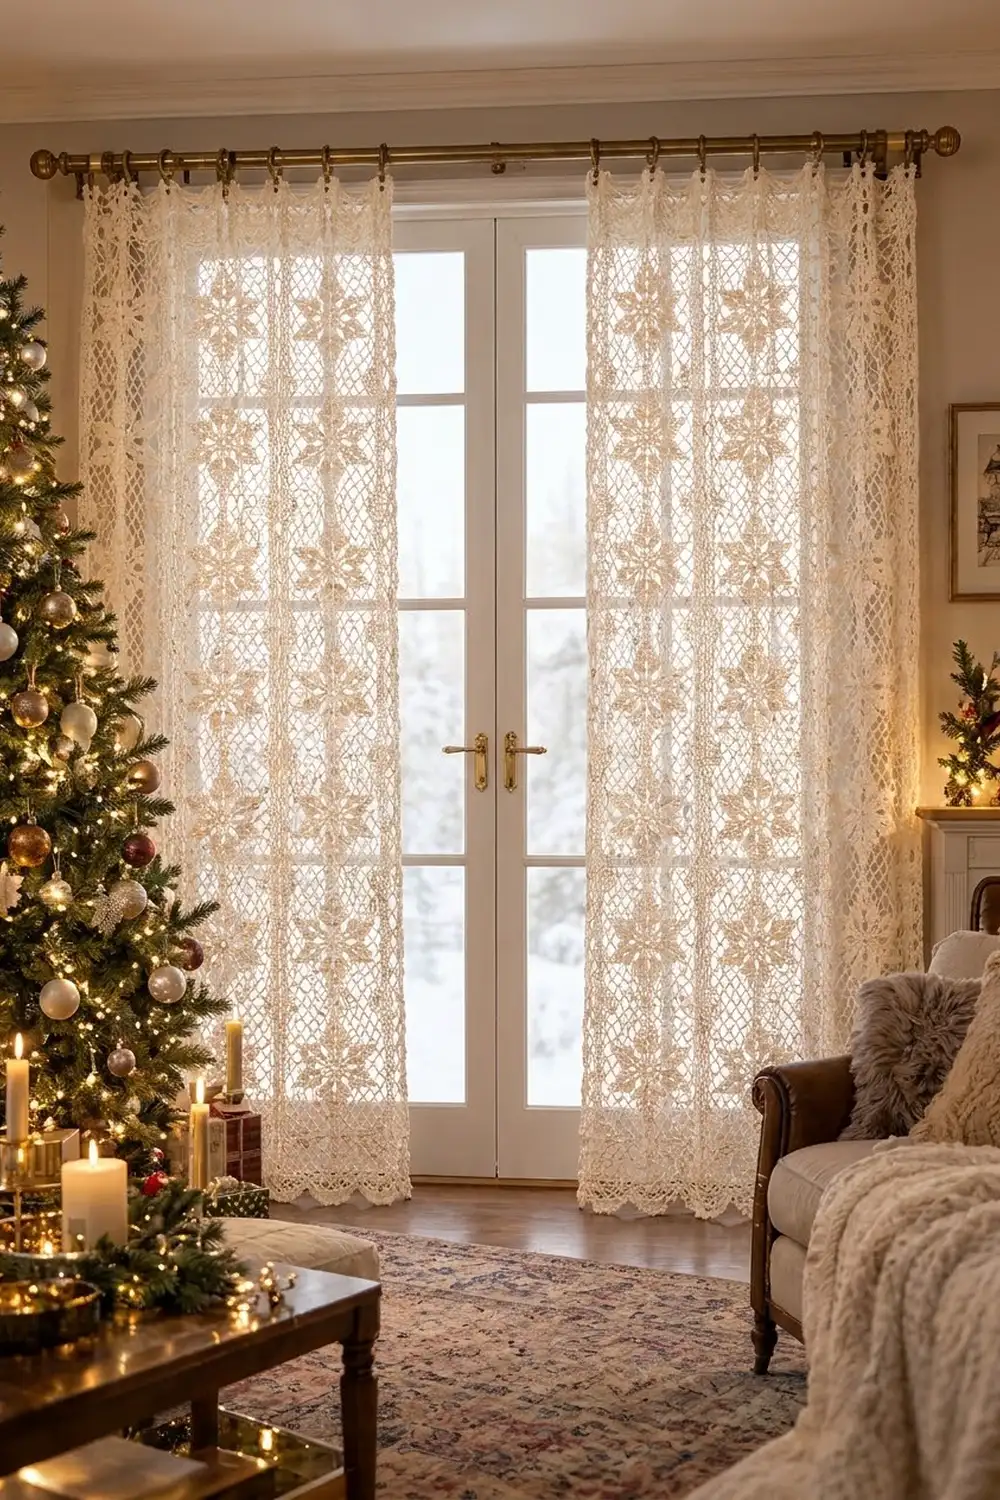
These curtains are made of eight-pointed snowflakes set in an open diamond lattice and worked in warm ivory cotton. When they hang in front of a window at night, the lace turns into a soft, glowing screen. They suit the winter season and still look clean and classic the rest of the year.
The set has two matching panels. Each one is built from 40 square snowflake motifs joined into a grid 4 motifs wide by 10 motifs tall. A short border frames each panel. It has a scalloped hem along the bottom and solid tabs along the top that slide straight onto a curtain rod.
The pattern uses US crochet terms throughout. Each finished panel measures 34 in (86.4 cm) wide by 82.5 in (209.6 cm) long, not counting the tabs. Each tab loop adds about 3 in (7.6 cm) above the rod.
Construction is simple and repetitive. You crochet 80 identical motifs in eight rounds each, block them, and slip-stitch them together in rows and then columns. Then you work a three-round border on each panel and add nine tabs across the top.
Finished Size and Construction
- Finished panel size: 34 in x 82.5 in (86.4 cm x 209.6 cm), not counting tabs
- Skill level: Intermediate
- Terminology: US crochet terms
- Yarn weight: DK / light (weight 3) mercerized cotton
- Hook: 3.5 mm (E-4)
- Number of pieces: 80 motifs (40 per panel), joined into 2 panels
- Layout per panel: 4 motifs wide x 10 motifs tall
- Motif size: 8 in x 8 in (20.3 cm x 20.3 cm) after blocking
- Panel size before border: 32 in x 80 in (81.3 cm x 203.2 cm)
- Border depth: 1 in (2.5 cm) on the sides and top, and 1.5 in (3.8 cm) at the peaks of the bottom scallops
Materials
Use a smooth mercerized cotton or a cotton blend. It shows the lace clearly, blocks crisply, and does not stretch out of shape while it hangs. Avoid fuzzy or very stretchy yarns, because the lattice will lose its definition and the panels will grow in length.
Yarn (one color):
- Ivory: 1,100 g / 2,530 m in total. That is about 22 balls of 50 g / 115 m, or 550 g / 1,265 m per panel.
The total covers 80 motifs at about 10 g / 23 m each, plus about 75 g / 173 m per panel for the border and tabs. The quantities include a margin of about 15%. Buy every ball from the same dye lot.
Tools:
- 3.5 mm (E-4) crochet hook
- Tapestry needle
- Stitch markers
- Rust-proof pins and blocking mats
- Spray bottle
- Measuring tape
- Sharp scissors
Abbreviations (US Terms)
- ch – chain
- sl st – slip stitch
- sc – single crochet
- dc – double crochet
- tr – treble crochet (yarn over twice, insert hook, pull up a loop, then [yarn over, pull through 2 loops] 3 times)
- sp(s) – space(s)
- st(s) – stitch(es)
- RS / WS – right side / wrong side
Special term: tip space. This is the chain space at the end of each snowflake arm. In Round 4 it is a ch-3 sp, and in Round 5 it becomes a ch-5 sp.
Counting note: In Round 8 and in the border, each ch-1 counts as a stitch. A beginning ch-3 counts as a dc.
Gauge and Checkpoints
Make and block one motif before you start the full set. The gauge that matters is the last round of the motif: 33 sts per side (17 dc and 16 ch-1) = 8 in (20.3 cm), which works out to 4.125 sts per inch.
Check these measurements as you go:
- After Round 2: the circle is about 2 in (5.1 cm) across.
- After Round 5: the snowflake measures about 5.5 in (14.0 cm) from one tip to the opposite tip.
- After Round 7: the square mesh measures about 7 in (17.8 cm) from side to side.
- After Round 8 and blocking: the motif is 8 in (20.3 cm) square. A difference of up to 1/4 in (0.6 cm) is fine.
If the motif is too big, go down a half size in hook. If it is too small, go up a half size. Each motif that is 1/4 in (0.6 cm) off adds up to 2.5 in (6.4 cm) over the length of a panel, so check one motif out of every ten.
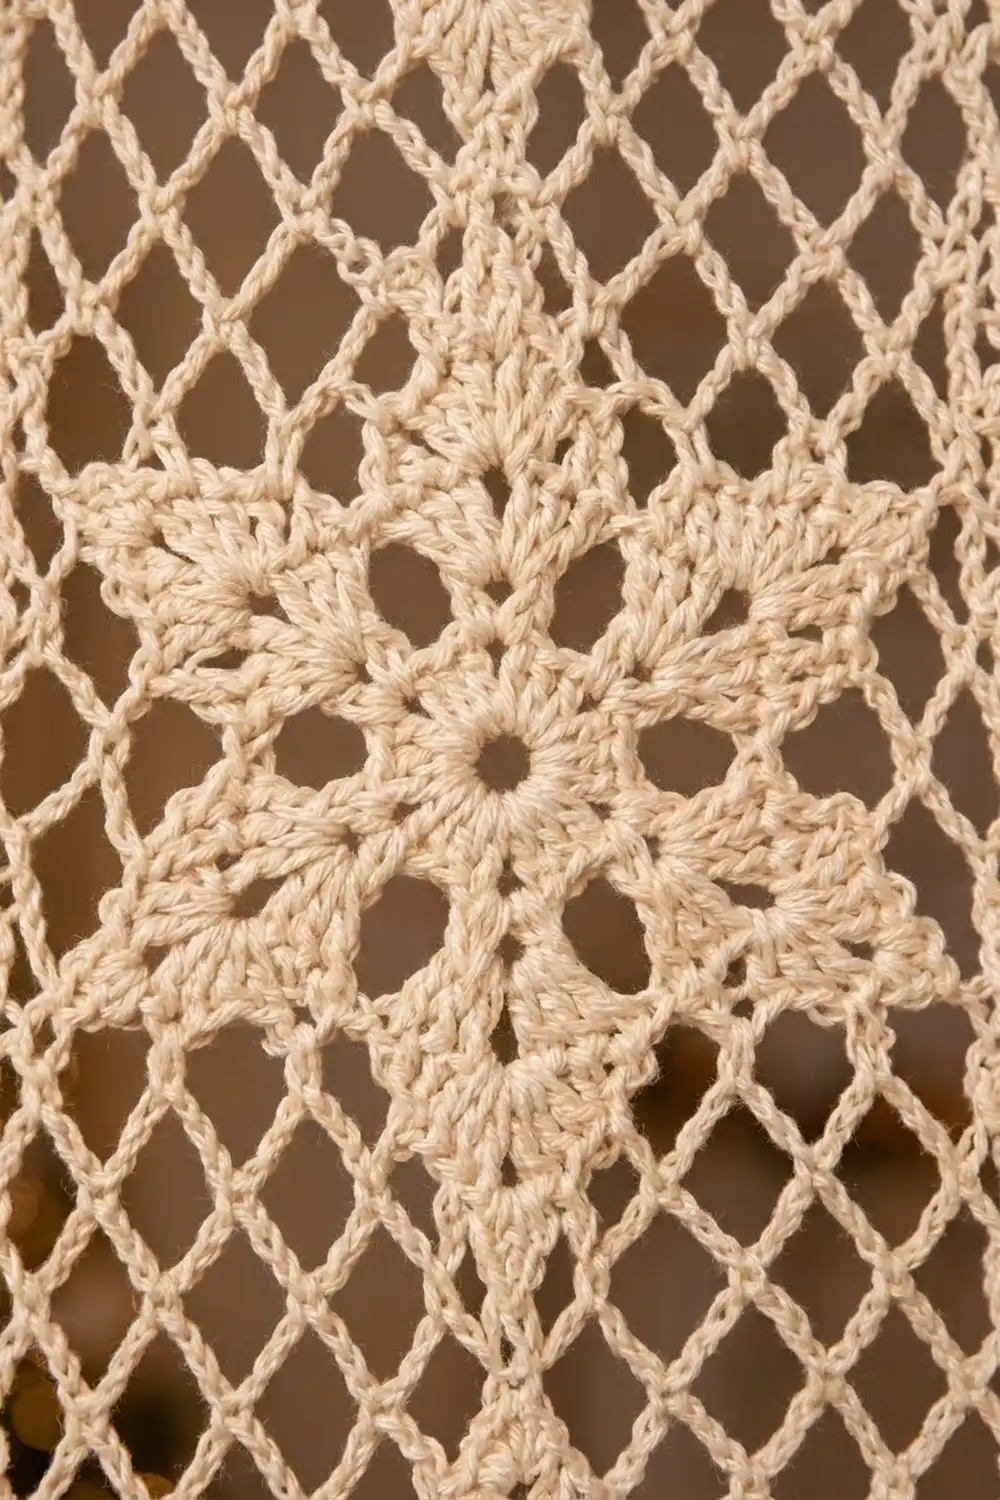
Snowflake Motif (Make 80)
Work every round with the RS facing you. Join each round with a sl st to the first stitch unless the instructions say otherwise.
Round 1: Make a magic ring. Ch 3 (counts as dc), then work 15 dc in the ring. Join. (16 dc)
Round 2: Ch 3 (counts as dc), dc in the same st, then 2 dc in each st around. Join. (32 dc)
Round 3: Ch 3 (counts as dc), dc in the next 2 sts, ch 3, skip 1 st. [Dc in the next 3 sts, ch 3, skip 1 st] 7 times. Join. (24 dc in 8 groups of 3, 8 ch-3 sps)
Round 4 (arms): Sl st in the next dc, which is the center dc of the first group. Ch 1, sc in the same st, ch 2. [(2 dc, ch 3, 2 dc) in the next ch-3 sp, ch 2, skip 1 dc, sc in the next dc (the center dc), ch 2, skip 1 dc] 8 times, but on the last repeat leave out the final sc and ch 2. Join to the first sc. (8 sc, 32 dc, 8 ch-3 tip sps, 16 ch-2 sps)
Round 5 (points): Ch 1, sc in the same sc. [Ch 4, (dc, ch 5, dc) in the next ch-3 tip sp, ch 4, sc in the next sc] 8 times, but on the last repeat join to the first sc instead of working the final sc. (8 sc, 16 dc, 8 ch-5 tip sps, 16 ch-4 sps)
The snowflake is complete. You now have eight pointed arms, with a single sc anchoring each “valley” between them.
Round 6 (squaring mesh): Sl st in the next 4 ch and the next dc, then sl st into the ch-5 tip sp. This tip becomes a side tip. Ch 1, sc in the same tip sp. [Ch 5, sc in the next valley sc, ch 5, (tr, ch 5, tr) in the next tip sp (this is a corner), ch 5, sc in the next valley sc, ch 5, sc in the next tip sp (a side tip)] 4 times, but on the last repeat join to the first sc instead of working the final sc. (12 sc, 8 tr, 16 ch-5 mesh sps, 4 ch-5 corner sps)
The tr corners push four of the arm tips outward, which turns the circle into a square. Each side now has 4 ch-5 mesh sps between its corners.
Round 7 (lattice): Sl st in the first 3 ch of the next ch-5 sp. Ch 1, sc in the same sp. [Ch 5, sc in the next ch-5 sp, ch 5, (sc, ch 5, sc) in the corner ch-5 sp, ch 5, sc in the next ch-5 sp, ch 5, sc in the next ch-5 sp, ch 5, sc in the next ch-5 sp] 4 times, but on the last repeat join to the first sc instead of working the final sc. (24 sc, 20 side ch-5 loops (5 per side), 4 corner ch-5 loops)
Round 8 (frame): Sl st in each st up to the next corner ch-5 loop, then sl st into that loop. Ch 4 (counts as dc and ch 2), dc in the same loop. Side: ch 1, then [(dc, ch 1, dc, ch 1, dc) in the next ch-5 loop, ch 1] 5 times. Corner: (dc, ch 2, dc) in the corner loop. Work 3 more sides and 2 more corners the same way, then work the last side. Join to the 3rd ch of the beginning ch-4.
Stitch count for each side: 1 corner dc + 15 dc in the loops + 1 corner dc = 17 dc. The ch-1s are 1 + 10 + 4 + 1 = 16. That gives 33 sts per side, including both corner dc. For the full round: 68 dc, 64 ch-1, and 4 ch-2 corner sps. Fasten off and weave in the ends.
Block each motif to 8 in (20.3 cm) square. Pin out all 8 arm tips so the snowflake lies flat.
Make All Pieces
Make 80 ivory motifs in total, 40 for each panel. The layout for each panel is shown below, where M is one motif (the top row is row 1, the bottom row is row 10):
Row 1:   M  M  M  M
Row 2:   M  M  M  M
Row 3:   M  M  M  M
Row 4:   M  M  M  M
Row 5:   M  M  M  M
Row 6:   M  M  M  M
Row 7:   M  M  M  M
Row 8:   M  M  M  M
Row 9:   M  M  M  M
Row 10:  M  M  M  M
Turn every motif the same way. This lines the snowflakes up into the neat vertical columns that show in the hanging panels.
Joining
Method: Use a slip-stitch seam on the WS.
- Hold two motifs with their RS together and line up their edges.
- Sl st through both layers in the corner ch-2 sp.
- Sl st through both layers in each of the 33 sts along the side, matching dc to dc and ch to ch.
- Finish with a sl st through both corner ch-2 sps.
Because both edges have exactly 33 sts, the seam lies flat and nothing ripples.
Order:
- Join the motifs into 10 strips of 4, working across each row.
- Join the strips together with long seams. Each long seam crosses 4 motifs, so it is 4 x 33 = 132 sts. Sl st through the paired corner sps at each place where motifs meet.
Tension: Keep each sl st as tall as a chain. If the seams pull tight, the panel will cup, and the lattice will look gathered at every join.
Checkpoint: The joined panel should measure 32 in x 80 in (81.3 cm x 203.2 cm). Lay it flat and measure it before you start the border.
Border
Border gauge: The border keeps the motif gauge of 4.125 sts per inch. Across the top or bottom edge, 132 sts / 32 in = 4.125. Along each long side, 330 sts / 80 in = 4.125. Since the gauge does not change, the edges will not ruffle or pull in.
Each side’s count is the number of motifs along that side times 33. The 33 already includes the motifs’ corner dc. Do not work into the joined corner sps at the seams, and do not add any stitches there.
Round 1 (sc): With the RS facing, join the yarn in the first dc of the top edge. Work sc in each dc and each ch-1 across the side. At each outer corner, ch 2 over the corner sp. Join.
- Top and bottom: 4 x 33 = 132 sc each
- Long sides: 10 x 33 = 330 sc each
- Total: 924 sc and 4 ch-2 corners
Round 2 (dc, a conversion round): Ch 3 (counts as dc). Work dc in each sc, and (dc, ch 2, dc) in each corner ch-2 sp. Join.
- Top and bottom: 132 worked 1-per-st + 2 corner dc added = 134 dc each
- Long sides: 330 worked 1-per-st + 2 corner dc added = 332 dc each
Round 3 (finish and scallops): Work (sc, ch 2, sc) in each corner sp.
- Top and long sides: Sc in each dc. The top has 134 sc + 2 corner sc = 136 sc. Each long side has 332 sc + 2 corner sc = 334 sc.
- Bottom edge: After the corner sc, work sc in the first dc. Then repeat [skip 2 dc, 5 dc in the next dc, skip 2 dc, sc in the next dc] 22 times, and finish with sc in the last dc. This uses 1 + (22 x 6) + 1 = 134 dc and makes 22 scallops, with 110 dc and 24 sc in total.
Join and fasten off.
Why the math works: Each scallop uses exactly 6 sts, and 134 = 1 + 132 + 1, so the scallops start and end evenly at the two corners.
Tabs
Join the yarn at the top-right corner sc with the RS facing. Across the 136 sc of the top edge, you will make 9 tabs that are each 8 sts wide, with 8 sts skipped between neighboring tabs. That works out to (9 x 8) + (8 x 8) = 136 sts, so a tab sits flush at each end.
Each tab:
- Row 1: Ch 1, then sc in the next 8 sts. Turn. (8 sc)
- Rows 2–24: Ch 1, then sc in each st across. Turn. (8 sc)
Each tab should measure about 2 in (5.1 cm) wide by 6 in (15.2 cm) long. Fold the tab to the WS and whipstitch the last row to the top of Border Round 2 to make a loop of about 3 in (7.6 cm).
Skip 8 sts and rejoin the yarn for the next tab.
Final Blocking
- Weave in all the ends before you block, following the direction of the stitches.
- Soak the panel in cool water with a little wool wash for 20 minutes. Press the water out gently without wringing.
- Roll the panel in towels to remove more water.
- Lay it flat on mats and pin it to 34 in x 82.5 in (86.4 cm x 209.6 cm).
- Pin each scallop and each corner, then mist the lattice and smooth the diamonds evenly with your fingers.
- Let it dry completely, which takes 24–48 hours.
- Hang the panel for a day and measure again. Cotton can drop by up to 1/2 in (1.3 cm).
Final Quality-Control Checklist
- Every motif has 33 sts per side.
- All snowflakes point the same way, and the columns line up.
- The seams lie flat, and no corner holes are pulled open.
- The joined panel measures 32 in x 80 in (81.3 cm x 203.2 cm).
- Border Round 1 has 132 / 330 / 132 / 330 sts.
- The bottom edge has 22 even scallops.
- There are 9 tabs, each 8 sts wide, sitting flush at both ends.
- The finished panel measures 34 in x 82.5 in (86.4 cm x 209.6 cm).
Troubleshooting
- The motif cups in Round 6: Your chains are too tight. Chain more loosely or go up a hook size for Rounds 6–7.
- The motif ruffles in Round 8: Recount the loops in Round 7. There must be exactly 5 loops per side.
- The corners look rounded: Pin the tr corners out harder when you block, or make the corner chains a little looser.
- The seams pucker: Unpick the seam and redo it with taller sl sts.
- The border waves: Check the Round 1 counts. Extra sts at the seams are the usual cause.
- The panel is too long after hanging: Re-block it shorter and dry it flat.
Care
Hand wash in cool water and dry the curtains flat. Re-block them lightly after every wash and never hang them while wet.
Final Notes
The whole project depends on one chain of measurements. Each motif has 33 sts per side and measures 8 in (20.3 cm). Joining 4 x 10 motifs gives a panel of 32 in x 80 in (81.3 cm x 203.2 cm), with 132 and 330 border sts. The border then brings the panel to 34 in x 82.5 in (86.4 cm x 209.6 cm). If you keep the first motif accurate, every later step works out.
Happy crocheting!