

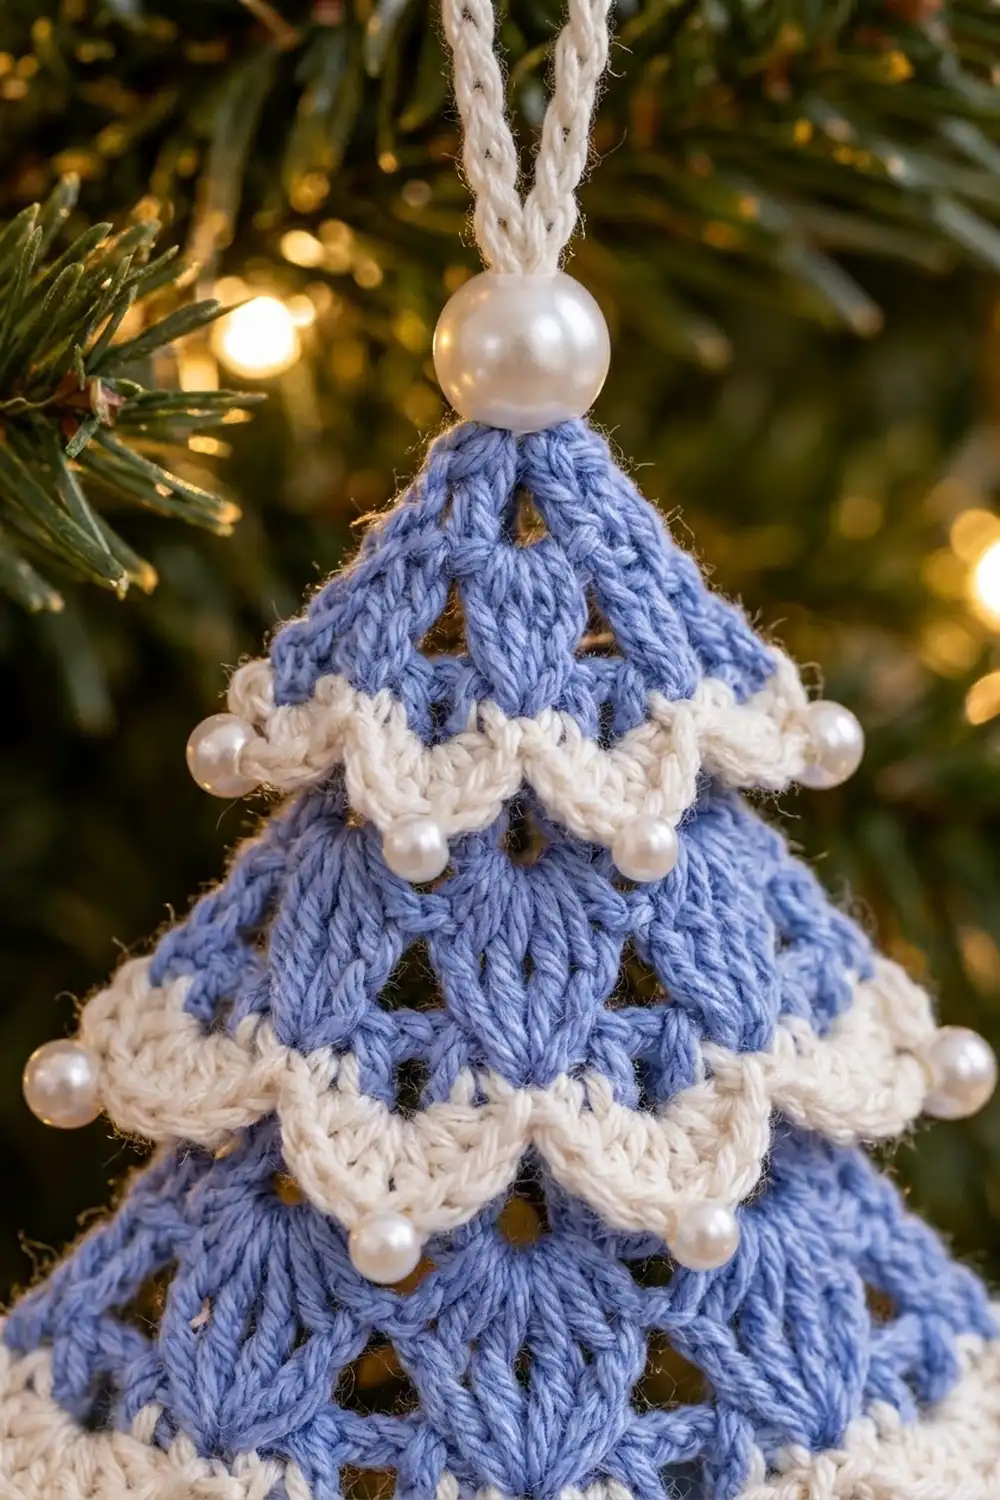
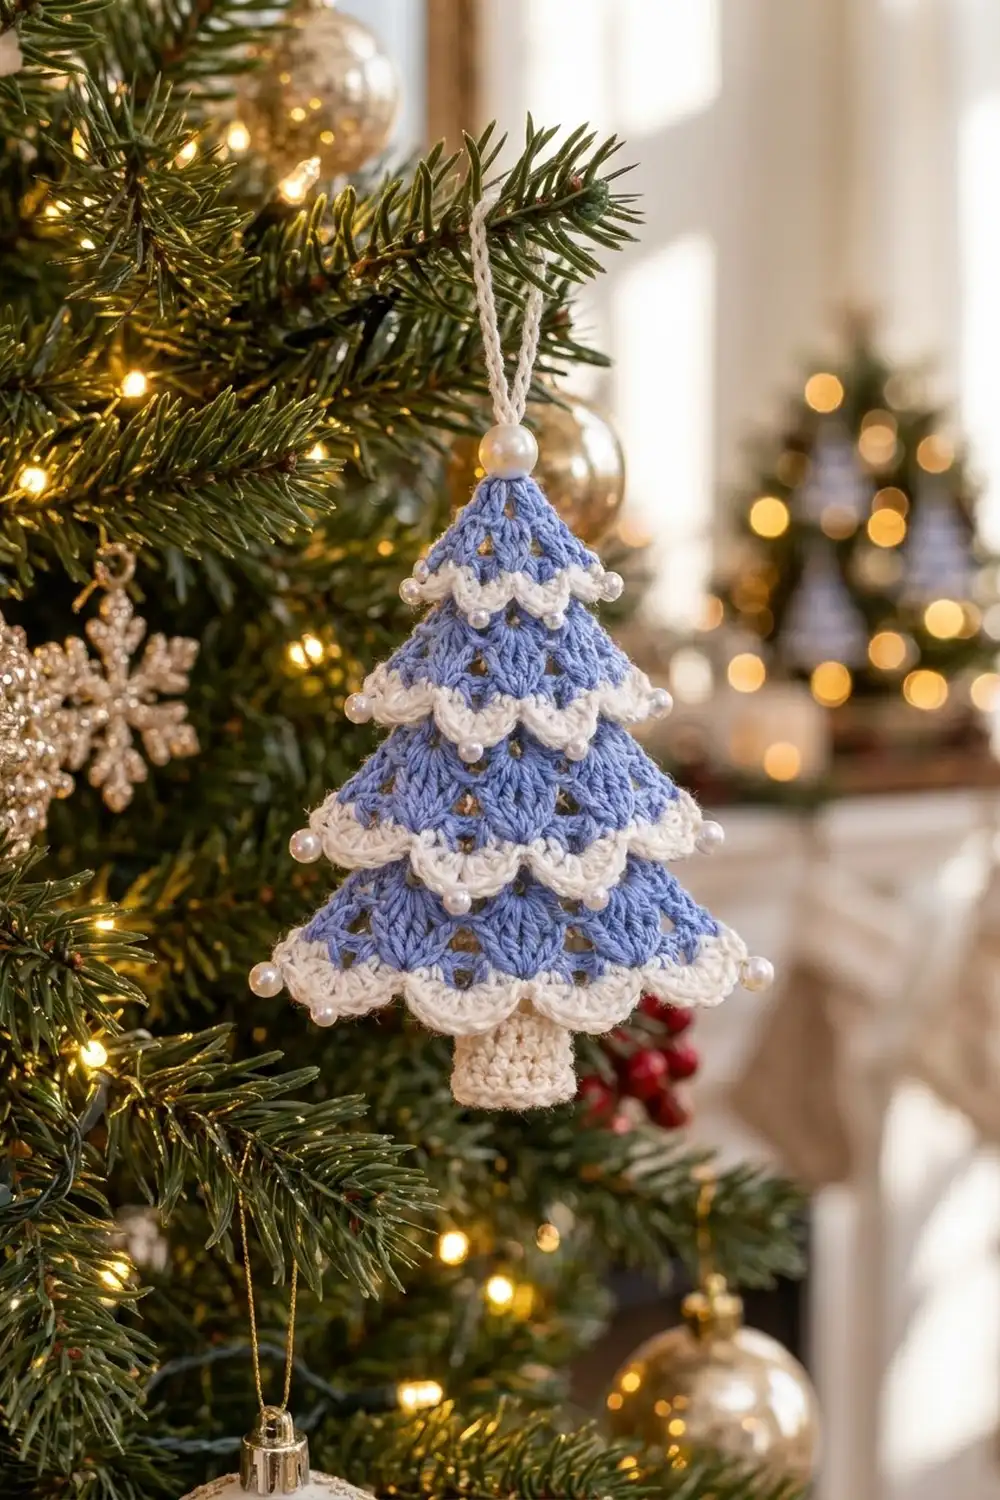
This little tree ornament is a flat, single-piece Christmas tree. It has five stacked tiers of periwinkle-blue V-stitch openwork, and each tier ends in a cream “snow” scallop edge that drapes over the tier below. A short cream trunk, small pearl beads at the tips of the tiers, a larger pearl at the top and a cream chain loop finish it off.
The palette is periwinkle blue and cream, with pearl accents. It looks soft, wintry and a little vintage, and it suits a real tree, a wreath, a gift tag or a window hook.
The pattern uses US crochet terms. The finished ornament measures about 3.5 in (8.9 cm) wide across the bottom scallops and 4.9 in (12.4 cm) tall from the top point to the bottom of the trunk. The hanging loop adds another 1.5 in (3.8 cm).
The tree is worked top-down in rows, from the point to the widest tier. After every second blue row you work a cream scallop row into the ch-1 spaces. The next blue row goes into the same spaces from behind, so each scallop folds forward over the tier below. The trunk is worked straight off the last blue row. There is no sewing apart from the pearls.
Finished Size and Construction
- Finished size: 3.5 in (8.9 cm) wide × 4.9 in (12.4 cm) tall, plus a 1.5 in (3.8 cm) loop
- Skill level: Easy-Intermediate
- Terminology: US crochet terms
- Yarn weight: Sport (#2) mercerized cotton
- Hook: 3.25 mm (US D/3)
- Number of pieces: 1
- Layout: One flat tree, five tiers, trunk centered below
- Piece size before border (blue body only): 3.33 in (8.5 cm) wide × 4.0 in (10.2 cm) tall
- Border depth (scallops): about 0.4 in (1.0 cm), flaring about 0.1 in (0.3 cm) past each side
Materials
Use a smooth mercerized cotton or cotton blend in sport weight. Cotton holds the scallops crisp and blocks flat. A fuzzy acrylic will blur the openwork.
- Color A, periwinkle blue: 8 g, about 24 m (26 yd)
- Color B, cream: 6 g, about 18 m (20 yd), for the scallops, trunk and loop
These quantities include a margin of about 30 percent, so you can swatch and still have enough.
Tools and notions:
- 3.25 mm (US D/3) crochet hook
- 10 pearl beads, 4 mm, for the tips of the tiers
- 1 pearl bead, 8 mm, for the top
- Sewing needle and cream sewing thread (or a beading needle)
- Tapestry needle
- 2 locking stitch markers
- Scissors, ruler, rust-proof pins and a blocking mat
Abbreviations (US Terms)
- ch – chain
- sl st – slip stitch
- sc – single crochet
- dc – double crochet
- sp – space
- st(s) – stitch(es)
- RS / WS – right side / wrong side
- BLO – back loop only
Special stitches:
- V-st (V-stitch): (dc, ch 1, dc) in the same st or sp. One V-st counts as 3 sts: dc, ch-1 sp, dc.
- Shell: 5 dc in the same sp.
- Edge dc: the single dc (or ch-3) at each end of a blue row.
Stitch counting rule: In every blue row, each dc and each ch-1 sp counts as 1 st. A row with n V-sts always has 3n + 2 sts: n V-sts plus 2 edge dc.
Gauge and Checkpoints
Gauge in V-st pattern: 6 sts = 1 in (2.5 cm) wide, and 5 blue rows = 2 in (5.1 cm) tall, so each row is 0.4 in (1.0 cm).
Trunk gauge: 6 sc = 1 in (2.5 cm), and 6 sc rows = 0.9 in (2.3 cm).
Your first tree is the test. Work Rows 1–4 with the scallop after Row 2, then measure before you go on.
Checkpoints (blue body, measured flat and lightly pressed, scallops folded out of the way):
| After | Sts | Width | Height |
|---|---|---|---|
| Row 2 | 8 | 1.33 in (3.4 cm) | 0.8 in (2.0 cm) |
| Row 4 | 11 | 1.83 in (4.6 cm) | 1.6 in (4.1 cm) |
| Row 6 | 14 | 2.33 in (5.9 cm) | 2.4 in (6.1 cm) |
| Row 8 | 17 | 2.83 in (7.2 cm) | 3.2 in (8.1 cm) |
| Row 10 | 20 | 3.33 in (8.5 cm) | 4.0 in (10.2 cm) |
If Row 4 is wider than 2.0 in (5.1 cm): go down to a 3.0 mm hook.
If Row 4 is narrower than 1.7 in (4.3 cm): go up to a 3.5 mm hook.
If the width is right but the rows are too tall: shorten your dc by pulling the first loop up less.
The ornament has no fixed size requirement, but checking the gauge keeps the tree in proportion with the trunk and pearls.
Tree Body Pattern
Color A unless stated. The rows are worked top-down: the top point first, then each new row is added below.
Tier 1 (Top Point)
Row 1 (RS): With A, ch 4. Work (dc, ch 1, dc, dc) in the 4th ch from the hook. The 3 skipped ch count as the first edge dc. (5 sts: edge dc, 1 V-st, edge dc)
Row 2 (WS, increase row): Ch 3 (counts as edge dc), turn. V-st in the sp between the edge dc and the V-st. V-st in the sp between the V-st and the last edge dc. Dc in the top of the turning ch. (8 sts: 2 V-sts)
Scallop Row 1 (RS, B): Remove the hook and place a marker in the A loop. Turn. Join B with a sc in the last st made (the edge dc). Shell in the ch-1 sp of the next V-st. If another V-st follows, sc in the sp between the two V-sts. Repeat from * across. Sc in the last edge dc. Fasten off B. (2 shells + 3 sc = 13 sts)
Tier 2
Row 3 (RS, stack row): Put the A loop back on the hook. Do not turn. Ch 3 (counts as edge dc). Fold the scallops toward you and, working behind them, work a V-st in the ch-1 sp of each V-st of Row 2. Dc in the top of the turning ch. (8 sts: 2 V-sts)
The V-sts in Row 3 share their spaces with the shells. This is what anchors each scallop and lets it hang forward over the new tier.
Row 4 (WS, increase row): Ch 3, turn. V-st in the sp between the edge dc and the first V-st, V-st in the sp between the two V-sts, and V-st in the sp between the last V-st and the edge dc. Dc in the top of the turning ch. (11 sts: 3 V-sts)
Scallop Row 2 (RS, B): Work as Scallop Row 1. (3 shells + 4 sc = 19 sts)
Tier 3
Row 5 (RS, stack row): Work as Row 3, behind the scallops. (11 sts: 3 V-sts)
Row 6 (WS, increase row): Ch 3, turn. Work a V-st in every sp between sts: the sp after the edge dc, each sp between V-sts, and the sp before the last edge dc. Dc in the top of the turning ch. (14 sts: 4 V-sts)
Scallop Row 3 (RS, B): Work as Scallop Row 1. (4 shells + 5 sc = 25 sts)
Tier 4
Row 7 (RS, stack row): Work as Row 3. (14 sts: 4 V-sts)
Row 8 (WS, increase row): Work as Row 6. (17 sts: 5 V-sts)
Scallop Row 4 (RS, B): Work as Scallop Row 1. (5 shells + 6 sc = 31 sts)
Tier 5
Row 9 (RS, stack row): Work as Row 3. (17 sts: 5 V-sts)
Row 10 (WS, increase row): Work as Row 6. (20 sts: 6 V-sts) Fasten off A.
Scallop Row 5 (RS, B): Work as Scallop Row 1. (6 shells + 7 sc = 37 sts) Fasten off B.
Body check: The blue body is 3.33 in (8.5 cm) wide at Row 10 and 4.0 in (10.2 cm) tall. Every stack row repeats the V-st count of the row above it, and every increase row adds exactly 1 V-st (3 sts).
Trunk
Row 10 has 20 sts. Counting from the right-hand edge with the RS facing, they are: edge dc (st 1), V-sts in sts 2–19, and edge dc (st 20). The center 6 sts are sts 8–13, which are the 3rd and 4th V-sts.
Trunk Row 1 (RS): Fold Scallop Row 5 up out of the way. Join B with a sl st in the BLO of st 8 of Row 10. Ch 1. Sc in the BLO of the same st and of the next 5 sts, counting each ch-1 sp as a st. (6 sc)
Trunk Rows 2–6: Ch 1, turn, sc in each st across. (6 sc)
Fasten off and leave a 6 in (15.2 cm) tail.
Trunk check: 1 in (2.5 cm) wide × 0.9 in (2.3 cm) long. About 0.4 in (1.0 cm) of it sits under the bottom scallops, so roughly 0.5 in (1.3 cm) shows below the tree.
Hanging Loop
Join B with a sl st in the top point, at the base of the foundation ch of Row 1. Ch 30 and sl st in the same st. Fasten off and weave in the end. The chain folds into a loop about 1.5 in (3.8 cm) long.
Pearls
Using a sewing needle and cream thread:
- Sew the 8 mm pearl at the top point, at the base of the loop.
- Sew one 4 mm pearl to each end of every scallop row, on the outer sc. That is 2 per tier, 10 in total.
Knot each pearl on the WS and hide the thread inside the stitches.
Border: Snow-Scallop Edging
The cream scallop rows are the border of this design. Instead of one round at the end, the border is worked in five sections, one after each increase row.
Border gauge: One shell together with its following sc covers 3 base sts, or about 0.5 in (1.3 cm). A finished shell is about 0.4 in (1.0 cm) deep. Shells are a little wider than the V-sts beneath them, which is what makes each tier flare about 0.1 in (0.3 cm) beyond the blue edge on each side.
Counts per tier:
| Scallop Row | Base row (sts / V-sts) | Shells | Sc | Total |
|---|---|---|---|---|
| 1 | Row 2: 8 / 2 | 2 | 3 | 13 |
| 2 | Row 4: 11 / 3 | 3 | 4 | 19 |
| 3 | Row 6: 14 / 4 | 4 | 5 | 25 |
| 4 | Row 8: 17 / 5 | 5 | 6 | 31 |
| 5 | Row 10: 20 / 6 | 6 | 7 | 37 |
Why the math works: A base row with n V-sts has n ch-1 sps (one shell each) and n − 1 gaps between V-sts (one sc each), plus 2 edge dc (one sc each). That gives n shells and n + 1 sc, so the total is 5n + (n + 1) = 6n + 1 sts.
Each scallop has exactly one shell above each V-st, so it lines up with the openwork below. The sc at each end sits right on the edge dc, which gives the pearls a firm place to sit.
The scallop rows add no height to the body. They hang over the stack row beneath them, so the body height stays at 4.0 in (10.2 cm).
Final Blocking
- Weave in all ends along the matching colors. Run blue tails through the blue V-sts and cream tails through the scallops.
- If you have already sewn the pearls on, steam lightly or wet block around them without pressing.
- Spray the ornament until it is damp, or wet it and roll it in a towel.
- Lay it RS up on a blocking mat. Pin the top point and the two outer tips of Scallop Row 5 to make a 3.5 in (8.9 cm) wide base, with the tip sitting 4.0 in (10.2 cm) above the bottom of the blue body.
- Pin the center of each shell so the scallops point down and lie flat over the tier below.
- Pin the trunk straight, 1 in (2.5 cm) wide.
- Let it dry completely, then remove the pins.
- For a stiffer ornament, brush on a light fabric stiffener or a sugar-water solution, and let it dry flat again.
Final Quality-Control Checklist
- [ ] Row stitch counts are 5, 8, 8, 11, 11, 14, 14, 17, 17, 20
- [ ] Scallop counts are 13, 19, 25, 31, 37
- [ ] All scallops are on the RS and fold downward over the next tier
- [ ] Body is 3.33 in (8.5 cm) wide × 4.0 in (10.2 cm) tall
- [ ] Overall size is 3.5 in (8.9 cm) × 4.9 in (12.4 cm)
- [ ] Trunk is centered under sts 8–13, with 6 sc × 6 rows
- [ ] 10 small pearls are at the tier tips, and 1 large pearl is at the top
- [ ] Hanging loop is secure, about 1.5 in (3.8 cm)
- [ ] No loose ends showing on either side
Troubleshooting
The tree leans to one side. You probably missed the end V-st on an increase row. Count the V-sts: every increase row needs a V-st in the first and last sp.
The scallops stand up instead of folding down. The stack row was worked in front of the shells. Work it behind them, pushing the scallops toward you.
The scallops ruffle too much. Your dc are too loose. Go down a hook size for the cream rows only, or work 4-dc shells. A 4-dc shell changes the scallop total to 5n + 1, so 11, 16, 21, 26 and 31.
There are gaps where the colors change. Pull the A loop snug before ch 3, and keep the B join tail behind your work.
The trunk is off-center. Recount Row 10 from the right edge. The trunk must begin in st 8.
The pearls droop. Sew each pearl through the sc, not just through the shell, and knot it twice on the WS.
Care
Hand wash in cool water with a mild soap, press out the water in a towel and dry flat. Avoid wringing or tumble drying, because both can loosen the pearls and flatten the scallops.
Final Notes
Everything in this pattern follows one measurement chain. A gauge of 6 sts per 1 in (2.5 cm) and 0.4 in (1.0 cm) per row gives 20 sts and 4.0 in (10.2 cm) of height after 10 rows. The scallops add about 0.1 in (0.3 cm) to each side, which brings the width to 3.5 in (8.9 cm). The trunk adds 0.9 in (2.3 cm), for a total height of 4.9 in (12.4 cm).
If your Row 4 checkpoint matches, the rest of the tree will match too. Make one tree in blue as a test, then try other color pairs to build a set for the tree.
Happy crocheting!