

This is a cutlery holder shaped like a Christmas tree, made to slip a fork and spoon into at each place setting. The cream tree has three stepped tiers covered in rows of soft puff stitches. A line of small eyelets runs down the center like a trunk seam, and a caramel-tan square trunk sits at the bottom.
The look is warm and simple, made in two colors. Cream gives a snowy, frosted texture, and the tan trunk adds a natural wood note. It goes well with plain white plates, greenery, and candlelight.
The pattern uses US crochet terms. The finished holder measures 5.25 in (13.3 cm) wide at the widest tier and 7 in (17.8 cm) tall including the trunk. The pocket body alone is 6 in (15.2 cm) tall.
You crochet two identical flat tree panels from the bottom up. You then hold them together and seam them with single crochet along the sides and bottom, which also forms the border. Finally you sew a small tan trunk to the front.
Finished Size and Construction
- Finished size: 5.25 in wide x 7 in tall (13.3 x 17.8 cm) including trunk
- Skill level: Easy-intermediate
- Terminology: US crochet terms
- Yarn weight: Worsted (#4)
- Hook: 5 mm (H-8)
- Number of pieces: 3 (2 tree panels and 1 trunk)
- Layout: front panel stacked on back panel, trunk centered below the front
- Piece size (one panel): 4.75 in wide x 5.75 in tall (12.1 x 14.6 cm)
- Size before border: 4.75 x 5.75 in (12.1 x 14.6 cm)
- Border depth: 0.25 in (0.6 cm) on the sides and bottom
Materials
Yarn: Use a smooth worsted-weight cotton or cotton blend. Cotton keeps the puffs well defined and handles washing after meals. Acrylic also works but makes a softer, puffier tree.
- Cream (main color): 30 g, about 55 m (60 yd), for both panels and the seam
- Caramel tan (trunk): 5 g, about 9 m (10 yd)
All quantities include a margin of about 20 percent for swatching and tails. If you make a set of holders, multiply by the number you need.
Tools:
- 5 mm (H-8) crochet hook
- Tapestry needle
- 4 locking stitch markers
- Scissors
- Measuring tape
- Blocking mat and rust-proof pins
- Spray bottle or steamer
Abbreviations (US Terms)
- ch – chain
- sc – single crochet
- hdc – half double crochet
- sc2tog – single crochet 2 together (insert hook in the next stitch and pull up a loop, insert hook in the following stitch and pull up a loop, then yarn over and pull through all 3 loops)
- sk – skip
- sl st – slip stitch
- st(s) – stitch(es)
- sp – space
- RS / WS – right side / wrong side
- PS – puff stitch (see below)
Puff Stitch (PS): Yarn over, insert hook in the stitch, yarn over, and pull up a loop to about the height of an hdc. Repeat from * to * 2 more times in the same stitch, giving 7 loops on the hook. Yarn over and pull through all 7 loops. Do not chain to close. Each PS counts as 1 stitch.
Gauge and Checkpoints
Gauge: 16 sc and 16 sc rows = 4 x 4 in (10.2 x 10.2 cm). In the tree pattern, one puff row plus one sc row measures 0.75 in (1.9 cm) tall.
Make one panel first. Finish one panel and measure it before you start the second. Both panels must match exactly for the seam to line up row by row.
Checkpoints for one panel (before border):
- After Row 1: 4.75 in (12.1 cm) wide
- After Row 5 (Tier 1 done): 1.75 in (4.4 cm) tall
- After Row 9 (Tier 2 done): 3.25 in (8.3 cm) tall
- After Row 13 (Tier 3 done): 4.75 in (12.1 cm) tall
- After Row 17 (finished panel): 5.75 in (14.6 cm) tall, with a top band 2.75 in (7.0 cm) wide
If your panel is too big: go down to a 4.5 mm hook and pull your puff loops up a little lower. If it is too small: go up to a 5.5 mm hook. Change the hook rather than the stitch counts, because every count below is matched to the border and seam.
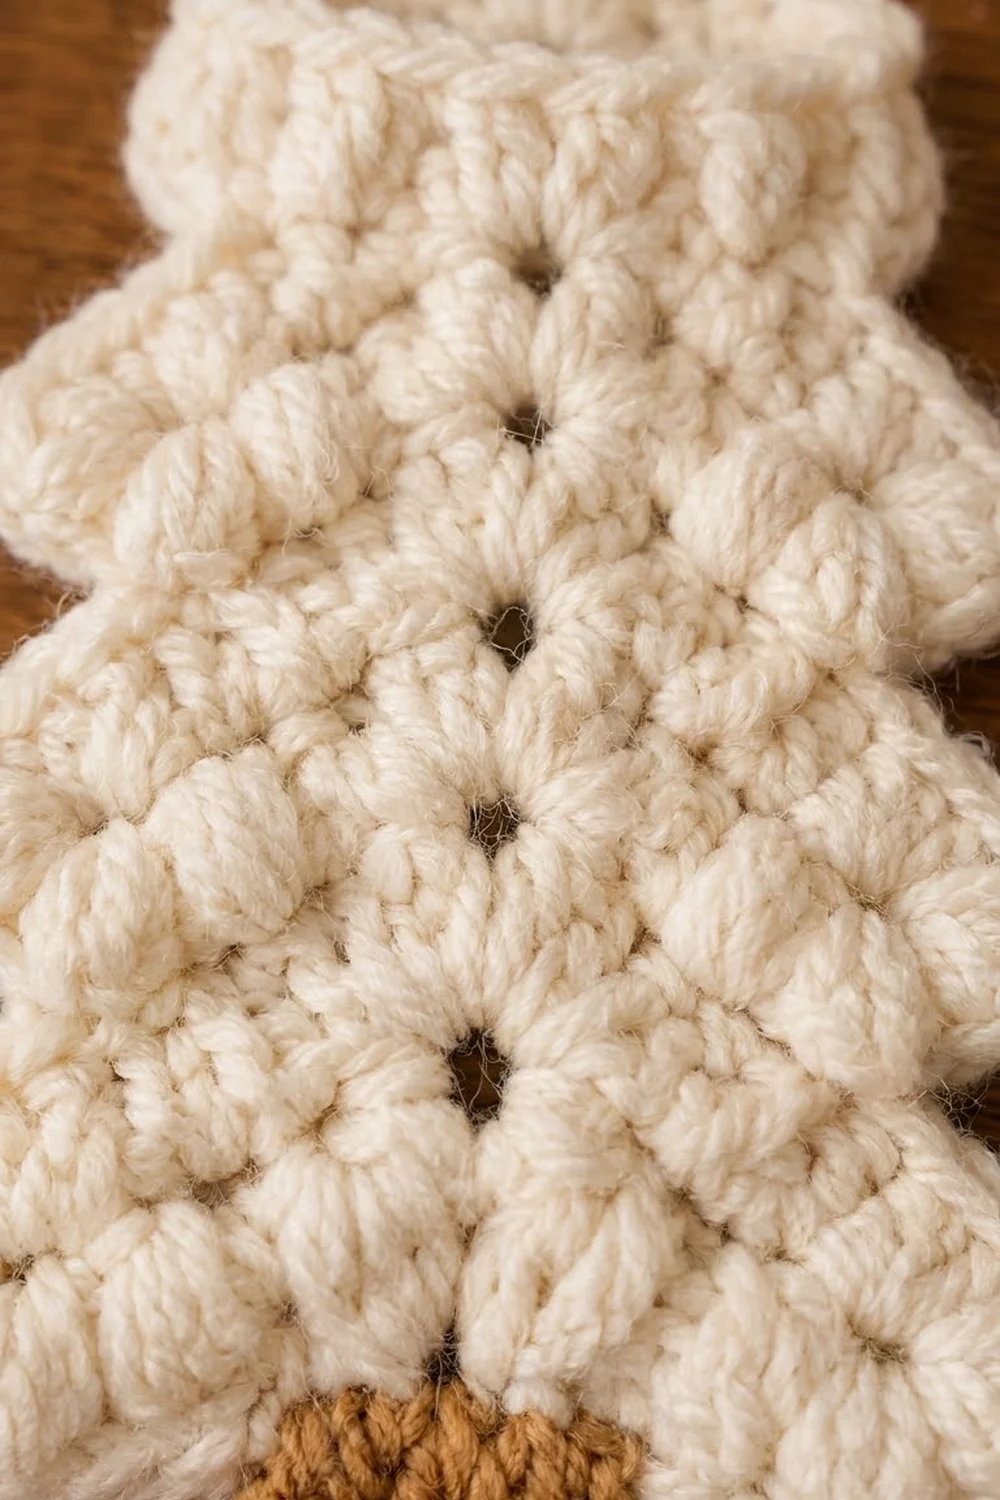
Tree Panel (Make 2)
Use cream. The ch 2 at the start of each puff row does not count as a stitch. In every sc row, work 1 sc into each ch-1 sp, and do not work into the ch-2 turning chain.
Tier 1
Foundation: Ch 20.
Row 1 (WS): Sc in 2nd ch from hook and in each ch across, turn. (19 sts)
Row 2 (RS, puff row): Ch 2, hdc in first st, (PS in next st, hdc in next st) 4 times, ch 1, sk next st, (hdc in next st, PS in next st) 4 times, hdc in last st, turn. (19 sts: 10 hdc, 8 PS, 1 ch-1 sp)
The skipped center stitch makes the first eyelet.
Row 3 (WS, decrease row): Ch 1, sc2tog, sc in each st and ch-1 sp across to the last 2 sts, sc2tog, turn. (17 sts)
Row 4 (RS): Ch 2, hdc in first st, (PS in next st, hdc in next st) 3 times, PS in next st, ch 1, sk next st, PS in next st, (hdc in next st, PS in next st) 3 times, hdc in last st, turn. (17 sts: 8 hdc, 8 PS, 1 ch-1 sp)
Row 5 (WS): Repeat Row 3. (15 sts)
Checkpoint: 1.75 in (4.4 cm) tall. The sides should slant inward.
Tier 2
Row 6 (RS, flare row): Ch 2, 2 hdc in first st, hdc in next st, (PS in next st, hdc in next st) 2 times, PS in next st, ch 1, sk next st, PS in next st, (hdc in next st, PS in next st) 2 times, hdc in next st, 2 hdc in last st, turn. (17 sts: 10 hdc, 6 PS, 1 ch-1 sp)
This is a growth row. The 2-hdc increases at each end push the edge outward and create the stepped notch between tiers.
Row 7 (WS): Repeat Row 3. (15 sts)
Row 8 (RS): Ch 2, hdc in first st, (PS in next st, hdc in next st) 3 times, ch 1, sk next st, (hdc in next st, PS in next st) 3 times, hdc in last st, turn. (15 sts: 8 hdc, 6 PS, 1 ch-1 sp)
Row 9 (WS): Repeat Row 3. (13 sts)
Checkpoint: 3.25 in (8.3 cm) tall.
Tier 3
Row 10 (RS, flare row): Ch 2, 2 hdc in first st, hdc in next st, PS in next st, hdc in next st, PS in next st, hdc in next st, ch 1, sk next st, hdc in next st, PS in next st, hdc in next st, PS in next st, hdc in next st, 2 hdc in last st, turn. (15 sts: 10 hdc, 4 PS, 1 ch-1 sp)
Row 11 (WS): Repeat Row 3. (13 sts)
Row 12 (RS): Ch 2, hdc in first st, (PS in next st, hdc in next st) 2 times, PS in next st, ch 1, sk next st, PS in next st, (hdc in next st, PS in next st) 2 times, hdc in last st, turn. (13 sts: 6 hdc, 6 PS, 1 ch-1 sp)
Row 13 (WS): Repeat Row 3. (11 sts)
Checkpoint: 4.75 in (12.1 cm) tall. Count six eyelets in a straight vertical line.
Top Band
Rows 14–17: Ch 1, sc in each st across, turn. (11 sts each row)
Fasten off. Weave in the tails on the WS. The finished panel is 5.75 in (14.6 cm) tall and 2.75 in (7.0 cm) wide across the band.
Trunk (Make 1)
Use caramel tan.
Foundation: Ch 6.
Row 1: Sc in 2nd ch from hook and in each ch across, turn. (5 sts)
Rows 2–5: Ch 1, sc in each st across, turn. (5 sts each row)
Fasten off, leaving a 12 in (30.5 cm) tail for sewing. The trunk measures 1.25 x 1.25 in (3.2 x 3.2 cm).
Make All Pieces
- Cream: 2 tree panels
- Tan: 1 trunk
Layout:
+---------------------------+
|  FRONT PANEL (RS out)     |
|  over                     |
|  BACK PANEL (RS out)      |
|  top edges stay open      |
+---------------------------+
          [TRUNK]
   centered below the front
Joining
Method: Hold the panels WS together so the puffs face outward on both sides. Join them with single crochet through both layers along the left side, bottom, and right side. Leave the top open. This seam is also Border Row 1 below.
Stitch-to-stitch logic: The panels are identical, so each row end on the front sits directly on the same row end of the back. Place markers at Rows 5, 9, and 13 on both panels and match them. Each sc goes through the matching row end, or the matching foundation stitch, on both layers at once.
Tension: Keep the seam stitches the same size as your panel stitches. A tight seam bends the tier notches, and a loose seam makes the edges flare.
Size checkpoint: Before you seam, lay the stacked panels flat. They should measure 4.75 x 5.75 in (12.1 x 14.6 cm), and every edge should line up.
Border
Border gauge: 4 sc per 1 in (2.5 cm) along every edge. That matches the panel stitch gauge.
Border Row 1 (seam): Hold the front facing you. Join cream with a sl st through both layers at the top-left corner, at the Row 17 row end. Ch 1.
- Left side: Work 1 sc in each sc-row end and 2 sc in each puff-row end, working down to Row 1. (23 sc) That is 11 sc rows x 1 sc plus 6 puff rows x 2 sc.
- Bottom: 3 sc in the first foundation st (corner), 1 sc in each of the next 17 sts, 3 sc in the last foundation st (corner). (23 sc, including both corners)
- Right side: Repeat the left-side sequence, working up to Row 17. (23 sc)
Total: 23 + 23 + 23 = 69 sc. The side counts are row ends only. The bottom count already includes its two corner groups, so no corner stitches are counted twice. Fasten off.
Border Row 2 (top edge finish): Join cream at the top band of the front panel only. Sl st loosely in each of its 11 sts. Fasten off. Repeat across the top of the back panel (11 sl st on each). This firms up the opening without adding height.
Why the math works: Each side is 5.75 in (14.6 cm) tall, and 23 sc at 4 per inch equals exactly 5.75 in. The bottom has 19 foundation stitches, which matches 4.75 in (12.1 cm), plus 2 extra stitches in each corner so the corners turn flat. The border adds 0.25 in (0.6 cm) to each side and to the bottom. That brings the pocket to 5.25 x 6 in (13.3 x 15.2 cm).
Attach the trunk: Center the trunk under the eyelet column, over bottom border stitches 10 through 14. Overlap its top 0.25 in (0.6 cm) onto the front of the border. Whipstitch it through the front layer only. With 1 in (2.5 cm) of trunk below the edge, the total height is 7 in (17.8 cm).
Final Blocking
- Mist the holder lightly with water, or hover steam over it without touching the yarn.
- Slide a piece of folded cardstock into the pocket to keep the layers apart.
- Pin it flat to 5.25 in (13.3 cm) wide and 6 in (15.2 cm) tall, not counting the trunk.
- Pin each tier notch so the steps are crisp.
- Square the trunk to 1.25 in (3.2 cm).
- Do not press the puffs flat. Let them dry fully in the air.
- Remove the pins and the card.
Final Quality-Control Checklist
- Both panels have the same number of rows (17) and the same stitch counts.
- Six eyelets line up vertically on each panel.
- Each side seam has 23 sc, and the full seam has 69 sc.
- The top opening is open, with 11 sl st across each layer.
- The tier notches look the same on the left and right.
- The trunk is centered and straight, and hangs 1 in (2.5 cm) below the edge.
- The finished size is 5.25 x 7 in (13.3 x 17.8 cm).
- All tails are woven in on the inside.
Troubleshooting
The puffs look flat or uneven. Pull every loop up to the same height before closing the puff.
The eyelet line drifts off center. Count to the center before each ch 1. Your stitch counts on either side should match the row instructions.
The tier notches don’t show. Make sure you worked the 2-hdc increases in Rows 6 and 10, and that the decrease rows are firm.
The seam puckers. Your seam is too tight. Redo it with a hook 0.5 mm larger.
The side edges ripple. You have too many stitches in the seam. Recount, aiming for 23 per side.
The pocket is too narrow for your cutlery. Go up a hook size for both panels. Don’t add stitches, or the seam and border counts will no longer match.
Care
Hand wash in cool water with mild soap and lay flat to dry, reshaping the puffs while damp. Do not tumble dry, because heat can fuzz the cream yarn.

Final Notes
The measurements build on each other. Gauge of 16 sc = 4 in (10.2 cm) gives a panel 4.75 x 5.75 in (12.1 x 14.6 cm). A border of 23 sc per side and 23 sc across the bottom, at 0.25 in (0.6 cm) deep, turns that into a 5.25 x 6 in (13.3 x 15.2 cm) pocket. The 1.25 in (3.2 cm) trunk brings the finished holder to 7 in (17.8 cm). Check each checkpoint as you go and your holders will all match.
Happy crocheting!