

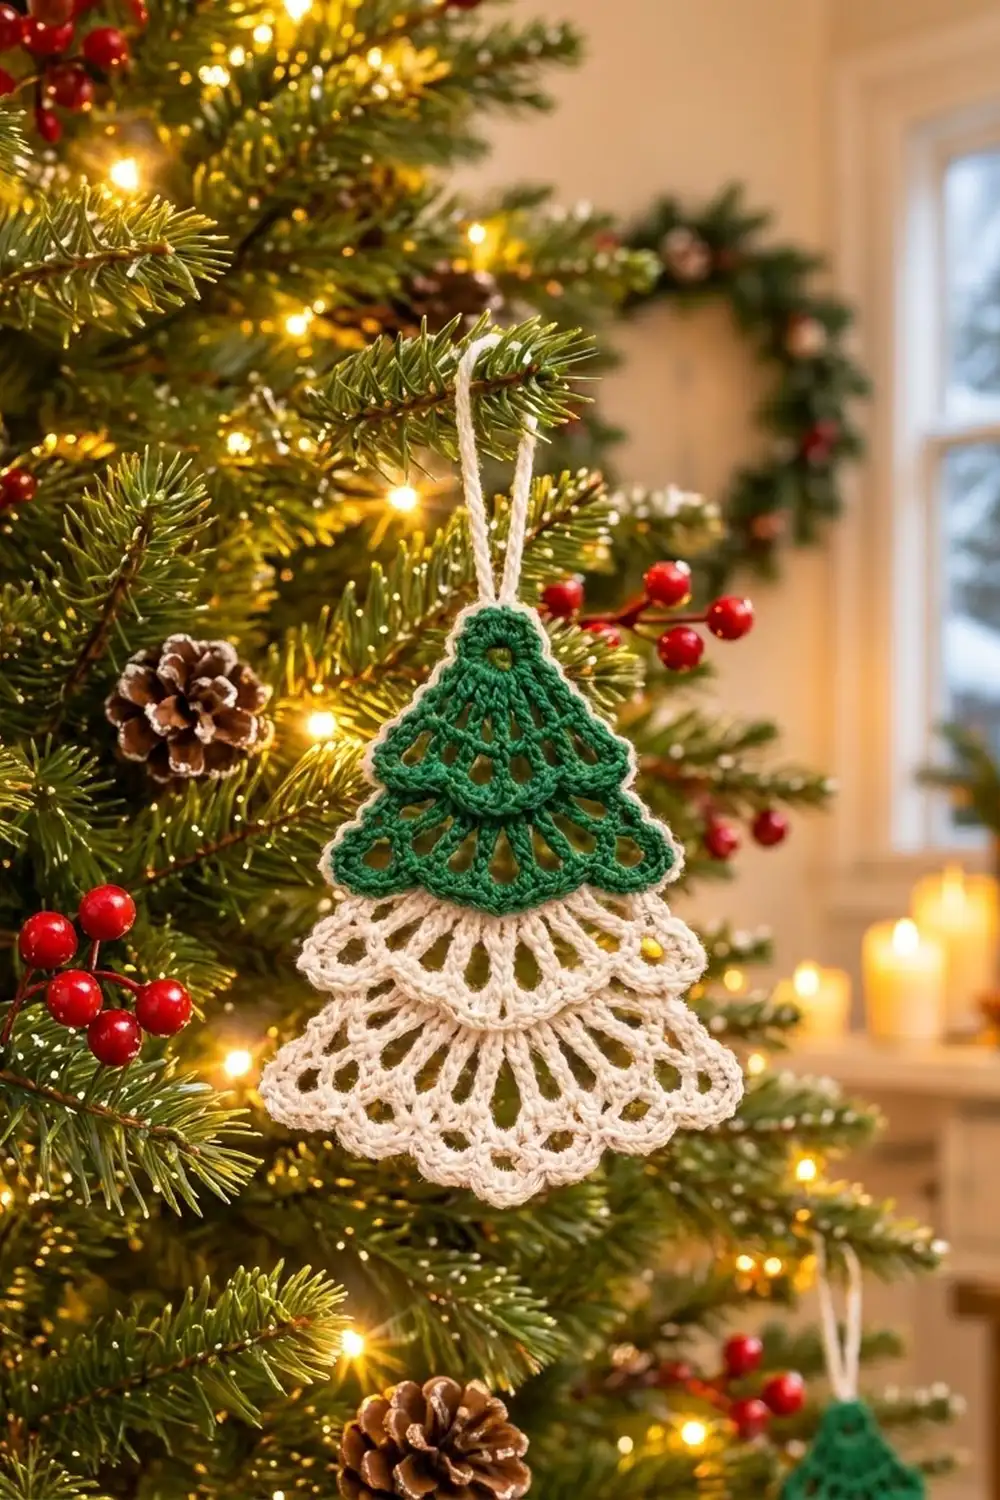
This little lace tree is made in one piece. It has four layered tiers: two forest green tiers at the top and two cream tiers below. Each tier ends in a frill of open chain arches that drapes over the tier beneath it, so the ornament looks like a tree dusted with snow.
The finished ornament measures about 4.5 in (11.4 cm) wide and 4.75 in (12.1 cm) tall, not counting the hanging loop. With the loop it is about 7 in (17.8 cm) tall. The pattern uses US crochet terms throughout.
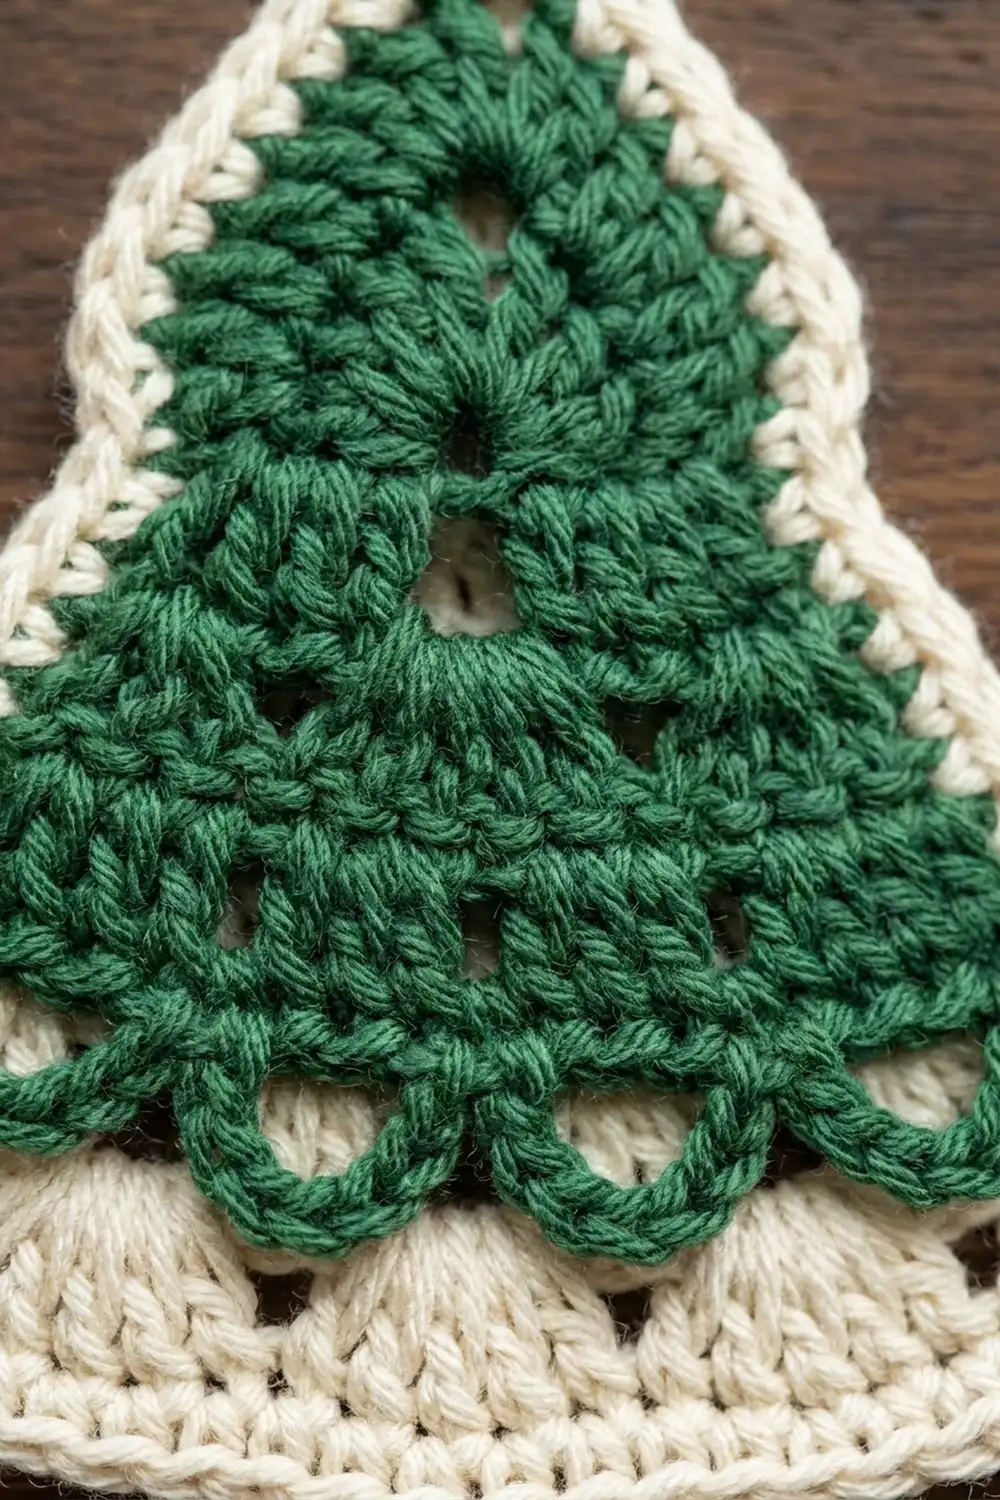
You start at the tip with a small chain ring that stays open as an eyelet. The tree is then worked in flat rows that widen as you go down. Each tier is built from four rows: a solid double crochet row, a lacy spoke row, a single crochet base row, and an arch row. The arch row is worked in front loops only, and the next tier is worked into the back loops left behind. That is what makes the frills layer.
To finish, you work one round of cream single crochet around the outline, block the piece, and add a corded hanging loop.
Finished Size and Construction
- Finished size: 4.5 in (11.4 cm) wide × 4.75 in (12.1 cm) tall, plus a 2.25 in (5.7 cm) loop
- Skill level: Advanced beginner
- Terminology: US
- Yarn weight: DK / light (3) cotton
- Hook: 3.5 mm (E-4)
- Number of pieces: 1
- Layout: a single tree with 4 stacked tiers (2 green, 2 cream)
- Piece size before border: 4.2 in (10.7 cm) wide × 4.5 in (11.4 cm) tall
- Border depth: about 0.125 in (0.3 cm) on every edge
Materials
Mercerized cotton gives the crispest arches and holds its shape on the tree. A soft cotton blend also works, but the frills will look gentler. Choose two colors with strong contrast so the tier change is clear.
- Forest green: 8 g (about 19 m)
- Cream: 12 g (about 29 m), which covers the bottom tiers, the border and the loop
- 3.5 mm (E-4) crochet hook
- Tapestry needle
- Scissors
- Blocking mat, rust-proof pins and a spray bottle
These quantities include a margin of about 25% for your gauge swatch and weaving in ends.
Abbreviations (US Terms)
- ch – chain
- sl st – slip stitch
- sc – single crochet
- dc – double crochet
- sk – skip
- st(s) – stitch(es)
- sp(s) – space(s)
- FLO – front loop only
- RS / WS – right side / wrong side
- beg – beginning
Special stitch – Arch: ch 4, sk 1 st, sc in next st. Each arch uses 2 stitches of the row below.
Unused loops: after an FLO row, the back loops of the row below are left empty. The next tier is worked into these loops, behind the arches.
Gauge and Checkpoints
- Gauge: 5 sc = 1 in (2.5 cm). One dc row is about 0.45 in (1.1 cm) tall and one sc row about 0.2 in (0.5 cm).
Use Tier 1 as your test piece. After Row 2, the sc base row (9 sts) should measure 1.8 in (4.6 cm) across.
Checkpoints (width across the base row, then height from the top of the ring):
- After Row 2: 1.8 in (4.6 cm) wide, 0.8 in (2.0 cm) tall
- After Row 6: 2.6 in (6.6 cm) wide, 1.9 in (4.8 cm) tall
- After Row 10: 3.4 in (8.6 cm) wide, 3.0 in (7.6 cm) tall
- After Row 14: 4.2 in (10.7 cm) wide, 4.1 in (10.4 cm) tall
- After Row 15: 4.5 in (11.4 cm) tall, including the bottom arches
If your test piece is off:
– Wider than 1.8 in (4.6 cm): go down a hook size.
– Narrower than 1.6 in (4.1 cm): go up a hook size.
Small differences matter here, because each tier adds about 0.4 in (1.0 cm) of width.
Pattern
Tier 1 (Green Tip)
Foundation: With green, ch 5, sl st in first ch to form a ring.
Row 1 (RS): Ch 3 (counts as dc), 6 dc in ring. Turn. (7 dc)
The dc cover only the lower part of the ring. The upper arc stays bare and forms the eyelet tip.
Row 2 (WS): Ch 1, sc in first 2 dc, 2 sc in next dc, sc in next dc, 2 sc in next dc, sc in next dc, sc in top of beg ch-3. Turn. (9 sc)
Row 3 (RS): Ch 1. Working in FLO, sc in first sc, [Arch] 4 times. Turn. (5 sc, 4 arches)
The arches are your first frill.
Tier 2 (Green)
Row 4 (WS): Fold the arches out of the way. Working in the unused loops of Row 2: ch 3 (counts as dc), dc in same st, dc in each of next 7 sts, 2 dc in last st. Turn. (11 dc)
Row 5 (RS): Ch 4 (counts as dc + ch 1), sk next dc, [dc in next dc, ch 1, sk next dc] 4 times, dc in top of beg ch-3. Turn. (6 dc, 5 ch-1 sps)
These are the lacy spokes.
Row 6 (WS): Ch 1, 2 sc in first dc, [sc in next ch-1 sp, sc in next dc] 4 times, sc in next ch-1 sp, 2 sc in 3rd ch of beg ch-4. Turn. (13 sc)
Row 7 (RS): Ch 1. Working in FLO, sc in first sc, [Arch] 6 times. (7 sc, 6 arches)
Fasten off green.
Tier 3 (Cream)
Row 8 (WS): Join cream with a sl st in the first unused loop of Row 6, at the end where Row 7 finished. Ch 3 (counts as dc), dc in same st, dc in each of next 11 sts, 2 dc in last st. Turn. (15 dc)
Row 9 (RS): Ch 4 (counts as dc + ch 1), sk next dc, [dc in next dc, ch 1, sk next dc] 6 times, dc in top of beg ch-3. Turn. (8 dc, 7 ch-1 sps)
Row 10 (WS): Ch 1, 2 sc in first dc, [sc in next ch-1 sp, sc in next dc] 6 times, sc in next ch-1 sp, 2 sc in 3rd ch of beg ch-4. Turn. (17 sc)
Row 11 (RS): Ch 1. Working in FLO, sc in first sc, [Arch] 8 times. Turn. (9 sc, 8 arches)
Tier 4 (Cream)
Row 12 (WS): Working in the unused loops of Row 10: ch 3 (counts as dc), dc in same st, dc in each of next 15 sts, 2 dc in last st. Turn. (19 dc)
Row 13 (RS): Ch 4 (counts as dc + ch 1), sk next dc, [dc in next dc, ch 1, sk next dc] 8 times, dc in top of beg ch-3. Turn. (10 dc, 9 ch-1 sps)
Row 14 (WS): Ch 1, 2 sc in first dc, [sc in next ch-1 sp, sc in next dc] 8 times, sc in next ch-1 sp, 2 sc in 3rd ch of beg ch-4. Turn. (21 sc)
Row 15 (RS): Ch 1. Working through both loops, sc in first sc, [Arch] 10 times. (11 sc, 10 arches)
Fasten off.
Why the counts work: every tier follows the same steps.
1. The solid dc row adds 2 stitches (one at each end).
2. The spoke row keeps that width, because each dc + ch-1 pair replaces 2 stitches.
3. The base row adds 2 more.
So the base rows run 9, 13, 17, 21: four more stitches per tier. Each of those counts is 1 + (arches × 2), so the arches always fit exactly.
Border
Border gauge:
– 2 sc per dc row end
– 1 sc per sc base row end
– 4 sc in each ch-4 arch
Work the middle arch rows’ ends together with their base row ends, so they don’t add extra height at the sides.
Round 1: With RS facing, join cream with a sl st in the first sc of Row 15 (a bottom corner). Ch 1, then work:
- Bottom edge: 3 sc in the same sc (corner), [4 sc in next arch, sc in next sc] 9 times, 4 sc in last arch, 3 sc in last sc (corner). (55 sc)
- First side: 18 sc along the row ends: 5 for Tier 4 (Rows 14, 13, 12 = 1 + 2 + 2), 5 for Tier 3, 5 for Tier 2, and 3 for Tier 1 (Row 2 = 1, Row 1 = 2). (18 sc)
- Top: 7 sc into the bare arc of the ring. The stitches wrap the chain, so the eyelet stays open. (7 sc)
- Second side: 18 sc, mirroring the first side. (18 sc)
Sl st in first sc to join. (98 sc total)
The bottom corner stitches are counted only in the bottom edge (55). The side counts start after them, so nothing is counted twice: 55 + 18 + 7 + 18 = 98.
Why the math works: 2 sc per dc row end matches the dc height of 0.45 in (1.1 cm) at 5 sc per inch. One sc per sc row matches 0.2 in (0.5 cm). Four sc in a ch-4 arch covers the chain without ruffling or pulling it tight.
Hanging Loop
Join cream in the 4th of the 7 top sc. Ch 28, then sl st in the same sc to form the loop. Sl st in the back bump of each of the 28 ch around the loop, then sl st in the same sc. Fasten off.
The loop should hang 2.25 in (5.7 cm) above the tip.
Final Blocking
- Weave in all ends along the matching color, especially at the green-to-cream change.
- Lay the tree RS up on a blocking mat.
- Mist it until it is evenly damp, but not dripping.
- Pin the tip first, then the two bottom corners, at 4.5 in (11.4 cm) apart.
- Check the total height of 4.75 in (12.1 cm) and keep both sides straight.
- Pin the bottom arches into even rounded points.
- Lift each middle frill so it lies flat over the tier below, and pin it lightly.
- Leave it to dry completely before you remove the pins.
- Straighten the loop with your fingers while it is still slightly damp.
Final Quality-Control Checklist
- The eyelet at the tip is open and round.
- The base rows counted 9, 13, 17 and 21 sc.
- Each middle frill lies over the next tier and doesn’t flip upward.
- Both sides are straight lines from the tip to the corners, with no bowing.
- The border has 98 sc, and both bottom corners are crisp.
- The size is 4.5 in (11.4 cm) × 4.75 in (12.1 cm).
- The loop is centered and 2.25 in (5.7 cm) tall.
- All ends are secure and hidden.
Troubleshooting
- The arches stand up instead of hanging: check that the arch rows went into the front loops and the next tier into the back loops. Blocking fixes small lifts.
- The sides wave: you may have too many border stitches along the row ends. Keep strictly to 2 sc per dc row and 1 per sc row.
- The sides pull in: your border tension is too tight. Go up a hook size for the border only.
- The spoke row is too wide: check that you skipped 1 dc between spokes. The dc count should be half the previous row plus 0.5 (6, 8, 10).
- The eyelet closed up: you worked the border sc into stitches instead of around the ring chain. Pull them out and work them into the ring.
- The tiers lean to one side: an increase is missing at one end. Recount the base row.
Care
Hand wash in cool water with mild soap, press out the water in a towel, and reshape it flat to dry. Store it flat or hanging so the frills don’t crush.
Final Notes
The measurement chain is short and easy to check:
- Tier 1 base: 9 sc, 1.8 in (4.6 cm) wide.
- Each new tier adds 4 stitches, or 0.8 in (2.0 cm) of base width, giving 13, 17 and finally 21 sc at 4.2 in (10.7 cm).
- The unbordered tree is 4.5 in (11.4 cm) tall.
- The 98-stitch cream border adds about 0.125 in (0.3 cm) on each edge, for a finished size of 4.5 in (11.4 cm) × 4.75 in (12.1 cm).
- The loop adds 2.25 in (5.7 cm).
Check the base row widths as you go, and each tier will sit neatly over the one below. Make one for every branch of your tree.
Happy crocheting!