

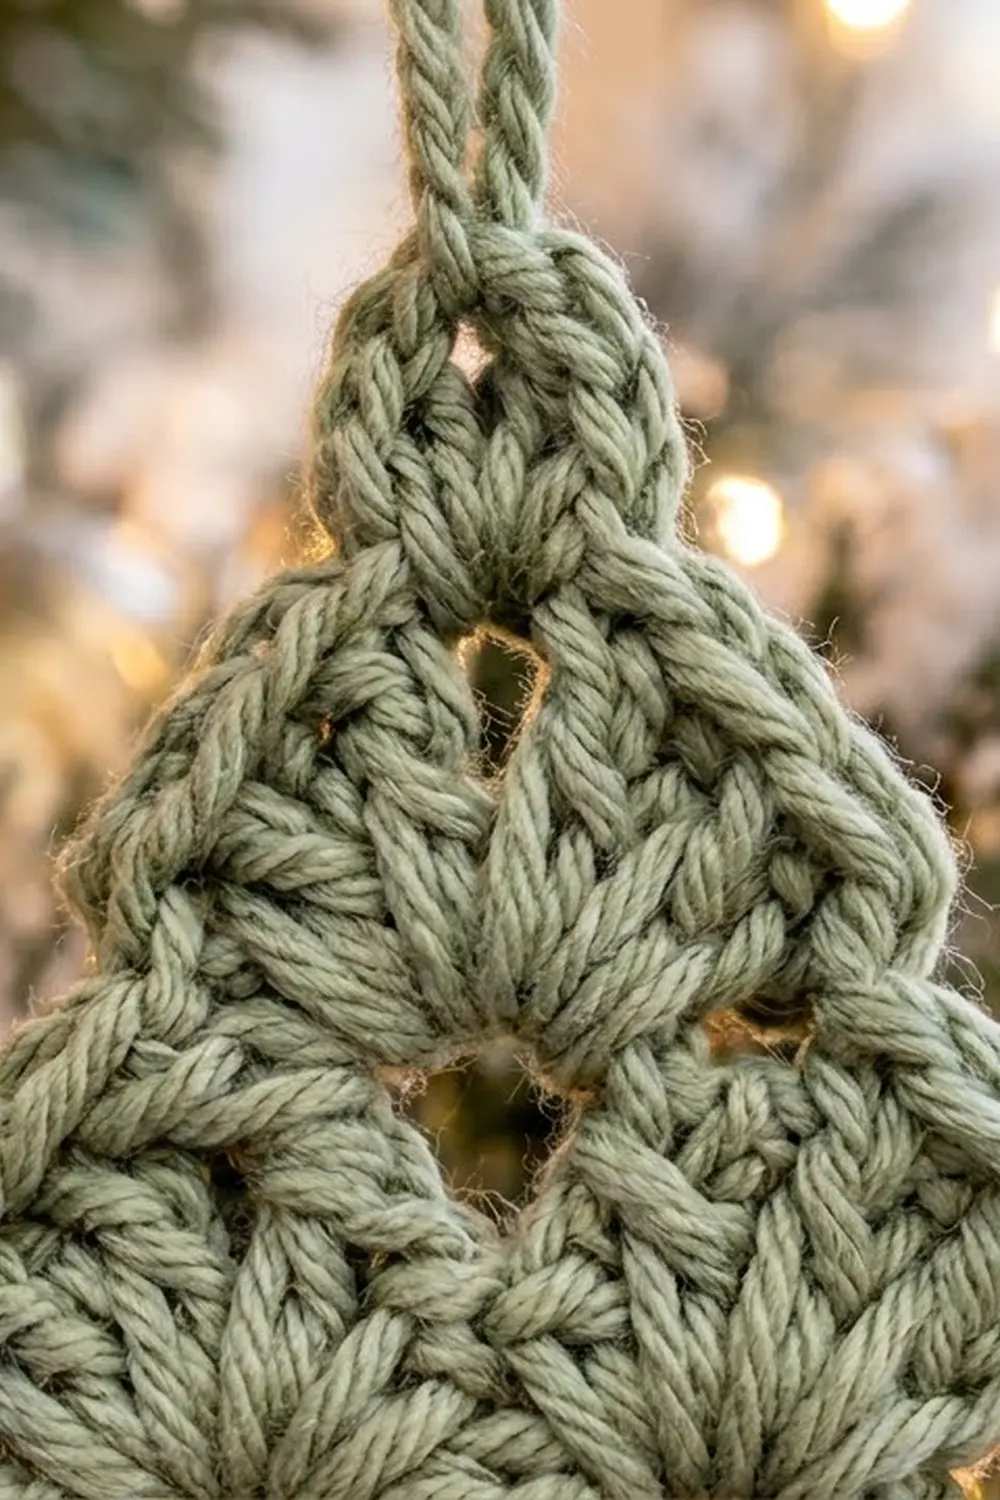
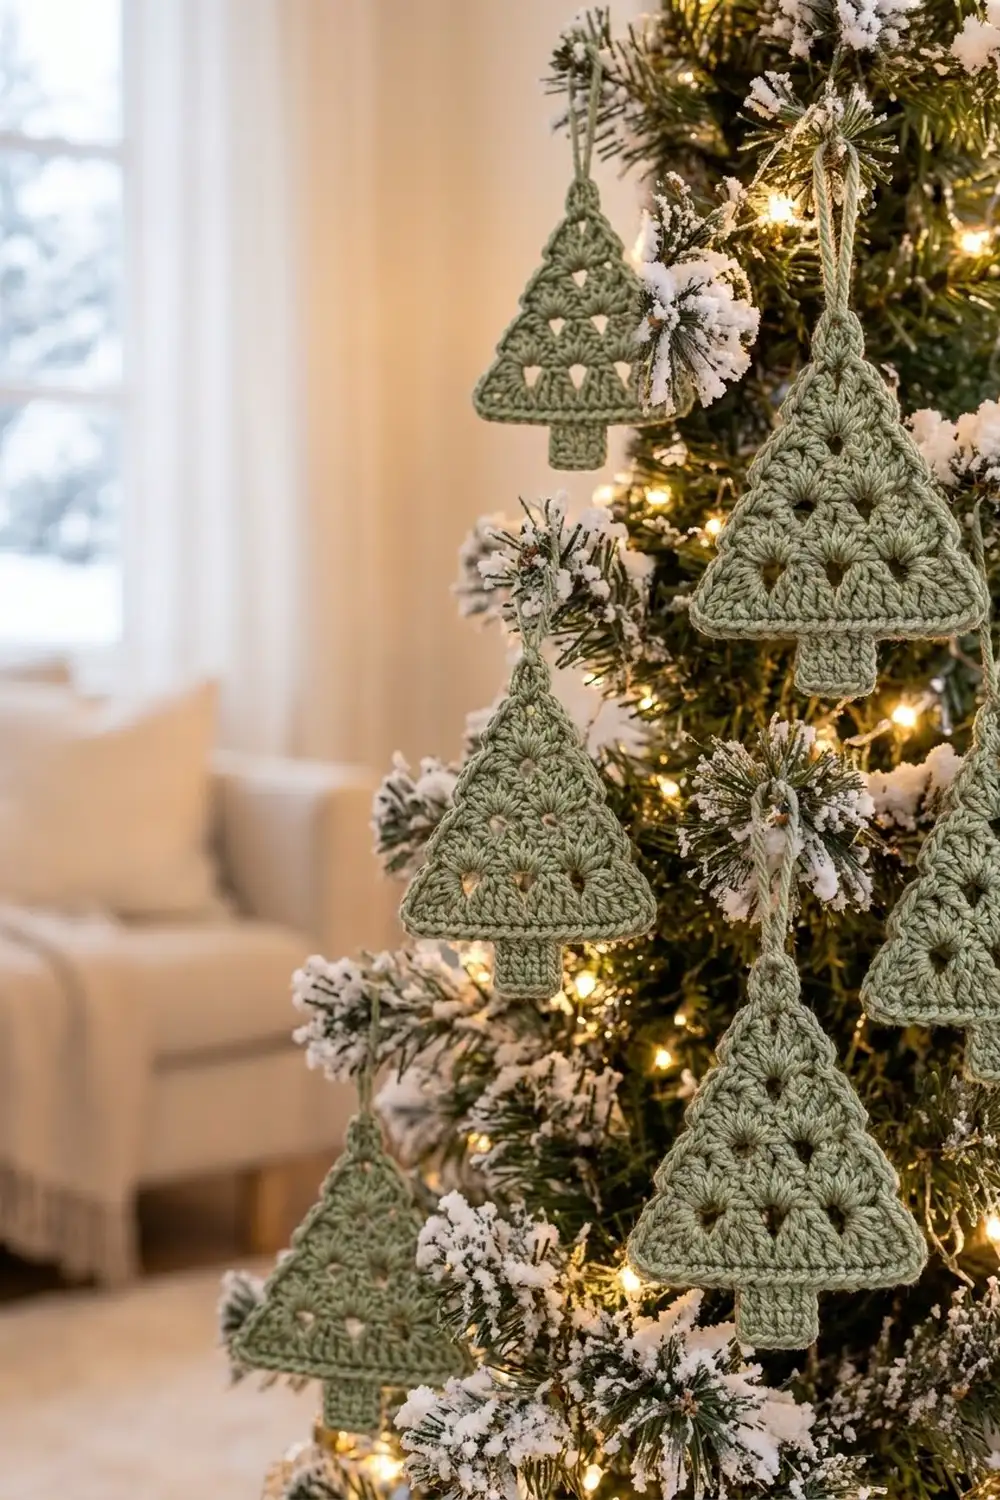
This little sage green tree is a flat, one-piece ornament made from tiers of fan-shaped shells. It has a single fan at the top and widens to four fans at the base. Small triangular openings between the fans let tree lights glow through, and a neat single crochet rim keeps the edges crisp.
The pattern uses a single color for a calm, modern, Scandinavian-style look. Sage green suits snowy greenery, gold baubles and warm white lights, but any solid color will work. All instructions use US crochet terms.
The finished ornament measures 4.4 in (11.2 cm) wide and 4.2 in (10.7 cm) tall including the trunk. The hanging loop adds about 2 in (5.1 cm).
Construction is simple. You crochet the triangle from the base up in four shell rows, each with one fewer fan than the last. Then you work one round of single crochet border around the triangle, add a 7-stitch trunk at the bottom center, and finish with a chain loop at the tip. There is no sewing apart from weaving in ends.
Finished Size and Construction
- Finished size: 4.4 in (11.2 cm) wide x 4.2 in (10.7 cm) tall, excluding loop
- Skill level: Easy
- Terminology: US crochet terms
- Yarn weight: Sport (CYC 2)
- Hook: 3.5 mm (E/4)
- Number of pieces: 1
- Layout: Single ornament, no joining
- Triangle before border: 4.0 in (10.2 cm) wide x 2.8 in (7.1 cm) tall
- Border depth: 0.2 in (0.5 cm) on every side
- Triangle after border: 4.4 in (11.2 cm) wide x 3.2 in (8.1 cm) tall
- Trunk: 1.2 in (3.0 cm) wide x 1.0 in (2.5 cm) long
Materials
Yarn: Use a smooth sport-weight cotton or cotton blend. Cotton gives the shells clear stitch definition and blocks flat, which matters for a hanging ornament. Avoid fuzzy or very splitty yarns because they hide the openings.
- Sage green: 10 g, about 30 m (33 yd)
This quantity includes a margin of roughly 30% for your gauge swatch, tails and the hanging loop. One ornament uses about 7 g.
Tools:
- 3.5 mm (E/4) crochet hook
- Tapestry needle
- Scissors
- Stitch marker
- Rust-proof pins and a blocking mat or folded towel
- Spray bottle with water
- Ruler or tape measure
Abbreviations (US Terms)
- ch – chain
- sl st – slip stitch
- sc – single crochet
- tr – treble crochet (yarn over twice, insert hook, pull up a loop, [yarn over, pull through 2 loops] 3 times)
- st(s) – stitch(es)
- sp – space
- RS – right side
- rep – repeat
Special stitch:
- Shell: 5 tr worked into the same stitch. The 3rd tr is the center tr of the shell.
Gauge and Checkpoints
Gauge: 6 sc and 6 rows = 1 in (2.5 cm) in sc rows. One tr row in the shell pattern measures 0.7 in (1.8 cm) tall. One shell repeat (shell plus anchor sc) is 1.0 in (2.5 cm) wide.
Make one complete ornament first and treat it as your test piece. A 2 in (5.1 cm) square of sc (12 sts x 12 rows) is a quick pre-check, but the shells are the real test.
Measurement checkpoints:
- After Row 1: 4.0 in (10.2 cm) wide and 0.7 in (1.8 cm) tall
- After Row 2: 3 shells span 3.0 in (7.6 cm); total height is 1.4 in (3.6 cm)
- After Row 3: 2 shells span 2.0 in (5.1 cm); total height is 2.1 in (5.3 cm)
- After Row 4: 1 shell spans 1.0 in (2.5 cm); total height is 2.8 in (7.1 cm)
- After border: 4.4 in (11.2 cm) x 3.2 in (8.1 cm)
- After trunk: total height 4.2 in (10.7 cm)
A difference of 0.1 in (0.3 cm) is fine. If Row 1 is wider than 4.2 in (10.7 cm), go down half a hook size. If it is narrower than 3.8 in (9.7 cm), go up half a hook size. If the width is right but the rows are short, try pulling up the first loop of each tr a little taller.
Triangle
Foundation: Ch 26.
Row 1 (RS): Sc in 2nd ch from hook. Skip 2 ch, shell in next ch, skip 2 ch, sc in next ch; rep from * 3 more times. Turn.
(4 shells, 5 sc = 25 sts)*
The sc stitches land in chains 2, 8, 14, 20 and 26, counting from the hook, and the shells land in chains 5, 11, 17 and 23. The last sc goes into the final chain.
Row 2: Ch 1 (does not count as a st). Sl st in first sc, sl st in next 2 tr (3 sl sts total). Sc in next tr, which is the center tr of the first shell. Ch 2, shell in next sc, ch 2, sc in center tr of next shell; rep from * 2 more times. Turn.
(3 shells, 4 sc = 19 sts, plus 6 ch-2 sps)*
Each new shell sits in the sc between two lower shells. Each anchor sc sits on top of a lower shell’s center. Because the ch-2 bridges lift the new shell away from the lower fabric, a small triangular opening forms beside each anchor. These are the tree’s openings.
Row 3: Ch 1. Sl st in first sc, sl st in ch-2 sp, sl st in next 2 tr (4 sl sts total). Sc in center tr of the same shell. Ch 2, shell in next sc, ch 2, sc in center tr of next shell; rep from * 1 more time. Turn.
(2 shells, 3 sc = 13 sts, plus 4 ch-2 sps)*
Row 4: Ch 1. Sl st in first sc, sl st in ch-2 sp, sl st in next 2 tr (4 sl sts total). Sc in center tr of the same shell. Ch 2, shell in next sc, ch 2, sc in center tr of next shell.
(1 shell, 2 sc = 7 sts, plus 2 ch-2 sps)
Fasten off, leaving a 6 in (15.2 cm) tail. The single shell in Row 4 is the treetop fan.
Why the shape works: Every row starts and ends on the center tr of the outer shells below. That moves the edge inward by half a shell, 0.5 in (1.3 cm), on each side per row, while the row rises 0.7 in (1.8 cm). The shell count drops by exactly one each row: 4, 3, 2, 1. This gives straight, even slopes.
Border
Border gauge: 6 sc = 1 in (2.5 cm) along the base, with corners worked as 3 sc in one stitch.
Path along each slope: If you trace one side from the tip down, the edge zigzags through the same 4 positions in every tier: the 2 outer tr of a shell, the ch-2 sp, and the anchor sc. On the side where a row began, these positions are covered by sl sts, so you work into the sl sts instead. Either way, there are 4 positions per tier.
Round 1: With RS facing, join yarn in the center tr of the Row 4 shell (apex). Ch 1, 3 sc in same st (apex corner).
Right slope: Sc in each of the next 2 tr, sc in ch-2 sp, sc in anchor sc (tier 4: 4 sc). Sc in the 2 outer tr of the Row 3 shell, sc in ch-2 sp, sc in anchor sc (tier 3: 4 sc). Sc in the 2 outer tr of the Row 2 shell, sc in ch-2 sp, sc in anchor sc (tier 2: 4 sc). Sc in the 2 outer tr of the Row 1 shell (tier 1: 2 sc).
(14 sc between corners)
Base corner: 3 sc in the end sc of Row 1.
Base: Working into the free loops of the foundation chain, sc in each of the next 23 ch (chains 25 back to 3 if the corner was chain 26, or chains 3 to 25 if it was chain 2).
Base corner: 3 sc in the end sc of Row 1 at the other end.
Left slope: Work up the side through the same positions in reverse: 2 sc for tier 1, then 4 sc for each of tiers 2, 3 and 4, working into sl sts wherever the row began.
(14 sc between corners)
Join with sl st to first sc. Fasten off.
(60 sc)
Counts per side (each includes the center sc of its two corner groups):
- Each slope: 1 + 14 + 1 = 16 sc
- Base: 1 + 23 + 1 = 25 sc
Why the math works: The sides total 16 + 16 + 25 = 57. Since each corner center sc belongs to two sides, subtract the 3 shared corners to get 54. Each 3-sc corner group adds 2 extra stitches, so 54 + 6 = 60 sc. The base has exactly one sc per foundation stitch, so it stays at 4.0 in (10.2 cm) plus the border. On the slopes, 4 sc per 0.7 in (1.8 cm) tier keeps the edge flat without ruffling or cupping.
Trunk
With RS facing, find the 23 single base sc between the two base corner groups. Skip the first 8 and join yarn in the 9th sc.
Row 1: Ch 1, sc in same st and in next 6 sc. Turn. (7 sc)
This leaves 8 sc unworked on each side of the trunk, so 8 + 7 + 8 = 23 and the trunk is centered.
Rows 2–6: Ch 1, sc in each st across. Turn. (7 sc)
Fasten off. The trunk measures 1.2 in (3.0 cm) wide and 1.0 in (2.5 cm) long.
Hanging Loop
Join yarn in the center sc of the apex corner group. Ch 25, sl st in the same apex sc to form a loop. Sl st in each ch around the loop, then sl st into the apex sc again. Fasten off.
(25 sl sts)
The slip stitches turn the chain into a firm cord, so the loop doesn’t stretch under the ornament’s weight. The loop hangs about 2 in (5.1 cm) above the tip.
Final Blocking
- Weave in all ends along the border or the trunk edges, not across the openings.
- Lightly mist the ornament until it is evenly damp, not soaking.
- Lay it RS up on the blocking mat.
- Pin the apex and both base corners first, making the base 4.4 in (11.2 cm) wide and the triangle 3.2 in (8.1 cm) tall.
- Pin each slope straight between the corners. Lay a ruler along the edge to check.
- Open each triangular opening gently with a fingertip and pin it if needed.
- Pin the trunk square at 1.2 in (3.0 cm) x 1.0 in (2.5 cm).
- Straighten the loop and leave everything to dry completely.
Final Quality-Control Checklist
- Shells run 4, 3, 2, 1 from the base to the tip.
- Each shell has 5 tr.
- Every anchor sc sits on a lower shell’s center tr.
- Openings show clearly between the fans.
- The border has 60 sc: 16 per slope and 25 along the base, counting corners.
- All three corners are sharp and lie flat.
- The trunk has 7 sc across and 6 rows, with 8 base sc free on each side.
- The size is 4.4 in (11.2 cm) x 4.2 in (10.7 cm), excluding the loop.
- The loop is firm and centered at the apex.
- No ends show on the right side.
Troubleshooting
- The triangle is too short and wide: Your tr rows are short. Pull up the first loop taller, or go up half a hook size.
- Shells ruffle on Row 1: The foundation chain is too tight. Chain loosely or use a hook one size larger for the chain only.
- Openings are hard to see: Make sure you are working ch 2 on both sides of each shell, not ch 1.
- Slopes are wavy: Recount to 4 sc per tier. Extra stitches cause ripples, and missing ones pull the edge in.
- Base cups upward: You may have skipped foundation chains. There should be 23 sc between the corner groups.
- Trunk is off-center: Count again so 8 base sc stay free on each side.
- The ornament leans: Re-block with the apex pinned directly above the trunk.
Care
Hand wash in cool water, press out the water in a towel, and dry flat. Re-pin to shape if needed. Store flat between tissue paper so the shells keep their shape.
Final Notes
The measurement chain is short. Row 1 sets the 4.0 in (10.2 cm) base, and each tr row adds 0.7 in (1.8 cm), for a 2.8 in (7.1 cm) triangle. The one-round border adds 0.2 in (0.5 cm) all around, giving 4.4 in (11.2 cm) x 3.2 in (8.1 cm). The trunk adds 1.0 in (2.5 cm), for a total height of 4.2 in (10.7 cm). If Row 1 is right, everything after it should be too.
Make one, check your numbers, and then make as many as you like for your tree, gift tags or a mantel display.
Happy crocheting!