

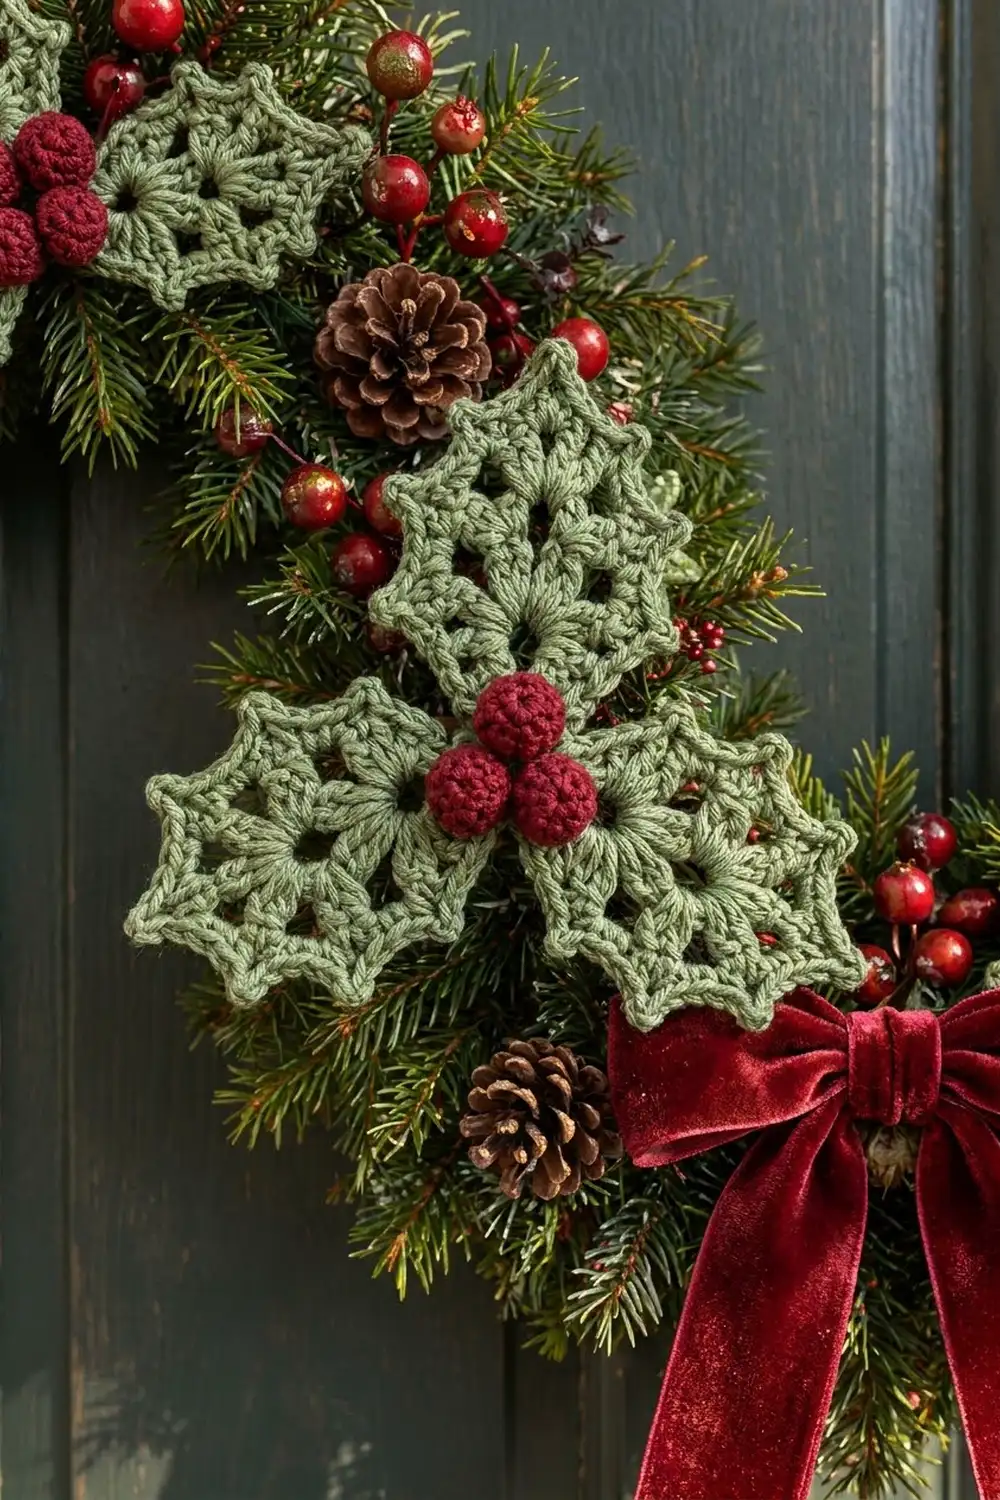
This holly cluster is a small, textured motif made of three lacy leaves and three plump berries. The leaves are sage green cotton and the berries are deep cranberry red. Together they give a soft, vintage Christmas look rather than bright primary colors.
Each leaf is a rounded hexagon with a solid center, six double crochet fans and a ring of small holes. A single crochet edge adds six sharp points, so the outline reads as holly even though the leaf is worked in the round. The berries are tightly worked single crochet balls, firmly stuffed so their stitches look pebbly.
The pattern uses US crochet terms. The finished cluster measures about 7.25 in (18.4 cm) wide and 7 in (17.8 cm) tall. Each leaf is 3.75 in (9.5 cm) point to point, and each berry is about 1 in (2.5 cm) across.
Construction is simple. You crochet three leaves and add the pointed edging to each one. Then you sew the leaves together point to point at the center, make three stuffed berries and sew them over the join. You can use the finished cluster as a gift-tag topper, a tree ornament or an appliqué.
Finished Size and Construction
- Finished size: 7.25 in (18.4 cm) wide x 7 in (17.8 cm) tall
- Skill level: Easy-intermediate
- Terminology: US crochet terms
- Yarn weight: DK (weight 3) cotton or cotton blend
- Hooks: 3.5 mm (E-4) for leaves, 3.0 mm for berries
- Number of pieces: 6 (3 leaves, 3 berries)
- Layout: 3 leaves in a trefoil, 120 degrees apart, with the berries in a triangle at the center
- Leaf size: 3.75 in (9.5 cm) point to point
- Leaf size before border: 3 in (7.6 cm) across
- Border depth: about 3/8 in (1.0 cm) at each point
Materials
Choose a smooth DK-weight cotton, either mercerized or matte. Cotton holds the points crisply, shows the holes clearly and blocks flat. Acrylic also works, but the points tend to curl and the holes close up more. Pick a muted sage for the leaves and a dark cranberry for the berries; bright green and red make the piece look busier.
- Color A, sage green: 25 g, about 60 m (66 yd)
- Color B, cranberry red: 10 g, about 24 m (26 yd)
These quantities include a comfortable margin over what one cluster actually uses.
Tools:
- 3.5 mm (E-4) crochet hook
- 3.0 mm crochet hook
- Tapestry needle
- Small amount of polyester fiberfill
- Scissors
- Stitch marker
- Rustproof pins and a blocking mat or folded towel
- Spray bottle with water
Abbreviations (US Terms)
- ch: chain
- sl st: slip stitch
- sc: single crochet
- hdc: half double crochet
- dc: double crochet
- sc2tog: single crochet 2 together
- MR: magic ring
- sp: space
- st(s): stitch(es)
- inc: 2 sc in the same st
Special stitch – Point: Ch 4, sl st in 2nd ch from hook, sc in next ch, hdc in next ch. This makes a short tapered spike, about 3/8 in (1.0 cm) long, that stands out from the edge. A Point does not count as a stitch in the round’s sc total.
Gauge and Checkpoints
Make one complete leaf before you commit to the full cluster. Gauge is checked by diameter, not with a flat swatch, because the leaf is worked in the round. Measure across the widest point with the piece lying flat and relaxed, not stretched.
- After Round 1: 1.25 in (3.2 cm) across
- After Round 2: 2.25 in (5.7 cm) across
- After Round 3: 3 in (7.6 cm) across
- After Round 4 (border): 3.75 in (9.5 cm) point to point
- Berry: 1 in (2.5 cm) across after stuffing
If your leaf is too big, go down a half or full hook size. If it is too small, go up a size. If Round 2 ruffles, your dc are too loose; if it cups, they are too tight. Adjust your hook before Round 3, because the border cannot fix a leaf that is already the wrong size.
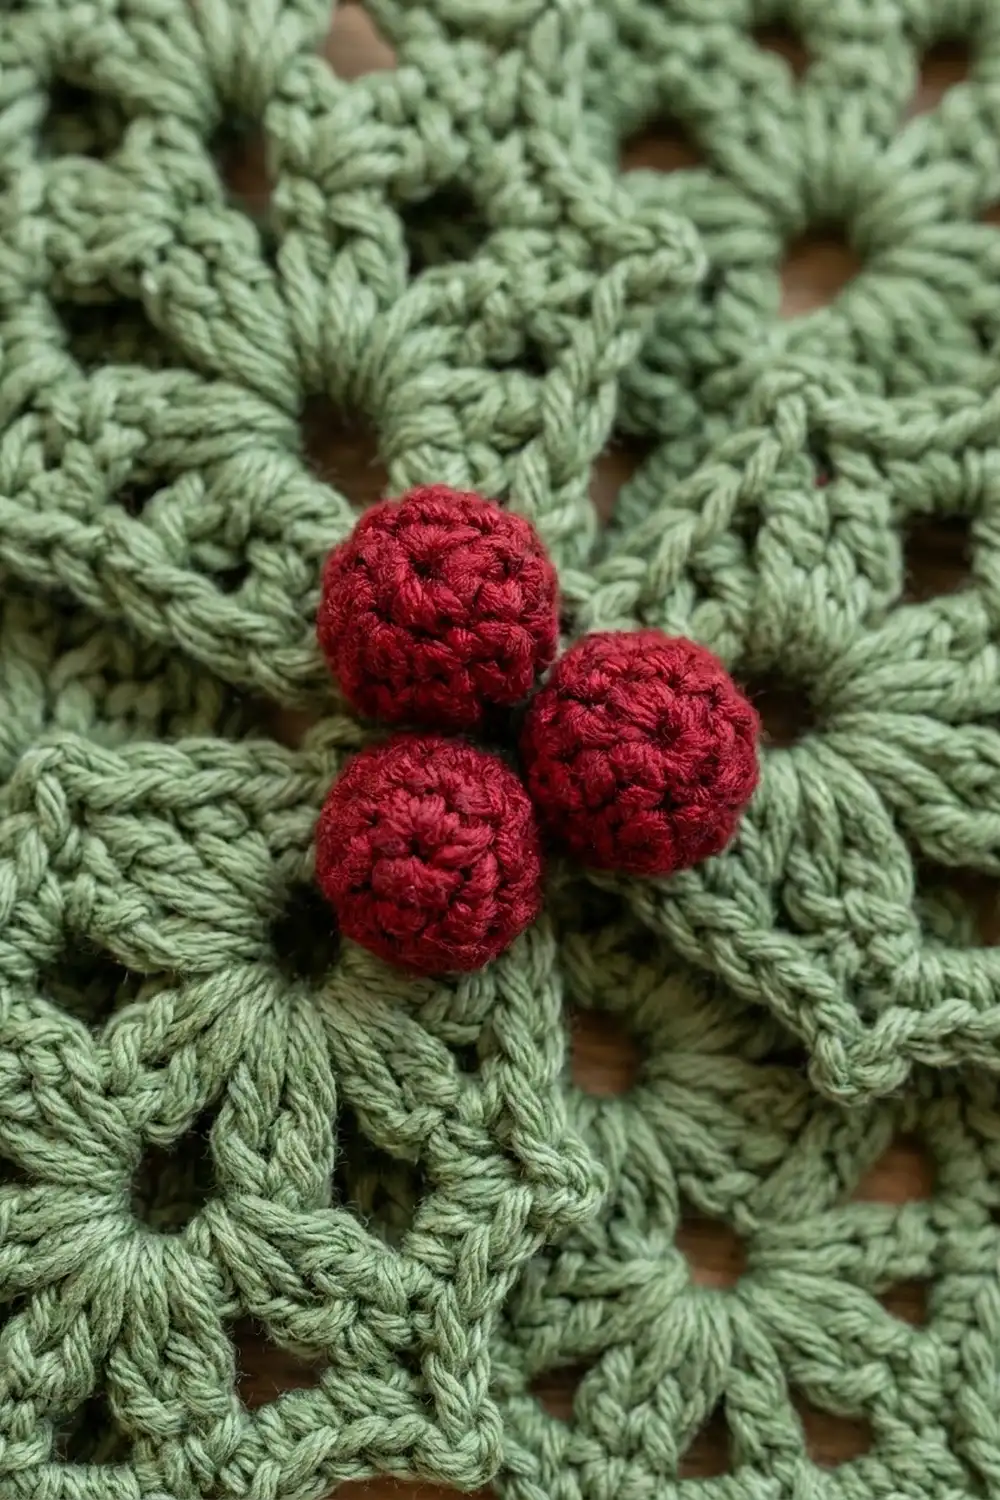
Leaf (make 3)
Use the 3.5 mm hook and Color A.
Round 1: MR, ch 3 (counts as dc), 11 dc in ring, sl st to top of ch-3. Pull the ring tight. (12 dc)
Round 2 (growth): Ch 3 (counts as dc), dc in same st, 2 dc in next st, ch 2; 2 dc in each of next 2 sts, ch 2; repeat from * 4 more times. Sl st to top of beginning ch-3. (24 dc in 6 groups of 4, plus 6 ch-2 sps)*
This round sets the six sides. Each 4-dc group becomes a fan, and each ch-2 sp marks where a point will go.
Round 3 (conversion): Ch 3 (counts as dc), dc in next 3 dc, ch 2, sc in next ch-2 sp, ch 2; *dc in next 4 dc, ch 2, sc in next ch-2 sp, ch 2; repeat from * 4 more times. Sl st to top of beginning ch-3.
Count: 24 dc worked 1 per existing dc + 6 sc added in the spaces = 30 sts, plus 12 ch-2 sps.
The ch-2 arcs on each side of each sc open into the small holes between the fans, giving 12 holes in total. Measure now: the leaf should be 3 in (7.6 cm) across.
Do not fasten off. Continue straight into the border.
Make All Pieces
You need:
- Color A, sage green: 3 leaves, each finished with the Round 4 border
- Color B, cranberry red: 3 berries
Layout grid, seen from the front (P = base point at the center, B = berry):
          [ Leaf 1 ]
              |
              P
           B     B
    P        B        P
[ Leaf 2 ]       [ Leaf 3 ]
Leaf 1 points straight up. Leaves 2 and 3 point down-left and down-right. All three base points meet at the center, under the berries.
Border (Leaf Edging, Round 4)
Work the border on each leaf separately, before joining. It does not go around the joined cluster, so there are no seam stitches to account for.
Border gauge: The 10 sc on one side measure about 1.75 in (4.4 cm), from the base of one Point to the base of the next.
Round 4 (trim): Ch 1, sc in same st as join and in next 3 dc, 2 sc in next ch-2 sp, (sc, Point, sc) in next sc, 2 sc in next ch-2 sp; *sc in next 4 dc, 2 sc in next ch-2 sp, (sc, Point, sc) in next sc, 2 sc in next ch-2 sp; repeat from * 4 more times. Sl st to first sc. Fasten off. On one leaf only, leave a 10 in (25.4 cm) tail for joining; weave in the tails on the other two.
Count per side: 4 sc (over the dc) + 2 sc (first ch-2 sp) + 2 sc (on either side of the Point) + 2 sc (second ch-2 sp) = 10 sc and 1 Point per side.
Round total: 6 sides x 10 sc = 60 sc, plus 6 Points.
As a conversion count: 30 sc worked 1 per existing st (24 over the dc, 6 into the sc) + 30 extra sc (24 in the twelve ch-2 sps, plus the 6 second sc at the Points) = 60 sc.
Why the math works: Each side of Round 3 has exactly 4 dc, 2 ch-2 sps and 1 sc. The edging puts 1 sc in each dc, 2 sc in each ch-2 sp and 2 sc in the center sc. The 2 sc on either side of each Point are that point’s only corner stitches, and they are counted once, within that side’s 10. Because the Point is a separate chain spike, it adds length outward without adding stitches to the round. The edge stays flat while the outline becomes spiky.
Check: each leaf should measure 3.75 in (9.5 cm) point to point.
Berry (make 3)
Use the 3.0 mm hook and Color B. Work in continuous rounds and mark the first st of each round.
Round 1: MR, 6 sc in ring. (6 sc)
Round 2: Inc in each st around. (12 sc)
Round 3: Sc in next st, inc; repeat from * 5 more times. (18 sc)*
Rounds 4–5: Sc in each st around. (18 sc in each round)
Round 6: Sc in next st, sc2tog; repeat from * 5 more times. (12 sc)*
Stuff firmly so the berry is round and the stitches look pebbly.
Round 7: Sc2tog 6 times. (6 sc)
Fasten off, leaving a 10 in (25.4 cm) tail. Thread the tail through the front loops of the last 6 sts, pull the opening closed and keep the tail for sewing.
Check: each berry should be 1 in (2.5 cm) across.
Joining
Method: Whipstitch with the tapestry needle and Color A, right sides facing up, working through back loops only. This gives a flat seam that is almost invisible from the front.
Step 1 – Choose base points. On each leaf, pick one Point as the base point. It will sit at the center. Choose the neatest-looking points for the outer tips, because the base points will be hidden.
Step 2 – Arrange. Lay the leaves flat in the trefoil shown in the layout grid. The three base points should touch at the center, with the leaves 120 degrees apart.
Step 3 – Join the points. Use the tail you left on one leaf. Pass the needle through the tip of each base point and draw the three tips together. Make two passes for strength.
Step 4 – Sew stitch to stitch. Whipstitch the last 2 sc before Leaf 1’s base point to the first 2 sc after Leaf 2’s base point, one stitch to one stitch. Repeat between Leaf 2 and Leaf 3, and between Leaf 3 and Leaf 1. That makes 3 seams of 2 sts each, 6 whipstitches in total. The remaining 8 sc on each of those sides stay free, which keeps the scalloped gaps between the leaves.
Tension: Pull each whipstitch just snug. If the seam puckers, or the leaves start to cup toward each other, loosen it. The cluster must lie flat before you add the berries.
Size checkpoint: The joined leaves should measure 7.25 in (18.4 cm) wide and 7 in (17.8 cm) tall. If the cluster is wider, the base points are too far apart; pull the center tighter.
Step 5 – Add the berries. Place the three berries in a tight triangle over the center so they touch each other and fully cover the joined base points. Sew each berry down with its own tail, making 4–5 small stitches through the base of the berry and the leaf underneath. Stitch through the sides of the berries where they touch to lock them together. Weave in all ends on the back.
Final Blocking
- Mist the cluster lightly with water until it is damp, not soaked. Keep water off the berries if you can.
- Lay it face down on a blocking mat or folded towel.
- Pin the center first. Then pin the tip of each leaf so the trefoil is even, with the leaves 120 degrees apart.
- Pin out the 15 remaining free Points (5 per leaf), pulling each one straight out from the center of its leaf.
- Check the size: 7.25 in (18.4 cm) wide x 7 in (17.8 cm) tall.
- Gently open each hole in Round 3 with a fingertip.
- Let the cluster dry completely, at least 6–8 hours, before you unpin it.
- Turn it face up and plump the berries with your fingers.
Final Quality-Control Checklist
- Each leaf has 6 groups of 4 dc and 12 small holes (2 per side)
- Each leaf border has 60 sc and 6 Points
- Each leaf measures 3.75 in (9.5 cm) point to point
- All three base points meet tightly at the center
- Seams lie flat with no puckering
- Berries are round, firmly stuffed and 1 in (2.5 cm) across
- Berries completely hide the center join
- The cluster measures 7.25 in (18.4 cm) x 7 in (17.8 cm)
- All ends are woven in on the back
Troubleshooting
There is a hole in the middle of Round 1. Pull the magic ring tighter before joining, then weave the tail through the ring once more.
The leaf cups like a bowl. Your dc are too tight. Go up a hook size or loosen your yarn-over tension.
The leaf ruffles. Your dc are too loose. Go down a hook size.
The points flop over. Work the Point chains more firmly and pin them straight during blocking. Cotton holds points better than acrylic.
Round 4 has the wrong stitch count. Recount one side: it must be 4 + 2 + 2 + 2 = 10 sc. The most common mistake is working only 1 sc into a ch-2 sp.
Stuffing shows through the berry. Use the 3.0 mm hook or a smaller one. Keep the stuffing firm but not overpacked.
The cluster won’t lie flat. Undo the center seams, rejoin with lighter tension and block again.
Care
Spot clean with a damp cloth, or hand wash in cool water and lay flat to dry, reshaping the points while they are damp. Do not tumble dry.
Final Notes
The whole cluster rests on a short chain of measurements. Round 2 reaches 2.25 in (5.7 cm), Round 3 reaches 3 in (7.6 cm), and the pointed border brings each leaf to 3.75 in (9.5 cm) point to point. Three leaves joined at their base points make a 7.25 in (18.4 cm) x 7 in (17.8 cm) trefoil, and three 1 in (2.5 cm) berries finish the center. Check each stage as you go, and the final size will follow.
Happy crocheting!