

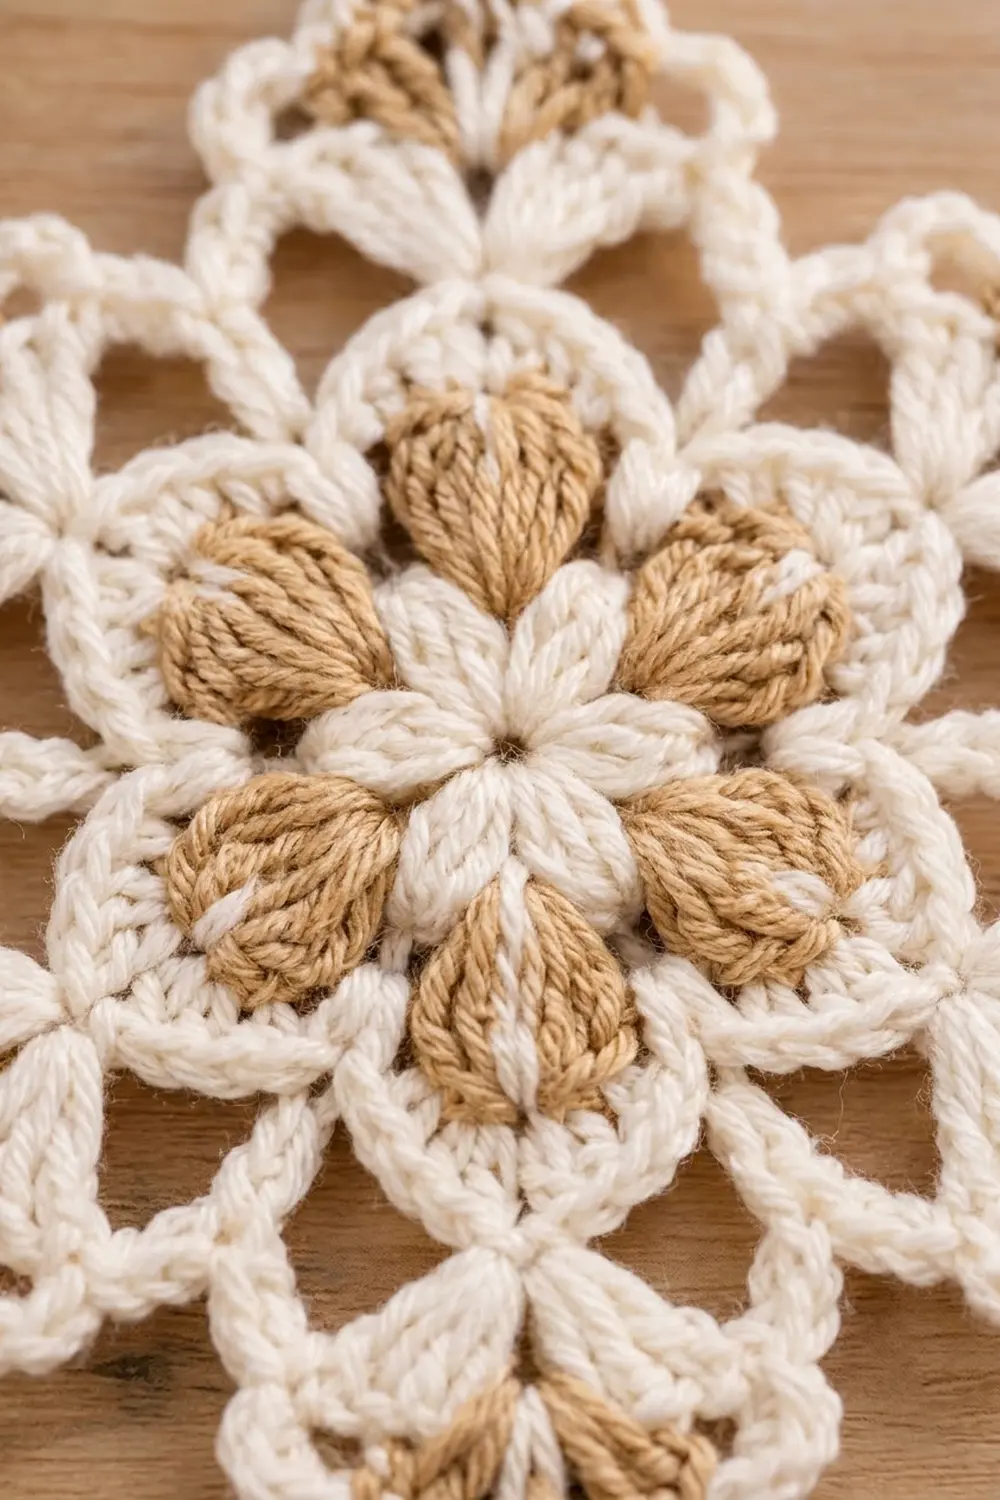
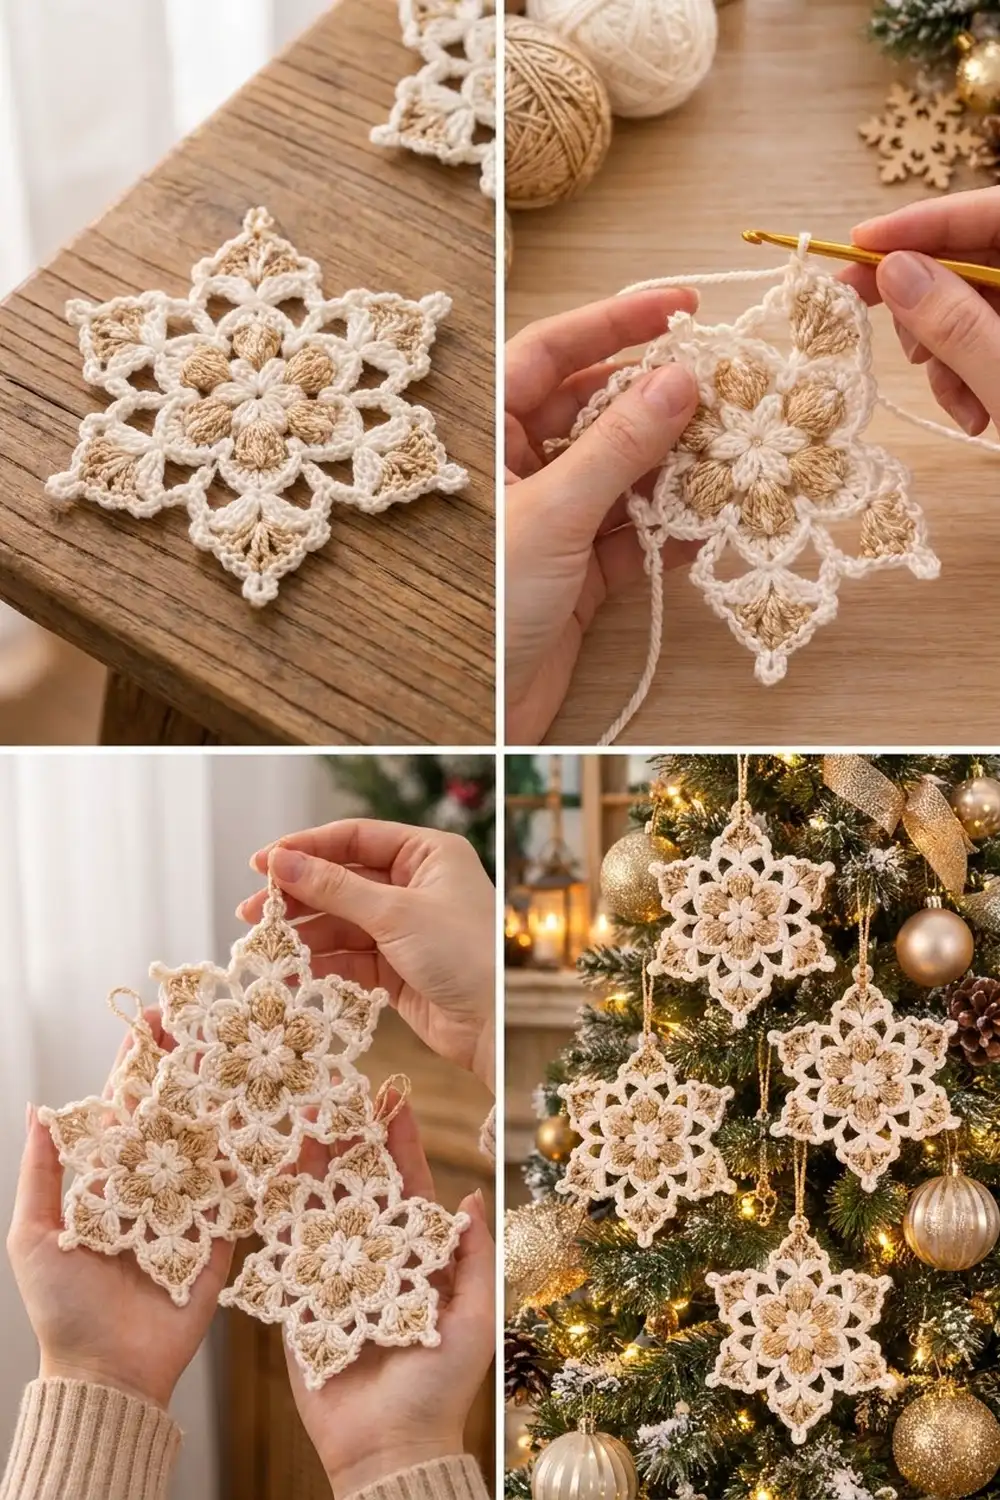
The Golden Frost Snowflake is a six-pointed ornament in creamy white and soft tan. It has a small cream flower at the center, a ring of plump tan puff stitches, and six lacy points, each filled with a tan fan. A neat cream single crochet outline runs around the whole edge, so the snowflake keeps its shape on a tree, on a gift tag, or in a window.
The look is warm, rustic, and a little vintage. It’s a good use for small amounts of cotton or cotton-blend DK yarn, and it suits a natural, neutral holiday palette.
The pattern uses US crochet terms. The finished ornament measures about 5.5 in (14.0 cm) from point to point and about 4.25 in (10.8 cm) from valley to opposite valley.
You make it as one piece in six joined rounds: a cluster center, a puff ring, a cream outline, an openwork shell round, tan tip fans, and a cream edging with picots. Then you add a small hanging loop at one point and block the piece.
Finished Size and Construction
- Finished size: 5.5 in (14.0 cm) point to point; 4.25 in (10.8 cm) valley to valley
- Skill level: Easy-intermediate (clusters, puff stitches, color changes)
- Terminology: US crochet terms
- Yarn weight: DK (#3), cotton or cotton blend
- Hook: 4.0 mm (G-6)
- Number of pieces: 1 (single motif)
- Layout: Single six-pointed snowflake, worked in the round
- Piece size: 5.5 in (14.0 cm) point to point
- Size before border (after Round 5): 5 in (12.7 cm) point to point
- Border depth: about 0.25 in (0.6 cm) on each side, adding 0.5 in (1.3 cm) to the total width
Materials
Yarn: Use a smooth DK cotton or cotton blend with good stitch definition. Mercerized cotton gives the crispest points, and soft cotton blends give a cozier, slightly fuzzier look. Choose two colors with clear contrast, such as a warm ivory and a light camel.
- Color A (cream): about 8 g, roughly 18 m
- Color B (tan): about 4 g, roughly 9 m, which includes the hanging loop
These quantities include a margin of about 20% for swatching and weaving in ends. A single 50 g ball of each color is enough for several ornaments.
Tools:
– 4.0 mm (G-6) crochet hook
– Tapestry needle
– Scissors
– Stitch marker
– Blocking mat or foam board and rust-proof pins
– Spray bottle with water (optional: light spray starch)
Abbreviations (US Terms)
- ch: chain
- sl st: slip stitch
- sc: single crochet
- sc2tog: single crochet 2 together
- dc: double crochet
- sp: space
- st(s): stitch(es)
- cl: cluster
- MR: magic ring
Special stitches:
- 2-dc cluster (2-dc cl): (Yarn over, insert hook, pull up a loop, yarn over, pull through 2 loops) twice, then yarn over and pull through all 3 loops on hook.
- 3-dc cluster (3-dc cl): (Yarn over, insert hook, pull up a loop, yarn over, pull through 2 loops) 3 times, then yarn over and pull through all 4 loops on hook.
- Puff stitch (puff): (Yarn over, insert hook, pull up a loop to about 0.5 in / 1.3 cm tall) 4 times, which leaves 9 loops on the hook. Yarn over and pull through all 9 loops, then ch 1 to close. The closing ch 1 is the top of the puff.
- Beginning puff: Ch 2, then work the puff as above. The ch 2 does not count as a stitch.
Gauge and Checkpoints
Gauge is not critical for an ornament, but it controls the final size and how sharp the points look. Make one snowflake first and check it against the measurements below before you make a set.
Base gauge: Round 1 measures 1.25 in (3.2 cm) across.
Checkpoints (measured flat, before blocking):
| After Round | Measurement |
|---|---|
| 1 | 1.25 in (3.2 cm) across |
| 2 | 2.25 in (5.7 cm) across the puff tips |
| 3 | 2.75 in (7.0 cm) across |
| 4 | 4 in (10.2 cm) point to point |
| 5 | 5 in (12.7 cm) point to point |
| 6 | 5.5 in (14.0 cm) point to point |
Too big? Go down to a 3.5 mm hook, or tighten your chains. Loose chain arches in Round 4 are the most common cause of oversizing.
Too small or cupping? Go up to a 4.5 mm hook, and make sure your puff loops are pulled up to the full 0.5 in (1.3 cm).
Rippling? Your chains are too long for your stitches. Chain more firmly, or swap the ch-4 arches in Round 4 for ch-3.
Pattern
Round 1: Cream Flower Center (Color A)
Make a MR with Color A.
Ch 2, work a 2-dc cl into the ring (the ch 2 and the cluster together count as the first 3-dc cl). Ch 3, 3-dc cl into the ring. Repeat from * 4 more times. Ch 3 and join with a sl st to the top of the first cluster. Pull the ring closed tightly.
Count: 6 clusters and 6 ch-3 spaces.
Fasten off Color A.
Round 2: Tan Puff Ring (Color B)
Join Color B with a sl st in any ch-3 space.
Work a beginning puff in the same space, then ch 4. Work a puff in the next ch-3 space, ch 4. Repeat from * 4 more times. Join with a sl st to the top of the first puff (its closing ch 1).
Count: 6 puffs and 6 ch-4 spaces.
Each puff sits between two cream petals and points outward. These 6 puffs set the positions of the 6 snowflake points. Fasten off Color B.
Round 3: Cream Outline (Color A)
Join Color A with a sl st in the top (closing ch 1) of any puff.
Ch 1. (Sc, ch 3, sc) in the top of the puff, then 4 sc in the next ch-4 space. Repeat from * around for 6 repeats. Join with a sl st to the first sc.
Count: 36 sc (6 per repeat: 2 at the puff and 4 in the space) and 6 ch-3 spaces.
This round draws the cream outline around each tan teardrop. The ch-3 space above each puff is where a point will grow. Don’t fasten off.
Round 4: Openwork Shells (Color A)
Sl st into the next ch-3 space.
Ch 3 (counts as dc), then work (dc, ch 3, 2 dc) in the same space. This is the first shell. Ch 4, skip the next 2 sc, sc in each of the next 2 sc, ch 4, and skip the next 2 sc.
(2 dc, ch 3, 2 dc) in the next ch-3 space, ch 4, skip 2 sc, sc in each of the next 2 sc, ch 4, skip 2 sc. Repeat from * 4 more times. Join with a sl st to the top of the beginning ch 3.
Count: 24 dc, 12 sc, 6 ch-3 tip spaces, and 12 ch-4 arches.
Stitch check: Between two ch-3 spaces in Round 3 there are 6 sc. You skip 2, work 2, and skip 2, which uses all 6, so the shells stay centered over the puffs.
Fasten off Color A.
Round 5: Tan Tip Fans (Color B)
Join Color B with a sl st in any ch-3 tip space.
Ch 2 and work a 2-dc cl in the same space (together these count as the first 3-dc cl). Then work (ch 2, 3-dc cl) twice more in the same space. This makes a fan of 3 clusters. Ch 1, skip the next 2 dc, work 3 sc in the next ch-4 arch, sc in each of the next 2 sc, 3 sc in the next ch-4 arch, ch 1, and skip the next 2 dc.
(3-dc cl, ch 2, 3-dc cl, ch 2, 3-dc cl) in the next ch-3 space, ch 1, skip 2 dc, 3 sc in the next ch-4 arch, sc in the next 2 sc, 3 sc in the next ch-4 arch, ch 1, skip 2 dc. Repeat from * 4 more times. Join with a sl st to the top of the first cluster.
Count: 18 clusters (3 per point), 12 ch-2 spaces, 48 sc (8 per valley), and 12 ch-1 spaces.
Checkpoint: The piece should now measure 5 in (12.7 cm) from point to point. Fasten off Color B.
Border
The border is Round 6, a cream single crochet edging with a picot at each point and a decrease at each valley.
Border gauge: About 5 sc per 1 in (2.5 cm) along the edge. The edging adds about 0.25 in (0.6 cm) on every side.
Round 6: Cream Edging (Color A)
Join Color A with a sl st in the ch-1 space just before any tip fan.
Ch 1. Then work each repeat as follows:
- Sc in the ch-1 space.
- Sc in the top of the first cluster.
- 3 sc in the next ch-2 space.
- (Sc, ch 3, sc) in the top of the center cluster. This is the picot point.
- 3 sc in the next ch-2 space.
- Sc in the top of the third cluster.
- Sc in the next ch-1 space.
- Sc in each of the next 3 sc, sc2tog over the next 2 sc, and sc in each of the next 3 sc.
Repeat steps 1–8 around for 6 repeats. Join with a sl st to the first sc and fasten off.
Count per point: 1 + 1 + 3 + 2 + 3 + 1 + 1 = 12 sc along the point, plus 7 stitches across the valley (3 sc, 1 sc2tog, 3 sc). That is 19 stitches and 1 ch-3 picot per repeat.
Round total: 19 × 6 = 114 stitches and 6 ch-3 picots.
Why the math works: Every stitch in Round 5 is used exactly once. Each valley has 8 sc, and 3 + 2 + 3 = 8 uses all of them, with the sc2tog pulling the center in to make the V-dip. Each fan has 3 cluster tops, 2 ch-2 spaces, and 2 ch-1 spaces. Working 3 sc in each ch-2 space adds just enough to go around the fan without cupping, and the picot sharpens the tip. Adding 0.25 in (0.6 cm) on each side takes the 5 in (12.7 cm) piece to 5.5 in (14.0 cm).
Hanging Loop (Color B)
Join Color B with a sl st in the ch-3 picot of any point. Ch 20, which is about 3 in (7.6 cm), and sl st back into the same picot. Fasten off and weave the tail back through the chain for strength.
If you prefer a twisted cord, cut a 12 in (30.5 cm) strand, twist it until it kinks, fold it in half, let it twist on itself, and knot it through the picot.
Final Blocking
- Weave in all ends along stitches of the same color, so no tan shows through cream.
- Spritz the snowflake until it is evenly damp, or soak it briefly and roll it in a towel.
- Lay it face up on a blocking mat.
- Pin the center flat, then pin each of the 6 picots outward to a 5.5 in (14.0 cm) point-to-point diameter. Check opposite pairs of points so they all match.
- Pin each valley V so the valleys measure 4.25 in (10.8 cm) across.
- Gently shape each tan puff into a teardrop with your fingertip.
- For a stiffer ornament, mist lightly with spray starch.
- Let it dry completely before you unpin it, usually 6–12 hours.
Final Quality-Control Checklist
- 6 cream center clusters, 6 tan puffs, and 6 points
- Each puff lines up directly with a point
- Round 4: 24 dc, 12 sc, 6 shells, 12 arches
- Round 5: 18 clusters and 48 sc
- Round 6: 114 stitches and 6 picots
- Point to point 5.5 in (14.0 cm); valley to valley 4.25 in (10.8 cm)
- Every valley has a visible V-dip
- Ends are woven in invisibly, and the loop is secure
Troubleshooting
- The center hole is open: Pull the magic ring tighter before you join Round 1, and weave the tail around the ring once.
- The puffs look flat: Pull each loop up to a full 0.5 in (1.3 cm) and close firmly with the ch 1.
- The points are lopsided: Recount Round 3. Each repeat needs exactly 4 sc in the ch-4 space.
- The piece ruffles after Round 4: Use ch 3 instead of ch 4 for the arches, or go down a hook size.
- The edge cups: Use 2 sc instead of 3 in each ch-2 space during Round 6.
- The valleys are not dipping: Check that the sc2tog falls over the 2 center sc of each valley.
Care
Hand wash cool with mild soap, press out the water in a towel, and re-block flat to dry. Store flat between tissue paper so the points stay crisp.
Final Notes
The measurement chain is simple: Round 1 is 1.25 in (3.2 cm), Round 2 is 2.25 in (5.7 cm), Round 3 is 2.75 in (7.0 cm), and Round 4 is 4 in (10.2 cm). Round 5 brings it to 5 in (12.7 cm), and the Round 6 edging adds 0.25 in (0.6 cm) per side for a finished 5.5 in (14.0 cm) snowflake. If your first ornament hits these checkpoints, every snowflake in your set will match.
Happy crocheting!