

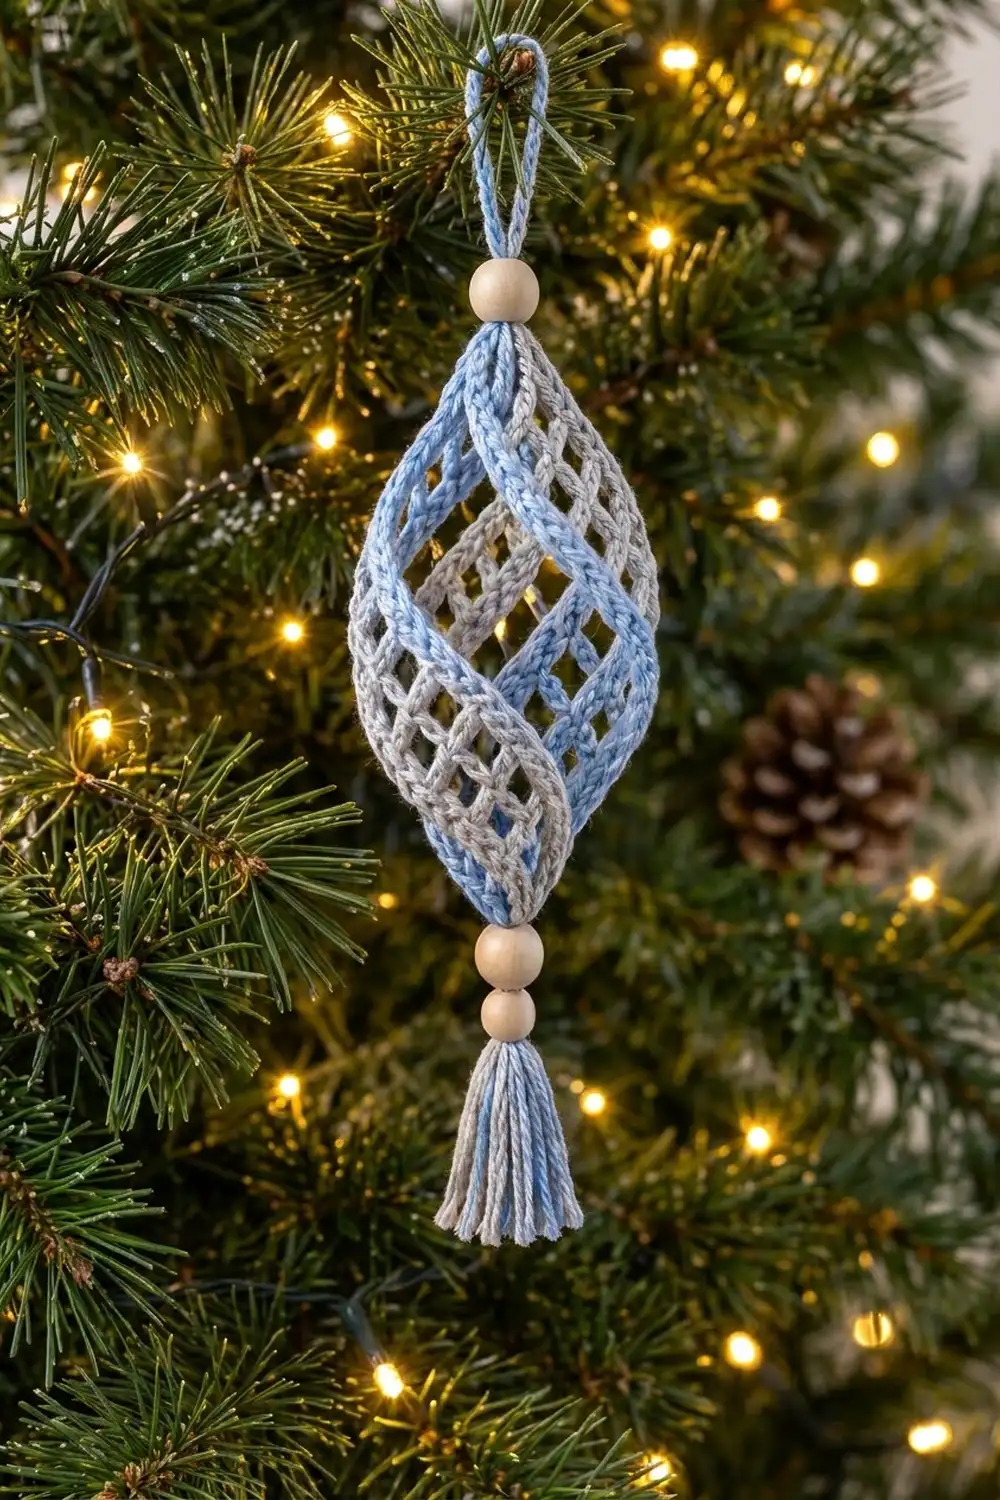
The Frosted Spiral Ornament is a light, airy Christmas decoration made from four slim strips of filet mesh. You gather the strips at both ends and give them a half-turn, so they bow outward and wind around each other in a soft spiral. The result looks delicate, but the stitches are simple.
This version alternates powder blue and silver gray for a cool, wintry look. Natural wooden beads and a two-color tassel give it a calm Scandinavian feel that works on any tree.
The pattern uses US crochet terms. The ornament body is 5 in (12.7 cm) tall and about 2.5 in (6.4 cm) wide. From the top bead to the tip of the tassel it measures about 8.5 in (21.6 cm), plus a 2 in (5.1 cm) hanging loop.
Here is how it comes together. You crochet four mesh strips, each 2 squares wide and 16 rows long. Then you edge each strip with single crochet, gather the strip ends at the top and bottom, and set the spiral height with a central cord. To finish, you add the beads and the tassel.
Finished Size and Construction
- Finished body size: 5 in (12.7 cm) tall × 2.5 in (6.4 cm) wide
- Overall length (top bead to tassel tip): about 8.5 in (21.6 cm), plus a 2 in (5.1 cm) loop
- Skill level: Easy / Advanced Beginner
- Terminology: US crochet terms
- Yarn weight: Super Fine (#1) fingering-weight cotton
- Hook: 2.5 mm
- Number of pieces: 4 mesh strips (2 blue, 2 gray), plus 1 tassel
- Layout: 4 strips arranged around a central cord, alternating BLUE, GRAY, BLUE, GRAY
- Strip size before border: 0.75 in × 6 in (1.9 cm × 15.2 cm)
- Strip size after border: 1 in × 6.25 in (2.5 cm × 15.9 cm)
- Border depth: 0.125 in (0.3 cm) on every side
Materials
Yarn: Use a smooth, mercerized fingering-weight cotton. Mercerized cotton holds the open mesh squares crisply and keeps its shape when the strips bow outward. Soft acrylic or fuzzy yarn will blur the squares and make the spiral droop.
- Light blue: 10 g, about 34 m (strips, hanging cord, tassel, gathering)
- Light gray: 10 g, about 34 m (strips, tassel)
These quantities include a generous margin. One ornament uses roughly half this amount, so one small ball of each color will make several ornaments.
Tools and notions:
- 2.5 mm crochet hook
- Blunt yarn needle with an eye large enough for a doubled strand
- 2 natural wooden beads, 14 mm (one above the body, one below)
- 1 natural wooden bead, 10 mm (under the larger bottom bead)
- A piece of stiff card 2 in (5.1 cm) wide, for the tassel
- Scissors, ruler or tape measure
- Rust-proof pins and a foam blocking mat
- A spray bottle of water, or diluted fabric stiffener (optional)
Check that the bead holes are at least 3 mm across, because a doubled strand of yarn has to pass through them.
Abbreviations (US Terms)
- ch – chain
- sc – single crochet
- dc – double crochet
- sk – skip
- sp(s) – space(s)
- st(s) – stitch(es)
- sl st – slip stitch
Special stitch – Mesh square: One open filet square is made of 1 dc, ch 1, sk 1, then the next dc. The two dc posts are the sides of the square and the ch-1 forms the top. Neighboring squares share their dc posts.
Gauge and Checkpoints
Make one complete strip first, including its border, and measure it before you make the other three. All four strips must match closely, or the spiral will lean to one side.
Gauge: 2 mesh squares (3 dc) = 0.75 in (1.9 cm) wide; 8 rows = 3 in (7.6 cm) tall.
Checkpoints:
- After Row 8: the strip is 3 in (7.6 cm) long.
- After Row 16: the strip is 6 in (15.2 cm) long and 0.75 in (1.9 cm) wide.
- After the border: the strip is 6.25 in (15.9 cm) long and 1 in (2.5 cm) wide.
- After joining: the body is 5 in (12.7 cm) tall and about 2.5 in (6.4 cm) wide.
If your strip is too long (more than 6.25 in / 15.9 cm before the border), go down to a 2.25 mm hook, or tighten the yarn-overs on your dc.
If it is too short (less than 5.75 in / 14.6 cm before the border), go up to a 2.75 mm hook.
A difference of up to 0.25 in (0.6 cm) is fine, as long as all four strips match each other.
Mesh Strip (Make 4)
Make 2 strips in light blue and 2 strips in light gray. Each strip is worked in short rows, 2 mesh squares wide.
Foundation: Ch 8.
Row 1: Dc in the 6th ch from the hook (the skipped 5 ch count as dc + ch-1 sp), ch 1, sk next ch, dc in the last ch. Turn.
Count: 3 dc and 2 ch-1 sps (5 sts), which makes 2 mesh squares.
Row 2: Ch 4 (counts as dc + ch 1), sk first ch-1 sp, dc in next dc, ch 1, sk next ch-1 sp, dc in 3rd ch of the turning ch. Turn.
Count: 3 dc and 2 ch-1 sps (5 sts).
Rows 3–16: Repeat Row 2.
Count on every row: 3 dc and 2 ch-1 sps (5 sts). After Row 16 you have 16 rows of 2 squares, or 32 squares in total.
Do not fasten off. Go straight on to the single crochet edging in the Border section below, working it on this strip now. Each strip gets its own border before joining.
As you work, keep each dc post straight and the same height. Even posts give clean, square holes, and square holes make the spiral look neat.
Make All Pieces
Your finished pieces are:
- Light blue: 2 strips, each bordered in light blue
- Light gray: 2 strips, each bordered in light gray
- Tassel: 1, in blue and gray held together (see Joining)
Layout around the central cord (seen from above):
POSITION:  1     2     3     4
COLOR:     BLUE  GRAY  BLUE  GRAY
Opposite strips are the same color. This keeps the colors alternating all the way around the spiral.
Joining
The strips are joined only at their ends. The middle of each strip floats free and bows outward.
Prepare: Weave in all tails along the long edges of each strip. Leave the top and bottom short ends clean.
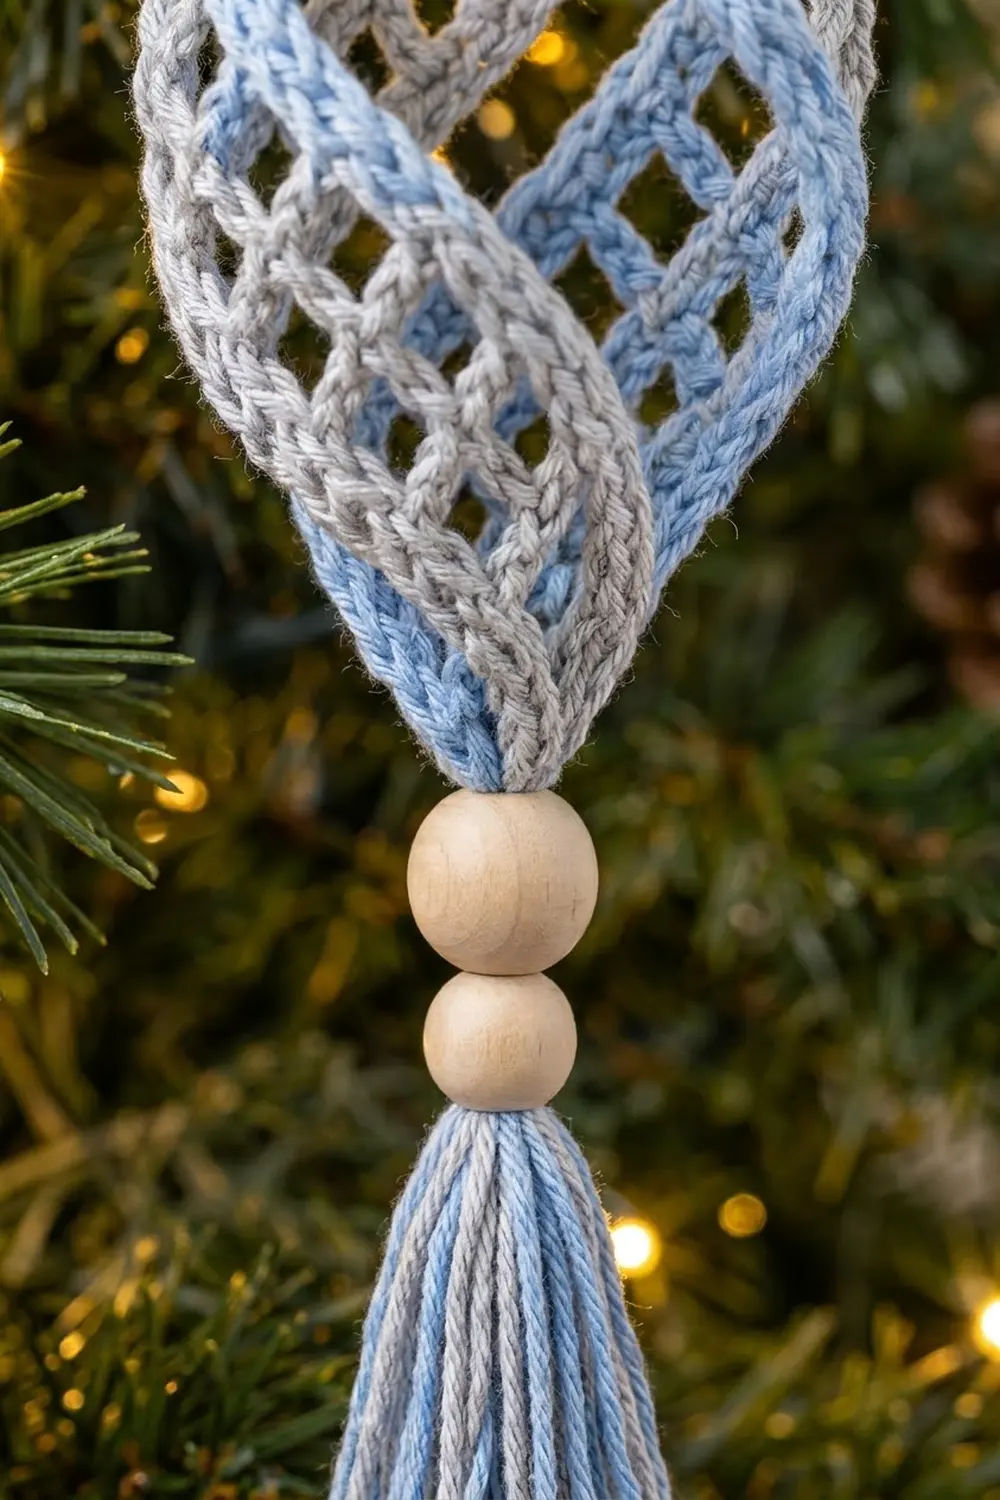
Top gather: Cut a 12 in (30.5 cm) strand of blue. Stack the strips in layout order: BLUE, GRAY, BLUE, GRAY. With the yarn needle, run the strand through all 9 sc of the top short end of each strip, one strip after another. That is 4 strips × 9 sc = 36 sc on one strand. Pull firmly to close the ends into a tight ring, then knot it twice. Leave the ends hanging for now.
Bottom gather with the half-turn: Hold the top gather still. Turn the free bottom ends of all four strips one half-turn (180°) clockwise as a group, keeping them in the same BLUE, GRAY, BLUE, GRAY order. With a second 12 in (30.5 cm) blue strand, gather the 9 sc of each bottom short end in the same way (36 sc), pull tight, and knot.
Stitch-to-stitch logic: Each strip gives exactly 9 sc to each gather. This is why every strip must have the same border count. A strip with 8 or 10 sc at one end would sit higher or lower in the ring and tilt the spiral.
Central cord and beads: Cut a 30 in (76.2 cm) strand of blue and fold it in half. The fold becomes the 2 in (5.1 cm) hanging loop. Thread both ends of the folded strand through these, in order:
- One 14 mm bead (top)
- Down through the center of the top gather
- Through the inside of the ornament
- Out through the center of the bottom gather
- The second 14 mm bead
- The 10 mm bead
Set the height: Slide the gathers along the cord until the distance between them is 5 in (12.7 cm). The strips are 6.25 in (15.9 cm) long, so the extra 1.25 in (3.2 cm) pushes each strip outward into its curve. Tie the gathering tails tightly around the cord at the top and at the bottom, so the gathers can’t slide. Tie a knot right under the 10 mm bead. Keep the cord ends for the tassel.
Tension advice: Pull the gathers tight, but leave the cord itself relaxed. If the cord is pulled shorter than 5 in (12.7 cm), the strips will kink instead of curving.
Tassel: Hold one strand of blue and one strand of gray together. Wrap them 15 times around the 2 in (5.1 cm) card. Slide the loops off the card and tie them at the center with the two cord ends. Fold the loops down so they hang below the knot. Wrap a short blue strand around the tassel 0.25 in (0.6 cm) below the top, knot it, and hide the ends inside. Cut the bottom loops and trim the tassel to 2 in (5.1 cm).
Size checkpoint: The body is 5 in (12.7 cm) tall and about 2.5 in (6.4 cm) wide. From the top bead to the tassel tip it measures about 8.5 in (21.6 cm).
Border: Single Crochet Edging (Each Strip)
Work this edging on each strip straight after Row 16, using the same color as the strip.
Border gauge: 16 sc = 3 in (7.6 cm) along the long sides. That works out to 2 sc for each dc row end.
Edging round: Ch 1, then turn the strip so you are working along the end of Row 16.
- Short end 1 (top of Row 16): 3 sc in the first dc (corner), sc in the next ch-1 sp, sc in the next dc, sc in the next ch-1 sp, 3 sc in the last st (corner).
Count: 9 sc. - Long side 1: Work 2 sc around each dc row-end post, all the way down the side.
Count: 16 rows × 2 = 32 sc. - Short end 2 (foundation chain): 3 sc in the first ch (corner), sc in each of the next 3 chs, 3 sc in the last ch (corner).
Count: 9 sc. - Long side 2: Work 2 sc around each row-end post.
Count: 32 sc.
Join with a sl st to the first sc and fasten off.
Round total: 9 + 32 + 9 + 32 = 82 sc.
Why the math works: Each short end has 5 stitches (3 dc and 2 ch-1 sps). Each of those gets 1 sc, and the 2 corner stitches each get 2 extra sc, so the total is 5 + 4 = 9 sc. Each corner group of 3 sc is counted entirely within its short end, so no corner is counted twice.
On the long sides, a dc is about as tall as 2 sc. Working 2 sc per row end therefore keeps the edge flat: 32 sc = 6 in (15.2 cm), which matches the 16 rows below it. The border adds 0.125 in (0.3 cm) on each side, so the strip grows from 0.75 × 6 in (1.9 × 15.2 cm) to 1 × 6.25 in (2.5 × 15.9 cm).
Final Blocking
- Block the strips before joining if you can. Spray each strip lightly with water, or dip it in diluted fabric stiffener.
- Pin each strip flat to 1 × 6.25 in (2.5 × 15.9 cm). Put a pin in each corner and one every 1 in (2.5 cm) along the long sides.
- Open the squares by nudging each ch-1 space square with the tip of a pin.
- Let the strips dry completely, usually 4–6 hours.
- After joining, hang the ornament and gently shape each strip into an even, rounded curve with your fingers.
- If you used stiffener, mist the assembled ornament lightly. Let it hang until dry so the spiral sets in place.
- Comb the tassel with your fingers or a fine comb, then trim it level to 2 in (5.1 cm).
Final Quality-Control Checklist
- Every strip has 16 rows, with 3 dc and 2 ch-1 sps per row.
- Every border has 82 sc: 9 sc on each short end and 32 sc on each long side.
- Every strip measures 1 × 6.25 in (2.5 × 15.9 cm).
- Colors alternate BLUE, GRAY, BLUE, GRAY around the cord.
- Each gather holds exactly 36 sc, closed tightly and knotted.
- The bottom is turned a half-turn (180°) relative to the top.
- The body measures 5 in (12.7 cm) tall and about 2.5 in (6.4 cm) wide.
- The beads sit snugly: one 14 mm above, then one 14 mm and one 10 mm below.
- The tassel is 2 in (5.1 cm), wrapped neatly, and trimmed level.
- All tails are woven in or hidden inside the tassel.
Troubleshooting
The squares look like rectangles. Your dc is too tall or too short compared with the ch-1. Adjust your yarn-over tension, or change the ch-1 to a looser chain.
The strip curls or ripples along the long edge. Check that you made 2 sc per row end. Fewer makes the edge pull in; more makes it ruffle.
The spiral leans to one side. One strip is longer than the others. Measure all four, then rework or re-block the odd one.
The strips kink instead of curving. The cord between the gathers is too short. Loosen it to 5 in (12.7 cm).
The ornament looks flat, not rounded. The cord is too long. Shorten it slightly, or check that the half-turn was made.
There is a gap or hole at a gather. Pass the gathering strand through the 36 sc a second time and pull tighter.
The beads slide around. Tie an extra knot in the cord directly under each bead.
Care
Dust the ornament gently, or hand-wash it in cool water if needed. Reshape it and let it hang to dry. Store it in a small box so the spiral is not crushed.
Final Notes
The whole ornament follows one simple measurement chain:
- 2 mesh squares are 0.75 in (1.9 cm) wide, and 16 rows are 6 in (15.2 cm) long.
- The 82-sc border brings each strip to 1 × 6.25 in (2.5 × 15.9 cm).
- Four strips give 9 sc each to make a 36-sc gather at both ends.
- A 5 in (12.7 cm) central cord bows the strips into a spiral about 2.5 in (6.4 cm) wide.
- Beads and a 2 in (5.1 cm) tassel finish it at about 8.5 in (21.6 cm) from the top bead to the tassel tip.
Keep your strips matched and your gathers tight, and the spiral will wind cleanly every time. Once you have made one, try other color pairs, such as red and white or gold and cream, to build a matching set for your tree.
Happy crocheting!