

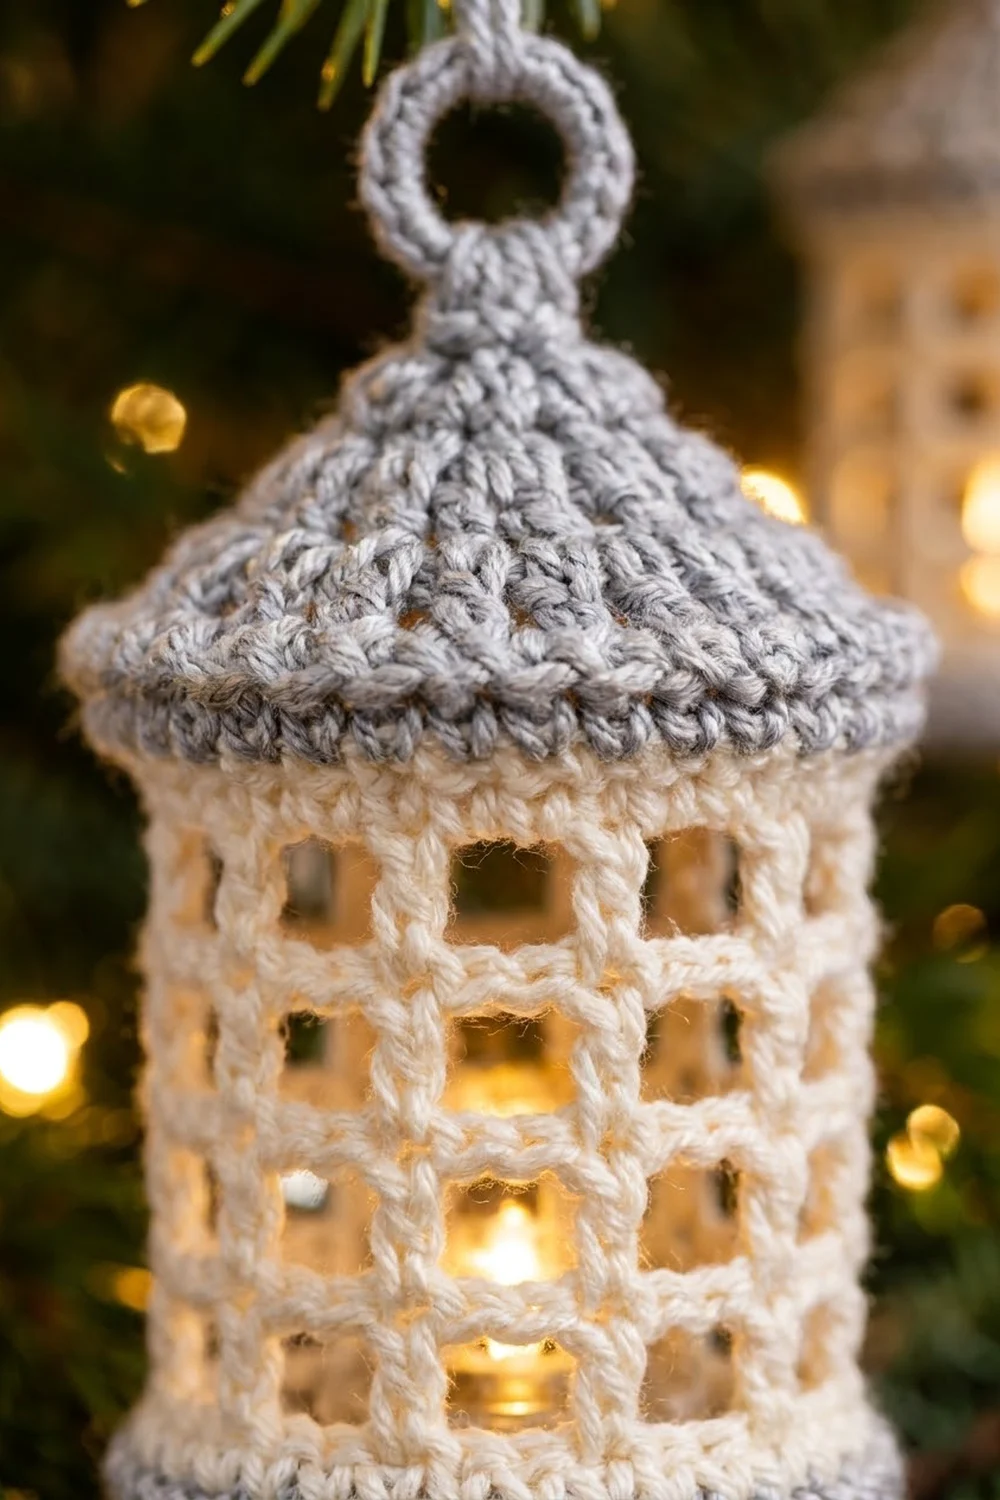
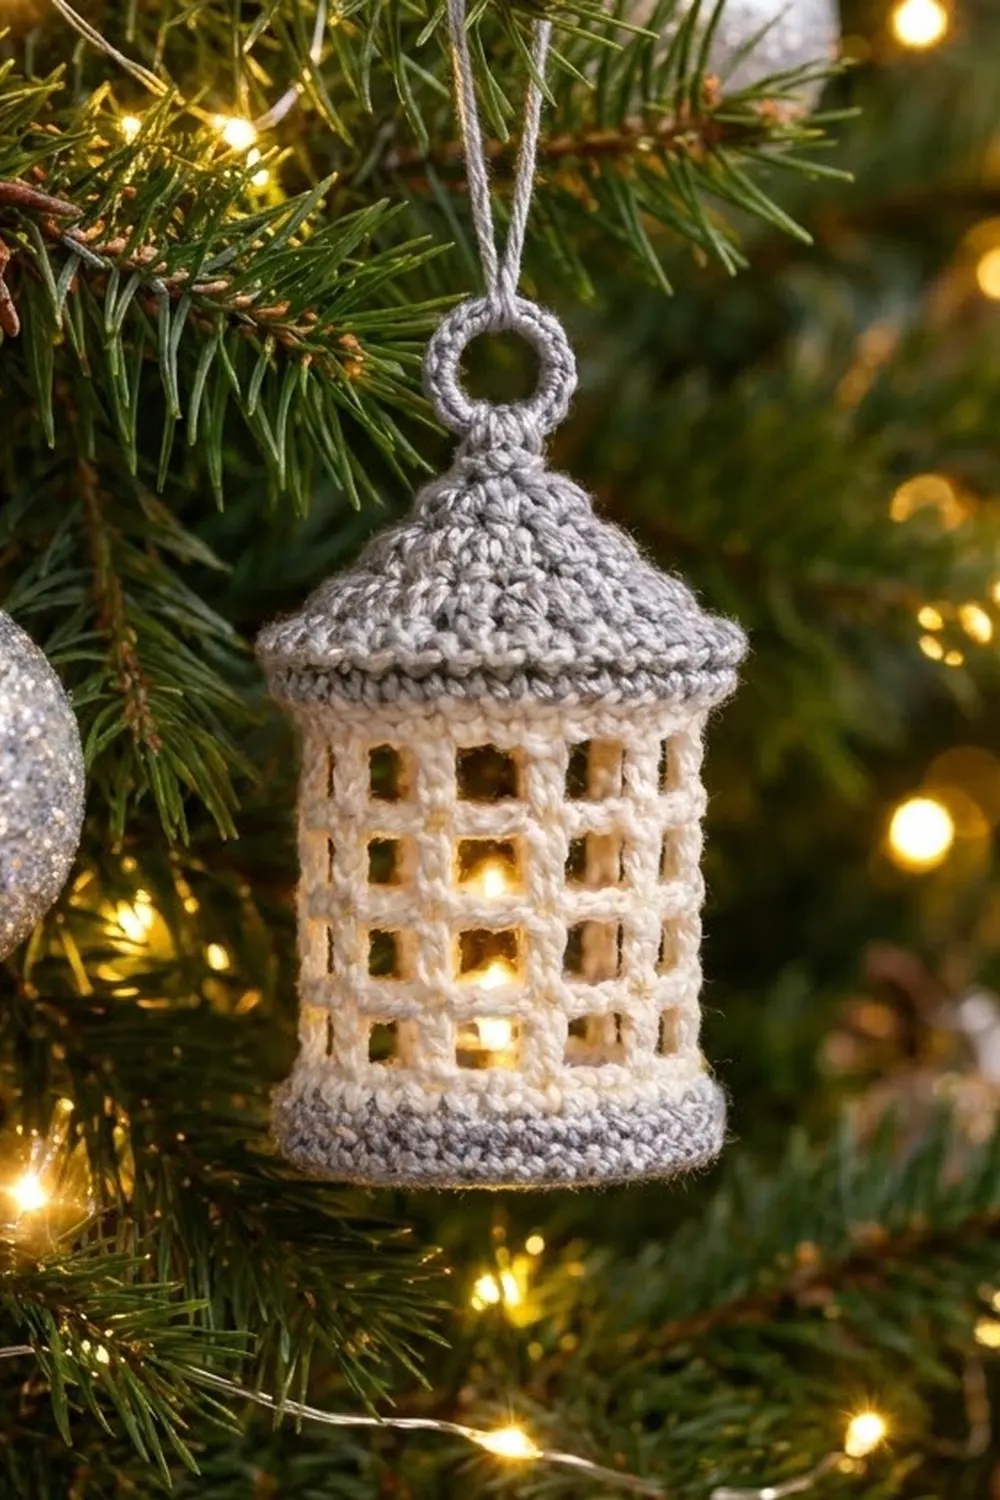
This little lantern ornament has a soft gray roof, a cream openwork body, and a neat gray base. The open “windows” are a simple filet mesh, so light from your tree glows through them and makes the lantern look lit from inside.
The colors are quiet and wintry: cream for the walls and silver-gray for the base, roof, brim, and hanging ring. It suits a Scandinavian or farmhouse tree and looks good hung in groups of three.
The pattern uses US crochet terms. The finished lantern is about 2.25 in (5.7 cm) across the body and about 2.6 in (6.6 cm) across the roof brim. It is 4 in (10.2 cm) tall without the ring and 4.75 in (12.1 cm) tall with it.
You crochet the whole lantern in one piece, in joined rounds from the bottom up. First you make a flat gray circle and turn its edge up into a gray band. Then you switch to cream for the mesh walls and back to gray to decrease into the roof, finishing with a hanging ring. Last, you work a short brim edging into front loops left free under the roof.
Finished Size and Construction
- Finished size: 2.25 in (5.7 cm) body diameter; 4 in (10.2 cm) tall without ring; 4.75 in (12.1 cm) with ring
- Skill level: Easy-intermediate
- Terminology: US crochet terms
- Yarn weight: Sport weight (#2) cotton
- Hook: 2.75 mm (C/2)
- Number of pieces: 1 (a single ornament, worked in one piece)
- Layout: One 3D cylinder with a cone-shaped roof; no assembly
- Piece size: Body circumference 7 in (17.8 cm), 42 stitches around
- Size before border: 2.25 in (5.7 cm) wide, 4 in (10.2 cm) tall without ring
- Border depth: Roof brim sticks out about 0.3 in (0.8 cm)
Materials
Choose a smooth, mercerized sport-weight cotton or cotton blend. Cotton keeps the mesh crisp and the windows square. Avoid fuzzy yarns, which blur the openings.
- Silver-gray (Color A): 10 g, about 28 m (base, base band, roof, ring, brim)
- Cream (Color B): 6 g, about 17 m (mesh walls and top band)
Tools:
- 2.75 mm (C/2) crochet hook
- Tapestry needle
- Stitch marker
- Scissors
- A jar, spice bottle, or rolled card tube about 2.25 in (5.7 cm) across, for blocking
- Optional: spray starch or diluted fabric stiffener
- Optional: thin cord or ribbon, about 10 in (25.4 cm) long, for hanging
The yarn amounts include about 20 percent extra for a gauge swatch and weaving in ends.
Abbreviations (US Terms)
- ch: chain
- sl st: slip stitch
- sc: single crochet
- dc: double crochet
- sc2tog: single crochet 2 together (decrease)
- BLO: back loop only
- FLO: front loop only
- sp: space
- st(s): stitch(es)
- rnd(s): round(s)
Special stitch (mesh space): ch 2, skip 2 sts. Each dc plus its mesh space covers 3 stitches of the round below.
Joining note: End every round with a sl st into the first stitch. Then start the next round with ch 1 for sc rounds, or with the chain given for mesh rounds. The ch 1 does not count as a stitch. Joined rounds keep the color changes clean.
Gauge and Checkpoints
Gauge: 6 sc and 6 rnds = 1 in (2.5 cm) in sc. In the mesh, 3 rnds of dc mesh measure about 1.05 in (2.7 cm).
To make a test swatch, ch 13, sc in the 2nd ch from the hook and across (12 sc), then work 12 rows. It should measure 2 in (5.1 cm) square. The best test, though, is the base circle itself, because it uses the same stitches as the lantern.
Checkpoints:
- After Rnd 7 (flat base): 2.25 in (5.7 cm) across.
- After Rnd 11 (base band): the band stands about 0.75 in (1.9 cm) tall, measured from the table.
- After Rnd 12: total height about 0.9 in (2.3 cm).
- After Rnd 17 (mesh done): total height about 2.7 in (6.9 cm). The mesh section alone is about 1.75 in (4.4 cm).
- After Rnd 19 (body done): body height 3 in (7.6 cm).
- After Rnd 29 (roof done): total height about 4 in (10.2 cm).
If your work is too big: go down 0.25 mm in hook size and start the base again. If it is too small: go up 0.25 mm. Don’t change the stitch counts. The 42-stitch body is what lets the 14 windows divide evenly.
The Pattern
Part 1: Base (Color A, gray)
Rnd 1: Make a magic ring, ch 1, work 6 sc in the ring, sl st to the first sc. Pull the ring closed. (6 sts)
Rnd 2: Ch 1, 2 sc in each st around, join. (12 sts)
Rnd 3: Ch 1, sc in next st, 2 sc in next st 6 times, join. (18 sts)
Rnd 4: Ch 1, sc in next 2 sts, 2 sc in next st 6 times, join. (24 sts)
Rnd 5: Ch 1, sc in next 3 sts, 2 sc in next st 6 times, join. (30 sts)
Rnd 6: Ch 1, sc in next 4 sts, 2 sc in next st 6 times, join. (36 sts)
Rnd 7: Ch 1, sc in next 5 sts, 2 sc in next st 6 times, join. (42 sts)
Checkpoint: the circle lies flat and measures 2.25 in (5.7 cm) across. If it ruffles, your tension is too loose. If it cups, your tension is too tight.
Part 2: Base Band (Color A)
Rnd 8: Ch 1, sc in the BLO of each st around, join. (42 sts)
The unworked front loops form a crisp ridge. This makes the base turn sharply upward so the lantern stands flat.
Rnds 9–11: Ch 1, sc in each st around, join. (42 sts in each round)
On the last sl st of Rnd 11, change to Color B. Cut Color A, leaving a 6 in (15.2 cm) tail.
Part 3: Mesh Walls (Color B, cream)
Rnd 12: Ch 1, sc in each st around, join. (42 sts)
This solid cream round is the bottom window frame.
Rnd 13: Ch 5 (counts as dc + ch 2), skip next 2 sts, dc in next st, ch 2, skip next 2 sts 13 times, sl st in the 3rd ch of the beginning ch-5. (14 dc + 14 ch-2 sps = 42 sts)
Rnds 14–17: Ch 5 (counts as dc + ch 2), dc in next dc, ch 2 13 times, sl st in the 3rd ch of the beginning ch-5. (14 dc + 14 ch-2 sps = 42 sts in each round)
Stack each dc directly on top of the dc below so the vertical bars run straight. You now have 5 rows of 14 square windows, 70 windows in all. Each window is about 0.3 in (0.8 cm) wide.
Rnd 18 (conversion round): Ch 1, sc in the same st as the join, 2 sc in next ch-2 sp, sc in next dc, 2 sc in next ch-2 sp 13 times, join. (14 sc in the dc + 28 sc in the spaces = 42 sts)
Rnd 19: Ch 1, sc in each st around, join. (42 sts)
On the last sl st, change to Color A. Cut Color B. Checkpoint: the body is 3 in (7.6 cm) tall.
Part 4: Roof (Color A, gray)
Rnd 20: Ch 1, sc in the BLO of each st around, join. (42 sts)
This leaves the front loops of Rnd 19 free for the brim later. Put a marker in the first free front loop so you can find it again.
Rnd 21: Ch 1, sc in next 5 sts, sc2tog 6 times, join. (36 sts)
Rnd 22: Ch 1, sc in each st around, join. (36 sts)
Rnd 23: Ch 1, sc in next 4 sts, sc2tog 6 times, join. (30 sts)
Rnd 24: Ch 1, sc in next 3 sts, sc2tog 6 times, join. (24 sts)
Rnd 25: Ch 1, sc in each st around, join. (24 sts)
Optional: to add a permanent sealed micro LED inside, drop it in now through the 1.3 in (3.3 cm) opening. Never use a real flame.
Rnd 26: Ch 1, sc in next 2 sts, sc2tog 6 times, join. (18 sts)
Rnd 27: Ch 1, sc in next st, sc2tog 6 times, join. (12 sts)
Rnd 28: Ch 1, sc2tog 6 times, join. (6 sts)
Rnd 29: Ch 1, sc in each st around, join. (6 sts)
This short neck becomes the knob at the peak. The plain rounds (22, 25, and 29) give the roof its pointed, slightly domed slope. Without them it would decrease into a flat disc.
Part 5: Hanging Ring (Color A)
Ch 12, then sl st into the 4th sc of Rnd 29, directly across the neck, to form a loop. Work 18 sc over the chain loop, then sl st into the first sc of Rnd 29. Fasten off, leaving a 6 in (15.2 cm) tail.
Use the tail to tack the ring so it stands upright and to close any gap at the peak. The ring is about 0.75 in (1.9 cm) across.
Border: Roof Brim
The brim is a short gray edging worked into the 42 free front loops of Rnd 19. It forms the overhanging edge of the roof.
Border gauge: the same as the body, 6 sts = 1 in (2.5 cm).
Border Rnd 1: Hold the lantern upside down. Join Color A with a sl st in the marked front loop. Ch 1, sc in next 6 front loops, 2 sc in next front loop 6 times, join. (42 sts worked 1 per loop + 6 extra = 48 sts)
Border Rnd 2: Ch 1, sc in each st around, join. (48 sts)
Fasten off with an invisible join and weave in the end.
Why the math works: the body measures 42 sts around, or 7 in (17.8 cm). Adding 6 sts brings the brim to 48 sts, or 8 in (20.3 cm). That extra 1 in (2.5 cm) has nowhere to go but outward, so Border Rnd 1 flares out about 0.15 in (0.4 cm) on each side. Border Rnd 2 adds depth. Together they make a brim that sticks out about 0.3 in (0.8 cm), for a brim diameter of about 2.6 in (6.6 cm). Spacing the 6 increases evenly keeps the flare even all the way around.
Final Blocking
- Weave in all ends inside the solid bands, never across a window.
- Mist the lantern with water or dampen it lightly.
- Slide it over a jar or tube 2.25 in (5.7 cm) across. Push the base band flat against the bottom of the jar.
- Use your fingers to straighten each dc bar and square up each window.
- Fold the brim outward so it sits level.
- Optional: spray with starch or brush on diluted stiffener for a firmer shape.
- Let it dry completely, about 12 to 24 hours, then slip it off.
- Gently pinch the roof into a cone and set the ring upright.
Final Quality-Control Checklist
- The base is flat and 2.25 in (5.7 cm) across.
- The body is 42 sts around and 3 in (7.6 cm) tall.
- There are 14 windows around and 5 windows high, all about the same size.
- The vertical dc bars line up in straight columns.
- The color changes are clean, with no gray showing in the cream.
- The brim has 48 sts and flares evenly.
- The roof comes to a centered point, and the ring stands upright.
- The total height is about 4.75 in (12.1 cm) with the ring.
- No loose ends show through the windows.
Troubleshooting
Mesh columns spiral or lean. You worked into a chain instead of the dc. Always put each dc into the top of the dc below it.
Windows are tall rectangles. Your dc stitches are tall for your gauge. Pull up the first loop of each dc a little less, or work the ch-2 slightly looser so the windows get wider.
Body collapses. Starch it, or block it over a jar and let it dry fully.
Roof is flat, not pointed. Your sc may be too loose. Crochet Rnds 21–29 more tightly, or add one more plain round after Rnd 26.
Brim ruffles. You added extra stitches. Recount Border Rnd 1. It should have exactly 48.
Gap at a color change. Change colors on the last sl st of the round, and pull the tails snug before weaving them in.
Base cups upward. Your tension is too tight. Go up 0.25 mm in hook size for Rnds 1–7.
Care
Spot clean with cool water and mild soap, then reshape the lantern over a jar to dry. Store it upright in a box so the roof and ring keep their shape.
Final Notes
Here is how the measurements connect. The 42-stitch base is 2.25 in (5.7 cm) across, which gives a body 7 in (17.8 cm) around. That divides into 14 mesh windows of 3 stitches each. Five mesh rounds plus the solid bands make a body 3 in (7.6 cm) tall. The roof decreases from 42 to 6 stitches over about 1 in (2.5 cm). The brim adds 6 stitches, reaching 48 for an edge 2.6 in (6.6 cm) across. With the ring, the lantern is 4.75 in (12.1 cm) tall.
Check your base circle first, and the rest of the measurements will follow.
Happy crocheting!