

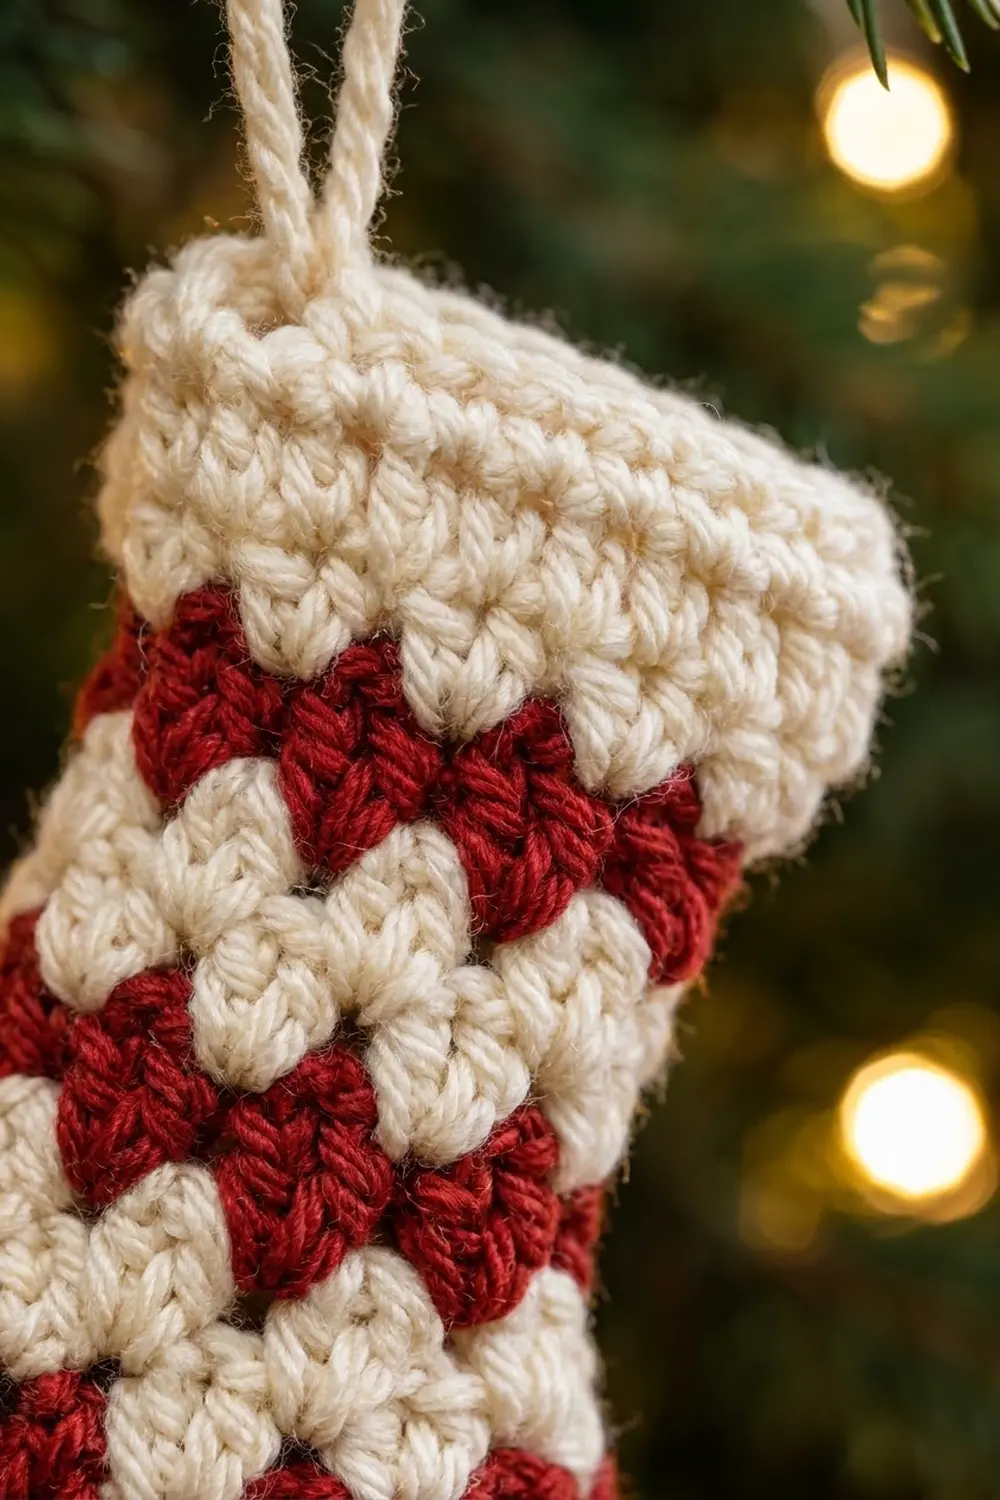
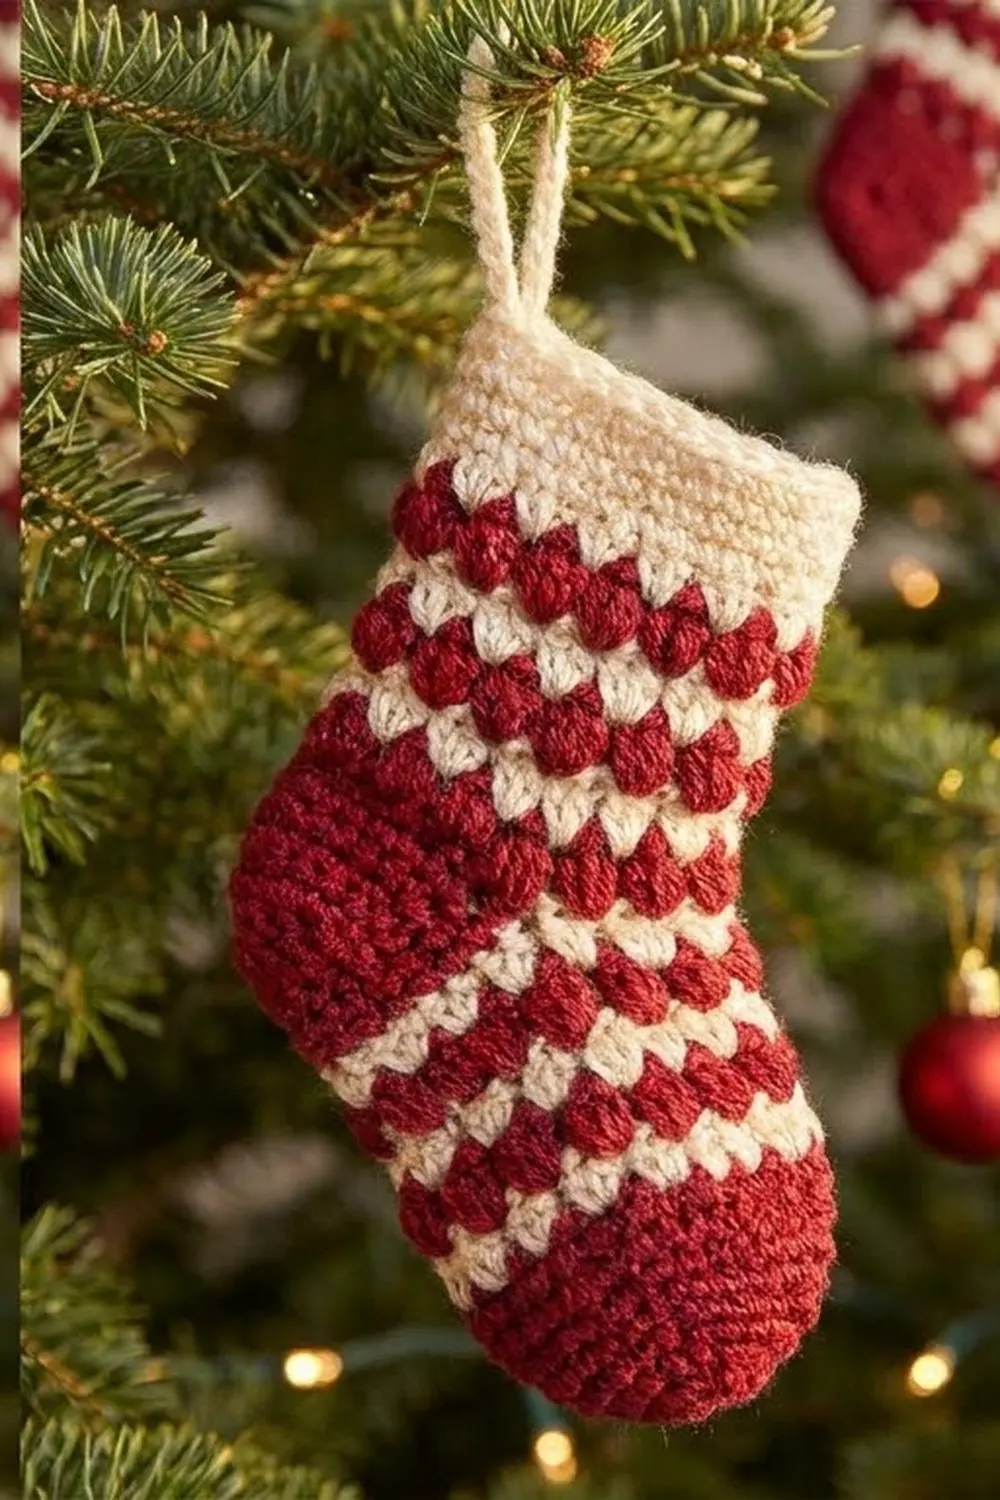
This little stocking is a quick, cheerful ornament that looks like a peppermint candy turned into a sock. It has a solid red toe and heel, a leg with alternating red and cream stripes in a soft bumpy texture, and a crisp cream cuff with a hanging loop.
The texture comes from a simple V-cluster stitch: a single crochet and a double crochet worked into the same stitch, then one stitch skipped. When you change color every round, the little clusters stack into a staggered zigzag that reads like rows of tiny hearts.
The pattern uses US crochet terms. The finished stocking is about 5 in (12.7 cm) tall without the loop, about 2 in (5.1 cm) wide across the leg when flat, and about 2.75 in (7.0 cm) long at the foot.
You work it toe-up in one seamless piece. First you make the toe, then the striped foot. Next comes a “placeholder” round that leaves a heel opening, then the striped leg and the cuff. Last, you crochet an afterthought heel into the opening and add a chain loop.
Finished Size and Construction
- Finished size: about 5 in (12.7 cm) tall × 2 in (5.1 cm) wide at the leg, plus a loop of about 2 in (5.1 cm)
- Foot length: about 2.75 in (7.0 cm)
- Skill level: Easy to intermediate (working in the round, color changes, afterthought heel)
- Terminology: US crochet terms
- Yarn weight: DK (light worsted / #3)
- Hook: 3.5 mm (E-4)
- Number of pieces: 1 stocking, plus 1 chain loop made directly onto it
- Layout: a single tube worked toe-up, with the heel added afterward
- Leg circumference: 20 stitches = 4 in (10.2 cm)
- Size before border (cuff): about 4 in (10.2 cm) tall
- Border (cuff) depth: 1 in (2.5 cm), 6 rounds
Materials
Pick a smooth DK yarn so the clusters show clearly. Cotton or a cotton blend gives the crispest texture, and soft acrylic gives a cozier look. Avoid fuzzy or very splitty yarn, because the V-clusters lose their definition.
Yarn:
– Color A – Cranberry Red: 10 g / about 25 m (27 yd)
– Color B – Cream: 10 g / about 25 m (27 yd)
These amounts include a safety margin of roughly 20% over what one stocking actually uses. Leftovers from one 50 g ball of each color will make four or five stockings.
Tools:
– 3.5 mm (E-4) crochet hook
– Tapestry needle
– Stitch marker
– Scissors
– Ruler or tape measure
– Pins and a steam iron or spray bottle for blocking
Abbreviations (US Terms)
- ch – chain
- sl st – slip stitch
- sc – single crochet
- dc – double crochet
- sc2tog – single crochet 2 together
- st(s) – stitch(es)
- sk – skip
- rnd(s) – round(s)
- MR – magic ring
- A / B – Color A (red) / Color B (cream)
Special stitch – V-cluster (Vc): Work (sc, dc) in the same stitch, then skip the next stitch. One Vc covers 2 stitches and counts as 2 stitches.
V-cluster round over sc: Work Vc around, starting in the first st. With 20 sts, you get 10 Vc = 20 sts.
V-cluster round over V-clusters: Work (sc, dc) in the sc of each Vc from the previous round, skipping the dc. You still get 10 Vc = 20 sts.
Joining rounds: Each round ends with a sl st into the first sc. Begin each round with ch 1, which does not count as a stitch. To change color, work the joining sl st with the new color.
Gauge and Checkpoints
Gauge: 20 sc and 24 rnds = 4 in (10.2 cm) in sc worked in the round. In V-cluster stripes, 10 rnds = 2 in (5.1 cm).
The best gauge test here is the toe itself, so work Rounds 1–7 and measure before going further.
Checkpoints:
– After Rnd 4: the flat toe circle measures about 1.25 in (3.2 cm) across.
– After Rnd 7: the toe tube is 2 in (5.1 cm) wide when flattened and about 1.2 in (3.0 cm) long.
– After Rnd 11: the foot measures 2 in (5.1 cm) from the toe tip.
– After Rnd 22: the leg measures about 2.2 in (5.6 cm) above the heel round.
– After Rnd 28: the stocking is about 5 in (12.7 cm) tall when the heel is finished and the stocking is laid flat.
Too big? If the flattened tube is wider than 2 in (5.1 cm), go down to a 3.25 mm hook. Too small? If it is narrower than 1.9 in (4.8 cm), go up to a 3.75 mm hook. Keep the stitch counts the same, because the cluster pattern needs an even number of stitches.
Pattern
Toe (Color A)
Rnd 1: With A, MR, ch 1, 5 sc in ring, sl st to first sc. (5 sts)
Rnd 2: Ch 1, 2 sc in each st around, sl st to join. (10 sts)
Rnd 3: Ch 1, (sc 1, 2 sc in next st) 5 times, sl st to join. (15 sts)
Rnd 4: Ch 1, (sc 2, 2 sc in next st) 5 times, sl st to join. (20 sts)
Rnds 5–7: Ch 1, sc in each st around, sl st to join. (20 sts each)
At the end of Rnd 7, complete the joining sl st with B. Do not cut A. Carry the unused color loosely up the inside of the tube at the join, and catch it under the next joining sl st every round.
Pull the MR tail tight and weave it in now. This keeps the toe tip neat and rounded.
Foot (V-Cluster Stripes)
Rnd 8 (B): Ch 1, Vc in first st, *Vc in next st; rep from * around, ending with the 10th Vc. Sl st to first sc, changing to A. (10 Vc = 20 sts)
Rnd 9 (A): Ch 1, (sc, dc) in the sc of each Vc around. Sl st to join, changing to B. (10 Vc = 20 sts)
Rnd 10 (B): Repeat Rnd 9, changing to A at the join. (20 sts)
Rnd 11 (A): Repeat Rnd 9. At the join, stay in A. (20 sts)
Check that the foot measures 2 in (5.1 cm) from the toe tip.
Heel Placeholder Round (Color A)
This round leaves a gap for the afterthought heel.
Rnd 12 (A): Ch 1, sc in each of the next 10 sts (counting each sc and dc as one st), ch 10, sk the next 10 sts, sl st to first sc, changing to B. (10 sc + 10 ch = 20 sts)
The 10 skipped stitches will become the bottom edge of the heel opening, and the 10 chains will become the top edge.
Leg (V-Cluster Stripes)
Rnd 13 (B): Ch 1, Vc around, working into the 10 sc and then into the 10 ch (insert the hook under the top loop and back bump of each chain). Sl st to join, changing to A. (10 Vc = 20 sts)
Rnds 14–22: Work as Rnd 9, alternating colors: Rnd 14 in A, Rnd 15 in B, and so on, ending with Rnd 22 in A. (20 sts each)
At the end of Rnd 22, complete the joining sl st with B and cut A, leaving a 6 in (15.2 cm) tail.
You now have 10 stripe rounds in the leg: 5 cream and 5 red. The leg measures about 2.2 in (5.6 cm) above the heel round.
Border (Cuff)
The cuff is the stocking’s border. It is solid cream sc that flares slightly so it reads as a separate band, like the folded top of a real stocking.
Border gauge: 5 sc and 6 rnds per 1 in (2.5 cm), the same as the toe.
Rnd 23 (B): Ch 1, sc 9, 2 sc in next st, sc 9, 2 sc in next st, sl st to join. (20 + 2 = 22 sts)
That is 20 sc worked one per existing stitch, plus 2 extra stitches. Laid flat, this gives 11 sts on the front and 11 sts on the back.
Rnds 24–28 (B): Ch 1, sc in each st around, sl st to join. (22 sts each: 11 front, 11 back)
Fasten off and leave a 12 in (30.5 cm) tail for the loop.
Why the math works: 22 sts at 5 sts per inch gives a 4.4 in (11.2 cm) circumference. Flat, that is 2.2 in (5.6 cm) wide, just 0.2 in (0.5 cm) wider than the 2 in (5.1 cm) leg. The two increases sit at the sides of the flattened stocking, so the cuff flares evenly without ruffling. The six rounds give exactly 1 in (2.5 cm) of depth.
Hanging Loop (Color B)
Make a slip knot with B, ch 24, and fasten off. That is about 4 in (10.2 cm) of chain. Fold it in half and sew both ends securely to the inside of the cuff at the back edge, right above the round joins, so the jog is hidden at the back. The loop hangs about 2 in (5.1 cm) above the cuff.
If you prefer, you can skip the separate chain and use the 12 in (30.5 cm) cuff tail to make the chain directly.
Afterthought Heel (Color A)
Turn the stocking so the heel opening faces you. The bottom edge has the 10 skipped stitches from Rnd 11. The top edge has the 10 chains from Rnd 12.
Rnd 1: Join A at one corner. Ch 1, work 10 sc across the bottom edge, then 10 sc into the underside loops of the chains along the top edge. Sl st to first sc. (10 + 10 = 20 sts)
Rnd 2: Ch 1, (sc 3, sc2tog) 4 times, sl st to join. (16 sts)
Rnd 3: Ch 1, (sc 2, sc2tog) 4 times, sl st to join. (12 sts)
Rnd 4: Ch 1, (sc 1, sc2tog) 4 times, sl st to join. (8 sts)
Rnd 5: Ch 1, sc2tog 4 times, sl st to join. (4 sts)
Fasten off, leaving a 6 in (15.2 cm) tail. Thread it through the front loops of the last 4 sts and pull it closed.
The heel is 5 rnds deep, about 0.8 in (2.0 cm). This brings the total foot length to about 2.75 in (7.0 cm).
Use the starting tail to close any small gaps at the two heel corners with a couple of stitches. This gives the clean red heel patch you see on the finished piece.
Finishing
Weave in all ends inside the stocking. Run the carried strands at the join neatly under the inside of the stitches so they don’t show through the clusters. The stocking is not stuffed.
Final Blocking
- Turn the stocking right side out and gently push the toe and heel into shape with a finger.
- Lay it flat with the round joins along the back edge of the leg, the heel to one side, and the toe pointing the other way.
- Pin the leg to 2 in (5.1 cm) wide and the cuff to 2.2 in (5.6 cm) wide.
- Check that the total height is 5 in (12.7 cm) and the foot length is 2.75 in (7.0 cm). Adjust the pins if needed.
- Hover a steam iron about 0.5 in (1.3 cm) above the piece, or mist it lightly with water. Do not press down on the clusters.
- Let it dry completely, then unpin it.
- Flip it over and repeat lightly on the back if the stocking curls.
Final Quality-Control Checklist
- Toe: 7 solid red rounds, ending at 20 sts, with a smooth rounded tip
- Foot: 4 stripe rounds (cream, red, cream, red)
- Heel round: 10 sc + 10 ch, with the opening lined up with the round joins
- Leg: 10 stripe rounds, 5 cream and 5 red, with 20 sts in every round
- Cuff: 6 cream rounds, 22 sts, 1 in (2.5 cm) deep
- Heel: closed at 4 sts with no gaps at the corners
- Loop: sewn securely at the back and centered over the joins
- Size: 5 in (12.7 cm) tall, 2 in (5.1 cm) wide at the leg, 2.75 in (7.0 cm) foot
- All ends woven in on the inside
Troubleshooting
Clusters are drifting or the count is off: Make sure every Vc goes into the sc of the cluster below, never the dc. Count 10 clusters every round.
A visible stair-step at the color changes: This jog is normal for stripes in joined rounds. Keep the joins in a straight line at the back, and block firmly.
Floats show through the stripes: Carry the unused yarn more loosely, and catch it under the joining sl st every round.
Holes at the heel corners: Pick up one extra sc in each corner on heel Rnd 1, then sc2tog it away on Rnd 2. Or sew the gap closed with the tail.
Cuff ruffles: Skip the increases in Rnd 23 and keep 20 sts.
Leg is too long: Remove one pair of stripe rounds (one red and one cream). Each pair takes off 0.4 in (1.0 cm).
Care
Hand wash in cool water, press out the water gently in a towel, and dry it flat in shape. Store it flat or hanging so the cuff and heel keep their shape.
Final Notes
The measurement chain is simple. A 20-stitch tube at 5 sts per inch gives a 2 in (5.1 cm) flat width. The toe and foot reach 2 in (5.1 cm) by Rnd 11. Ten stripe rounds add 2 in (5.1 cm) of leg, and the 22-stitch cuff adds 1 in (2.5 cm) of flared border. The 5-round heel completes a 2.75 in (7.0 cm) foot, and the whole stocking is about 5 in (12.7 cm) tall.
If you hit the gauge on the toe, everything after it falls into place. Make one, hang it up, and you’ll probably want a whole row of them on the tree.
Happy crocheting!