

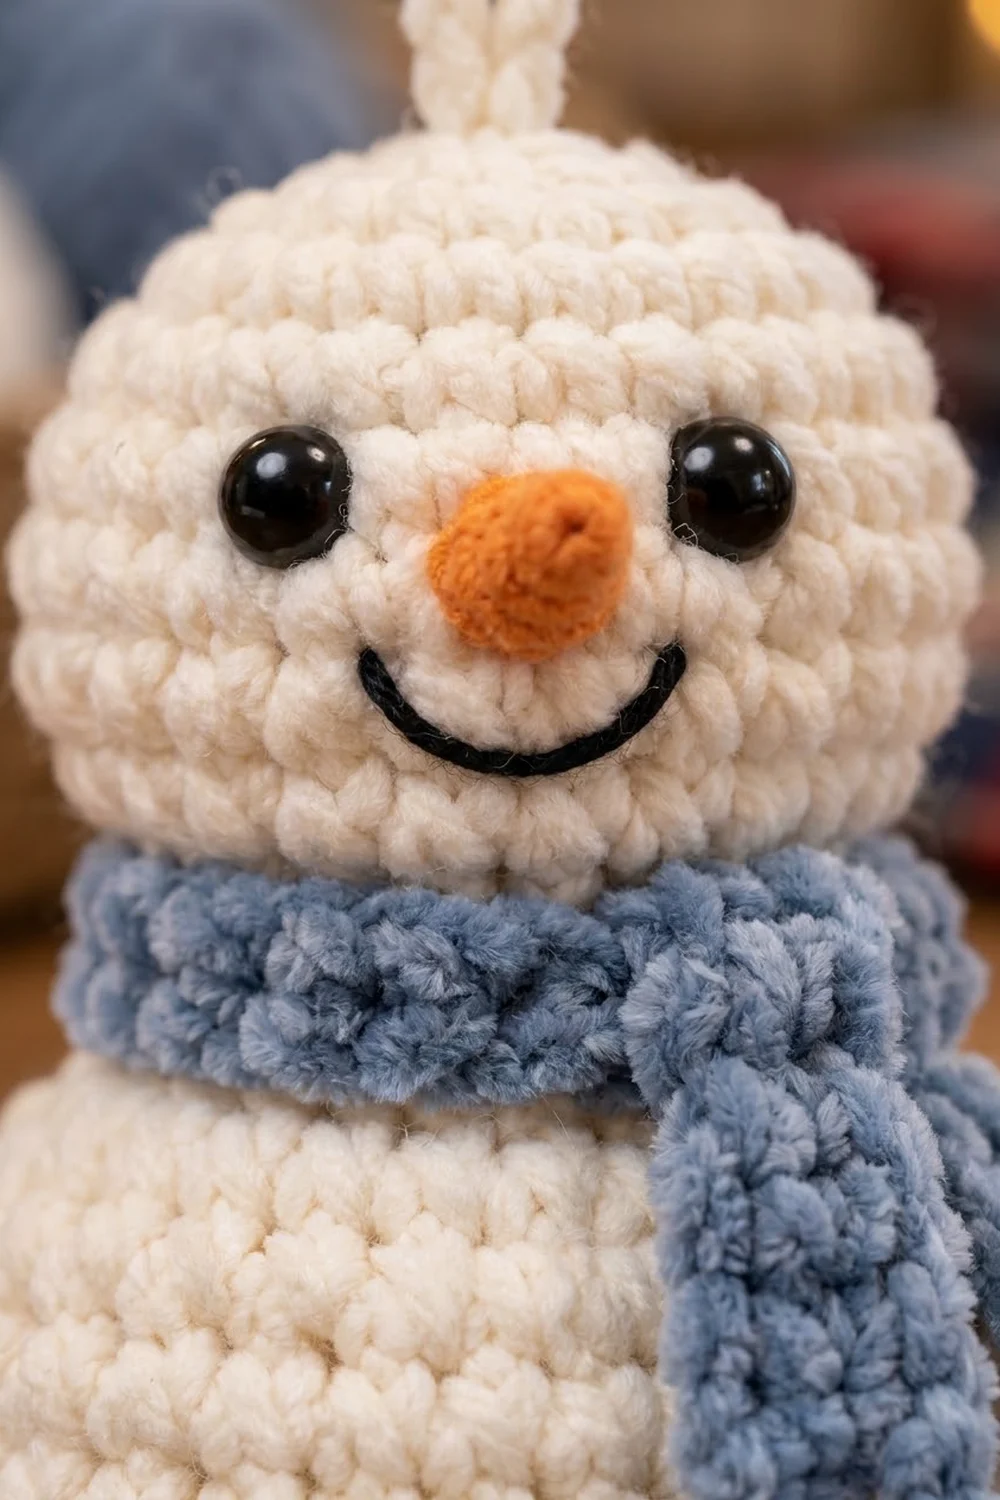
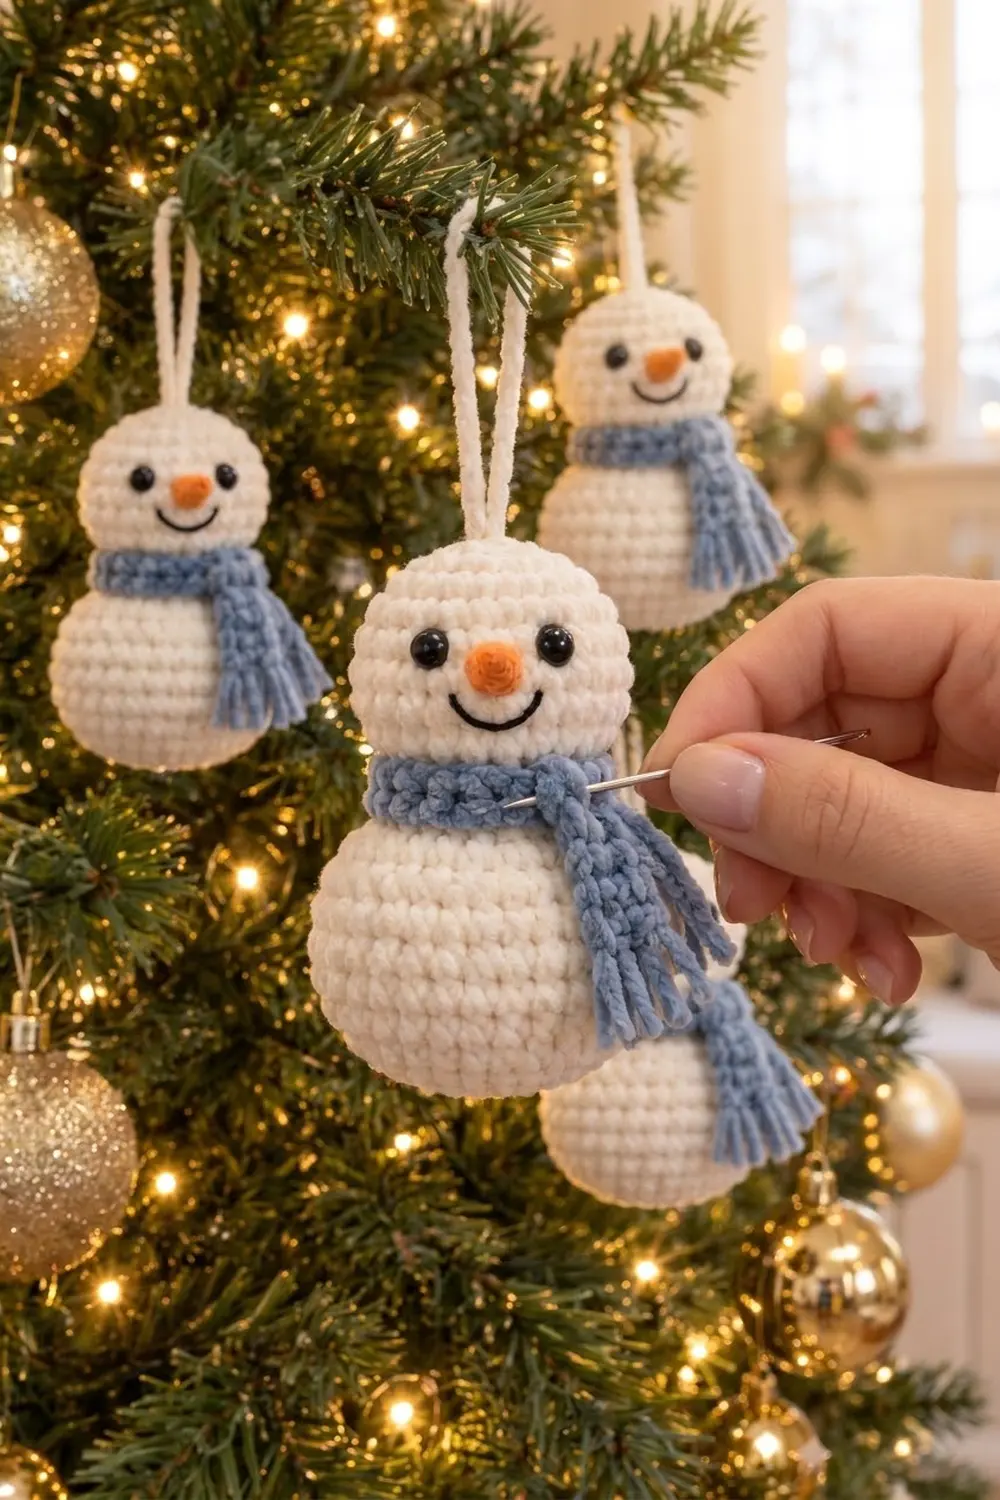
This little snowman is a quick amigurumi ornament for your tree, a gift tag or a stocking. He is worked in tight cream single crochet. His round body is slightly flattened at the base so he can sit or hang neatly, and a smaller head sits on top with a pinched neck.
The colors are cream for the snowman, dusty blue for the scarf, orange for the carrot nose and black for the eyes and smile. The look is soft, simple and Scandinavian-inspired: no hat, no buttons, just a cozy ridged scarf with fringed ends.
This pattern uses US crochet terms. The finished ornament is 4.25 in (10.8 cm) tall without the loop and 2.75 in (7.0 cm) wide at the body. The hanging loop adds 1.75 in (4.4 cm).
You crochet the body and head in one continuous spiral from the bottom up, stuffing as you go. Then you make a tiny carrot nose and a flat scarf, add the fringe, embroider the face and sew on a hanging cord.
Finished Size and Construction
- Finished size: 4.25 in (10.8 cm) tall, 2.75 in (7.0 cm) wide; head 2 in (5.1 cm) wide
- Skill level: Easy / advanced beginner
- Terminology: US crochet terms
- Yarn weight: Worsted (#4)
- Hook: 3.5 mm (E-4)
- Number of pieces: 1 ornament. It is made from 1 body-and-head piece, 1 nose, 1 scarf and 1 hanging cord.
- Layout: Head stacked on the body, worked in one continuous spiral
- Body circumference: 8.4 in (21.3 cm) at the widest round
- Size before scarf: 4.25 in x 2.75 in (10.8 cm x 7.0 cm)
- Scarf (“border”) depth: 0.75 in (1.9 cm) wide, 8 in (20.3 cm) long before fringe
Materials
Choose a smooth worsted-weight yarn in cotton, a cotton blend or acrylic. Smooth yarn shows clear, even stitches. Avoid fuzzy or brushed yarns, because they hide the stitch texture and make the face harder to place.
- Cream (body, head, loop): 15 g, about 30 m
- Dusty blue (scarf and fringe): 5 g, about 10 m
- Orange (nose): 1 g, about 2 m
- Black (smile): about 1 m of worsted or embroidery floss
All quantities include a small safety margin.
Tools:
– 3.5 mm (E-4) crochet hook
– 2 black safety eyes, 8 mm (embroider them instead for small children)
– About 10 g polyester fiberfill
– Stitch marker
– Tapestry needle
– Scissors
– Straight pins
Abbreviations (US Terms)
- MR: magic ring
- ch: chain
- sl st: slip stitch
- sc: single crochet
- hdc: half double crochet
- inc: 2 sc in the same stitch
- dec: single crochet two together. For a smoother finish, use the invisible decrease: insert the hook in the front loop only of the next 2 stitches, yarn over, pull through both front loops, then yarn over and pull through 2 loops.
- BLO: back loop only
- ( ) x6: repeat the sequence in brackets 6 times in total
- (n): stitch count at the end of the round or row
Special technique – spiral rounds: Do not join rounds. Move the stitch marker up to the first stitch of each new round.
Gauge and Checkpoints
Gauge: 5 sc and 5 rounds = 1 in (2.5 cm) in tight spiral sc with a 3.5 mm hook.
Make the base disk first as your test piece. If it measures correctly, carry on into the body without starting over.
Checkpoints:
– After Round 7: The flat base disk measures 2.75 in (7.0 cm) across.
– After Round 14: The body circumference measures 8.4 in (21.3 cm).
– After Round 27: The head circumference measures 6 in (15.2 cm).
– Finished: 4.25 in (10.8 cm) tall when stuffed.
If your piece is too big: Change to a 3.25 mm (D-3) hook, or crochet more tightly. Stuffing must not show between the stitches.
If your piece is too small: Change to a 3.75 mm (F-5) hook. Check again that no gaps open when you stuff firmly.
Body and Head (Cream)
Work in continuous spiral rounds. Place the marker in the first stitch of Round 1.
Body
Round 1: In a MR, work 6 sc. (6)
Round 2: Inc in each st around. (12)
Round 3: (Sc 1, inc) x6. (18)
Round 4: (Sc 2, inc) x6. (24)
Round 5: (Sc 3, inc) x6. (30)
Round 6: (Sc 4, inc) x6. (36)
Round 7: (Sc 5, inc) x6. (42)
Checkpoint: The disk lies flat and measures 2.75 in (7.0 cm) across.
Rounds 8–14 (7 rounds): Sc in each st around. (42 each round)
Checkpoint: The body circumference measures 8.4 in (21.3 cm).
Round 15: (Sc 5, dec) x6. (36)
Round 16: Sc in each st around. (36)
Round 17: (Sc 4, dec) x6. (30)
Round 18: (Sc 3, dec) x6. (24)
Stuff the body firmly now. Press the base gently against the table so it flattens slightly.
Round 19: (Sc 2, dec) x6. (18)
Round 20: Sc in each st around. (18)
Rounds 19 and 20 form the neck, which is 3.6 in (9.1 cm) around. Top up the stuffing through the neck opening.
Head
Keep working in the same spiral. Do not fasten off.
Round 21: (Sc 2, inc) x6. (24)
Round 22: (Sc 3, inc) x6. (30)
Rounds 23–27 (5 rounds): Sc in each st around. (30 each round)
Checkpoint: The head circumference measures 6 in (15.2 cm).
Insert the safety eyes now. Place them between Rounds 25 and 26, with 6 stitches between them, centered over the front of the body. To find the front, look for where the start-of-round jog sits; that side becomes the back.
Round 28: (Sc 3, dec) x6. (24)
Round 29: (Sc 2, dec) x6. (18)
Stuff the head firmly. Push a little extra fiberfill into the neck so the head stands upright.
Round 30: (Sc 1, dec) x6. (12)
Round 31: Dec x6. (6)
Fasten off, leaving a 6 in (15.2 cm) tail. Thread the tail through the front loops of the last 6 stitches and pull tight to close. Weave in the end.
Shaping the Neck
Thread a 12 in (30.5 cm) strand of cream yarn onto the needle. Weave it in and out around Round 20, pull it snug to deepen the neck, then knot and hide the ends inside. This gives the clear two-ball snowman shape.
Carrot Nose (Orange)
Round 1: In a MR, work 4 sc. (4)
Round 2: (Sc 1, inc) x2. (6)
Round 3: Sc in each st around. (6)
Fasten off, leaving an 8 in (20.3 cm) tail. Do not stuff the nose; it holds its cone shape on its own. It measures about 0.6 in (1.5 cm) long.
Center the nose between the eyes, between Rounds 24 and 25. Sew around the open edge with the tail.
Smile (Black)
With black yarn, make a curved backstitch smile 7 stitches wide. Start at Round 23, one stitch outside each eye. Dip the center down to Round 22 and come back up to Round 23 on the other side. Knot the ends inside the head.
Border: Scarf Trim (Dusty Blue)
On this ornament the scarf works as the finishing “border”. It frames the neck and adds the main color accent.
Scarf gauge: 5 hdc = 1 in (2.5 cm); 4 rows of hdc = 1 in (2.5 cm).
Foundation: Ch 42.
Row 1: Hdc in the 3rd ch from the hook and in each ch across. (40 hdc; the turning chain does not count)
Row 2: Ch 2 (does not count), turn. Hdc in the BLO of each st across. (40)
Row 3: Ch 2 (does not count), turn. Hdc in the BLO of each st across. (40)
Fasten off and weave in the ends.
Scarf counts per side:
– Each long edge: 40 stitches = 8 in (20.3 cm)
– Each short end: 3 rows = 0.75 in (1.9 cm)
Working into the back loops creates the ridged texture you see on the scarf.
Fringe
Cut 12 strands of blue, each 3 in (7.6 cm) long. On each short end, attach 3 fringes, one in each row end, using 2 strands per fringe.
To attach a fringe, fold the strands in half, pull the fold through the row end, then pull the cut ends through the loop. After trimming, the fringe hangs 1 in (2.5 cm).
Why the Math Works
The stuffed neck, with the scarf’s own thickness, takes about 4.4 in (11.2 cm) of the 8 in (20.3 cm) scarf. That leaves 3.6 in (9.1 cm) for the two tails. Cross the scarf at the front-side of the neck so that one tail hangs about 2.4 in (6.1 cm) down the body and the other tail, about 1.2 in (3.0 cm), tucks over the knot. With its 1 in (2.5 cm) fringe, the long tail ends just above the base, as in the photo.
Attaching the Scarf
Wrap the scarf around the neck, cross the ends and arrange the tails. Sew 3 or 4 small, hidden stitches through the scarf and into the neck so it cannot slip off.
Hanging Loop (Cream)
Row 1: Ch 26. Sl st in the 2nd ch from the hook and in each ch across. (25 sl st)
This makes a firm cord about 4 in (10.2 cm) long. Fold it in half and sew both ends into the top of the head, about 0.25 in (0.6 cm) deep, over the closed ring. The finished loop stands 1.75 in (4.4 cm) tall.
Final Blocking
- Roll the body gently between your palms to even out the stuffing.
- Press the base against the table to set the slight flat bottom.
- Hold a steam iron about 1 in (2.5 cm) away from the piece. Steam the scarf lightly, but do not touch the safety eyes.
- Pin the long scarf tail flat against the body while it is still warm.
- Comb the fringe straight with your fingers and trim it to an even 1 in (2.5 cm).
- Let the ornament dry fully before removing the pins.
- Hang it by the loop and check that it stays upright. Adjust the stuffing in the neck if it tilts.
Final Quality-Control Checklist
- The ornament measures 4.25 in (10.8 cm) tall and 2.75 in (7.0 cm) wide.
- No stuffing shows between the stitches.
- The eyes are level, sit between Rounds 25 and 26, and have 6 stitches between them.
- The nose is centered and points straight forward.
- The smile is symmetrical.
- The neck is clearly pinched and the scarf is secured.
- The fringe on both ends is an even 1 in (2.5 cm).
- The loop is centered and firmly sewn.
- All ends are hidden inside the piece.
Troubleshooting
- Gaps show stuffing: Go down a hook size, or wrap the yarn twice around your finger for tighter tension.
- Body is cone-shaped instead of round: Your increases are stacking. Shift the inc position by one stitch in alternate rounds.
- Head flops forward: Add more stuffing to the neck and tighten the cinching strand around Round 20.
- Scarf is too short: Your hdc are tighter than gauge. Add 5 chains to the foundation for every 1 in (2.5 cm) you are missing.
- Nose leans down: Stuff a tiny wisp of fiberfill into the nose and sew all the way around its edge.
- Visible jog at the color change: Keep the start of the round at the back of the ornament.
Care
Spot clean with a damp cloth and mild soap, and let the ornament air dry. Store it in a box with tissue paper so the scarf fringe stays straight.
Final Notes
The measurement chain is simple:
– The 2.75 in (7.0 cm) base disk sets the body at 8.4 in (21.3 cm) around.
– The 18-stitch neck pinches the shape at 3.6 in (9.1 cm).
– The 30-stitch head reaches 6 in (15.2 cm) around.
– The finished snowman stands 4.25 in (10.8 cm) tall.
– The 40-stitch, 8 in (20.3 cm) scarf wraps the neck once with room for a fringed tail.
Check your gauge on the base disk, and every later stage will fall into place. Make one snowman, then a few more for the whole tree.
Happy crocheting!