

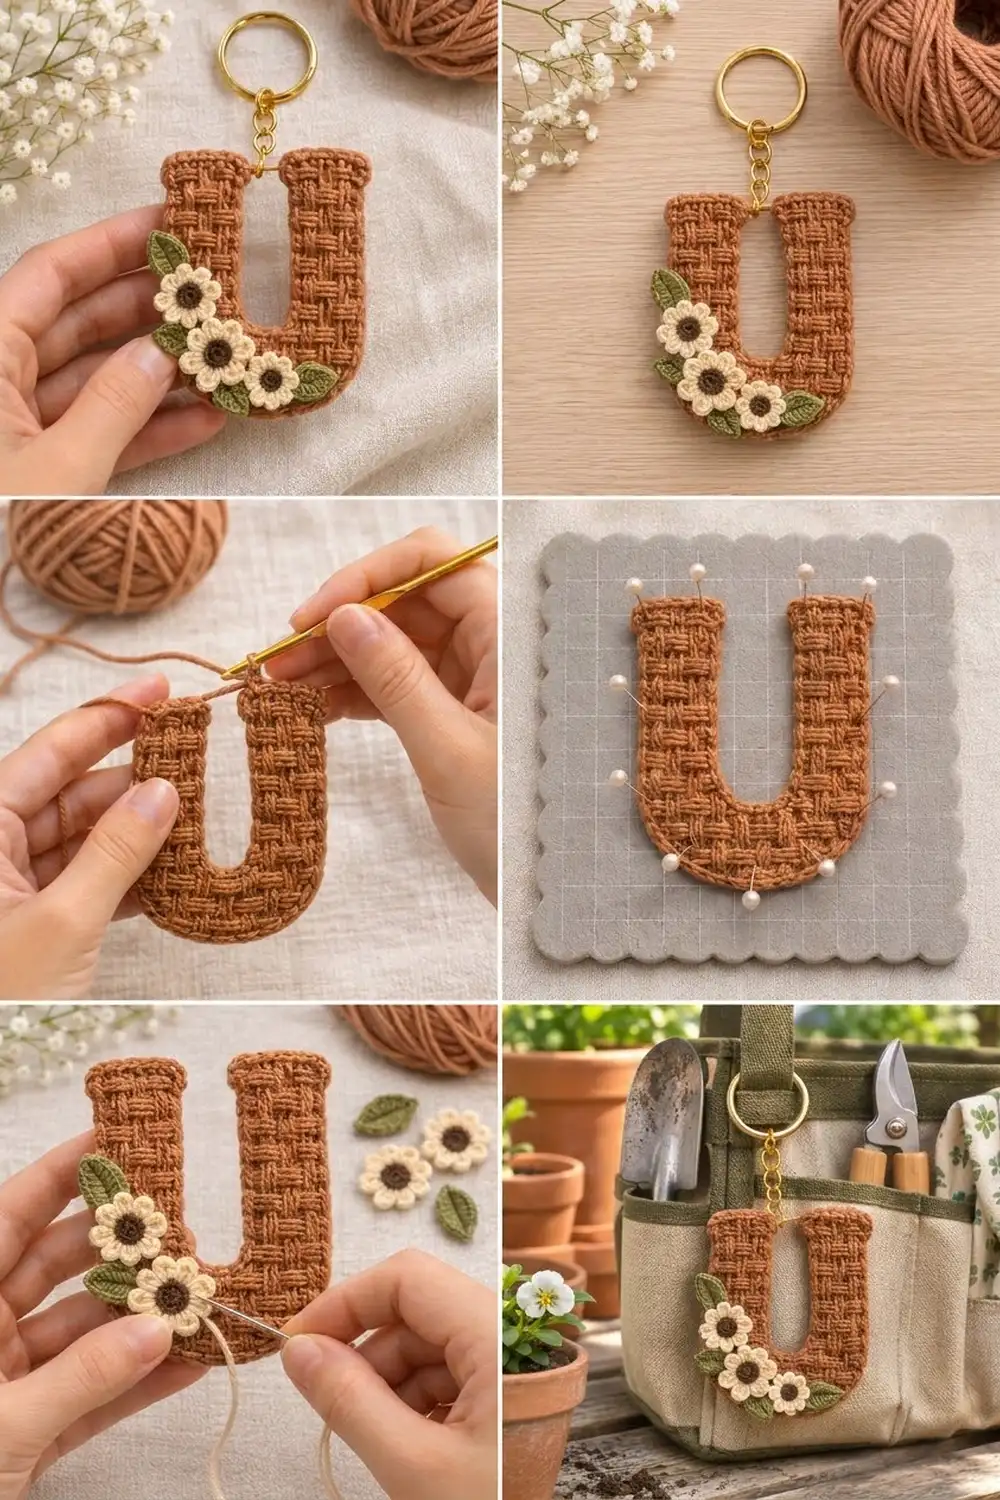
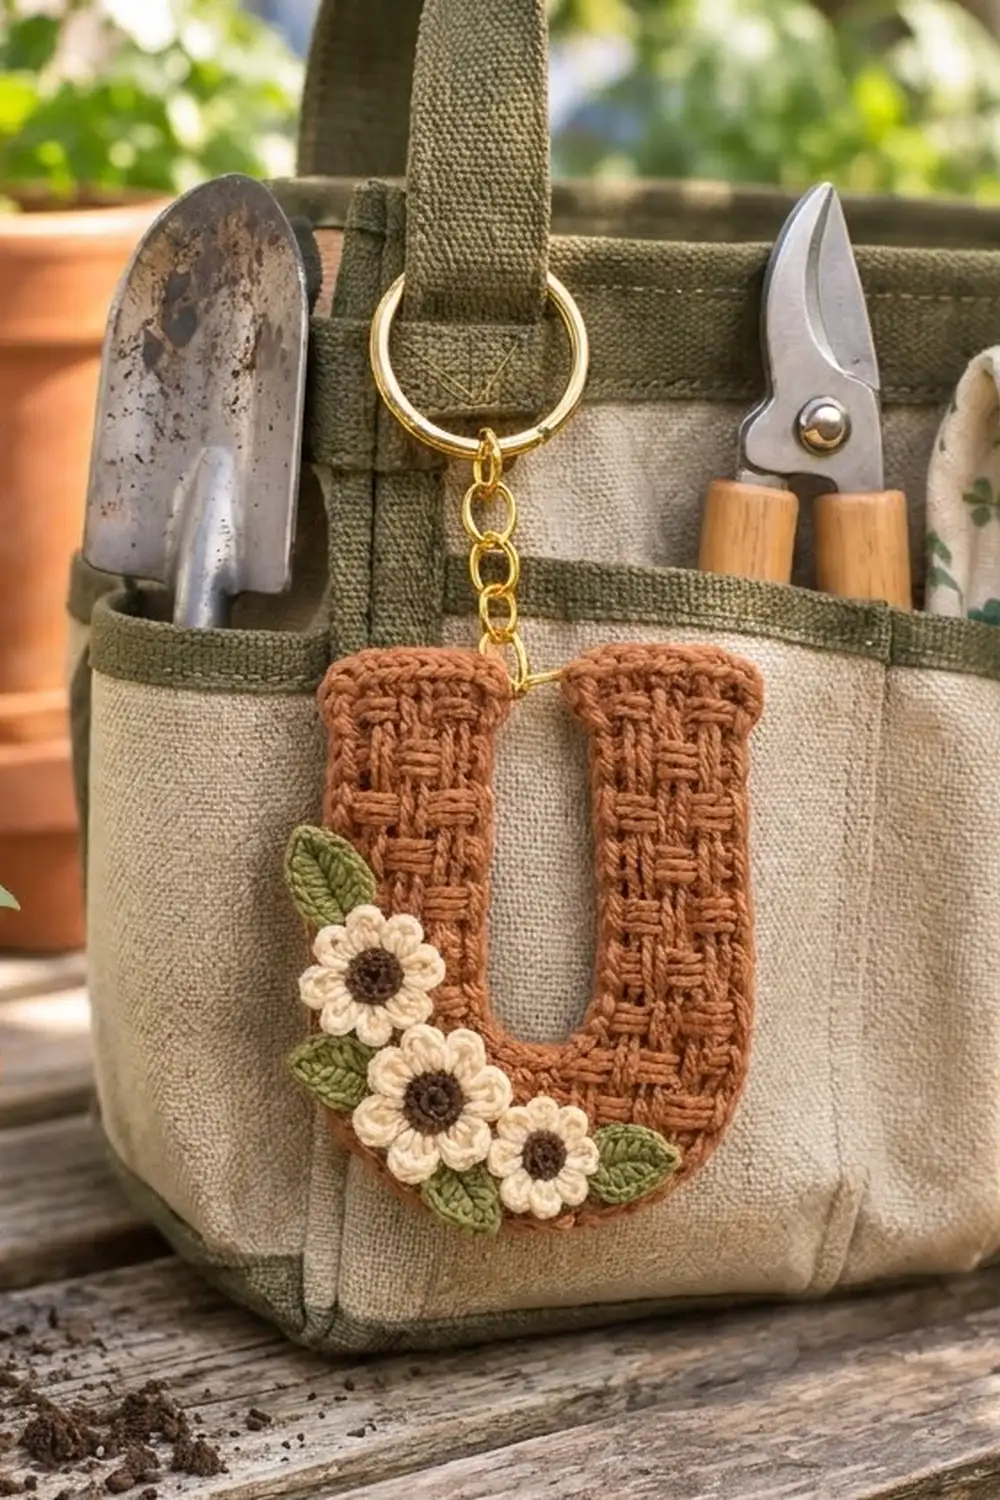
This letter U keychain looks like a tiny woven garden basket. The letter is worked in warm cinnamon rust with a raised basketweave texture. A smooth corded rim outlines the shape, and a small cluster of cream daisies with sage leaves sits along the lower-left curve.
The colors are rust brown for the letter, cream petals with dark chocolate centers, and sage-green leaves, finished with a gold key ring and chain. It’s a cozy, cottage-garden style that works on a tote, a set of keys, or a gift bag.
The pattern uses US crochet terms. The finished keychain measures 3.375 in (8.6 cm) wide across the body, 3.625 in (9.2 cm) across the cap tops, and 4 in (10.2 cm) tall.
You work the letter flat in rows from the bottom up. The rounded bottom bar comes first, then each arm is worked separately and finished with a two-row cap. Two border rounds add the corded rim. The flowers and leaves are made separately and sewn on after blocking.
Finished Size and Construction
- Finished size: 3.375 in (8.6 cm) wide × 4 in (10.2 cm) tall; 3.625 in (9.2 cm) across the caps
- Skill level: Intermediate (post stitches, simple shaping)
- Terminology: US
- Yarn weight: Sport (#2)
- Hook: 2.75 mm (US C-2)
- Number of pieces: 1 letter body + 3 flowers + 3 leaves, assembled into one keychain
- Layout: One letter U; the appliqués are clustered on the lower-left curve
- Body size before border: 2.875 in (7.3 cm) wide × 3.5 in (8.9 cm) tall
- Border depth: 0.25 in (0.6 cm) per side
Materials
Use a smooth, firmly plied cotton or cotton-blend sport yarn so the post stitches show crisp blocks. Fuzzy yarns blur the weave.
- Rust brown (main): 15 g / 45 m
- Cream (petals): 4 g / 12 m
- Dark brown (flower centers): 2 g / 6 m
- Sage green (leaves): 3 g / 9 m
Tools:
– 2.75 mm (US C-2) hook
– Tapestry needle
– 4 stitch markers
– Rust-proof pins and a blocking mat
– Spray bottle
– Gold split key ring, 1 in (2.5 cm), with a short chain about 0.75 in (1.9 cm) long
– Gold jump ring
– 2 pairs of flat-nose pliers
These yarn quantities include a small margin for swatching and weaving in ends.
Abbreviations (US Terms)
- ch – chain
- sl st – slip stitch
- sc – single crochet
- hdc – half double crochet
- dc – double crochet
- FPdc – front post double crochet
- BPdc – back post double crochet
- sc2tog – single crochet 2 together
- rev sc – reverse single crochet (crab stitch)
- st(s) – stitch(es)
- RS / WS – right side / wrong side
Special stitches: basketweave blocks
Each block is 3 stitches wide.
- R (raised block): on a RS row, FPdc in each of the next 3 sts. On a WS row, BPdc in each of the next 3 sts.
- S (sunken block): on a RS row, BPdc in each of the next 3 sts. On a WS row, FPdc in each of the next 3 sts.
On every row, the ch-2 turning chain does not count as a stitch. Each row begins with one plain dc edge stitch and ends with one.
Gauge and Checkpoints
Gauge: 32 sts and 16 rows = 4 in (10.2 cm) in basketweave pattern. That works out to 8 sts and 4 rows per 1 in (2.5 cm).
Your test piece is the bottom bar itself (Rows 1–7). Measure it before you start the arms:
- After Row 1: 2.125 in (5.4 cm) wide
- After Row 2: 2.625 in (6.7 cm) wide
- After Row 7: 2.875 in (7.3 cm) wide × 1.75 in (4.4 cm) tall
- After Row 13: 3.25 in (8.3 cm) tall
- After caps: 3.5 in (8.9 cm) tall
- After border: 3.375 in (8.6 cm) × 4 in (10.2 cm)
If the bar is wider than 2.875 in (7.3 cm), go down a hook size. If it’s narrower, go up one. If only the height is off, check your dc height and make sure you aren’t pulling the post stitches tight.
Letter Body
Bottom Bar
With rust brown:
Row 1 (WS): Ch 19. Dc in 3rd ch from hook and in each ch across. Turn. (17 sts)
Row 2 (RS): Ch 2, 3 dc in first st, R, S, R, S, R, 3 dc in last st. Turn. (21 sts: 3 plain + 15 block sts + 3 plain)
Row 3 (WS): Ch 2, 2 dc in first st, dc in next 2 sts, R, S, R, S, R (each block keeps its texture), dc in next 2 sts, 2 dc in last st. Turn. (23 sts: 4 plain + 15 block sts + 4 plain)
Rows 2–3 round off the bottom corners. The 4 plain stitches at each side now become a 1-stitch edge plus a new block.
Row 4 (RS): Ch 2, dc in first st, R, S, R, S, R, S, R, dc in last st. Turn. (23 sts)
The center five blocks have switched texture. The new outer blocks are worked around the plain dc below them.
Row 5 (WS): Ch 2, dc in first st, R, S, R, S, R, S, R, dc in last st. Turn. (23 sts)
Row 6 (RS): Ch 2, dc in first st, S, R, S, R, S, R, S, dc in last st. Turn. (23 sts)
Row 7 (WS): Ch 2, dc in first st, S, R, S, R, S, R, S, dc in last st. Turn. (23 sts)
Checkpoint: 2.875 in (7.3 cm) × 1.75 in (4.4 cm).
Number the Row 7 stitches 1–23. The first arm uses sts 1–8, the gap is sts 9–15 (7 sts), and the second arm uses sts 16–23. Place markers in sts 8 and 16.
First Arm
Row 8 (RS): Ch 2, dc in first st, R, S, dc in next st (marked st 8). Leave the rest unworked. Turn. (8 sts)
St 8 was part of a block below. It now becomes this arm’s plain edge stitch.
- Row 9 (WS): Ch 2, dc, S, R, dc. Turn. (8 sts)
- Row 10 (RS): Ch 2, dc, S, R, dc. Turn. (8 sts)
- Row 11 (WS): Ch 2, dc, R, S, dc. Turn. (8 sts)
- Row 12 (RS): Ch 2, dc, R, S, dc. Turn. (8 sts)
- Row 13 (WS): Ch 2, dc, S, R, dc. Turn. (8 sts)
Cap Row 14 (RS): Ch 1, 2 sc in first st, sc in next 6 sts, 2 sc in last st. Turn. (10 sts)
Cap Row 15 (WS): Ch 1, sc in each st. (10 sts)
Fasten off. The arm should measure 1 in (2.5 cm) wide, and the cap 1.25 in (3.2 cm) wide.
Second Arm
With RS facing, join rust brown in marked st 16 of Row 7.
- Row 8 (RS): Ch 2, dc in same st, S, R, dc in last st. Turn. (8 sts)
- Row 9 (WS): Ch 2, dc, R, S, dc. Turn.
- Row 10 (RS): Ch 2, dc, R, S, dc. Turn.
- Row 11 (WS): Ch 2, dc, S, R, dc. Turn.
- Row 12 (RS): Ch 2, dc, S, R, dc. Turn.
- Row 13 (WS): Ch 2, dc, R, S, dc. Turn. (8 sts)
- Cap Rows 14–15: Work as for the first arm. (10 sts)
Do not fasten off.
Checkpoint: 2.875 in (7.3 cm) wide at the arms, 3.125 in (7.9 cm) across the caps, and 3.5 in (8.9 cm) tall. The gap is 0.875 in (2.2 cm) wide, narrowing to 0.625 in (1.6 cm) between the caps.
Flowers (Make 3)
Rnd 1: With dark brown, make a magic ring, ch 1, 8 sc in ring. Join with sl st to first sc. Pull the ring tight and fasten off. (8 sc)
Rnd 2: Join cream in any sc. (Sl st, hdc, dc, hdc) in next sc. Repeat from * 8 times total. Join with sl st to first sl st. (32 sts; 8 petals)
Fasten off, leaving a 10 in (25.4 cm) tail. The center is 0.375 in (1.0 cm) across, and the flower is 0.875 in (2.2 cm) across.
Leaves (Make 3)
With sage green, ch 7.
- Side 1: Starting in the 2nd ch from hook, sc, hdc, dc, dc, hdc in the next 5 chs, then 3 sc in the last ch.
- Side 2: Rotate and work along the opposite side of the chain: hdc, dc, dc, hdc, sc in the next 5 chs. Sl st in the skipped tip ch.
That makes 13 sts plus the sl st. Fasten off, leaving an 8 in (20.3 cm) tail.
The foundation chain forms the center vein. Each leaf is 0.875 in (2.2 cm) long and 0.5 in (1.3 cm) wide.
Border
Border gauge: 8 sc = 1 in (2.5 cm).
Work 1 sc per stitch top and 2 sc per dc row end. On the cap rows, work 1 sc per sc row end.
Rnd 1 (RS): Continuing from the second arm, turn the piece so the RS faces you. Work around the whole letter in this order, starting across the second cap:
- Cap 2 top: 3 sc in first st, sc in next 8 sts, 3 sc in last st. (14 sc)
- Second arm, inner side: 1 sc in each cap row end (2) + 2 sc in each of the 6 dc row ends (12). (14 sc)
- Gap (7 sts of Row 7): sc2tog, sc in next 3, sc2tog. (5 sts)
- First arm, inner side: (14 sc)
- Cap 1 top: 3 sc in first st, sc in next 8 sts, 3 sc in last st. (14 sc)
- First outer side: 2 cap sc + 2 sc in each of the 13 dc row ends (26). (28 sc)
- Bottom edge (17 foundation sts): 2 sc in first st, sc in next 15, 2 sc in last st. (19 sc)
- Second outer side: (28 sc)
Join with sl st to first sc. (136 sts)
Rnd 2: Ch 1, rev sc in each st around. Join and fasten off. (136 rev sc)
Why the math works:
– Each dc row is 0.25 in (0.6 cm) tall, and 2 sc at 8 per inch also span 0.25 in. So the 28 sc on each outer side match the 3.5 in (8.9 cm) body height exactly.
– The inner sides have 14 sc = 1.75 in (4.4 cm), which matches 6 dc rows plus 2 cap rows.
– The 2-sc bottom corners continue the curve begun in Rows 2–3.
– The gap sc2togs pull the inside of the U into a smooth arch.
– Check the total: 14 + 14 + 5 + 14 + 14 + 28 + 19 + 28 = 136.
– The two rounds add 0.25 in (0.6 cm) per side: 2.875 + 0.5 = 3.375 in (8.6 cm) wide, and 3.5 + 0.5 = 4 in (10.2 cm) tall.
Final Blocking
- Weave in all body ends along the WS row ends, not across the blocks.
- Lay the letter RS up on the mat. Pin the four cap corners first so the arms are parallel, 0.625 in (1.6 cm) apart at the caps.
- Pin the outer sides straight to 3.375 in (8.6 cm) total width, and the bottom of the U to 4 in (10.2 cm) total height. Ease the bottom into a smooth curve with 3 pins.
- Spray until damp, not soaked. Pat the blocks flat with your fingertips; don’t press the texture.
- Let it dry completely, then unpin.
- Arrange the appliqués on the lower-left curve:
- Flower 1 on the outer edge of the left arm, about 1.25 in (3.2 cm) above the bottom.
- Flower 2 on the bottom-left curve.
- Flower 3 at the bottom, just left of center.
- Let each flower extend about 0.125 in (0.3 cm) past the rim.
- Tuck the leaves partly under the flowers:
- Leaf 1 above Flower 1, pointing up and out.
- Leaf 2 between Flowers 1 and 2 on the outer edge.
- Leaf 3 to the right of Flower 3, pointing right.
- Sew each leaf with small stitches along its vein. Sew each flower around its center and behind each petal base. Hide the tails on the WS.
- Open the jump ring with two pliers. Thread it through the center of the left cap, just under Border Rnd 1. Add the chain end and close the ring fully.
Final Quality-Control Checklist
- [ ] Body measures 3.375 in (8.6 cm) × 4 in (10.2 cm)
- [ ] Each arm is the same width and the same height
- [ ] Blocks alternate cleanly with no texture skipped
- [ ] Border Rnd 1 has 136 sts; the corded rim lies flat with no ruffles
- [ ] Inner arch is smooth, not puckered or pointed
- [ ] Three flowers with 8 petals each, centers secure
- [ ] Leaves are hidden at their bases, with tips free
- [ ] Jump ring is fully closed and the cap isn’t stretched
Troubleshooting
- Blocks look like stripes, not a weave: You forgot to switch textures. Switch on Rows 4, 6, 8, 10, and 12 only.
- Fabric curls toward the WS: The post stitches are too tight. Lengthen the loop before yarning over, then block flat.
- Arms lean apart: Your stitch count is off. Recount: each arm must start from exactly 8 sts, with 7 left in the gap.
- Border ruffles: Use exactly 2 sc per dc row end. If it still ruffles, use the next smaller hook for Rnd 2.
- Inner arch is pointed: Make sure both sc2togs are worked in the gap.
- Petals look like lumps: Start each petal group with the sl st so there’s a dip between petals.
Care
Hand wash in cool water, press out the water in a towel, and dry flat. Re-pin the arms if they drift. Remove the key ring before washing.
Final Notes
The measurement chain runs like this:
1. The 17-stitch foundation is 2.125 in (5.4 cm) wide.
2. The bar grows to 23 stitches, or 2.875 in (7.3 cm).
3. Two 8-stitch arms rise to 3.25 in (8.3 cm).
4. The caps bring the height to 3.5 in (8.9 cm).
5. The 136-stitch border finishes the letter at 3.375 in (8.6 cm) × 4 in (10.2 cm).
If each checkpoint matches, the finished keychain will too.
Happy crocheting!