

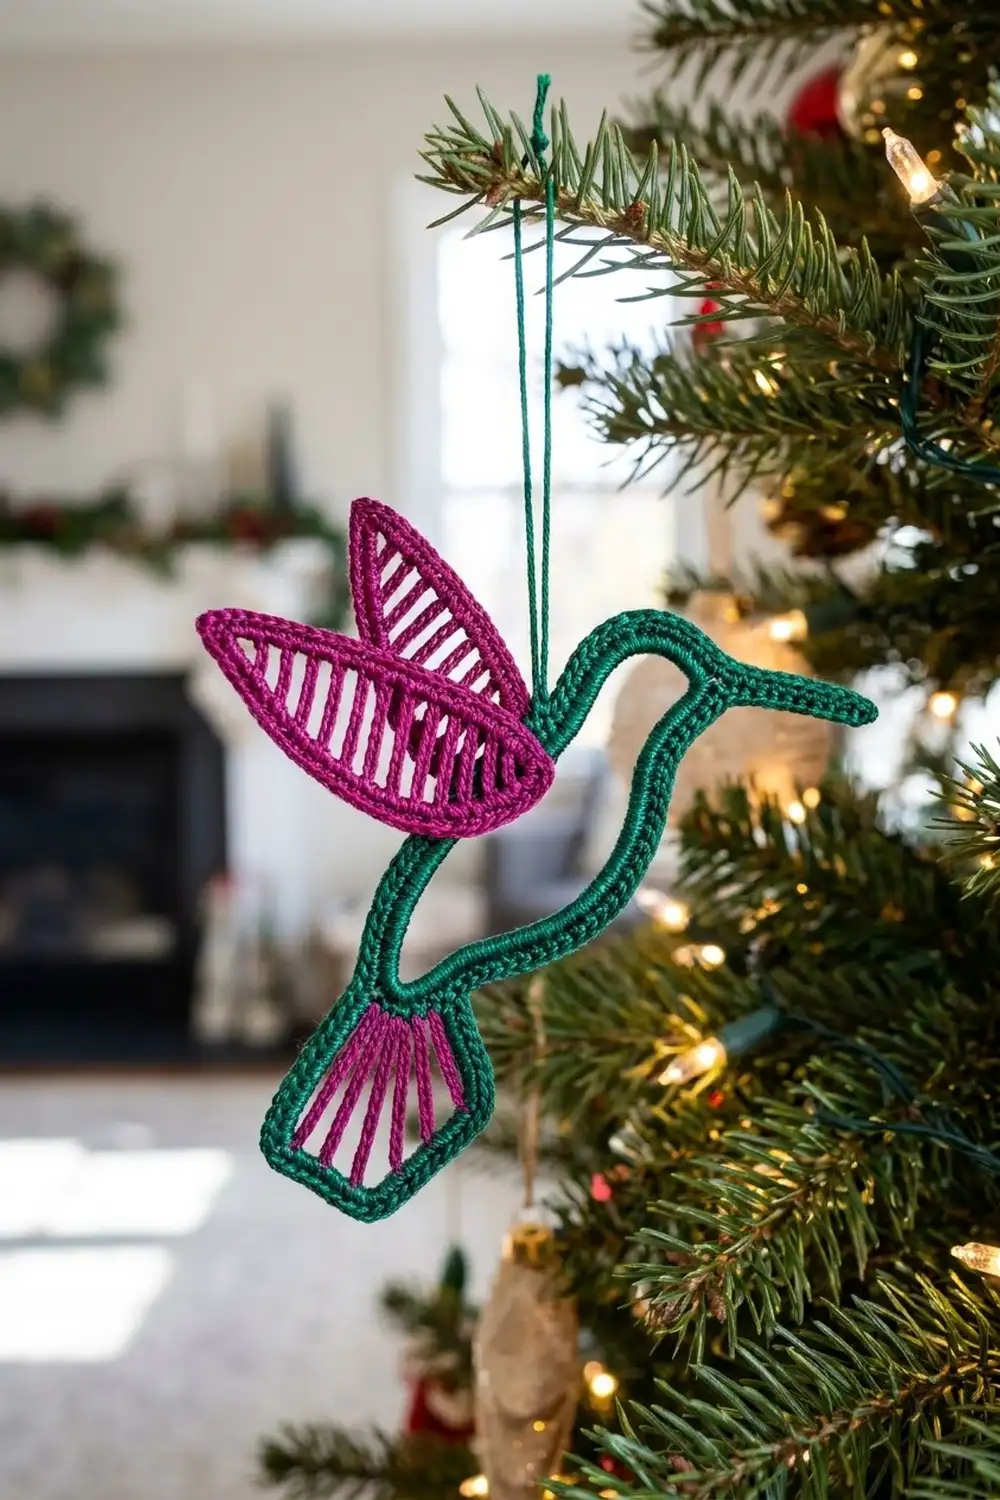
The Garden Flicker Hummingbird is a light, lacy ornament with a crisp outline. A deep emerald body forms the head, beak, teardrop body and fan tail. Two bright magenta wings with open bars give it a feeling of movement. It looks great on a tree, in a window or tied onto a gift.
The design uses two colors: emerald green for the body outline, tail edging and hanging loop, and magenta pink for the wings and tail spokes. Mercerized cotton thread gives the glossy, cord-like lines, and a light starch keeps the bird flat and sharp.
This pattern uses US crochet terms. The finished ornament measures about 5 in (12.7 cm) wide and 4.5 in (11.4 cm) tall, not counting the hanging loop.
You make it as one piece. First comes the head ring, then the beak, then the hollow body loop. Next, you work both wings directly off the back of the body. Last, you add the pink tail fan, the green tail edging (the border) and a hanging loop. There is no sewing apart from weaving in ends.
Finished Size and Construction
- Finished size: about 5 in (12.7 cm) wide × 4.5 in (11.4 cm) tall
- Skill level: Intermediate (thread work, tall stitches)
- Terminology: US crochet terms
- Yarn weight: Size 3 mercerized cotton crochet thread
- Hook: 2.0 mm steel hook
- Number of pieces: 1 (wings and tail are worked directly onto the body)
- Layout: Head ring with beak facing right, body hanging below it, wings sweeping up and left, tail at the bottom
- Piece size: 5 in (12.7 cm) × 4.5 in (11.4 cm)
- Size before border: 5 in (12.7 cm) × 4.4 in (11.2 cm)
- Border depth: one round of sc, about 0.1 in (0.3 cm), worked around the tail fan
Materials
Use a smooth, tightly twisted, mercerized cotton thread in size 3. Mercerized cotton holds its shape after starching and gives the glossy, rope-like lines this bird needs. Avoid fuzzy or loosely plied thread, because it hides the open spaces in the wings.
- Emerald green: 5 g, about 30 m (33 yd)
- Magenta pink: 4 g, about 25 m (27 yd)
These amounts include a margin for your gauge swatch, weaving in ends and one restart.
Tools:
– 2.0 mm steel crochet hook
– Fine tapestry needle
– 2 locking stitch markers
– Small sharp scissors
– Spray starch or a 1:1 mix of white craft glue and water
– Foam blocking board and rustproof pins
– Ruler or tape measure
Abbreviations (US Terms)
- ch – chain
- sl st – slip stitch
- sc – single crochet
- dc – double crochet
- tr – treble crochet (yarn over twice)
- dtr – double treble crochet (yarn over 3 times, then draw through 2 loops at a time 4 times)
- sk – skip
- sp – space
- st(s) – stitch(es)
Special technique, sc around a post: insert the hook from front to back around the whole post of a tall stitch, yarn over, pull up a loop and finish as a normal sc. This is how the tail edging wraps along the sides of the tail spokes.
Gauge and Checkpoints
Gauge: 16 sc = 2 in (5.1 cm) worked in a row along a foundation chain, which is 8 sc per 1 in (2.5 cm).
Make the head ring and beak first and measure them before you go on. These parts are small, so they show a gauge problem quickly.
Checkpoints:
– Head ring: outer diameter 0.9 in (2.3 cm), center opening about 0.4 in (1.0 cm)
– Beak: 15 sc = 1.9 in (4.8 cm) long
– Body loop: 40 sc around, hanging about 2.25 in (5.7 cm) from neck to bottom point
– Upper wing base: 20 sc = 2.5 in (6.4 cm)
– Lower wing base: 17 sc = 2.1 in (5.3 cm)
– Tail top edge: 10 sc = 1.25 in (3.2 cm)
If your beak is longer than 1.9 in (4.8 cm), your stitches are too loose. Go down to a 1.75 mm hook. If it is shorter than 1.8 in (4.6 cm), go up to a 2.25 mm hook. Fix the gauge rather than changing stitch counts. Every part of the bird uses the same 8-sc-per-inch logic, so the proportions only hold if the gauge does.
Pattern
Part 1: Head Ring (Green)
Ch 10, sl st in the first ch to form a ring.
Rnd 1: Ch 1 (does not count as a stitch), work 18 sc into the ring, sl st in the first sc. (18 sc)
Number the stitches in your mind: st 1 points forward (toward the beak) and the count runs clockwise. St 7 sits at the throat, st 11 at the back of the neck and st 14 at the top of the head. Place a marker in st 1.
Checkpoint: the outer diameter is 0.9 in (2.3 cm) and the center stays open at about 0.4 in (1.0 cm).
Part 2: Beak (Green)
Continue from the ring without fastening off.
Ch 16. Sc in the 2nd ch from the hook and in each ch across, then sl st in ring st 2. (15 sc)
The beak is a single straight line of sc that tapers to a point at the tip, because the turning ch tightens the end.
Checkpoint: the beak measures 1.9 in (4.8 cm) from the ring to the tip.
Part 3: Body Loop (Green)
Sl st in ring sts 3 through 7 (5 sl sts). This moves you to the throat.
Ch 40, then sl st in ring st 11. The chain hangs down as a long loop, leaving ring sts 8, 9 and 10 free between its two ends.
Body row: Ch 1, turn. Sc in each ch of the loop all the way back to the throat, then sl st in ring st 7. (40 sc) Fasten off and weave in the end.
Number the body sts in the order you worked them. Body st 1 is next to the back of the neck (ring st 11) and body st 40 is next to the throat (ring st 7). Sts 1 to 19 form the back, st 20 is the bottom point and sts 21 to 40 form the belly. Place a marker in body st 20.
Pinch the bottom of the loop at st 20 to form a teardrop.
Checkpoint: the body hangs about 2.25 in (5.7 cm) from the neck to the bottom point, with a total outline length of 40 sc = 5 in (12.7 cm).
Part 4: Upper Wing (Pink)
The wing is worked in 3 rows straight off the back of the body. Row 1 is the straight lower edge, Row 2 adds the vertical bars and Row 3 is the arched upper edge.
Row 1: Join pink with a sl st in body st 3. Ch 21. Sc in the 2nd ch from the hook and in each ch across, back toward the body, then sl st in body st 4 to anchor. (20 sc)
Wing st 1 is at the tip and wing st 20 is at the base next to the body.
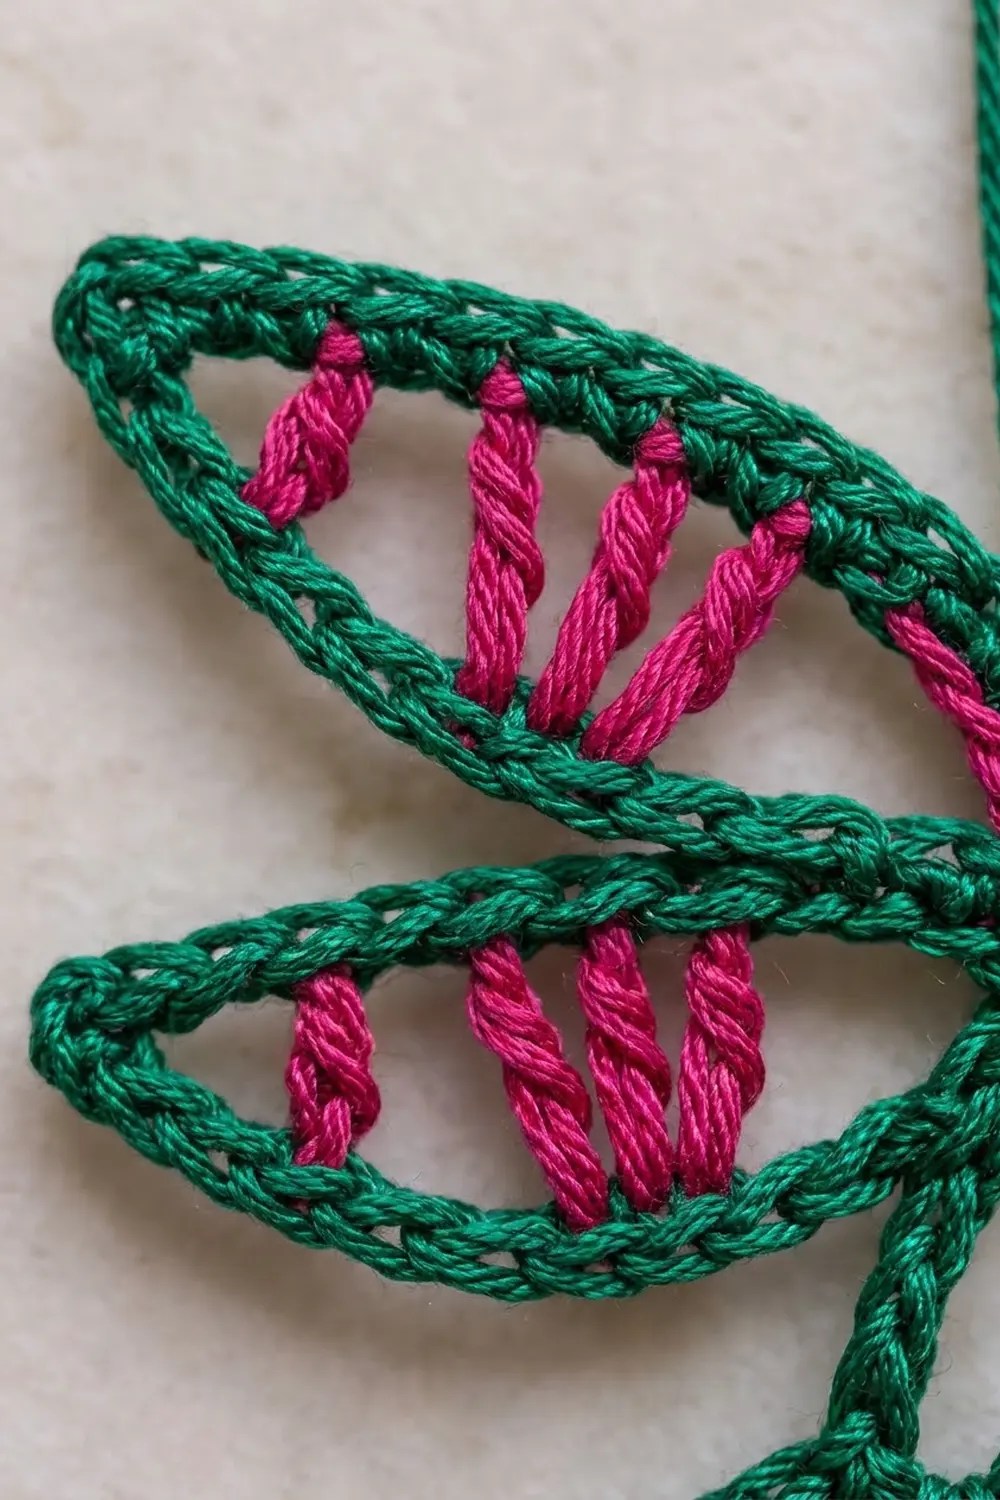
Row 2 (bars): Ch 1, turn. Sc in st 20, ch 1, dc in st 19, ch 2, sk 2, tr in st 16, ch 2, sk 2, dtr in st 13, ch 2, sk 2, dtr in st 10, ch 2, sk 2, tr in st 7, ch 2, sk 2, dc in st 4, ch 2, sk 2, sc in st 1.
(2 sc + 6 bars = 8 posts; 6 ch-2 sps + 1 ch-1 sp)
The bars go dc, tr, dtr, dtr, tr, dc. This makes them short at both ends and tallest in the middle, which gives the leaf shape.
Row 3 (upper edge): Ch 1, turn. Sc in the first sc, [3 sc in the next ch-2 sp, sc in the top of the next bar] 6 times, 2 sc in the ch-1 sp, sc in the last sc, sl st in body st 2.
Count: 1 + (6 × 4) + 2 + 1 = 28 sc
Fasten off and weave in the end.
Checkpoint: the lower edge measures 2.5 in (6.4 cm) and the wing is about 1 in (2.5 cm) deep at the dtr bars. Point the wing up and to the left.
Part 5: Lower Wing (Pink)
Row 1: Join pink with a sl st in body st 6. Ch 18. Sc in the 2nd ch from the hook and in each ch across, then sl st in body st 7. (17 sc)
Row 2 (bars): Ch 1, turn. Sc in st 17, ch 1, dc in st 16, ch 2, sk 2, tr in st 13, ch 2, sk 2, dtr in st 10, ch 2, sk 2, tr in st 7, ch 2, sk 2, dc in st 4, ch 2, sk 2, sc in st 1.
(2 sc + 5 bars = 7 posts; 5 ch-2 sps + 1 ch-1 sp)
Row 3 (upper edge): Ch 1, turn. Sc in the first sc, [3 sc in the next ch-2 sp, sc in the top of the next bar] 5 times, 2 sc in the ch-1 sp, sc in the last sc, sl st in body st 5.
Count: 1 + (5 × 4) + 2 + 1 = 24 sc
Fasten off and weave in the end.
Checkpoint: the lower edge measures 2.1 in (5.3 cm) and the wing is about 0.9 in (2.3 cm) deep. The lower wing sits just under the upper wing and points left.
Part 6: Tail Fan (Pink)
Row 1: Join pink with a sl st in body st 20 (the marked bottom point). Ch 5 (counts as the first dtr), [ch 2, dtr in the same st] 3 times. (4 dtr, 3 ch-2 sps)
Fasten off. The 4 spokes fan out from one point.
Checkpoint: the spokes are about 0.6 in (1.5 cm) tall.
Border: Green Tail Edging
The border is one round of green sc around the open sides and top of the tail fan. It turns the pink spokes into a green-outlined fan, like the rest of the bird.
Border gauge: the same 8 sc = 1 in (2.5 cm). Each dtr post is about 0.6 in (1.5 cm) tall, which fits 5 sc.
Border round: Join green with a sl st in body st 19.
- Left side: 5 sc around the post of the first dtr (the ch-5). (5 sc)
- Top: sc in the top of that dtr, [2 sc in the next ch-2 sp, sc in the top of the next dtr] 3 times. 1 + (3 × 3) = 10 sc
- Right side: 5 sc around the post of the last dtr. (5 sc)
Sl st in body st 21. Fasten off.
Border total: 5 + 10 + 5 = 20 sc
Why the math works: across the top, each dtr top gets 1 sc and each ch-2 space gets 2 sc. That is exactly 1 sc per existing stitch (4 dtr + 6 ch = 10), so the top edge lies flat at 1.25 in (3.2 cm) without ruffling or pulling in. Each side gets 5 sc because a 0.6 in (1.5 cm) post at 8 sc per inch holds about 5 sc. The border adds about 0.1 in (0.3 cm) to the height, which takes the bird from 4.4 in (11.2 cm) to 4.5 in (11.4 cm).
Hanging Loop (Green)
Join green with a sl st in ring st 14 (top of the head). Ch 30, sl st in the same st. Fasten off and weave in the end. The chain is about 3.5 in (8.9 cm) long and hangs about 1.75 in (4.4 cm) when folded.
Final Blocking
- Weave in all ends along stitches of the same color and trim them close.
- Soak the bird in cool water for 5 minutes, then press it gently in a towel.
- Pin it to the foam board right side up. Put one pin through the center of the head ring to keep the opening round.
- Pin the beak straight, pointing right and slightly up.
- Pinch the body loop into a teardrop and pin the bottom point.
- Fan the upper wing up and left. Pin its tip and pull the arched upper edge open so every bar stands straight.
- Pin the lower wing so it points left and slightly overlaps the base of the upper wing.
- Spread the tail spokes evenly and pin the two top corners.
- Spray it well with starch, or brush on the glue-and-water mix. Let it dry completely, which takes at least 6 hours.
- Unpin it and measure: 5 in (12.7 cm) × 4.5 in (11.4 cm).
Final Quality-Control Checklist
- Head ring has 18 sc and an open center about 0.4 in (1.0 cm) wide
- Beak has 15 sc and is 1.9 in (4.8 cm) long and straight
- Body loop has 40 sc and forms a clear teardrop
- Upper wing counts: 20 / 8 posts / 28
- Lower wing counts: 17 / 7 posts / 24
- Wing bars are shortest at the ends and tallest in the middle
- Tail has 4 pink spokes and 20 green border sc (5 / 10 / 5)
- No pink shows through the green outline, and no green shows through the pink wings
- Hanging loop is centered on top of the head
- Bird lies flat and stays stiff after starching
Troubleshooting
Wings ruffle along the upper edge: you probably worked 4 sc in the ch-2 spaces. Rework Row 3 with exactly 3 sc per space.
Wings cup or pull inward: your tall stitches are too tight. Pull up each yarn-over loop to full height, especially on the dtr bars.
Body looks round instead of like a teardrop: pin and starch a sharper point at st 20. Check that you joined at ring st 11, leaving 3 free sts.
Tail fan flares too wide: check that you used ch-2 spaces, not ch-3, between the spokes.
Beak droops: use stronger starch, or brush undiluted glue along the beak only.
Head ring closes up: you chained too tightly at the start. Remake it with a looser ch 10.
Care
Spot clean only with a damp cloth. If the bird goes limp, soak it, re-block it and re-starch it as above.
Final Notes
Everything in this hummingbird depends on one measurement: 8 sc per 1 in (2.5 cm). That gives a 0.9 in (2.3 cm) head ring, a 1.9 in (4.8 cm) beak and a 40-stitch body loop that hangs 2.25 in (5.7 cm). The wings measure 2.5 in (6.4 cm) and 2.1 in (5.3 cm), the tail top 1.25 in (3.2 cm), and the finished bird 5 in (12.7 cm) × 4.5 in (11.4 cm). Check your gauge at the beak, count at every checkpoint and starch well.
Happy crocheting!