
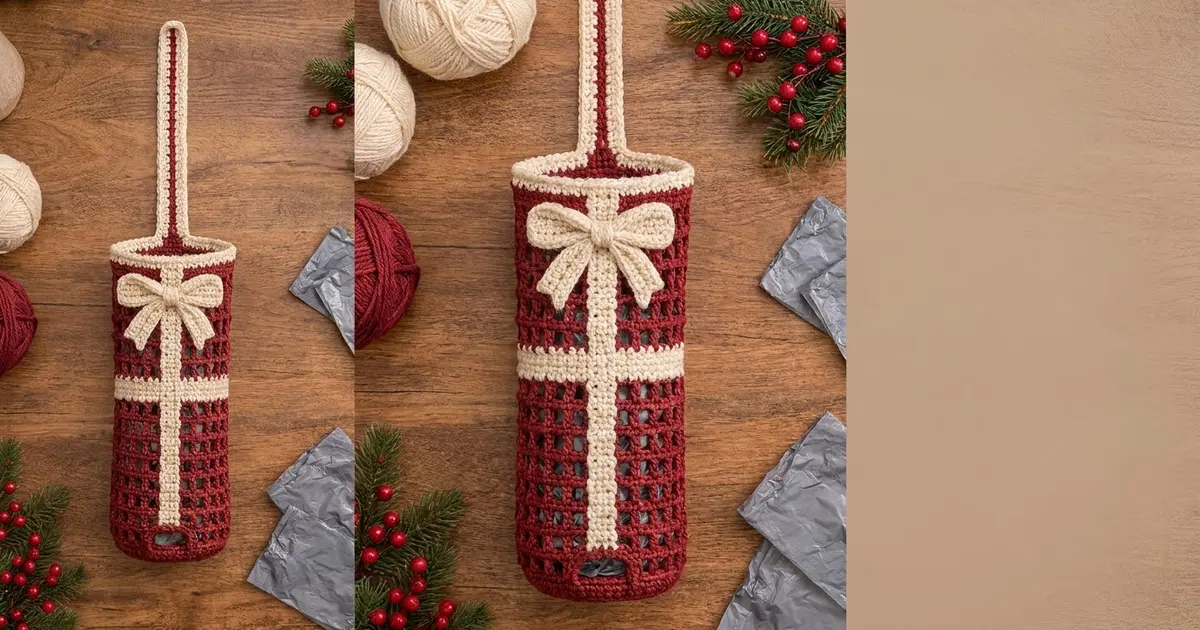
This holder looks like a wrapped present, and it keeps a kitchen’s loose plastic bags in one place. The cranberry mesh body has a cream “ribbon” running down the front and across the middle, a neat cream rim, and a bow just below the top edge. Stuff bags in at the top and pull them out one at a time through the small opening in the base.
The design pairs a deep red body with cream trim. The forest green version shown beside it uses the same pattern with only the main color changed. The open mesh is light and quick to work, and the solid bands give the piece its structure.
All instructions use US crochet terms. The finished holder measures about 5.5 in (14.0 cm) across and 16.25 in (41.3 cm) tall. The strap adds 6 in (15.2 cm), for a total hanging length of 22.25 in (56.5 cm).
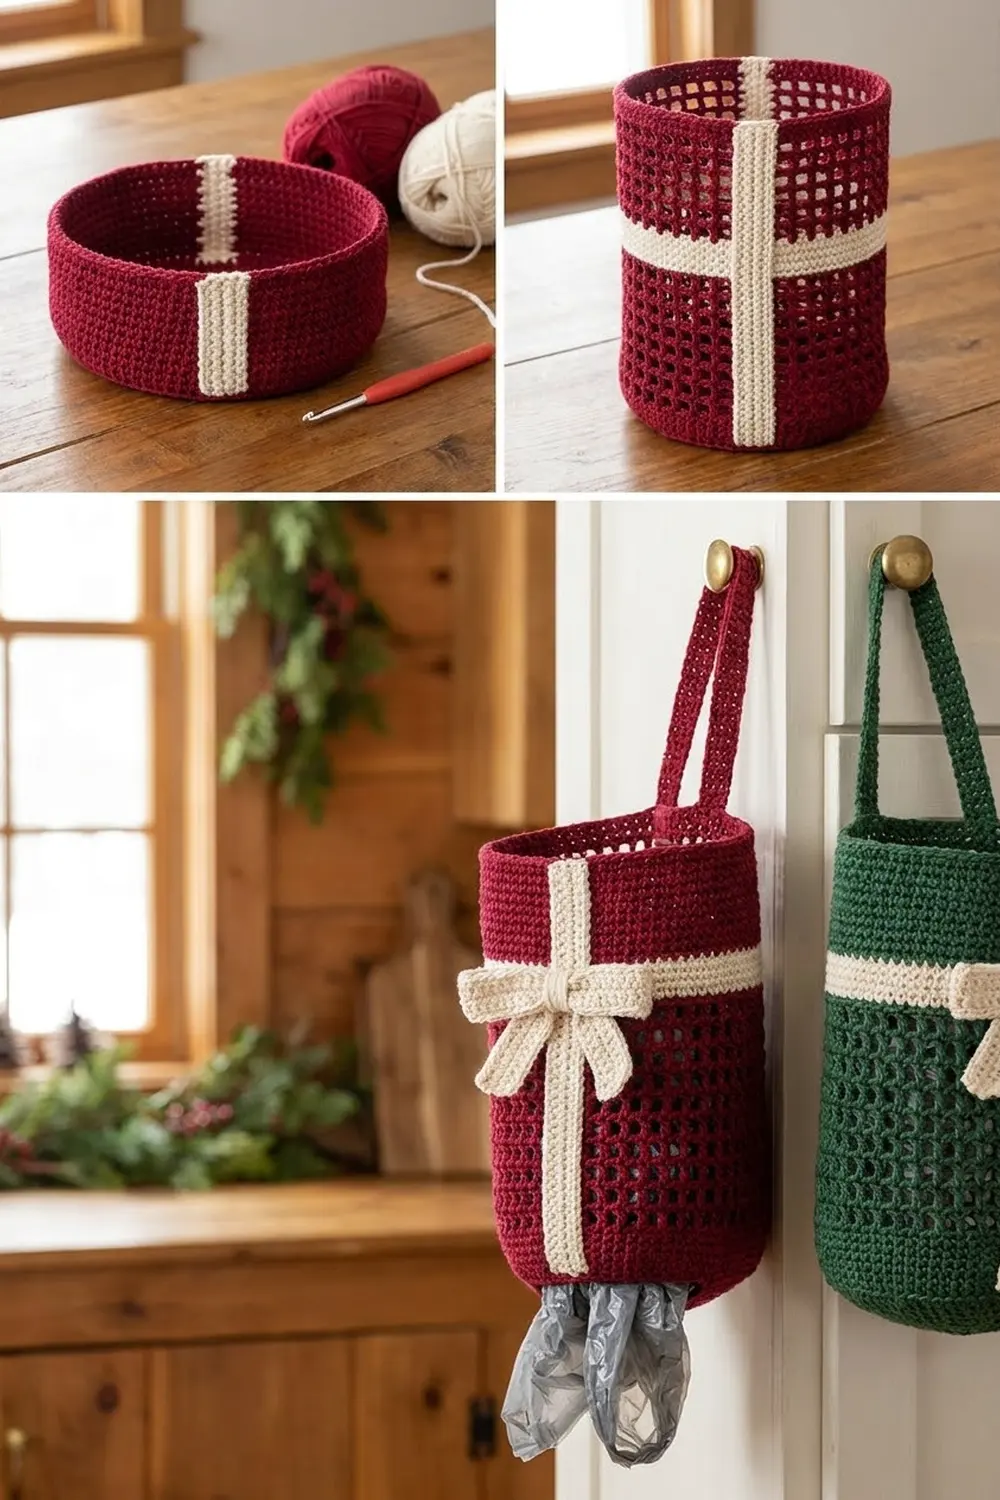
You’ll work the base in rounds from the bottom opening outward, then turn up the wall in mesh with one cream band partway up. The cream rim finishes the top. The strap is worked in rows straight off the rim, and the ribbon strip and bow are made separately and sewn on.
Finished Size and Construction
- Finished size: 5.5 in (14.0 cm) diameter × 16.25 in (41.3 cm) tall; 22.25 in (56.5 cm) including the strap
- Skill level: Easy / Advanced Beginner
- Terminology: US
- Yarn weight: Worsted (#4)
- Hook: 5.0 mm (H-8)
- Number of pieces: 1 body (with the strap worked on), plus 1 ribbon strip and 3 small bow parts sewn on
- Layout: a single seamless tube
- Circumference: 60 sts = 17.1 in (43.4 cm)
- Size before rim: 15.5 in (39.4 cm) tall
- Rim depth: 0.75 in (1.9 cm)
Materials
Choose a smooth worsted-weight cotton or acrylic. Cotton holds its shape well and washes easily. Avoid fuzzy yarns, because they blur the mesh.
- Main color, cranberry red (MC): 100 g, about 180 m
- Contrast color, cream (CC): 60 g, about 108 m
- For the green version, swap MC for forest green in the same amount.
Tools:
- 5.0 mm (H-8) crochet hook
- Tapestry needle
- 4 stitch markers
- Scissors
- Measuring tape
- Rust-proof pins and a spray bottle for blocking
These quantities include about a 15% margin for gauge swatches and differences in tension.
Abbreviations (US Terms)
- ch: chain
- sl st: slip stitch
- sc: single crochet
- dc: double crochet
- sk: skip
- sp: space
- BLO: back loop only
- inc: 2 sc in the same stitch
- st(s): stitch(es)
- MC / CC: main color / contrast color
Special stitch: mesh unit. One mesh unit is (dc, ch 1), worked over 2 stitches of the round below. Each mesh unit counts as 2 sts, so 30 mesh units = 60 sts.
Gauge and Checkpoints
- Single crochet: 14 sts × 16 rows = 4 in (10.2 cm)
- Mesh: 7 mesh units (14 sts) × 8 rounds = 4 in (10.2 cm)
Before starting the body, work a small swatch: 16 sc wide for 8 rows, then 8 rows of mesh. If 14 sc measure more than 4 in (10.2 cm), go down half a hook size. If they measure less, go up half a size. Circumference matters most here: the tube must be 17.1 in (43.4 cm) around.
Checkpoints along the way:
- After Rnd 6: a flat ring 5.5 in (14.0 cm) across, with an opening about 2.7 in (6.9 cm) across
- After Rnd 8: wall height 0.5 in (1.3 cm)
- After Rnd 24: wall height 8.5 in (21.6 cm)
- After Rnd 28: wall height 9.5 in (24.1 cm)
- After Rnd 40: wall height 15.5 in (39.4 cm)
- After Rnd 43: wall height 16.25 in (41.3 cm)
If the mesh comes out too tall, work the dc a little more snugly, or leave out one mesh round in the upper section. If it comes out too short, add one round. Each mesh round adds 0.5 in (1.3 cm).
Body
Mark the beginning of each round. All joins line up at the center back, which will be hidden under the strap.
Base
With MC, ch 30. Join with a sl st to the first ch to form a ring, taking care not to twist the chain. This ring becomes the dispensing opening: 8.6 in (21.8 cm) around, or about 2.7 in (6.9 cm) across.
Rnd 1: Ch 1, sc in each ch around, then join with a sl st to the first sc. (30 sts)
Rnd 2: Ch 1, sc in the next 4 sts, inc in the next st; repeat from * 6 times, then join. (36 sts)
Rnd 3: Ch 1, sc in the next 5 sts, inc; repeat 6 times, then join. (42 sts)
Rnd 4: Ch 1, sc in the next 6 sts, inc; repeat 6 times, then join. (48 sts)
Rnd 5: Ch 1, sc in the next 7 sts, inc; repeat 6 times, then join. (54 sts)
Rnd 6: Ch 1, sc in the next 8 sts, inc; repeat 6 times, then join. (60 sts)
Checkpoint: the ring should lie flat or dome very slightly, measuring 5.5 in (14.0 cm) across.
Lower Wall
Rnd 7: Ch 1, sc in the BLO of each st around, then join. (60 sts) This round turns the edge upward.
Rnd 8: Ch 1, sc in each st around, then join. (60 sts)
Rnd 9 (conversion round): Ch 4 (counts as dc + ch 1), sk the next st, dc in the next st, ch 1, sk the next st; repeat from * 29 times. Join with a sl st to the 3rd ch of the beginning ch-4. This gives 30 dc + 30 ch-1 sps = 60 sts.
Rnds 10–24: Ch 4 (counts as dc + ch 1), dc in the next dc, ch 1; repeat from * 29 times, then join to the 3rd ch of the ch-4. (60 sts: 30 dc + 30 ch-1 sps) Keep each dc stacked straight above the dc below to keep the grid square.
Checkpoint: wall height 8.5 in (21.6 cm). Fasten off MC.
Cream Band
Rnd 25 (conversion round): Join CC in any st at the center back. Ch 1, then work 1 sc in each dc and 1 sc in each ch-1 sp around. Join. Count: 60 worked 1-per-existing-stitch + 0 added = 60 sts.
Rnds 26–28: Ch 1, sc in each st around, then join. (60 sts)
The band is 1 in (2.5 cm) deep. Checkpoint: wall height 9.5 in (24.1 cm). Fasten off CC.
Upper Wall
Rnd 29 (conversion round): Join MC at the center back. Ch 4 (counts as dc + ch 1), sk the next st, dc in the next st, ch 1, sk the next st; repeat from * 29 times, then join. Count: 30 dc + 30 ch-1 sps = 60 sts.
Rnds 30–40: Repeat Rnd 10. (60 sts each round)
These 12 mesh rounds measure 6 in (15.2 cm). Checkpoint: wall height 15.5 in (39.4 cm). Fasten off MC.
Ribbon Strip
With CC, ch 6.
Row 1: Sc in the 2nd ch from the hook and in each ch across. Turn. (5 sts)
Rows 2–60: Ch 1, sc in each st across, then turn. (5 sts each row)
The strip should measure 1.4 in (3.6 cm) wide × 15 in (38.1 cm) long. Fasten off, leaving a long tail.
Find the center front, which is directly opposite the round joins. Pin the strip vertically from the top of Rnd 8 to the top of Rnd 40, laying it over the cream band. Whipstitch both long edges to the dc posts underneath. Sew it on before working the rim, so the rim covers the top end of the strip.
Border (Top Rim)
The rim gives the opening a firm, solid edge. It is worked at the same gauge as the base: 14 sc = 4 in (10.2 cm), with 4 rounds = 1 in (2.5 cm).
Rnd 41 (trim round): Join CC at the center back. Ch 1, then work 1 sc in each dc and 1 sc in each ch-1 sp around. Where the strip lies, work through both the strip and the mesh. Join. Count: 60 worked 1-per-existing-stitch + 0 added = 60 sts, or 30 sts across the front half and 30 across the back half.
Rnds 42–43: Ch 1, sc in each st around, then join. (60 sts; 30 front + 30 back)
Why the math works: every round from Rnd 6 up holds exactly 60 sts. Each mesh unit counts as 2 sts, so the rim lines up with the mesh stitch for stitch, and the tube stays 17.1 in (43.4 cm) around without flaring or pulling in. The 3 rim rounds add 0.75 in (1.9 cm), which brings the wall to 16.25 in (41.3 cm). Don’t fasten off yet.
Hanging Strap
Place markers on the last 4 sts and the first 4 sts of Rnd 43. These 8 sts are centered over the joins at the back.
Row 1: Sl st over to the first marked st. Ch 1, sc in each of the 8 marked sts, then turn. (8 sts)
Rows 2–12: Ch 1, sc 8, turn. (8 sts each row) The strap now measures 3 in (7.6 cm).
First leg, Rows 13–20: Ch 1, sc 2, turn. (2 sts each row) Fasten off.
Second leg: Sk the 4 center sts of Row 12. Join CC in the next st, then work Rows 13–20 the same way, with sc 2 in each row. Don’t fasten off.
Row 21: Ch 1, sc 2 across this leg, ch 4, then sc 2 across the first leg. Turn. (4 sc + 4 ch = 8 sts)
Rows 22–24: Ch 1, sc in each st and ch across, then turn. (8 sts each row)
The hanging hole is 1.1 in (2.8 cm) wide × 2 in (5.1 cm) tall, and the whole strap is 6 in (15.2 cm) long. Fasten off.
Red center line: With MC, work a surface sl st up the strap between sts 4 and 5, from the rim to the top of Row 12 (12 sl sts). Fasten off on the wrong side.
Bow
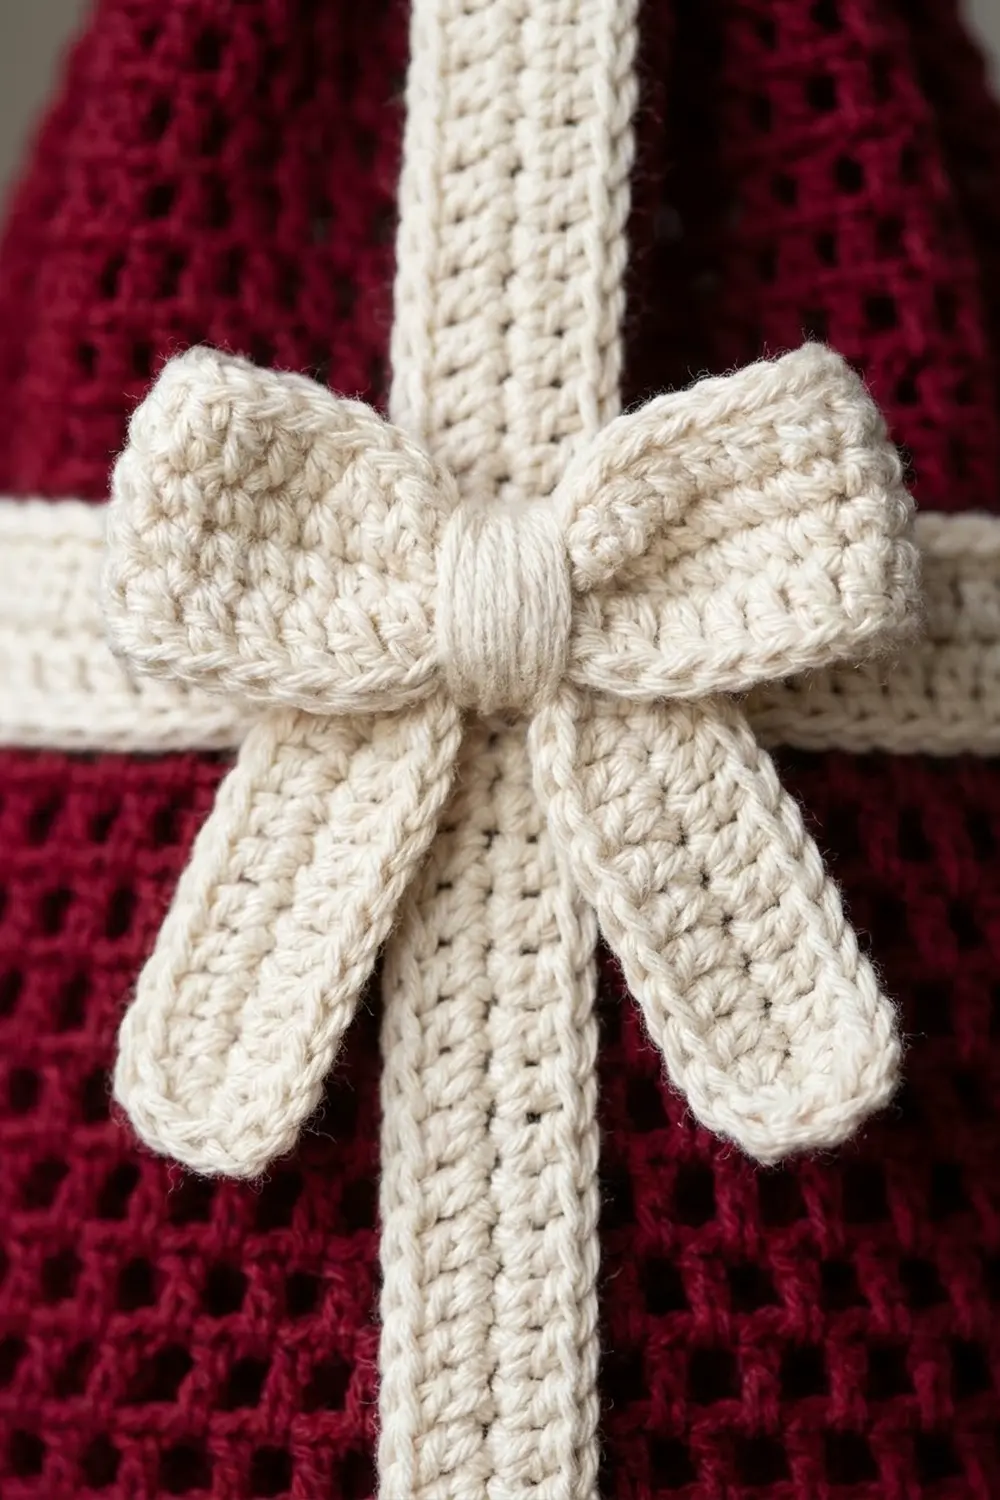
Loops: With CC, ch 27. Sc in the 2nd ch from the hook and in each ch across (26 sts). Work 3 more rows of 26 sc. The piece measures 7.4 in (18.8 cm) × 1 in (2.5 cm). Fold both short ends to the center, overlap them by 1 stitch, and sew them down. The bow is now 3.7 in (9.4 cm) wide.
Tails: With CC, ch 13. Sc 12, then work 2 more rows of 12 sc. The piece measures 3.4 in (8.6 cm) × 0.75 in (1.9 cm). Pinch it at the center to form an upside-down V.
Knot: With CC, ch 8. Sc 7, then work 2 more rows of 7 sc. The piece measures 2 in (5.1 cm) × 0.75 in (1.9 cm).
Stack the loops on top of the tails and cinch both at the center. Wrap the knot piece around the middle and seam it at the back. Sew the bow onto the ribbon strip about 1.5 in (3.8 cm) below the rim.
Final Blocking
- Weave in all ends along the solid sc rounds, where they won’t show through the mesh.
- Mist the whole piece until it is damp but not wet.
- Stuff the tube with a rolled towel to stretch it to 5.5 in (14.0 cm) across.
- Straighten the dc columns so the grid is square.
- Pin the strap flat, and shape the bow loops round with a little tissue inside.
- Let it dry completely, then remove the towel.
Final Quality-Control Checklist
- Every round from Rnd 6 to Rnd 43 has 60 sts
- Circumference is 17.1 in (43.4 cm)
- Height is 16.25 in (41.3 cm)
- The ribbon strip is straight, centered at the front, and covered at the top by the rim
- The strap is centered at the back and hides the joins
- The hanging hole fits over your knob or hook
- The bow sits level and is firmly stitched
- The bottom opening lets a bag pass through but holds a stuffed bundle in place
Troubleshooting
- The mesh slants or spirals: you’re joining one stitch off. Always join to the 3rd ch of the ch-4, and start the next round in that same spot.
- The tube flares at the cream band: the sc rounds are too loose. Work the band with a 4.5 mm hook.
- The base cups too much: work the increase rounds more loosely, or block the base flat.
- Bags fall straight through the bottom: run a sl st round in MC around the Rnd 1 opening to firm it up.
- The strip ripples: you have too many rows. Remove rows until the strip lies flat, ending at the bottom of the rim.
Care
Hand wash in cool water, or machine wash cotton on a gentle cycle. Reshape and dry flat over a rolled towel.
Final Notes
The measurement chain is short. The base grows from 30 to 60 sts, and the wall keeps those 60 sts all the way up at 17.1 in (43.4 cm) around. The heights add up as 0.5 in (1.3 cm) of solid base wall, 8 in (20.3 cm) of lower mesh, a 1 in (2.5 cm) band, 6 in (15.2 cm) of upper mesh and a 0.75 in (1.9 cm) rim, for a total of 16.25 in (41.3 cm). The 6 in (15.2 cm) strap brings the hanging length to 22.25 in (56.5 cm). If you check your gauge at the start, everything else follows.
Happy crocheting!