
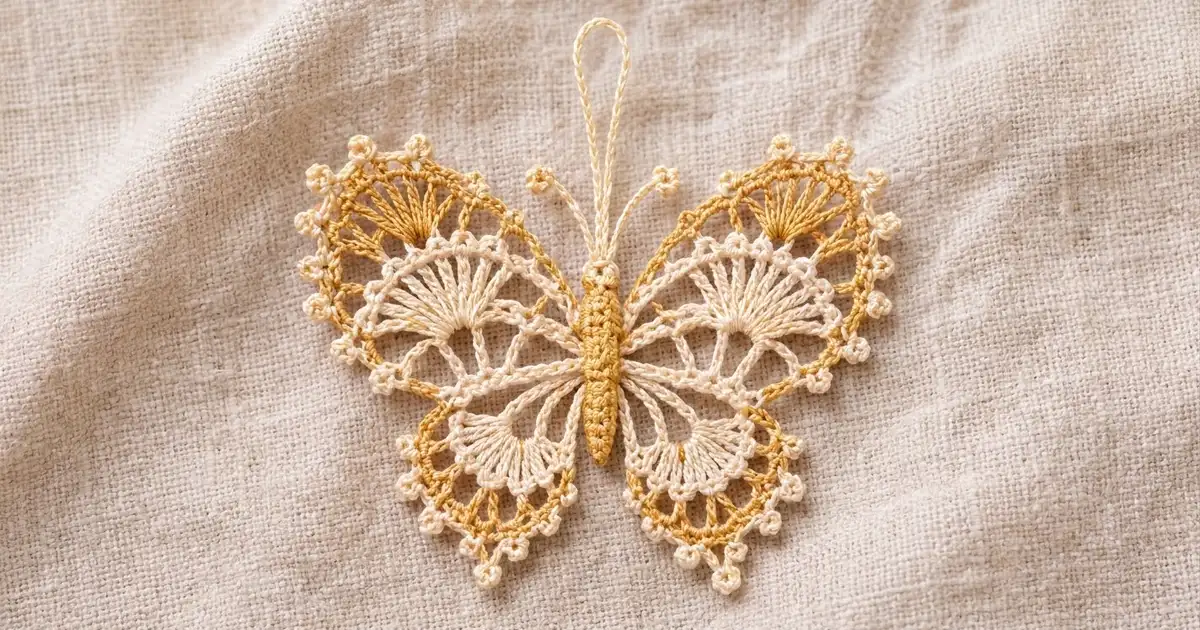
The Gilded Lace Butterfly is a small, airy thread-crochet ornament with an heirloom look. Fans of cream rays fill each wing, a gold chain lattice holds the shape, and a cream edge of tiny three-loop picots gives it a soft, beaded outline.
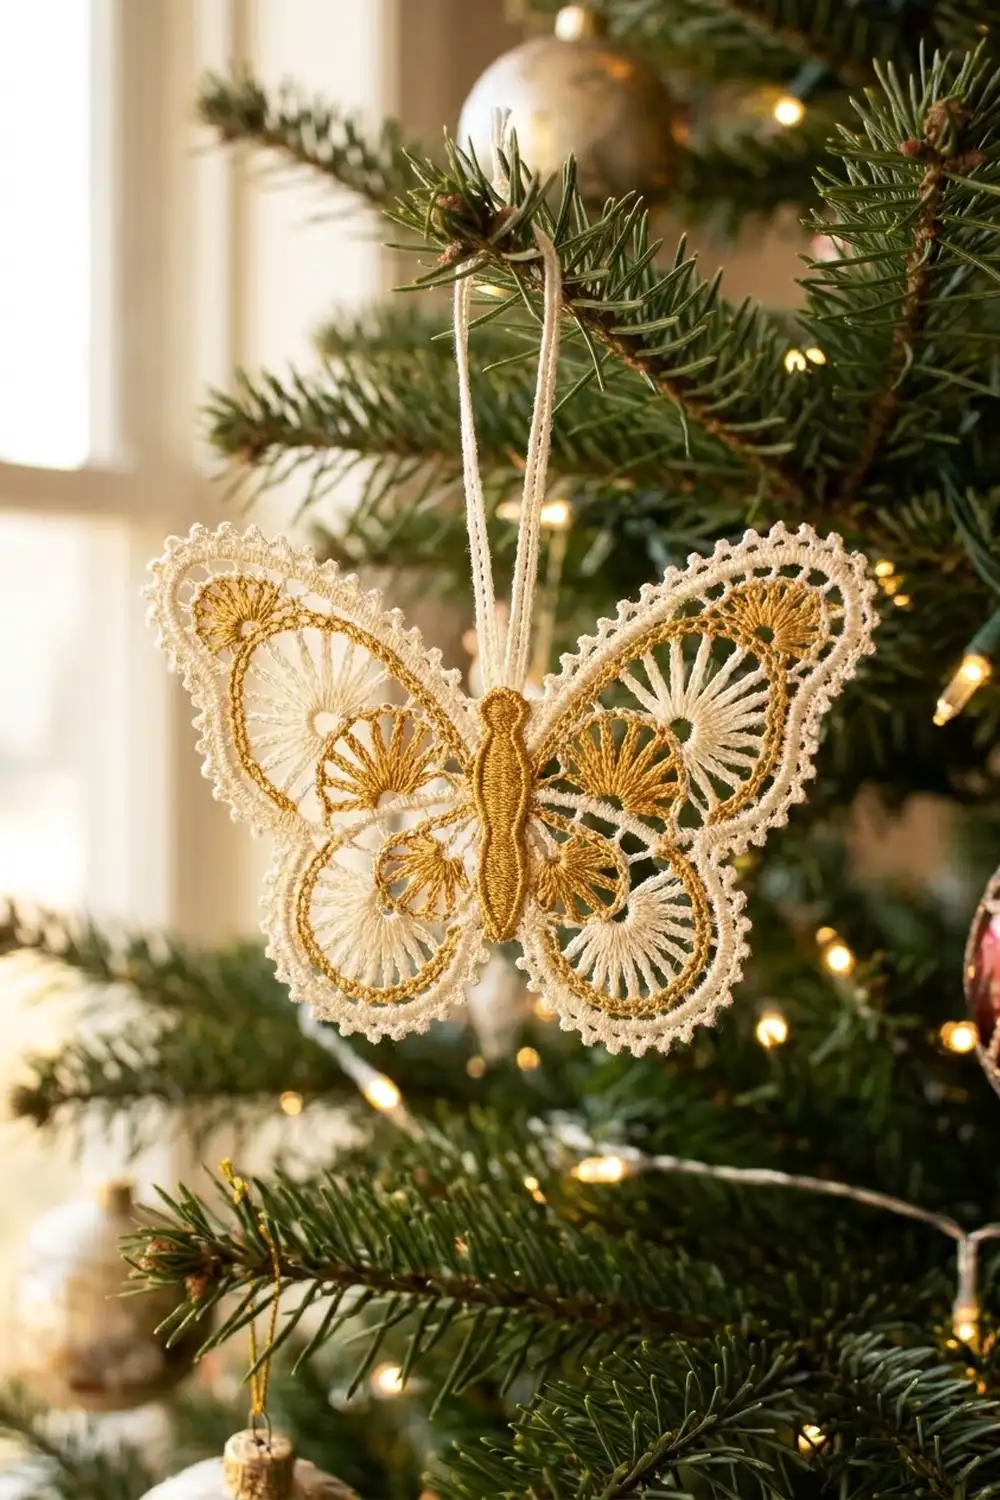
Two colors do all the work: cream for the wing fans and picot edge, honey gold for the accent fans, the arch lattice and the segmented body. Hang it on a tree, tie it to a gift, or stitch it onto a card.
This pattern uses US crochet terms. The finished butterfly measures 4.5 in (11.4 cm) wide and 3.5 in (8.9 cm) tall, not counting the hanging loop.
Construction is simple. You work a small center ring, then work four fan-shaped wings in rows straight off that ring, so the wing panel is one piece with no joining. A two-round border goes all the way around. Last, you make a small body in the round and sew it over the center, then add the antennae and hanging loop.
Finished Size and Construction
- Finished size: 4.5 in x 3.5 in (11.4 cm x 8.9 cm)
- Skill level: Intermediate (fine thread, lace rows)
- Terminology: US crochet terms
- Thread weight: Size 10 cotton crochet thread (lace weight)
- Hook: 1.75 mm steel hook (US steel 4)
- Number of pieces: 2 (one wing panel, one body appliqué)
- Layout: Single butterfly; body sewn down the vertical center line
- Wing panel before border: 3.5 in x 2.5 in (8.9 cm x 6.4 cm)
- Border depth: 0.5 in (1.3 cm) per side, 2 rounds
- Body length: 1.75 in (4.4 cm)
- Hanging loop: rises 1.5 in (3.8 cm) above the head
Materials
Use mercerized cotton thread in size 10. It holds a crisp edge, blocks well, and shows the stitch definition. A plain gold thread works better than a sparkly metallic blend, because metallic thread does not take stiffener well.
- Cream thread: 6 g, about 30 m (33 yd)
- Gold thread: 5 g, about 25 m (27 yd)
Quantities include a margin for swatching and tails.
Tools:
– 1.75 mm steel crochet hook
– 4 locking stitch markers
– Fine tapestry needle
– Small scissors
– Blocking board and rust-proof pins
– Spray starch or diluted fabric stiffener (optional)
Abbreviations (US Terms)
- ch – chain
- sl st – slip stitch
- sc – single crochet
- hdc – half double crochet
- dc – double crochet
- tr – treble crochet
- sc2tog – single crochet 2 together
- BLO – back loop only
- MR – magic ring
- sp – space
- st(s) – stitch(es)
Special stitches:
- Trefoil picot (tp): ch 4, sl st in 4th ch from hook; [ch 4, sl st in same base ch] twice. Three small loops share one base.
- 3-hdc cluster: [yo, insert hook, pull up a loop] 3 times in the same st, yo and pull through all 7 loops on hook.
Gauge and Checkpoints
Gauge matters less here than with a garment, but it decides whether the arches lie flat. Make the center ring and one upper wing first, then measure.
- Swatch gauge: 10 dc and 4 dc rows = 1 in (2.5 cm).
- Checkpoint 1: Center ring (Round 1) = 0.6 in (1.5 cm) across.
- Checkpoint 2: Upper wing Rows 1–2 extend 0.75 in (1.9 cm) from the ring edge to the tr tops.
- Checkpoint 3: Wing panel, all four wings = 3.5 in x 2.5 in (8.9 cm x 6.4 cm).
- Checkpoint 4: After Border Round 1 = 4.0 in x 3.0 in (10.2 cm x 7.6 cm).
- Checkpoint 5: After Border Round 2 = 4.5 in x 3.5 in (11.4 cm x 8.9 cm).
If your ring or wing is too big, go down to a 1.5 mm hook. If it is too small or the fan cups, go up to a 2.0 mm hook. Small differences of about 0.1 in (0.3 cm) will block out.
Center Ring
With cream, ch 10, sl st in first ch to form a ring.
Round 1: Ch 1, 24 sc in ring, sl st in first sc. (24 sc)
Number the sc 1 to 24 clockwise, starting at the top center. Mark the groups like this:
Sts 1–2    top gap
Sts 3–6    upper right wing
Sts 7–8    right side gap
Sts 9–12   lower right wing
Sts 13–14  bottom gap
Sts 15–18  lower left wing
Sts 19–20  left side gap
Sts 21–24  upper left wing
Place a marker in the first st of each wing group. Fasten off. The four 2-st gaps stay unworked for now. They create the notches between the wings and are later covered by the body.
Upper Wings (make 2)
Work each upper wing in rows off its 4 ring sts. Use cream.
Row 1 (RS): Join cream in the first st of the wing group, ch 3 (counts as dc), 2 dc in same st, 3 dc in each of next 3 sts, turn. (12 dc)
Row 2: Ch 5 (counts as tr + ch 1), [tr in next dc, ch 1] 10 times, tr in last dc, turn. (12 tr, 11 ch-1 sps)
These are the long cream rays of the fan.
Row 3: Ch 1, sc in first tr, [ch 5, skip next tr, sc in next tr] 5 times, ch 5, sc in last tr. (6 ch-5 loops, 7 sc) Fasten off.
Check Checkpoint 2 on the first wing.
Row 4 (gold accent fan): Count the ch-5 loops from the end nearest the top gap. Join gold in the sc before the 2nd loop, 9 tr in the 2nd loop, sl st in the next sc. Fasten off. (9 tr)
This solid gold fan sits near the top edge of each upper wing. Work it on both upper wings, always in the 2nd loop from the top gap, so the two wings mirror each other.
Lower Wings (make 2)
Work each lower wing off its 4 ring sts, in cream.
Row 1 (RS): Join cream in the first st of the wing group, ch 3 (counts as dc), dc in same st, 2 dc in each of next 3 sts, turn. (8 dc)
Row 2: Ch 5 (counts as tr + ch 1), [tr in next dc, ch 1] 6 times, tr in last dc, turn. (8 tr, 7 ch-1 sps)
Row 3: Ch 1, sc in first tr, [ch 5, skip next tr, sc in next tr] 3 times, ch 5, sc in last tr. (4 ch-5 loops, 5 sc) Fasten off.
The lower wings have no gold fan. Weave in all tails now, along the backs of the rays.
Lay the panel flat and check Checkpoint 3: 3.5 in x 2.5 in (8.9 cm x 6.4 cm).
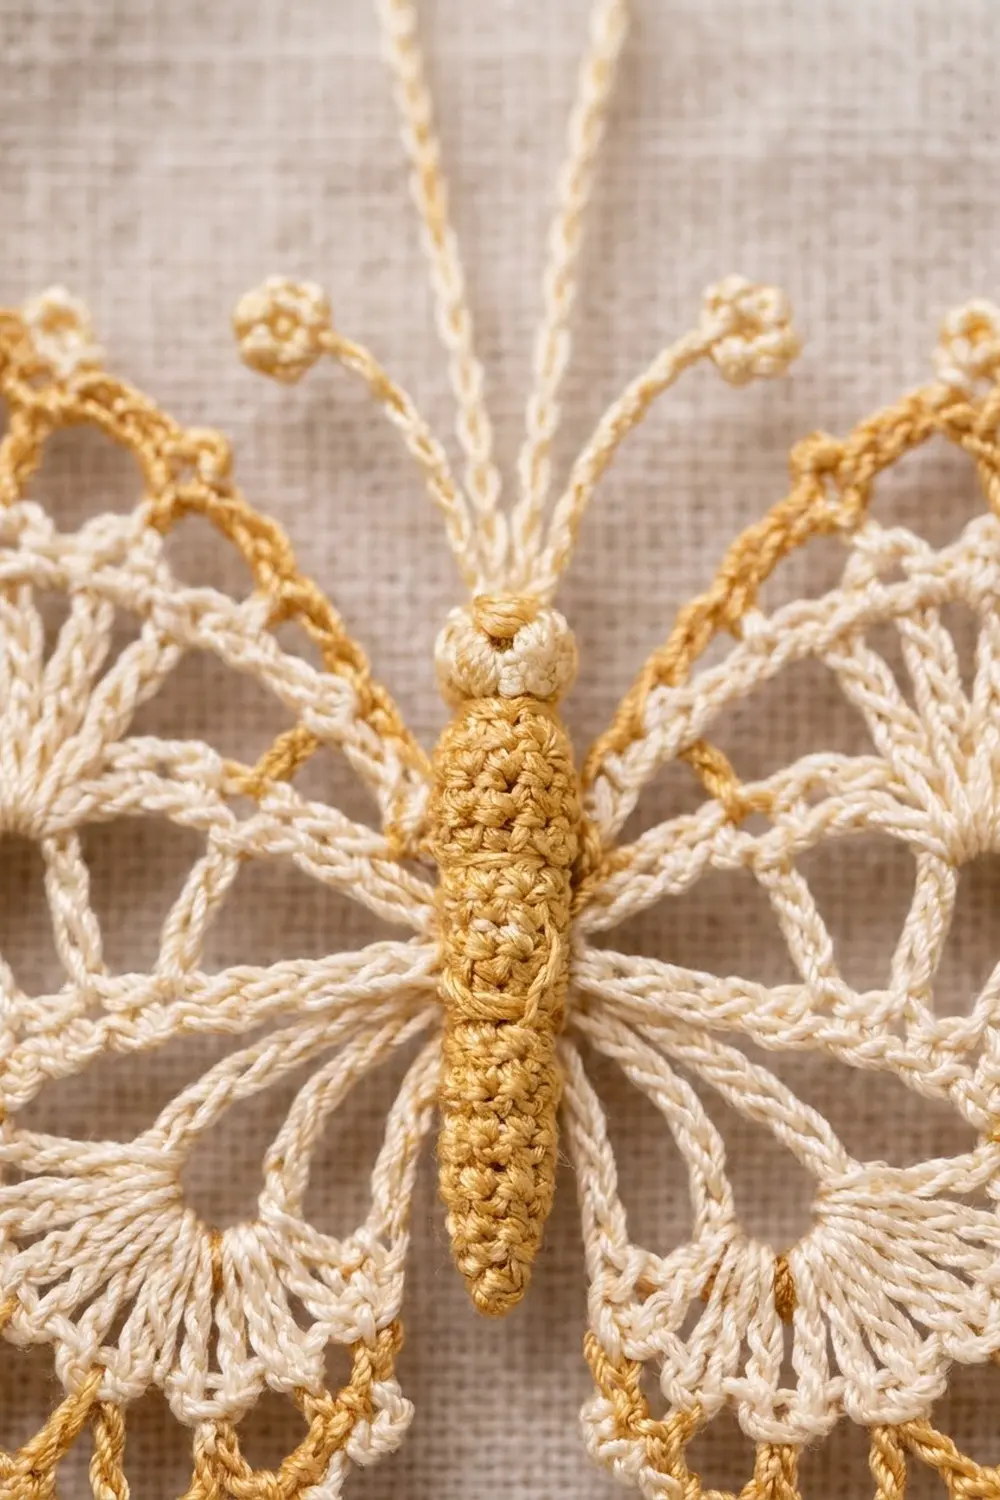
Body (make 1)
Work in continuous rounds with gold. Mark the first st of each round.
Round 1 (head): 6 sc in MR. (6 sc)
Round 2: Sc in each st. (6 sc)
Round 3 (neck): [Sc2tog, sc] twice. (4 sc)
Round 4 (thorax): 2 sc in each st. (8 sc)
Rounds 5–6: Sc in each st. (8 sc)
Rounds 7–14 (abdomen): Alternate one round of sc in BLO with one round of regular sc, starting with BLO. (8 sc each round)
The unused front loops form the ridges that make the body look segmented.
Round 15: Sc2tog 4 times. (4 sc)
Stuff lightly with a few thread scraps through the opening.
Round 16: Sc2tog twice. (2 sc) Fasten off, close the tip, and leave a 12 in (30.5 cm) tail for sewing.
The body measures 1.75 in (4.4 cm) long.
Antennae (make 2): Join cream at the top of the head, slightly off center. Ch 10, 3-hdc cluster in 3rd ch from hook (knob), sl st in each of the remaining 7 ch. Fasten off. Each antenna is about 0.75 in (1.9 cm) long.
Hanging loop: Join cream at the center top of the head, between the antennae. Ch 40, sl st in the same st to close the loop, then sl st in each ch back around the loop to firm it up. Fasten off. The loop rises 1.5 in (3.8 cm).
Border
The border goes around the whole wing panel in one continuous round each time. Round 1 makes the gold lattice. Round 2 fills each arch with cream sc and adds the trefoil picots.
Border gauge: One ch-6 arch spans about 0.4 in (1.0 cm). The border adds 0.25 in (0.6 cm) per round on every side.
Anchor points. Each arch runs from one anchor to the next. These are the anchors, in order around the panel:
- Gap anchor: sc2tog over the 2 ring sts of that gap.
- Row ends: sc in the end of Row 1, then the end of Row 2.
- Loops: sc in each ch-5 loop. On the upper wings, sc in the 5th (center) tr of the gold fan instead of in that loop.
Round 1 (gold): Join gold at the top gap with a sc2tog. Working clockwise, ch 6, sc in next anchor all the way around, ending with ch 6, sl st in the first sc2tog. Fasten off.
Arch counts, by section:
- Each upper wing: gap to Row 1 end, Row 1 to Row 2 end, Row 2 end to first loop, 5 arches across the loops and fan, last loop to Row 2 end, Row 2 to Row 1 end, Row 1 end to gap = 11 arches
- Each lower wing: gap to Row 1 end, Row 1 to Row 2 end, Row 2 end to first loop, 3 arches across the loops, last loop to Row 2 end, Row 2 to Row 1 end, Row 1 end to gap = 9 arches
- Total: 2 x 11 + 2 x 9 = 40 arches
Check: anchors per upper wing = 10 (2 row ends, 6 loop/fan points, 2 row ends), per lower wing = 8 (2 + 4 + 2), plus 4 gap anchors. 2 x 10 + 2 x 8 + 4 = 40 anchors. A closed round has exactly one arch per anchor, so 40 anchors give 40 arches.
Round 2 (cream): Join cream in any connector arch (an arch touching a gap anchor). Work around:
- In each connector arch: 7 sc.
- In every other arch: 3 sc, tp, 3 sc.
Join with a sl st to the first sc. Fasten off.
Each gap touches 2 arches, so there are 4 x 2 = 8 connector arches. They sit hidden under the body or inside the side notches, so they get no picot. The other 40 − 8 = 32 arches get one picot each.
Counts, by section:
- Each upper wing (11 arches): 9 picot arches x 6 sc = 54 sc, plus 2 connectors x 7 sc = 14 sc → 68 sc, 9 tp
- Each lower wing (9 arches): 7 picot arches x 6 sc = 42 sc, plus 2 connectors x 7 sc = 14 sc → 56 sc, 7 tp
- Total: 2 x 68 + 2 x 56 = 248 sc; 2 x 9 + 2 x 7 = 32 tp
Why the math works: Every arch holds the same 6 or 7 sc, so the edge grows evenly with the arch count. The upper wings have more arches than the lower wings because their fans are bigger (6 loops versus 4), which gives the larger, rounder top wings. The deep side notches come from the gap anchors, which pull the border back in to the ring.
Check Checkpoint 5: 4.5 in x 3.5 in (11.4 cm x 8.9 cm).
Final Blocking
- Weave in all remaining tails on the wing panel. Leave the body’s sewing tail.
- Wet the wing panel in cool water and press it gently in a towel.
- Pin it RS up on a blocking board at 4.5 in x 3.5 in (11.4 cm x 8.9 cm). Use the grid to keep it symmetrical.
- Pin each trefoil picot outward, then open each cream fan so the rays sit evenly spaced.
- Pull the side notches in toward the center so they sit about 0.5 in (1.3 cm) deep.
- Mist with starch or stiffener if you want a crisp ornament. Let it dry fully, about 6 hours.
- Unpin. Center the body over the ring, head toward the top gap, and whipstitch it down along both sides with the gold tail. Catch the gap sts and connector arches so the body covers the ring completely.
- Weave in the final tail through the body.
Final Quality-Control Checklist
- Panel measures 4.5 in x 3.5 in (11.4 cm x 8.9 cm).
- Both upper wings have 12 tr rays, 6 loops and one 9-tr gold fan in the matching position.
- Both lower wings have 8 tr rays and 4 loops.
- Border Round 1 has 40 arches; Round 2 has 248 sc and 32 picots.
- The ring is fully hidden under the body.
- Antennae are the same length and the loop is centered.
- No tails show on the RS.
Troubleshooting
Fans cup or ruffle: Your tr are too short or tight. Pull up the first loop of each tr to full height, or go up a hook size.
Arches pull the wings into a bowl: Chain more loosely, or work ch 7 arches on Round 1 only. Keep the arch count the same.
Picots disappear: Make sure the sl st of each picot goes into the same base ch, not into the next sc.
Wings are not mirrored: Check that the gold fan is in the 2nd loop counted from the top gap on both upper wings.
Body looks flat: Add a little more thread stuffing before Round 16.
Ornament droops on the tree: Use stiffener, not just starch, and let it dry flat.
Care
Hand wash in cool water with mild soap, press dry in a towel, and reblock flat. Store flat or hanging, away from direct sun, to keep the gold from fading.
Final Notes
The measurement chain is short and easy to check. The center ring of 24 sc measures 0.6 in (1.5 cm). Four fan wings bring the panel to 3.5 in x 2.5 in (8.9 cm x 6.4 cm). Border Round 1 adds 40 gold arches for 4.0 in x 3.0 in (10.2 cm x 7.6 cm), and Border Round 2 adds 248 sc and 32 trefoil picots for the finished 4.5 in x 3.5 in (11.4 cm x 8.9 cm). Add the 1.75 in (4.4 cm) gold body, the antennae and the loop, and the butterfly is ready to hang.
Happy crocheting!