

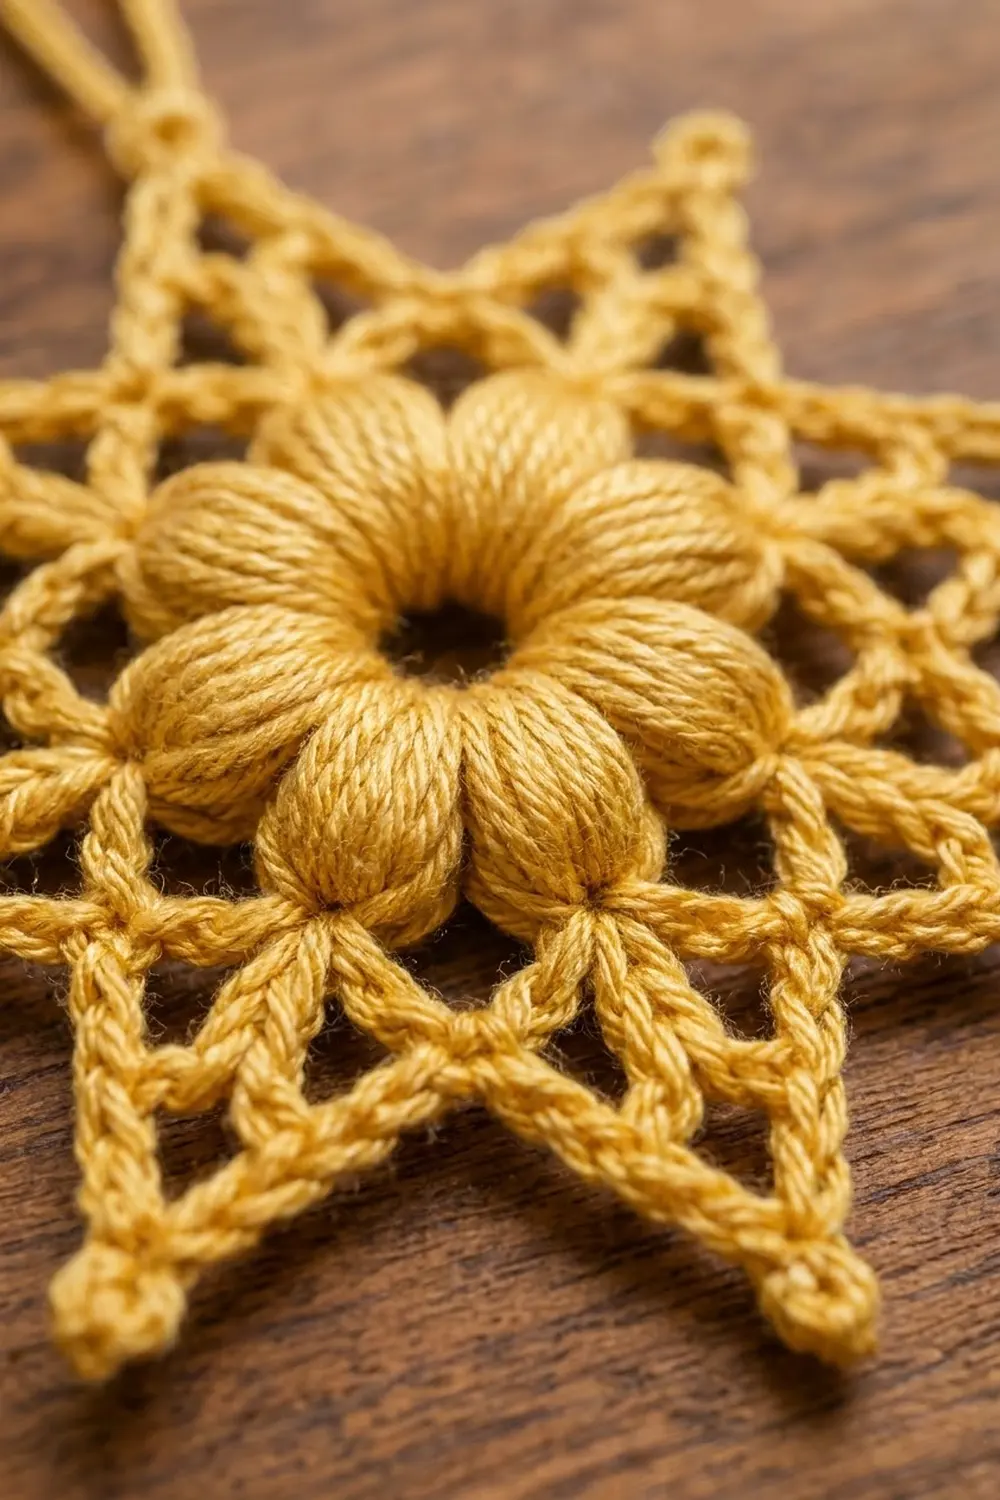
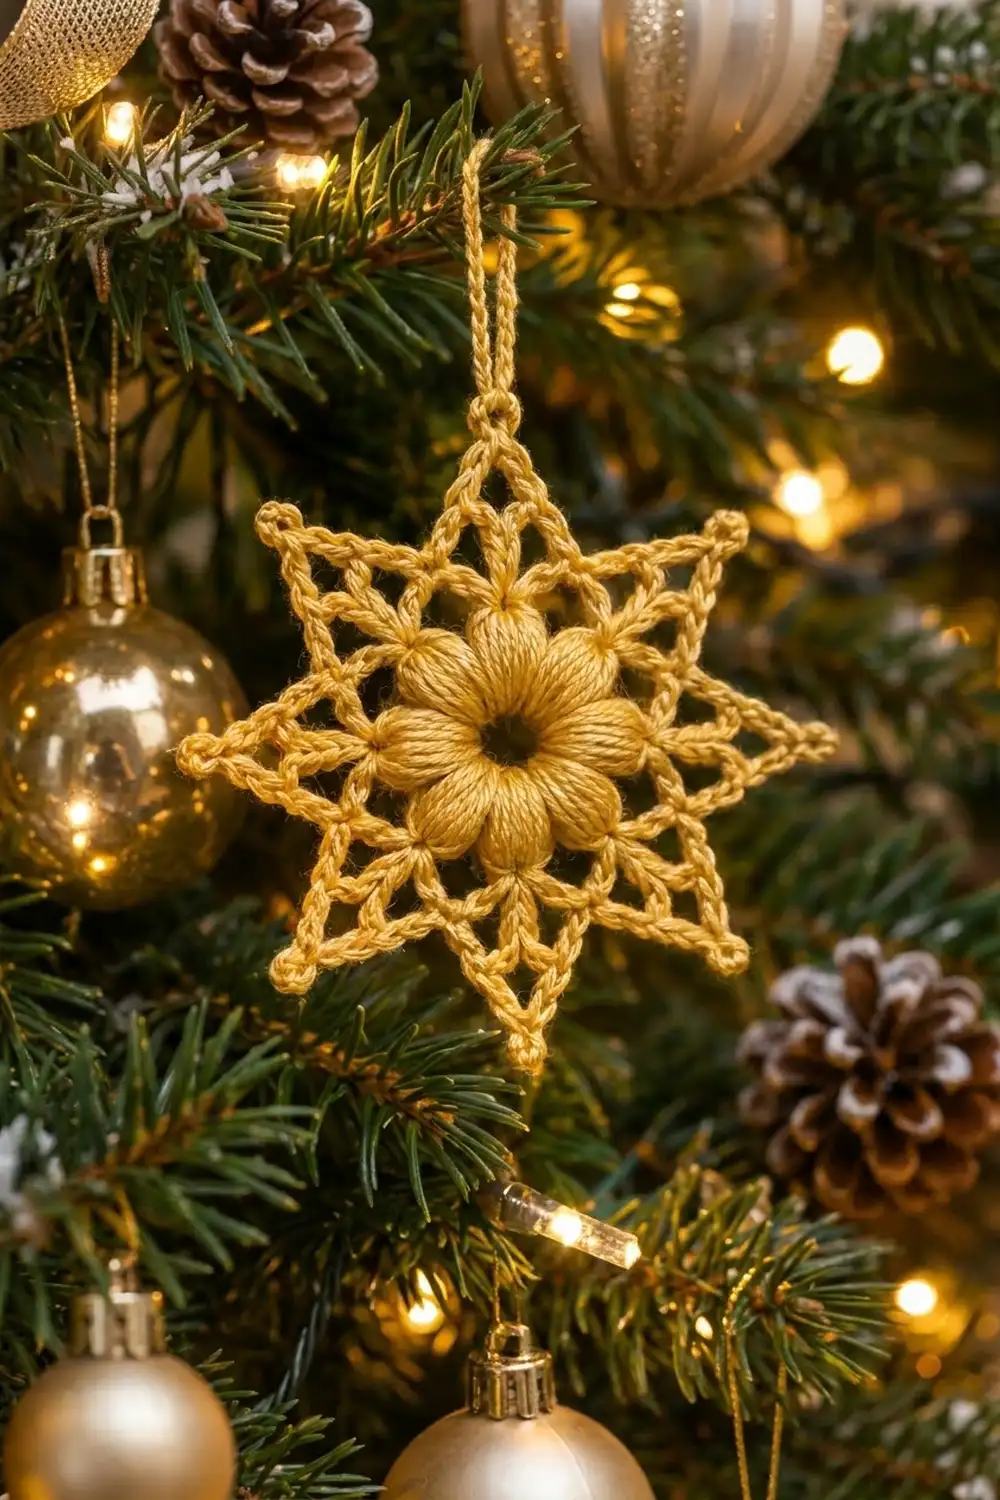
The Golden Bloom Star is a lacy eight-point Christmas ornament with a soft flower at its heart. Eight plump puff-stitch petals sit around a small open center, and eight slim, airy points spread out from the flower like rays of light.
The whole star uses one warm golden-yellow yarn, so it looks like a small piece of tinsel on the tree. Mercerized cotton gives the stitches a soft sheen that catches fairy lights well, especially after blocking with a little starch.
This pattern uses US crochet terms. The finished star measures 4.25 in (10.8 cm) from tip to opposite tip. The hanging loop at the top adds 1.25 in (3.2 cm).
The construction is simple. You work the flower center in the round, add a round of chain loops, and make a fan of double crochet for each point. An edging round then outlines every point and adds a small picot at each tip. The star is one single piece, finished with a chain hanging loop.
Finished Size and Construction
- Finished size: 4.25 in (10.8 cm) tip to opposite tip, plus a 1.25 in (3.2 cm) hanging loop
- Skill level: Easy+ (confident beginner)
- Terminology: US crochet terms
- Yarn weight: Sport weight (#2) mercerized cotton
- Hook: 3.0 mm (US C-2 / D-3)
- Number of pieces: 1
- Layout: Single eight-point star, worked in the round
- Flower center size: 1.75 in (4.4 cm) across after Round 3
- Size before edging: 3.5 in (8.9 cm) tip to tip after Round 5
- Edging depth: about 0.375 in (1.0 cm) added at each point tip
Materials
Yarn: Choose a smooth, tightly plied sport weight mercerized cotton or cotton blend. Mercerized cotton keeps the points crisp and shows off the puff stitches. Avoid fuzzy or very soft acrylic, because it can make the lace look blurry and let the points droop.
- Golden yellow: 15 g, about 50 m (55 yd)
One star uses about 10 g, or roughly 35 m (38 yd). The amount listed above includes a margin for a test swatch and for weaving in ends.
Tools:
- 3.0 mm (US C-2 / D-3) crochet hook
- Tapestry needle
- Scissors
- Rust-proof pins and a foam blocking mat
- Spray starch or a mild fabric stiffener (optional, but recommended)
- Ruler or tape measure
Abbreviations (US Terms)
- ch – chain
- sl st – slip stitch
- sc – single crochet
- dc – double crochet
- sk – skip
- sp(s) – space(s)
- st(s) – stitch(es)
- rep – repeat
- yo – yarn over
- beg – beginning
Special stitches:
- Puff stitch (puff): (Yo, insert hook in the indicated st, yo and pull up a loop to the height of a dc) 4 times, so you have 9 loops on the hook. Yo and pull through all 9 loops, then ch 1 to close. The closing ch does not count as a separate stitch.
- Tip picot spike: Worked in a ch-5 tip sp: sc, ch 7, sl st in 4th ch from hook (picot made), ch 3, sc in same sp.
Gauge and Checkpoints
Gauge is not critical for an ornament, but it decides how crisp the lace looks. Work Rounds 1–3 as a test piece before you go on.
Gauge: Rounds 1–3 = 1.75 in (4.4 cm) across.
Checkpoints:
- After Round 1: 1 in (2.5 cm) across, with a center hole about 0.375 in (1.0 cm) wide
- After Round 3: 1.75 in (4.4 cm) across
- After Round 4: 2.25 in (5.7 cm) across, measured over the chain loops
- After Round 5: 3.5 in (8.9 cm) tip to opposite tip
- After Round 6 and blocking: 4.25 in (10.8 cm) tip to opposite tip
If your flower is too big: Go down to a 2.75 mm hook. Also check that you are not pulling the puff loops up too tall.
If your flower is too small or cups: Go up to a 3.25 mm hook, and pull each puff loop up to the full height of a dc.
Measure the flower lying flat, without stretching it. A small difference of 0.125 in (0.3 cm) is fine. Anything larger will add up across the points.
Pattern
Before you start: Leave a 6 in (15.2 cm) starting tail. Keep your chains even throughout, because the chain lengths in Rounds 4–6 create the shape of the points. Work with the right side facing you the whole time and do not turn between rounds.
Round 1 – Center Ring
Ch 6, then sl st in the first ch to form a ring.
Ch 1, work 16 sc in the ring, then sl st in the first sc to join. (16 sc)
Pull the starting tail gently to firm up the ring, but keep a visible center hole about 0.375 in (1.0 cm) wide.
Round 2 – Puff Petals
Ch 2 (does not count as a st), puff in the same st as the join, ch 2, sk next st. Puff in next st, ch 2, sk next st; rep from * 6 more times. Sl st in the top of the first puff to join. (8 puffs, 8 ch-2 sps)*
Each puff sits on every other sc of Round 1, so the 8 puffs use all 16 sts: 8 worked into and 8 skipped.
Round 3 – Flower Edge
Ch 1, sc in the top of the same puff, 3 sc in next ch-2 sp. Sc in the top of next puff, 3 sc in next ch-2 sp; rep from * 6 more times. Sl st in the first sc to join. (32 sc)*
Count: 8 sc over the puffs + (8 sps × 3 sc) = 8 + 24 = 32 sc. That makes 4 sc per petal section, one section for each point to come.
The puffs should now dome slightly forward, forming eight rounded petals around the open center.
Round 4 – Chain Loops
Ch 1, sc in the same st as the join (above a puff). Ch 5, sk next 3 sts, sc in next st (above the next puff); rep from * 6 more times. Ch 5, sk the last 3 sts, sl st in the first sc to join. (8 sc, 8 ch-5 sps)*
Each ch-5 loop arches over the 3 sc between two puffs. Every loop becomes the base of one star point, so the points sit between the petals.
Checkpoint: 2.25 in (5.7 cm) across. The loops should lie flat. If they ruffle, your chains are too loose.
Round 5 – Point Fans
Sl st in the first ch-5 sp. Ch 3 (counts as dc), ch 2, dc in same sp, ch 5, dc in same sp, ch 2, dc in same sp. This completes the first fan.
In next ch-5 sp work (dc, ch 2, dc, ch 5, dc, ch 2, dc); rep from * 6 more times. Sl st in the top of the beg ch-3 to join. (32 dc, 16 ch-2 sps, 8 ch-5 tip sps)*
Do not chain between fans. Start each fan right after the previous one, skipping the sc of Round 4. This keeps a tight “valley” between the points.
Per point: 4 dc, 2 ch-2 sps, 1 ch-5 tip sp. Eight points × 4 dc = 32 dc, which matches the 32 sc of Round 3.
Checkpoint: 3.5 in (8.9 cm) tip to opposite tip. The ch-5 tip sps should now point straight outward.
Border
The border is Round 6. This lacy edging outlines every point with chain lines, sharpens each tip with a picot spike, and links the valleys together.
Border gauge: Each ch-5 side of a point should lie along its fan without pulling it in. Each point grows about 0.375 in (1.0 cm) longer.
Round 6 – Lace Edging and Picot Tips
Sl st in next ch-2 sp (the first ch-2 sp of the first point). Ch 1, sc in same sp, ch 5, work a tip picot spike in next ch-5 tip sp, ch 5, sc in next ch-2 sp, ch 2.
Sc in next ch-2 sp (the first ch-2 sp of the next point), ch 5, tip picot spike in next ch-5 tip sp, ch 5, sc in next ch-2 sp, ch 2; rep from * 6 more times. Sl st in the first sc to join. (32 sc, 16 ch-5 sps, 8 picot spikes, 8 ch-2 valley sps)*
Counts per point:
- 1 sc in the first ch-2 sp
- 1 ch-5 rising side
- 2 sc in the tip sp (part of the spike), with 1 picot between them
- 1 ch-5 descending side
- 1 sc in the second ch-2 sp
- 1 ch-2 across the valley
That is 4 sc per point, and 8 points × 4 sc = 32 sc.
Why the math works: Round 5 gives every point exactly 2 ch-2 sps and 1 tip sp. Round 6 puts 1 sc in each ch-2 sp (8 × 2 = 16 sc) and 2 sc in each tip sp (8 × 2 = 16 sc), for 32 sc total. No stitches are added or lost at the valleys, because the ch-2 only bridges from one point to the next. All eight points stay identical, so the star stays symmetrical.
Hanging Loop
Do not fasten off after the join. Sl st along the next ch-5 side up to the tip of the first point: 5 sl sts in the ch-5 sp, 1 sl st in the sc of the spike, then sl st into the picot.
Ch 20, then sl st in the same picot to form the loop. Sl st in each of the 20 ch back around the loop to make a firm, double-thick hanger. Sl st in the picot again and fasten off.
The loop measures about 1.25 in (3.2 cm) when hanging.
Weave in all ends securely through the backs of the Round 3 sc, where the flower will hide them.
Final Blocking
Blocking turns the soft lace into a crisp, flat star.
- Wet the star in cool water, or spray it until it is damp all the way through.
- Roll it in a towel and press gently to remove the extra water. Do not wring it.
- Lay the star face up on a blocking mat.
- Push the puff petals into a neat, domed circle with your fingertips, keeping the center hole open.
- Pin the first tip picot, then pin the opposite tip so the star measures 4.25 in (10.8 cm) tip to tip.
- Pin the remaining 6 tips, spacing all 8 points evenly. Each point should measure about 1.25 in (3.2 cm) from the flower edge to the tip.
- Pin each valley ch-2 lightly so the points form clean V shapes.
- Spray lightly with starch or brush on fabric stiffener, if using.
- Let the star dry completely, at least 12 hours, before unpinning.
- If the hanging loop has twisted, pull it straight and let it dry hanging.
Final Quality-Control Checklist
- Center hole is open and about 0.375 in (1.0 cm) wide
- 8 puff petals, evenly sized and domed
- Round 3 has exactly 32 sc
- 8 chain loops in Round 4, each over 3 skipped sts
- Round 5 has 32 dc, 16 ch-2 sps, and 8 ch-5 tip sps
- Round 6 has 32 sc, 8 picot spikes, and 8 valley ch-2 sps
- All 8 points are the same length
- Star measures 4.25 in (10.8 cm) tip to tip after blocking
- Hanging loop is firm and centered on one tip
- All ends are woven in on the back and hidden
Troubleshooting
Puffs look flat or thin: Pull each loop up to a full dc height before closing, and close with a firm ch 1.
The center hole closed up: You pulled the starting tail too hard. Loosen it slightly before weaving it in.
Round 4 ruffles: Your chains are loose. Chain more tightly, or try ch 4 instead of ch 5.
Round 4 cups the flower: Your chains are tight. Chain more loosely, or go up one hook size for the chains only.
Points are uneven: Check that each Round 5 fan sits in its own ch-5 loop and that you did not chain between fans.
Tips curl or flop: Block with starch and pin each picot firmly. A stiffer cotton also helps.
Wrong count in Round 6: Recount each point; it should have 4 sc. Most mistakes come from missing the second sc of the tip spike.
Star is too small after blocking: Your tension is tight overall. Remake it with a 3.25 mm hook rather than stretching the lace too far when pinning.
Care
Hand wash gently in cool water and dry flat. Re-pin the tips and add more starch if needed. Store the star flat in tissue paper between seasons so the points stay crisp.
Final Notes
The measurement chain is short and easy to follow. The center ring opens at 0.375 in (1.0 cm), and the flower reaches 1.75 in (4.4 cm) after Round 3. The chain loops reach 2.25 in (5.7 cm), and the point fans reach 3.5 in (8.9 cm). The lace edging brings the star to 4.25 in (10.8 cm) tip to tip, and the hanging loop adds 1.25 in (3.2 cm).
If every checkpoint matches, your finished star will match too. Make one for every branch, or tie one onto a gift as a keepsake tag.
Happy crocheting!