

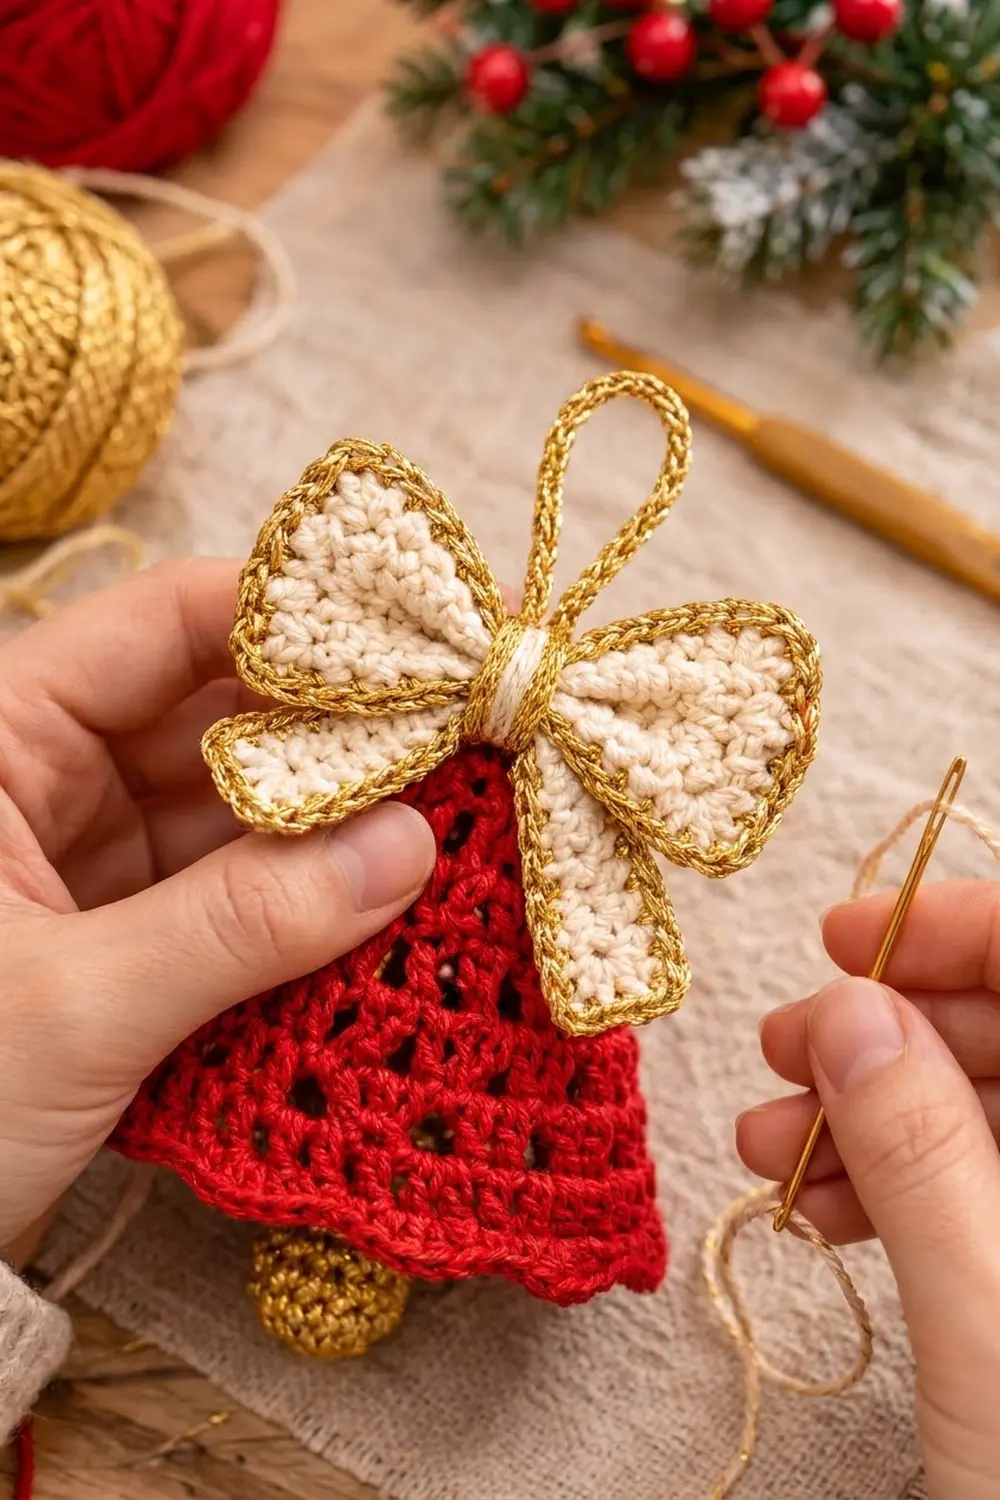
This little bell has a classic holiday look. The body is a lacy red mesh with neat vertical eyelets. It flares out from a small rounded crown to a layered, scalloped hem. A cream bow outlined in gold sits on top, and a gold ball clapper peeks out below.
The colors are traditional: rich red, warm cream and metallic gold. The style is cozy and vintage, and the gold edging gives it a bit of sparkle once it hangs among tree lights.
This pattern uses US crochet terms. The finished bell is about 5 in (12.7 cm) wide at the hem. It is about 4 in (10.2 cm) tall from the top of the bow to the bottom of the clapper, or about 5.6 in (14.2 cm) with the hanging loop.
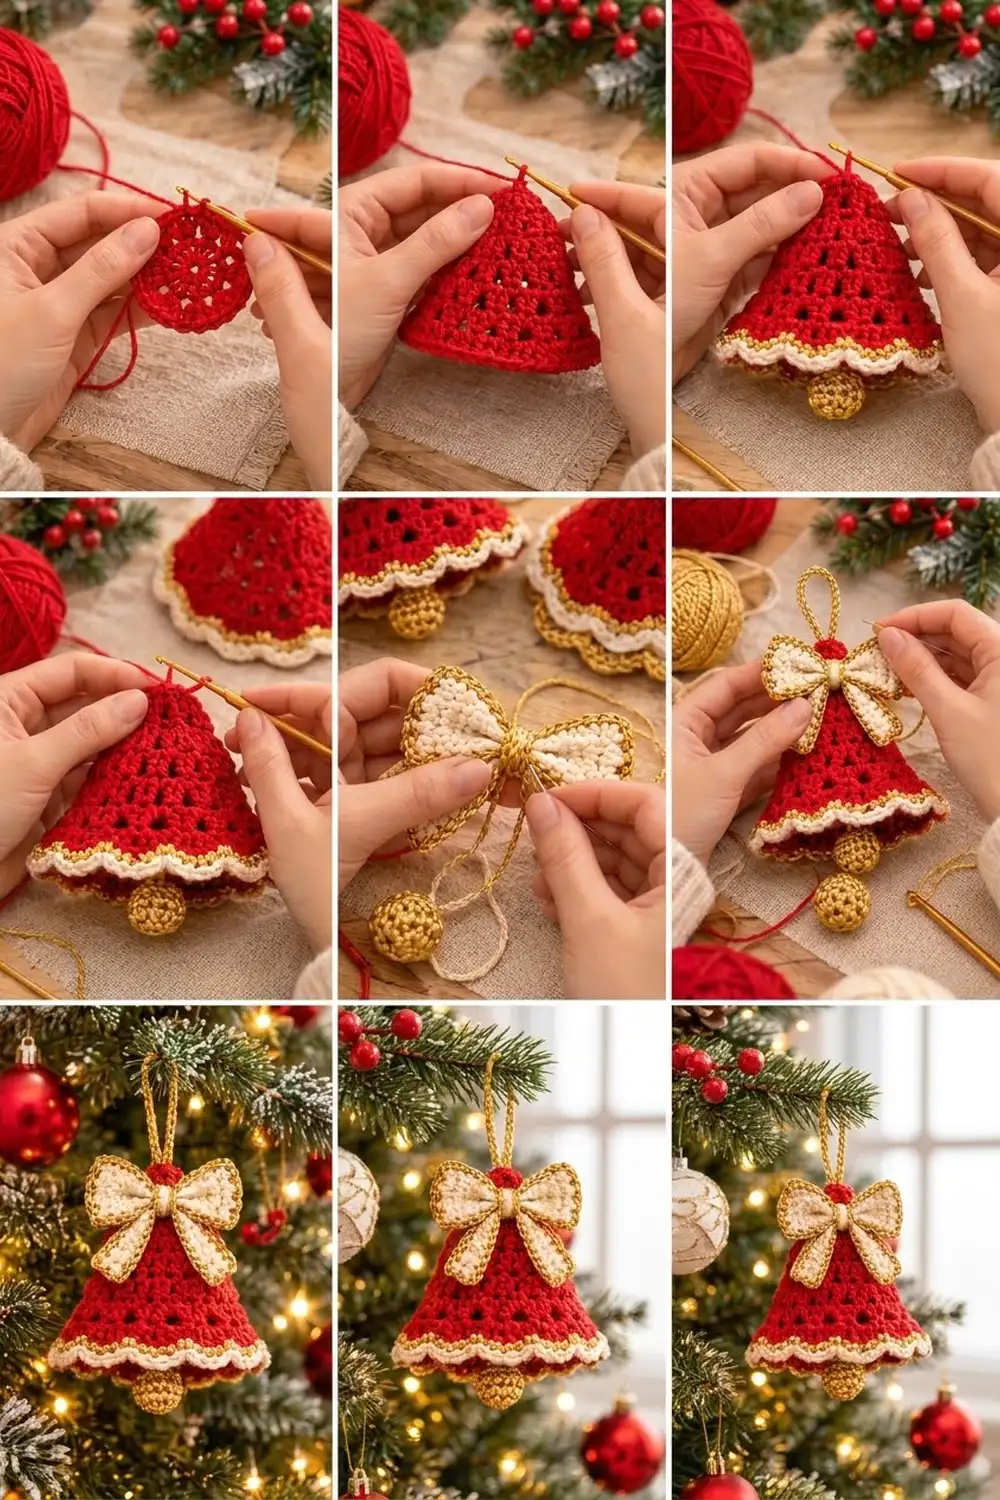
You make it as one ornament. The bell body is worked top-down in joined rounds: first a flat crown circle, then mesh rounds that flare out, then a three-layer scalloped trim. A gold ball clapper, a cream bow and a chain loop are made separately and sewn on.
Finished Size and Construction
- Finished size: 5 in (12.7 cm) wide at the scallop tips; 4 in (10.2 cm) tall without the loop
- Skill level: Easy-intermediate
- Terminology: US
- Yarn weight: DK / light worsted (#3)
- Hook: 3.5 mm (E-4)
- Number of pieces: 1 ornament (a seamless bell body plus 4 small sewn-on parts: clapper, bow wings, bow tails, loop)
- Layout: Single ornament, so there is no grid
- Bell body size before trim: 4.2 in (10.7 cm) wide laid flat, 2.6 in (6.6 cm) tall
- Trim (border) depth: 0.8 in (2.0 cm)
Materials
Choose a smooth DK yarn so the eyelets show up clearly. Cotton or a cotton blend gives the crispest scallops. Acrylic is fine too. For gold, use a metallic DK, or hold a fine metallic thread together with a gold-colored DK.
- Red: 12 g / 30 m
- Cream: 6 g / 15 m
- Gold metallic: 6 g / 15 m
These quantities include a margin of about 25% for swatching and weaving in.
Tools:
- 3.5 mm (E-4) crochet hook
- Tapestry needle
- Stitch marker
- Scissors
- A few gold yarn scraps for stuffing the clapper
- Optional: spray starch or a fabric stiffener
Abbreviations (US Terms)
- ch – chain
- sl st – slip stitch
- sc – single crochet
- dc – double crochet
- tr – treble crochet
- sc2tog – single crochet 2 together
- MR – magic ring
- BLO / FLO – back loop only / front loop only
- st(s) – stitch(es)
- sp – space
- sk – skip
- rep – repeat
- rnd – round
Special stitch – Shell scallop: Work 5 dc (or 5 tr, where stated) in the same stitch.
Round start note: At the start of each bell round, ch 3 counts as the first dc. Join every round with a sl st to the top of the beginning ch-3.
Gauge and Checkpoints
Gauge: 20 dc and 11 dc rounds = 4 in (10.2 cm). In sc: 20 sc and 24 rows = 4 in (10.2 cm).
The bell is small, so the bell itself works as your swatch. Make Rounds 1–2 and measure before you go on.
- After Rnd 2: Crown diameter 1.2 in (3.0 cm).
- After Rnd 6: Bell laid flat is 2.4 in (6.1 cm) wide at the last round.
- After Rnd 9: 4.2 in (10.7 cm) wide flat, 2.6 in (6.6 cm) tall from the crown edge.
- After trim: 5 in (12.7 cm) wide at the scallop tips.
Too big? Go down to a 3.25 mm hook. Too small? Go up to a 3.75 mm hook. Your checkpoints should land within 0.2 in (0.5 cm) of the targets.
Bell Body (Red)
Crown
Rnd 1: In red, make a MR. Ch 3 (counts as first dc), then work 11 dc in the ring. Pull the ring closed and join. (12 dc)
Rnd 2: Ch 3, dc in same st as join, 2 dc in next st, dc in next st, 2 dc in next st; rep from * 4 more times. Join. (18 dc)*
The crown is now a flat circle 1.2 in (3.0 cm) across.
Mesh Sides
From here the work turns downward. Holes stack in 6 vertical columns because each ch-1 is always worked over the ch-1 sp below it.
Rnd 3: Ch 3, working in BLO, dc in next st, ch 1, sk next st, dc in next 2 sts, ch 1, sk next st; rep from * 4 more times. Join. (18 sts: 12 dc + 6 ch-1 sp)*
The unworked front loops leave a small ridge around the crown edge, which helps the top keep its rounded shape.
Rnd 4: Ch 3, dc in next dc, ch 1, sk ch-1 sp, dc in next 2 dc, ch 1, sk ch-1 sp; rep from * 4 more times. Join. (18 sts: 12 dc + 6 ch-1 sp)*
Rnd 5 (increase): Ch 3, 2 dc in next dc, ch 1, sk ch-1 sp, dc in next dc, 2 dc in next dc, ch 1, sk ch-1 sp; rep from * 4 more times. Join. (24 sts: 18 dc + 6 ch-1 sp)*
Rnd 6: Ch 3, dc in next 2 dc, ch 1, sk ch-1 sp, dc in next 3 dc, ch 1, sk ch-1 sp; rep from * 4 more times. Join. (24 sts: 18 dc + 6 ch-1 sp)*
Checkpoint: 2.4 in (6.1 cm) wide laid flat.
Rnd 7 (increase): Ch 3, dc in next dc, 2 dc in next dc, ch 1, sk ch-1 sp, dc in next 2 dc, 2 dc in next dc, ch 1, sk ch-1 sp; rep from * 4 more times. Join. (30 sts: 24 dc + 6 ch-1 sp)*
Rnd 8 (increase): Ch 3, dc in next 2 dc, 2 dc in next dc, ch 1, sk ch-1 sp, dc in next 3 dc, 2 dc in next dc, ch 1, sk ch-1 sp; rep from * 4 more times. Join. (36 sts: 30 dc + 6 ch-1 sp)*
Rnd 9 (increase): Ch 3, dc in next 3 dc, 2 dc in next dc, ch 1, sk ch-1 sp, dc in next 4 dc, 2 dc in next dc, ch 1, sk ch-1 sp; rep from * 4 more times. Join. (42 sts: 36 dc + 6 ch-1 sp)* Fasten off red.
Checkpoint: 4.2 in (10.7 cm) wide flat, 2.6 in (6.6 cm) tall. Because the increases come faster in the last three rounds, the sides flare into a bell shape.
Clapper (Gold)
Rnd 1: MR, 6 sc in ring. (6 sc)
Rnd 2: 2 sc in each st. (12 sc)
Rnds 3–4: Sc in each st. (12 sc)
Stuff firmly with gold scraps.
Rnd 5: Sc2tog 6 times. (6 sts) Fasten off, leaving an 8 in (20.3 cm) tail. Weave the tail through the front loops, pull the opening closed, and keep the tail for hanging.
Checkpoint: about 0.8 in (2.0 cm) across.
Bow Wings (Cream, Edged in Gold)
Row 1: In cream, ch 17. Sc in 2nd ch from hook and in each ch across. Ch 1, turn. (16 sc)
Rows 2–6: Sc in each st across. Ch 1, turn. (16 sc) Fasten off cream.
Checkpoint: 3.2 in × 1 in (8.1 cm × 2.5 cm).
Edging Rnd: Join gold in the first st of Row 6. Work 3 sc in that corner st, sc in next 14 sts, and 3 sc in the last st. Then work 4 sc down the row ends (one per row, Rows 5–2). Along the foundation chain, work 3 sc in the first ch, sc in next 14 ch, and 3 sc in the last ch. Work 4 sc up the other row ends. Join. (48 sc: 14 + 14 on the long edges, 4 + 4 on the short edges, plus 4 corners × 3 sc = 12) Fasten off.
Checkpoint: 3.6 in × 1.4 in (9.1 cm × 3.6 cm).
Bow Tails (Cream, Edged in Gold)
Row 1: In cream, ch 13. Sc in 2nd ch from hook and in each ch across. Ch 1, turn. (12 sc)
Rows 2–3: Sc in each st across. Ch 1, turn. (12 sc) Fasten off cream.
Edging Rnd: In gold, work the same way as the wings: 3 sc in each corner st, 10 sc along each long edge between corners, and 1 sc on each short edge (Row 2 end). Join. (34 sc: 10 + 10 + 1 + 1 + 4 corners × 3 sc = 12) Fasten off.
Checkpoint: 2.8 in × 0.9 in (7.1 cm × 2.3 cm).
Hanging Loop (Gold)
Ch 16, which is about 3.2 in (8.1 cm). Fasten off, leaving 6 in (15.2 cm) tails at both ends. Folded in half, the loop stands 1.6 in (4.1 cm) tall.
Border: Layered Scalloped Trim
The trim has four rounds worked around the hem of Rnd 9. Gauge is the same as the body. Work Rnd 10 through both loops, and Rnds 11 and 13 into separate loops of Rnd 10 so the cream and red layers sit one in front of the other.
Rnd 10 (gold, conversion round): With the right side out, join gold in any dc of Rnd 9. Sc in each dc and work 2 sc in each ch-1 sp. Join to first sc. (48 sc = 42 sts worked one per existing st + 6 extra sc in the ch-1 sps) Fasten off.
Rnd 11 (cream shells, FLO of Rnd 10): Join cream in the FLO of any sc. Sc in FLO of this st, sk 1, 5 dc in FLO of next st, sk 1; rep from * 11 more times. Join to first sc. (12 scallops; 72 sts = 12 sc + 60 dc)* Fasten off.
Rnd 12 (gold outline, conversion round): Join gold in any sc of Rnd 11. Sc in each st, working 2 sc in the center (3rd) dc of each scallop. Join. (84 sc = 72 worked one per existing st + 12 extra at the scallop tips) Fasten off.
Rnd 13 (red ruffle, BLO of Rnd 10): Fold the cream layer forward. Find a Rnd 10 stitch that has a cream 5-dc shell in its front loop, and join red in that stitch’s back loop. Sc in BLO of this st, sk 1, 5 tr in BLO of next st, sk 1; rep from * 11 more times. Join. (12 scallops; 72 sts = 12 sc + 60 tr)* Fasten off.
Why the math works: Rnd 9 has 42 sts, and the conversion round raises that to 48. Each scallop repeat uses 4 base stitches (sc, sk, shell, sk), so 48 ÷ 4 = exactly 12 scallops, with no partial repeat. Both layers use the same 48 base stitches and the same 4-st repeat, so they line up perfectly. The red layer starts 2 sts later, which puts each red shell under a cream sc. Its tr shells are taller, so the red tips peek out about 0.2 in (0.5 cm) below the cream layer, between the cream points. The 6 extra sc in Rnd 10 also add flare, so the trim spreads to 5 in (12.7 cm).
Assembly
- Loop and clapper: Thread both loop tails and the clapper tail onto the needle. Pass them from the outside through the center of the crown’s MR, then back up through a neighboring Rnd 1 stitch.
- Adjust the clapper so its center sits level with the hem and about half the ball shows below the trim. Knot all the tails securely inside the crown and weave them in.
- Bow: Fold the tails piece into a shallow inverted V. Place it behind the center of the wings. Pinch the wings at the center into an hourglass shape.
- Wrap 30 in (76.2 cm) of gold yarn tightly around the center 8 times to make the knot. Secure it at the back.
- Sew the bow to the front of the bell so its knot sits on the crown edge ridge, just in front of the loop.
Final Blocking
- Lightly mist the bell with water, or with spray starch for a crisper finish.
- Stuff the bell loosely with plastic wrap or a rolled cloth to hold the flared shape.
- Pin the scallops of each layer so they point evenly downward. Spread the red ruffle so its tips show between the cream points.
- Shape the bow wings flat and open them evenly.
- Let it dry completely, then remove the stuffing. Check that it is 5 in (12.7 cm) wide at the scallop tips.
Final Quality-Control Checklist
- The crown is 1.2 in (3.0 cm) across and evenly round
- There are 6 straight columns of eyelets
- The bell body is 4.2 in (10.7 cm) wide flat before the trim
- There are 12 cream scallops and 12 red scallops, offset evenly
- The gold outline lies flat on the scallop tips, with no cupping
- The clapper hangs centered, half visible below the hem
- The bow is level, the knot is tight, and the tails point down evenly
- The loop stands upright and all ends are woven in
Troubleshooting
Eyelet columns drift sideways: Make sure you always ch 1 over the previous ch-1 sp and start each round in the same place.
The crown cups or ripples: Your Rnd 2 tension is off. Redo the round with an even, relaxed tension.
The bell is too straight and narrow: Check your counts on Rnds 7–9. Missed increases are the usual cause.
Scallops don’t divide evenly: Recount Rnd 10. You must have exactly 48 sc.
The red ruffle doesn’t show: Use tr, not dc, in Rnd 13, and make sure you started it 2 sts later than the cream.
The metallic yarn splits: Use a hook with a smooth, rounded tip and work a little more slowly.
Care
Spot clean with a damp cloth and lay flat to dry. Store the ornament stuffed with tissue so it keeps its flare.
Final Notes
Here is the measurement chain. The crown is 1.2 in (3.0 cm) after Rnd 2. The body is 2.4 in (6.1 cm) flat after Rnd 6 and 4.2 in (10.7 cm) flat by 2.6 in (6.6 cm) tall after Rnd 9. The 48-stitch conversion round splits into exactly 12 scallops per layer, and the 0.8 in (2.0 cm) trim brings the finished width to 5 in (12.7 cm). The bow, clapper and loop make the ornament 4 in (10.2 cm) tall, or 5.6 in (14.2 cm) with the loop. Check each stage and the finished bell will match.
Happy crocheting!