
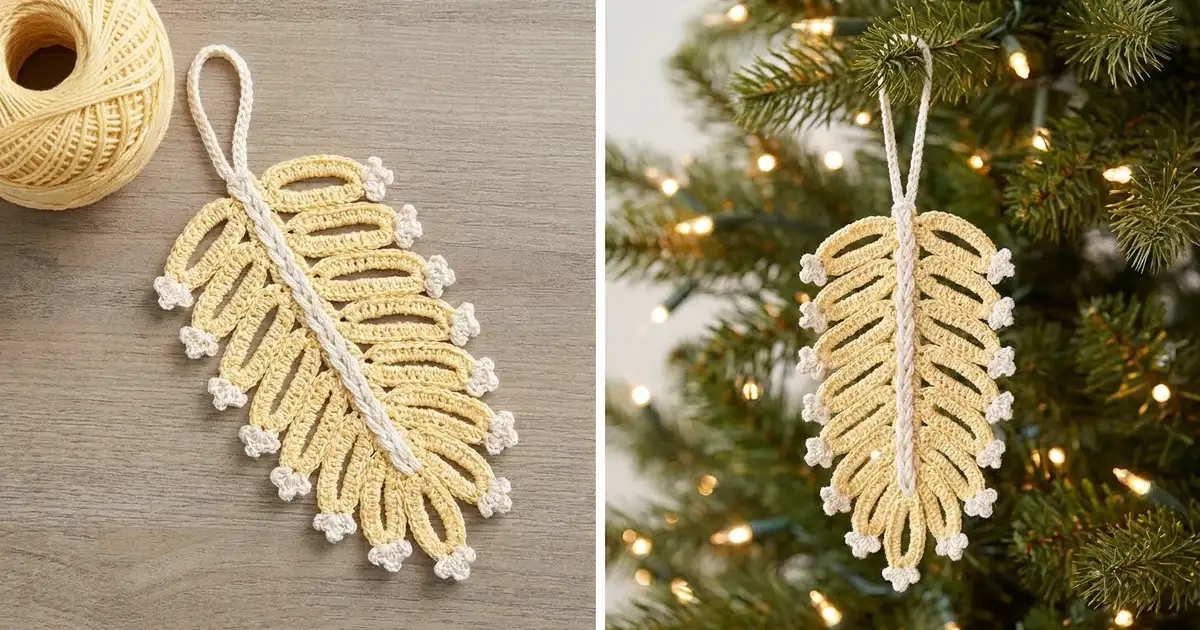
The Golden Frost Feather is a lacy, one-piece ornament shaped like a delicate fern frond. A raised, braided center spine carries nine pairs of openwork fronds. Each frond is a small arch of graded stitches with windows of chain space between them, and each tip has a tiny white trefoil picot.
The palette is soft and wintry: butter-yellow cotton thread for the body, with off-white for the picot tips and the hanging loop. It looks lovely on a tree, tied to a gift, or hung in a window.
This pattern uses US crochet terms. The finished ornament measures 2.75 in (7.0 cm) wide and 7.25 in (18.4 cm) long, plus a 1.5 in (3.8 cm) hanging loop, for a total height of 8.75 in (22.2 cm).
Construction is simple. You crochet one row of single crochet for the spine. Next, you work down one edge of the spine, adding a frond every 5 stitches, go around the bottom tip, and work back up the other edge. Finally, you add the white trefoils and the hanging loop.
Finished Size and Construction
- Finished size: 2.75 in (7.0 cm) wide × 7.25 in (18.4 cm) long; 8.75 in (22.2 cm) including the loop
- Skill level: Intermediate (thread work, working into chain loops)
- Terminology: US
- Yarn weight: Size 3 crochet thread (light fingering)
- Hook: 2.25 mm (US B-1)
- Number of pieces: 1
- Layout: One vertical feather; 9 fronds on each side of the spine
- Piece size before trim: 2.45 in (6.2 cm) × 7 in (17.8 cm)
- Trim depth: 0.15 in (0.4 cm) at each frond tip; 0.25 in (0.6 cm) at the bottom tip
Materials
Use a mercerized cotton thread in size 3. It holds crisp stitch definition and blocks well. Acrylic thread won’t hold the frond shapes after blocking.
- Butter yellow (A): 20 g, about 32 m
- Off-white (B): 10 g, about 16 m
These quantities include a generous margin for your gauge swatch and for the many weaving-in tails on the white trefoils.
Tools:
– 2.25 mm (US B-1) crochet hook
– Fine tapestry needle
– Scissors
– Rustproof pins and a foam blocking board
– Spray starch or a 1:1 mix of white glue and water (optional, for a firmer finish)
Abbreviations (US Terms)
- ch – chain
- sl st – slip stitch
- sc – single crochet
- hdc – half double crochet
- dc – double crochet
- tr – treble crochet
- sp – space
- st(s) – stitch(es)
Special stitch – Trefoil Picot Cluster (TPC): Join B with a sl st in the given ch-3 space. Work (ch 3, sl st in the same space) 3 times. Fasten off. Each TPC has 3 picots.
Frond sizes: There are three sizes, Small (S), Medium (M) and Large (L). The full instructions are in Part 2.
Gauge and Checkpoints
Gauge: 7 sc = 1 in (2.5 cm) with A on a 2.25 mm hook.
Before you start the ornament, chain 15, sc in the 2nd ch from the hook and in each ch across (14 sc), and measure. The 14 sc should measure 2 in (5.1 cm).
Checkpoints:
1. Spine (Part 1): 49 sc = 7 in (17.8 cm). Anything from 6.75 in (17.1 cm) to 7.25 in (18.4 cm) is fine.
2. After Side A: the half-feather measures 1.35 in (3.4 cm) at its widest point. That’s the spine (0.25 in / 0.6 cm) plus one Large frond (1.1 in / 2.8 cm).
3. After Side B: the width is 2.45 in (6.2 cm) at the widest point.
4. After trim: the width is 2.75 in (7.0 cm) and the length is 7.25 in (18.4 cm).
If your spine is too long: go down to a 2.0 mm hook. If it’s too short: go up to a 2.5 mm hook. Don’t change the stitch counts. Every frond position is tied to the 49-stitch spine.
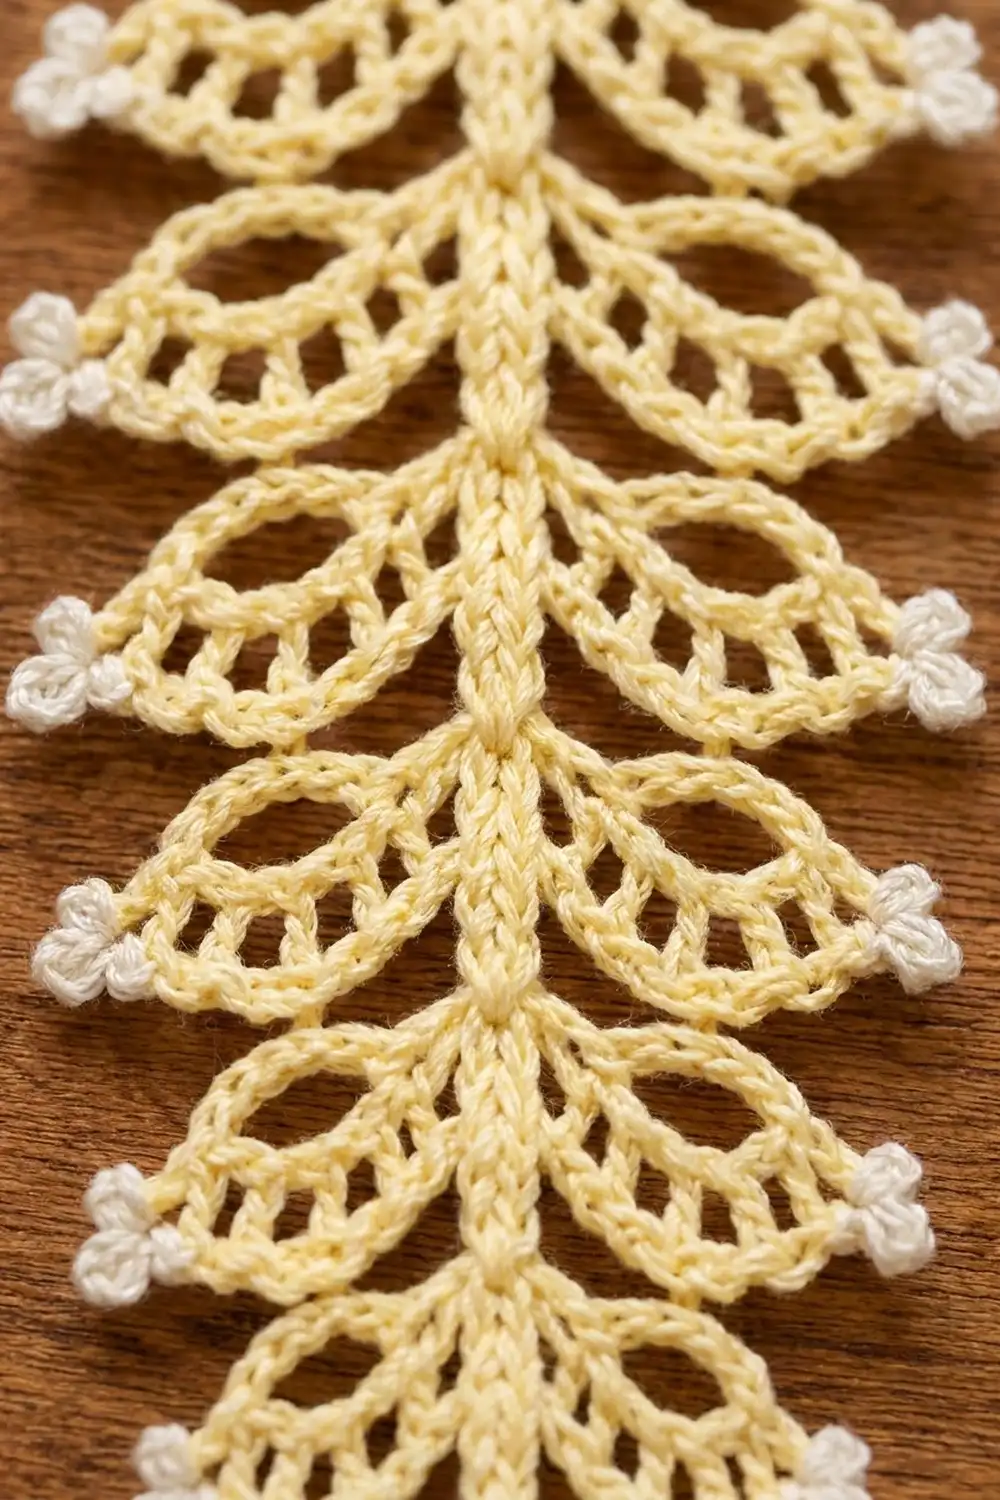
Part 1: The Spine
With A, ch 50.
Row 1: Sc in the 2nd ch from the hook and in each ch across. (49 sc)
You have worked from the bottom of the feather to the top. Number the stitches from the top down: st 1 is the last sc you made (at the top) and st 49 is the first sc you made (at the bottom).
Checkpoint: 7 in (17.8 cm).
Part 2: Frond Definitions
Each frond takes up a group of 5 spine stitches. Work it like this:
- Sl st in each of the next 5 sts. These sl sts form the raised braid along the spine.
- Chain the loop length for the frond size, then sl st into the first sl st of this group. The chain arch now spans the 5-stitch group.
- Without turning, work the fill into the loop (not into the individual chains), moving in the same direction you are traveling along the spine.
- Sl st in the last sl st of the group.
Large (L): Ch 18 for the loop.
Fill: 2 sc, hdc, ch 2, dc, ch 2, tr, ch 3, tr, ch 2, dc, ch 2, hdc, 2 sc.
(10 sts, four ch-2 sps, one ch-3 tip sp.) Projects 1.1 in (2.8 cm).
Medium (M): Ch 15 for the loop.
Fill: 2 sc, hdc, ch 2, dc, ch 3, dc, ch 2, hdc, 2 sc.
(8 sts, two ch-2 sps, one ch-3 tip sp.) Projects 0.9 in (2.3 cm).
Small (S): Ch 12 for the loop.
Fill: 2 sc, hdc, ch 1, dc, ch 3, dc, ch 1, hdc, 2 sc.
(8 sts, two ch-1 sps, one ch-3 tip sp.) Projects 0.7 in (1.8 cm).
The chain spaces between the taller stitches open into the small windows inside each frond. Every frond has exactly one ch-3 tip space for a white trefoil.
Part 3: Side A (Working Down the Spine)
Ch 1 and turn. You’ll now work along the tops of the Row 1 stitches, from st 1 at the top down to st 49.
- Frond A1 (sts 1–5): M
- Frond A2 (sts 6–10): L
- Frond A3 (sts 11–15): L
- Frond A4 (sts 16–20): L
- Frond A5 (sts 21–25): L
- Frond A6 (sts 26–30): L
- Frond A7 (sts 31–35): M
- Frond A8 (sts 36–40): M
- Frond A9 (sts 41–45): S
Stem: Sl st in each of sts 46, 47 and 48. (3 sl sts)
Bottom tip: In st 49, work (sc, ch 3, sc).
Count check: 45 stitches in the frond groups + 3 stem stitches + 1 tip stitch = 49. That matches the spine.
Side A totals: 9 fronds = 5 L + 3 M + 1 S. Including the bottom tip, there are 10 ch-3 tip spaces.
Checkpoint: The half-feather measures 1.35 in (3.4 cm) at its widest point.
Part 4: Side B (Working Up the Spine)
Rotate the piece so you can work into the free loops of the foundation chain. Each stitch on Side B goes into the chain loop directly under the matching spine stitch, so the fronds mirror Side A.
Stem: Sl st in the loops under sts 48, 47 and 46. (3 sl sts)
- Frond B1 (loops under sts 45–41): S
- Frond B2 (loops 40–36): M
- Frond B3 (loops 35–31): M
- Frond B4 (loops 30–26): L
- Frond B5 (loops 25–21): L
- Frond B6 (loops 20–16): L
- Frond B7 (loops 15–11): L
- Frond B8 (loops 10–6): L
- Frond B9 (loops 5–1): M
Top tip: Work (sc, ch 3, sc) in the ch-1 at the top of the spine. Sl st in the first sl st of Frond A1. Fasten off A.
Count check: 3 stem stitches + 45 frond-group stitches = 48 loops, under sts 48 to 1. The loop under st 49 sits beneath the bottom-tip cluster and is left unused.
Piece totals: 18 fronds (10 L, 6 M, 2 S) and 20 ch-3 tip spaces (18 frond tips + bottom tip + top tip).
Checkpoint: 2.45 in (6.2 cm) × 7 in (17.8 cm).
Part 5: White Trim and Hanging Loop (Border)
Trim gauge: One TPC adds about 0.15 in (0.4 cm) beyond the tip it sits on. At the bottom tip, the (sc, ch 3, sc) cluster plus the TPC together add 0.25 in (0.6 cm) to the length.
Round 1 – Side A trefoils: Work 1 TPC in the ch-3 tip space of each of Fronds A1–A9. (9 TPC, 27 picots)
Round 2 – Bottom tip: Work 1 TPC in the ch-3 space at st 49. (1 TPC, 3 picots)
Round 3 – Side B trefoils: Work 1 TPC in the ch-3 tip space of each of Fronds B1–B9. (9 TPC, 27 picots)
Round 4 – Hanging loop and top trefoil:
1. Join B with a sl st in the top ch-3 space.
2. Ch 24, then sl st in the same ch-3 space to form the loop.
3. Work 30 sc into the loop. The loop is now padded and corded.
4. Sl st in the ch-3 space.
5. Work (ch 3, sl st in the same space) 3 times.
6. Fasten off.
(1 loop of 30 sc and 1 top trefoil with 3 picots)
Trim totals: 20 trefoils (9 + 1 + 9 + 1) and 60 picots.
Why the math works: Each frond makes exactly one ch-3 tip space, and both spine ends make one more each. That gives 18 + 2 = 20 spaces, which matches the 20 trefoils one for one. Nothing is added or skipped. Width: 0.25 in spine + 2 × 1.1 in Large fronds = 2.45 in (6.2 cm) before trim. Adding 2 × 0.15 in for the trefoils gives 2.75 in (7.0 cm).
Leave 4 in (10.2 cm) tails on every trefoil. Weave each tail back through its own frond’s stitches so the white doesn’t show on the yellow.
Final Blocking
- Soak the ornament in cool water for 5 minutes. Press out the water in a towel; don’t wring it.
- If you want a firmer ornament, dip it in the starch or glue-water mix and blot off the excess.
- Pin the spine dead straight down the center of the board, to 7 in (17.8 cm).
- Pin each frond tip outward and slightly upward, at about 60 degrees from the spine. Put the pin in the frond’s ch-3 tip space, under the trefoil.
- Check the widths. The Large fronds should reach 1.1 in (2.8 cm) from the spine edge, the Medium fronds 0.9 in (2.3 cm) and the Small fronds 0.7 in (1.8 cm).
- Pin the three picots of each trefoil open into a little clover shape.
- Pin the hanging loop into a smooth teardrop 1.5 in (3.8 cm) tall.
- Leave to dry completely, at least 12 hours, before unpinning.
Final Quality-Control Checklist
- Spine: 49 sc, straight, with the raised sl-st braid along both edges
- 9 fronds per side, in the order M, L, L, L, L, L, M, M, S from the top down
- Each frond has its full fill and an open ch-3 tip space
- Both sides mirror each other at every level
- 20 white trefoils, each with 3 picots
- Hanging loop: 30 sc, centered at the top
- Body measures 2.75 in (7.0 cm) × 7.25 in (18.4 cm)
- Total height is 8.75 in (22.2 cm)
- All tails woven in and trimmed
Troubleshooting
Fronds ruffle or cup: Your fill is too tight for the loop. Chain the loop more loosely, or add 1 ch to the loop. Keep the stitch fill exactly as written.
Fronds look floppy and gappy: Your loop is too loose. Use a 2.0 mm hook for the loop chain only.
The spine curves to one side: You’ve probably worked the sl sts tighter on one side than the other. Re-block with extra pins along the spine. On your next ornament, keep the sl sts relaxed on both sides.
The fronds don’t line up across the spine: Count the foundation loops again. Side B must start in the loop under st 48, not st 49.
A trefoil comes loose: Tie its two tails in a square knot before weaving them in.
White shows through the yellow: Weave the white tails only through the frond the trefoil sits on, staying inside the solid stitches (sc and hdc).
Care
Hand wash in cool water with a mild soap, then re-block flat to dry. Store it flat in tissue paper so the fronds keep their shape.
Final Notes
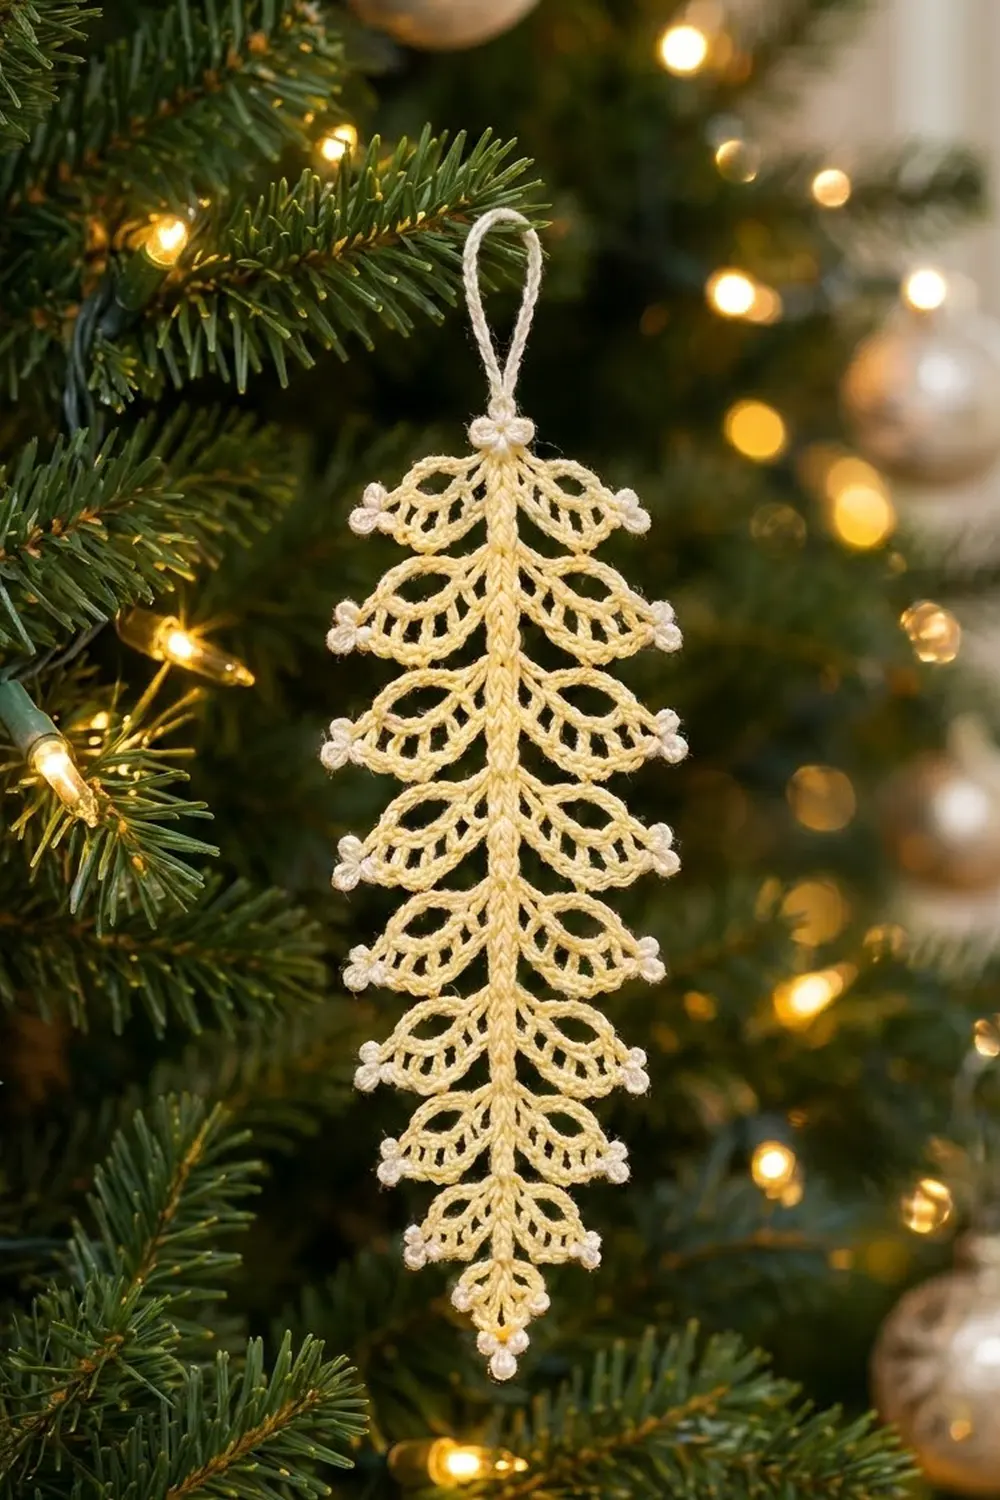
The whole design hangs on one measurement chain. Gauge is 7 sc per inch, so the 49-stitch spine is 7 in (17.8 cm). The nine 5-stitch frond groups plus a 3-stitch stem and 1 tip stitch use up the spine exactly. Large fronds bring the width to 2.45 in (6.2 cm), the trefoils bring it to 2.75 in (7.0 cm), and the tip trefoil plus the 1.5 in (3.8 cm) loop bring the total height to 8.75 in (22.2 cm). If you get the gauge right at the start, everything else follows from it.
Happy crocheting!