
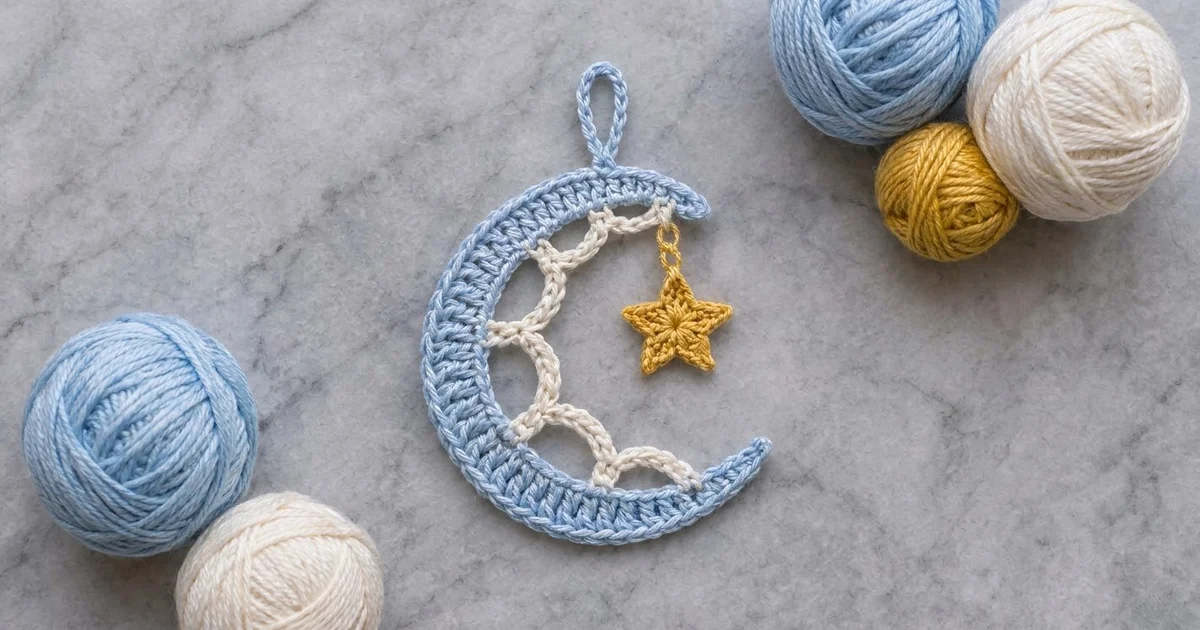
The Starlit Lullaby Moon is a small, soft holiday ornament. It is a light blue crescent with a cream lace scallop inside the curve and a tiny gold star hanging from the upper tip. It looks quiet and dreamy, like a nursery mobile, and it looks just as good on a Christmas tree, a window latch or the front of a gift box.
The palette has three colors. Sky blue is used for the moon, cream for the lace arches and mustard gold for the star. Cotton or a cotton blend in DK weight gives crisp stitch definition and keeps the crescent flat once it is blocked.
The pattern uses US crochet terms. The finished moon is 4.75 in (12.1 cm) tall and 4 in (10.2 cm) wide. With the hanging loop it measures about 6 in (15.2 cm) from the top of the loop to the lower tip.
Construction is simple. You work two shaped rows of the crescent from a foundation chain, then add a single crochet border all the way around. The cream lace goes into the inner edge in two rows of chain arches. Last, you make the star separately, hang it on a gold chain and add a blue hanging loop.
Finished Size and Construction
- Finished size: 4.75 in (12.1 cm) tall × 4 in (10.2 cm) wide
- Total hanging length: about 6 in (15.2 cm)
- Skill level: Easy / advanced beginner
- Terminology: US crochet terms
- Yarn weight: DK (light #3)
- Hook: 3.5 mm (E-4)
- Number of pieces: 1 ornament (a crescent with lace worked directly into it, plus 1 small star attached with a chain)
- Layout: single motif, no assembly grid
- Star size: 1.25 in (3.2 cm) point to point
- Size before border: 4.25 in (10.8 cm) tall × 3.5 in (8.9 cm) wide, band 0.75 in (1.9 cm) wide at center
- Border depth: 0.25 in (0.6 cm)
Materials
Use a smooth DK cotton or cotton blend. Mercerized cotton gives the cleanest lace arches. Acrylic also works, but it may need a firmer blocking.
- Color A, sky blue (moon, border, hanging loop): 8 g / 20 m
- Color B, cream (lace arches): 3 g / 8 m
- Color C, mustard gold (star and star chain): 2 g / 5 m
These quantities include a margin of about 25% for swatching and weaving in ends. Leftover yarn is ideal for this project.
Tools:
- 3.5 mm (E-4) crochet hook
- Tapestry needle
- Scissors
- Stitch markers (2–3)
- Blocking mat and rust-proof pins
- Spray bottle with water
- Optional: fabric stiffener or a diluted glue-water mix for a firmer lace
Abbreviations (US Terms)
- ch – chain
- sl st – slip stitch
- sc – single crochet
- hdc – half double crochet
- dc – double crochet
- sk – skip
- st(s) – stitch(es)
- MR – magic ring
- 2 dc in next – increase: work 2 double crochet into the same stitch
Special stitch – Star point: ch 4, sl st in 2nd ch from hook, sc in next ch, hdc in next ch, sk 1 sc of the ring, sl st in next sc.
Gauge and Checkpoints
Gauge: 22 sc = 4 in (10.2 cm) with a 3.5 mm hook. That works out to 5.5 sts per inch.
Work the moon itself as your swatch. Check it at each stage before you add the lace:
- After Row 1: the inner (chain) edge measures about 7.25 in (18.4 cm) when the strip lies straight. The row is about 0.4 in (1.0 cm) tall at the center.
- After Row 2: the strip curls into a crescent about 4.25 in (10.8 cm) tall and 3.5 in (8.9 cm) wide. The band is 0.75 in (1.9 cm) wide at the center.
- After the border: 4.75 in (12.1 cm) tall × 4 in (10.2 cm) wide, with a 1 in (2.5 cm) band.
- Star: the ring from Round 1 is about 0.5 in (1.3 cm) across, and the finished star is 1.25 in (3.2 cm).
If your moon is too big, go down to a 3.25 mm hook or switch to a slightly finer yarn. If it is too small, go up to a 3.75 mm hook. If the crescent ruffles, your increases are too loose for your tension, so drop half a hook size. If it barely curves, your dc are too tight, so go up half a size.
Crescent Moon
Use Color A.
Foundation: ch 41.
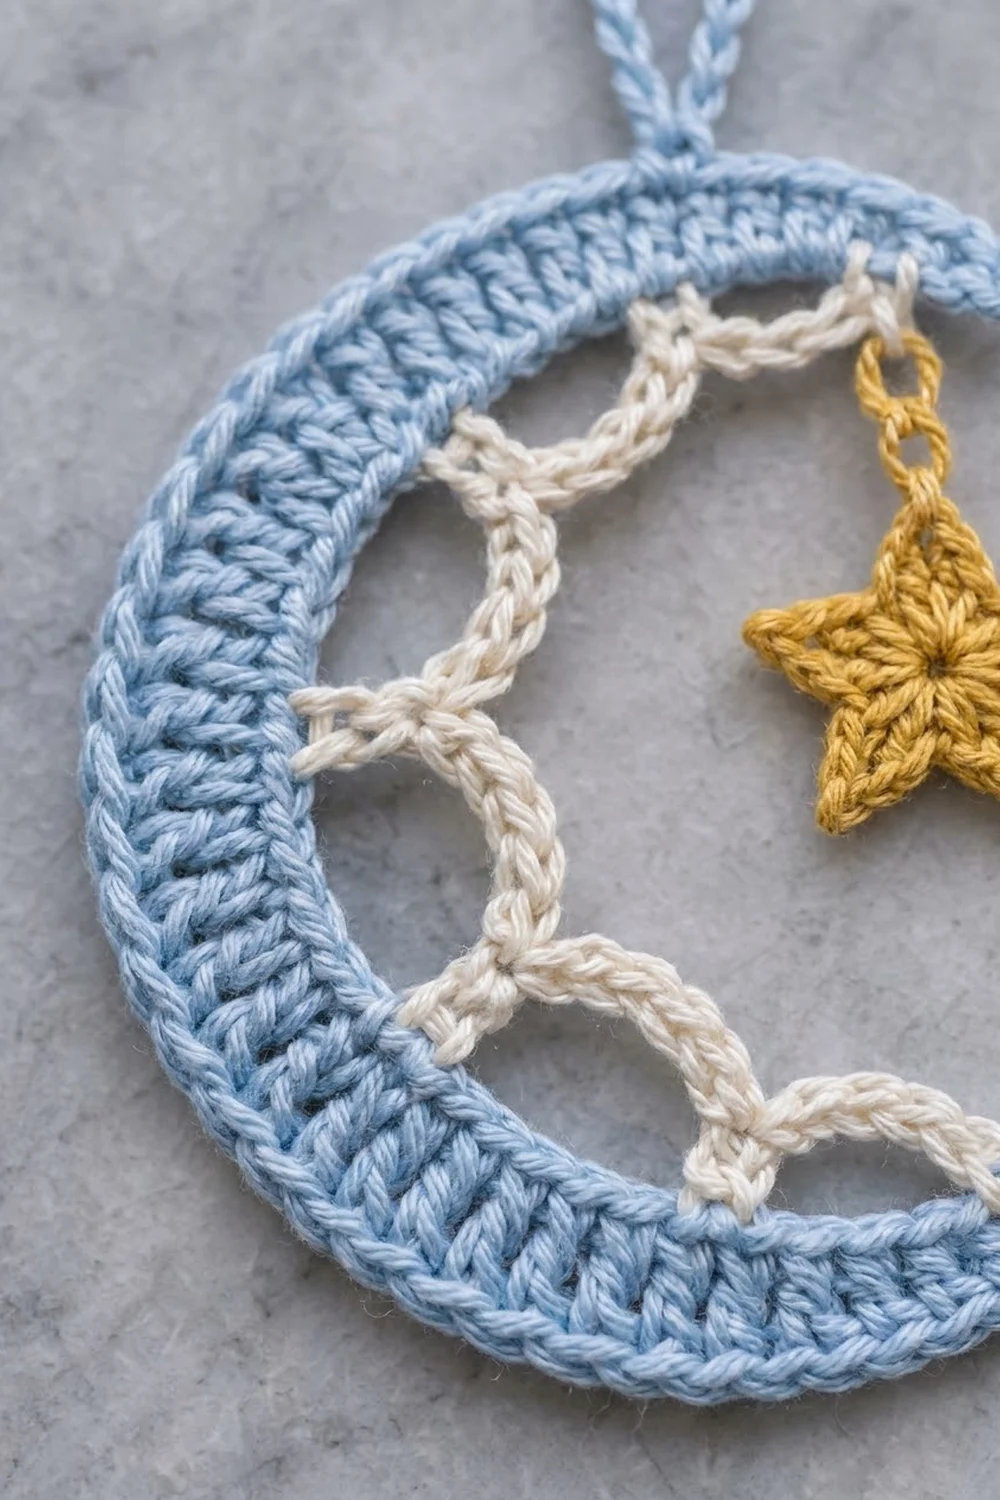
Row 1: Starting in the 2nd ch from the hook: sl st in the next ch, sc in each of the next 2 ch, hdc in each of the next 2 ch. Then dc in each of the next 2 ch, 2 dc in the next ch; repeat from * 10 times. Finish with hdc in each of the next 2 ch, sc in each of the next 2 ch and sl st in the last ch.
Count check: 1 sl st + 2 sc + 2 hdc + 40 dc + 2 hdc + 2 sc + 1 sl st = 50 sts. These are worked over 40 chains.
The 10 increases spread across the center 30 chains make the top edge longer than the chain edge. That is what starts the curve. The short stitches at each end make the pointed tips.
Row 2: Turn and ch 1 (this ch does not count as a stitch). Sl st in the first st, sc in each of the next 2 sts, hdc in each of the next 2 sts. Then dc in each of the next 3 sts, 2 dc in the next st; repeat from * 10 times. Finish with hdc in each of the next 2 sts, sc in each of the next 2 sts and sl st in the last st.
Count check: 1 sl st + 2 sc + 2 hdc + 50 dc + 2 hdc + 2 sc + 1 sl st = 60 sts. These are worked over the 50 sts of Row 1.
The 40 center dc of Row 1 become 50 dc in Row 2. The outer edge is now 60 sts long and the inner chain edge is 40, so the band bends into a crescent. Lay it flat and check the “After Row 2” measurements before you continue. Don’t fasten off.
Border
Border gauge: 5.5 sc per inch (2.54 cm) along both edges. Work the stitches at the same tension as your swatch.
Border round: Don’t turn. You are now at the tip where Row 2 ended. Call this the lower tip and hold the moon with its opening to the right.
- Work 3 sc into the point of the lower tip.
- Rotate the piece and work along the inner foundation edge. Put 1 sc into each of the 40 foundation chains, working into the free loops on the underside of the chain.
- Work 3 sc into the point of the upper tip.
- Work along the outer edge with 1 sc in each of the 60 sts of Row 2.
- Sl st to the first sc to join.
Count check: (40 inner sts + 60 outer sts, each worked 1-per-stitch) + (3 + 3 tip sc) = 100 + 6 = 106 sc.
Per side:
- Outer edge: 60 sc
- Inner edge: 40 sc
- Each tip: 3 sc
Fasten off and weave in the ends.
Why the math works: The border works exactly one sc into each existing edge stitch, so it adds no extra length along the curves and the curve you set in Row 2 stays the same. The only extra stitches are the 3 sc at each tip. They turn the sharp point into a neat, rounded point without making the tip flare. At 5.5 sc per inch, the 40 inner sc measure about 7.25 in (18.4 cm) and the 60 outer sc about 10.9 in (27.7 cm) along their arcs. A 0.25 in (0.6 cm) border on each side brings the 4.25 in × 3.5 in (10.8 cm × 8.9 cm) crescent up to 4.75 in × 4 in (12.1 cm × 10.2 cm).
Marking the inner edge: Number the 40 inner sc from 1 to 40, starting at the upper tip. Place markers in inner sc #1, #3 and #38.
Lace Arches
Use Color B. Work with the right side facing you and the moon’s opening to the right.
Lace Row 1: Join Color B with a sc in inner sc #3. Then ch 8, sk 4 sc, sc in the next sc; repeat from * 7 times. Your last sc lands in inner sc #38.
Count check: 7 ch-8 arches and 8 sc anchors. You have used inner sc #3 through #38, which is 36 sts (1 + 7 × 5). Two free sc are left at each end: #1–#2 at the top and #39–#40 at the bottom. This keeps the lace centered.
Lace Row 2: Turn. Sl st in each of the first 4 ch of the first arch to reach its center. Ch 1, then sc around the center of that same arch. Next, ch 6, sc around the center of the next ch-8 arch; repeat from * 6 times.
Count check: 6 ch-6 arches and 7 sc. One sc sits at the center of each Row 1 arch.
The shorter ch-6 loops pull the centers of the first arches toward each other. This makes the open, rounded cells in the scallop. Fasten off and weave the ends into the chains so they don’t show.
Star
Use Color C.
Round 1: MR, ch 1, 10 sc in the ring. Pull the ring closed and sl st to the first sc. (10 sc)
Round 2: Ch 4, sl st in 2nd ch from hook, sc in next ch, hdc in next ch, sk 1 sc, sl st in next sc; repeat from * 5 times. The last sl st lands on the joining sl st of Round 1. (5 star points)
Each point uses 2 sc of Round 1 (5 × 2 = 10), so the star lies flat with no gaps.
Star chain: Sl st up the side of the nearest point to its tip. Ch 7. Sl st into inner border sc #1 of the moon, the one closest to the upper tip. Sl st back into the last ch to lock it. Fasten off and hide the ends inside the chain.
The star should hang about 1.25 in (3.2 cm) below the inner edge and should not tangle with the lace.
Hanging Loop
Use Color A. Count 12 sts along the outer border, starting from the upper tip, and join with a sl st in outer border sc #12. Ch 16, then sl st in the same sc. Next, work 22 sc over the chain loop and sl st into the base. Fasten off.
The finished loop stands about 1.25 in (3.2 cm) tall and sits above the shoulder of the upper horn, so the moon hangs tilted, the way it does on the tree.
Final Blocking
- Spray the ornament lightly until it is damp but not dripping.
- Lay it right side up on the blocking mat with the opening of the crescent facing right.
- Pin the outer curve into a smooth arc 4.75 in (12.1 cm) tall and 4 in (10.2 cm) wide.
- Pin both tips to points. Keep the 3-sc tip stitches rounded rather than stretched.
- Pin the center of each ch-8 arch so the Row 1 scallops are evenly round. Then pin the ch-6 arches so the cells match.
- Pin the star flat with all 5 points open. Lay its chain straight.
- If you want a firmer lace, dab stiffener onto the cream arches only.
- Let it dry completely, usually 6–12 hours, before you unpin it.
Final Quality-Control Checklist
- Row 1 has 50 sts and Row 2 has 60 sts.
- The border has 106 sc: 60 outer, 40 inner and 3 at each tip.
- Lace Row 1 has 7 ch-8 arches with 2 free sc at each end.
- Lace Row 2 has 6 ch-6 arches.
- The star has 5 even points, and Round 1 has 10 sc.
- The moon measures 4.75 in × 4 in (12.1 cm × 10.2 cm).
- The band is 1 in (2.5 cm) wide at the center.
- The hanging loop is secure and about 1.25 in (3.2 cm) tall.
- All ends are woven in and none show on either side.
Troubleshooting
- The crescent stays almost straight. The increases are too tight. Re-check that you worked 10 increases in each row, or go up half a hook size.
- The band ruffles or cups. The increases are too loose. Drop half a hook size and block it firmly.
- The tips are blunt. Make sure each row starts and ends with sl st, 2 sc and 2 hdc, and don’t skip the 3-sc tip increase in the border.
- The lace sags. Shorten the arches to ch 7 and ch 5, or use stiffener.
- The lace pulls the moon closed. Your chains are too tight. Chain more loosely or use a half-size larger hook just for the lace.
- The star curls. Round 1 is too tight. Work the 10 sc more loosely and block the star flat.
- The ornament hangs crooked. Move the loop a stitch or two along the outer border until it balances.
Care
Hand wash in cool water with mild soap, press out the water in a towel, and dry flat, re-pinning if needed. Store flat or hanging, away from crushing weight, so the lace keeps its shape.
Final Notes
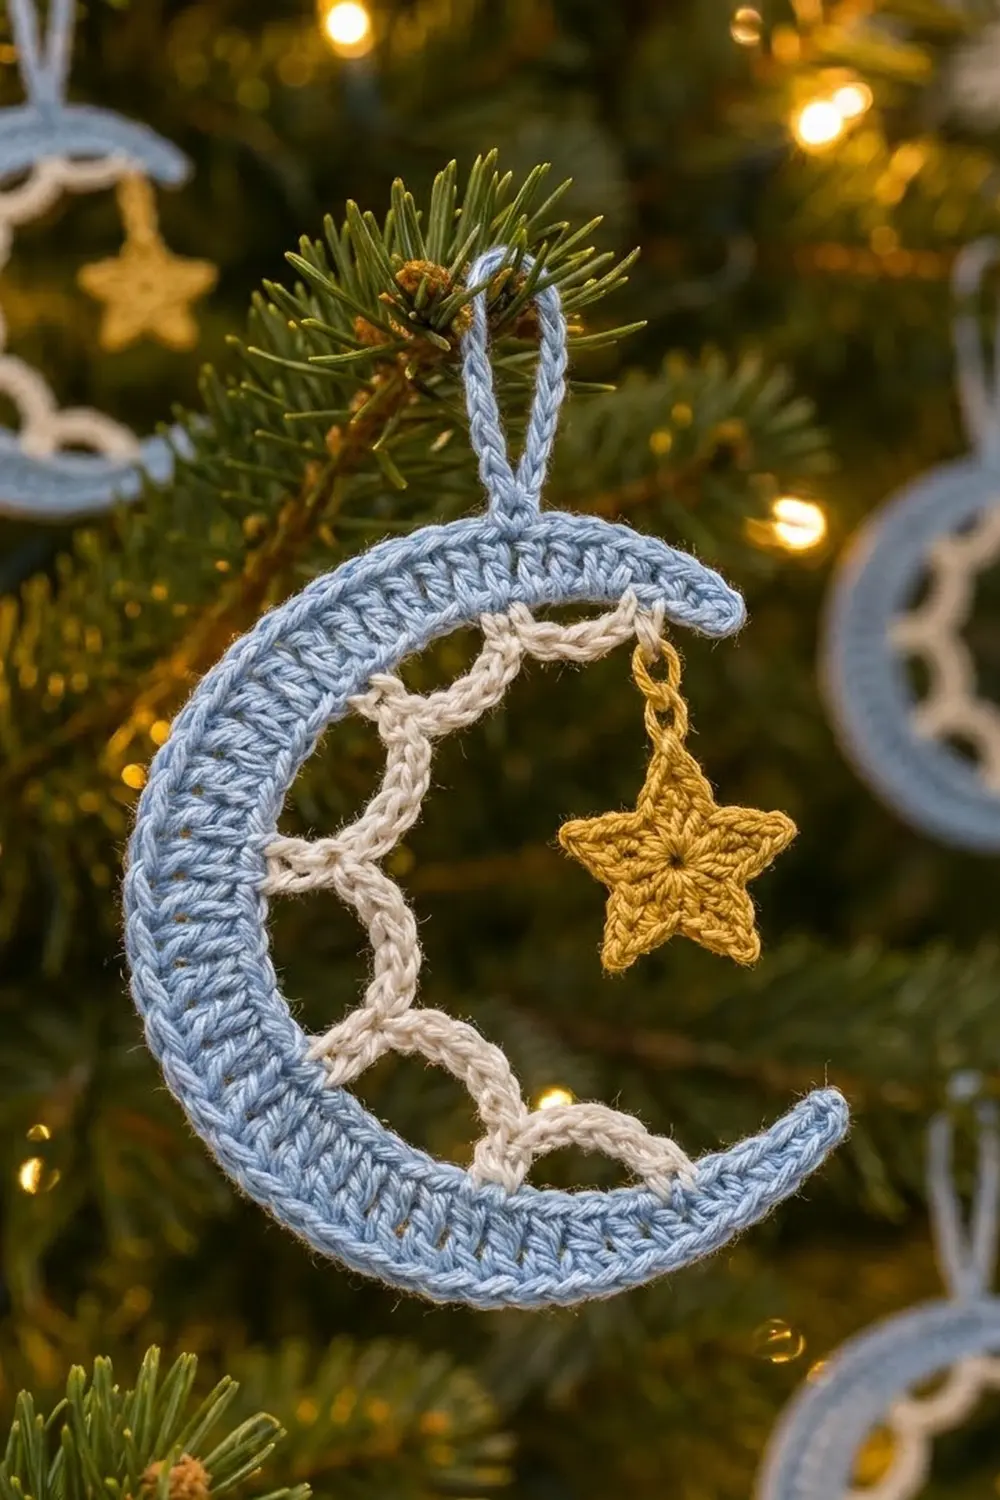
Here is the full measurement chain. A gauge of 22 sc = 4 in (10.2 cm) gives a Row 1 strip with a 7.25 in (18.4 cm) inner edge. Row 2 curls it into a 4.25 in × 3.5 in (10.8 cm × 8.9 cm) crescent. The 106-sc border, with a 0.25 in (0.6 cm) depth, brings it to 4.75 in × 4 in (12.1 cm × 10.2 cm). The cream lace fills the inner curve, the 1.25 in (3.2 cm) gold star hangs from the upper tip, and the loop brings the total hanging length to about 6 in (15.2 cm). If you check each stage as you go, the finished moon will match.
Happy crocheting!