

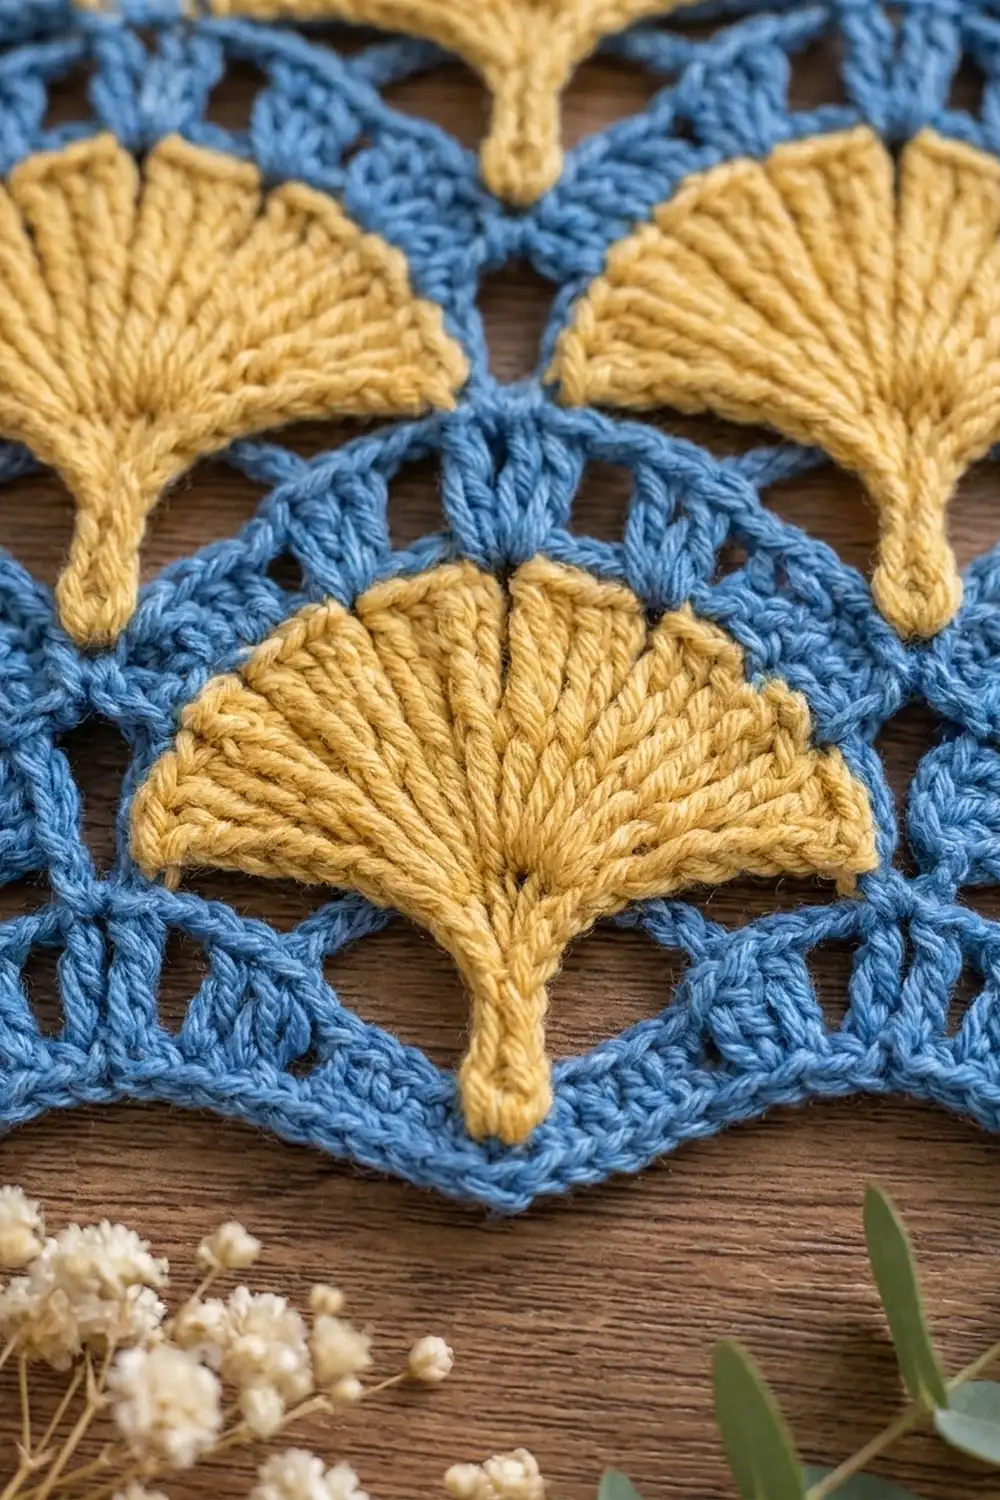
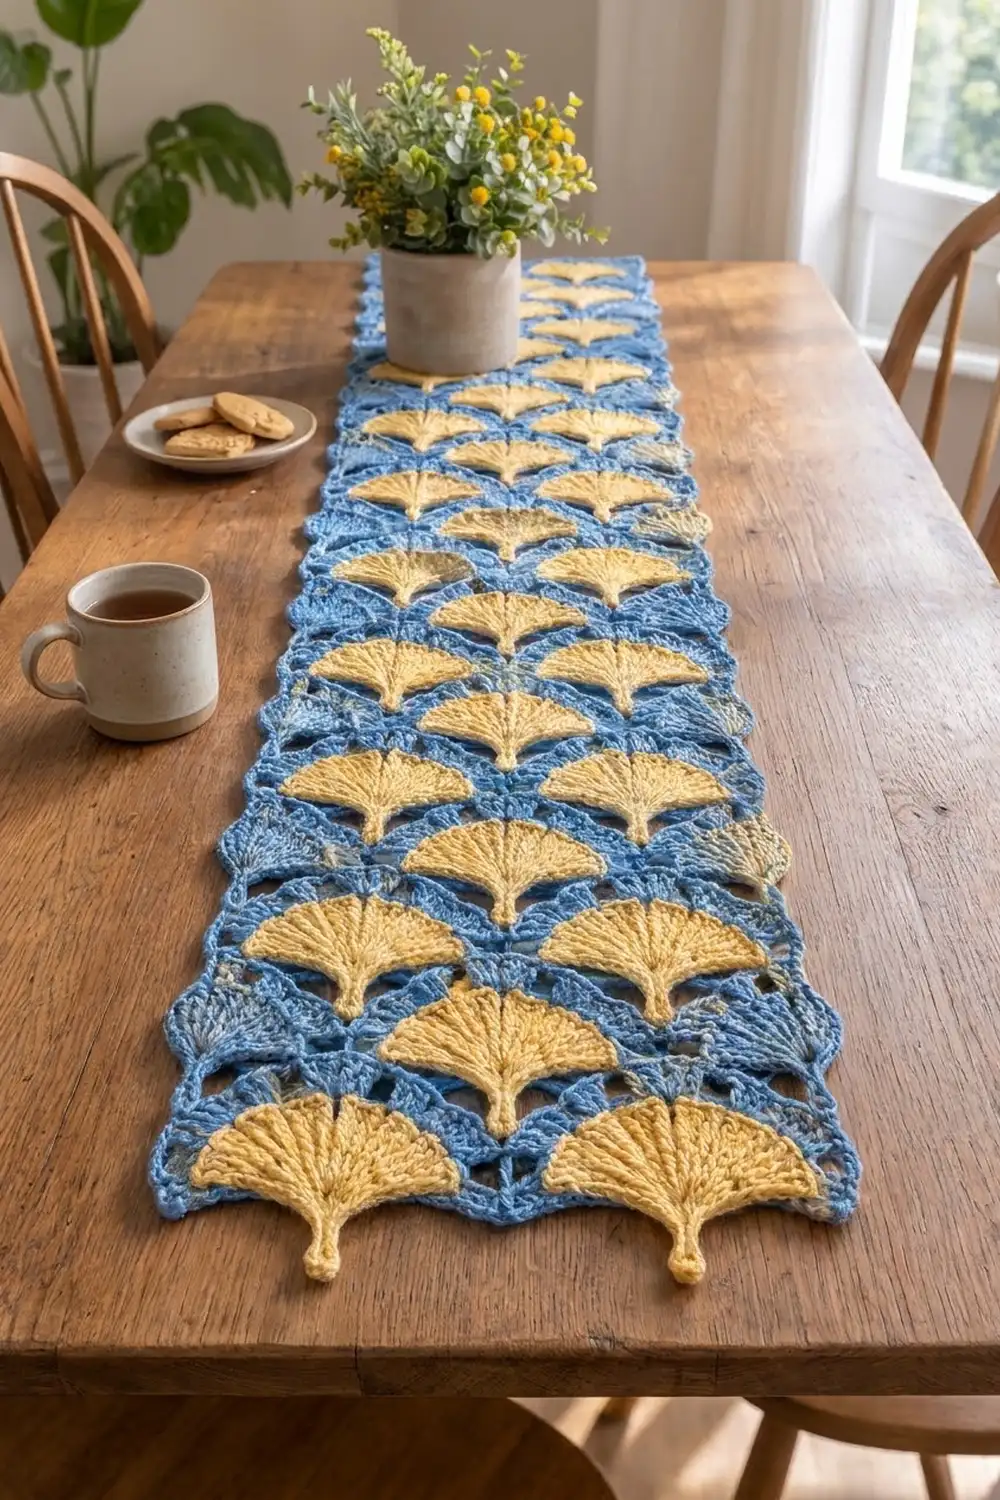
This panel combines solid mustard-yellow ginkgo fans with an airy cornflower-blue lattice. The yellow fans sit in staggered tiers, and each one narrows to a small stem. The blue openwork arches over the fans and fills the gaps with shells. A scalloped blue border finishes all four edges.
The look is fresh and a little vintage. It works as a table centerpiece, a dresser scarf, or a wall hanging. It is also a good way to learn a structured fan-and-lattice stitch before using it in something larger.
This pattern uses US crochet terms. The finished panel measures 8 x 13.75 in (20.3 x 34.9 cm) after blocking.
The panel is one piece worked flat in rows from the bottom up. You work 16 body rows: one foundation row and then five 3-row tiers. Yellow is added only for the fans, and the blue is carried inside them. Afterward you add short surface-stitched stems and a 2-round scalloped border.
Finished Size and Construction
- Finished size: 8 x 13.75 in (20.3 x 34.9 cm)
- Skill level: Intermediate
- Terminology: US
- Yarn weight: Worsted (#4) cotton
- Hook: 5.0 mm (H-8)
- Number of pieces: 1
- Layout: 5 tiers of fans, arranged 1-2-1-2-1 from bottom to top (7 yellow fans in total)
- Piece size before border: 7 x 12.75 in (17.8 x 32.4 cm)
- Border depth: 0.5 in (1.3 cm) on every side
Materials
Yarn: Use a smooth, mercerized or combed worsted-weight cotton. Cotton shows the fan ridges clearly and blocks flat. Avoid fuzzy yarns, because they blur the lattice.
- Color A, cornflower blue: 75 g, about 140 m
- Color B, mustard yellow: 25 g, about 45 m
These quantities include about a 15% margin for your gauge swatch and weaving in ends.
Tools:
- 5.0 mm (H-8) crochet hook
- Tapestry needle
- Scissors
- 4 stitch markers
- Blocking mat and rustproof pins
- Spray bottle
- Measuring tape
Abbreviations (US Terms)
- ch: chain
- sc: single crochet
- dc: double crochet
- sl st: slip stitch
- sk: skip
- sp: space
- st(s): stitch(es)
- RS: right side
Ginkgo Fan (GF): Work 9 dc into the same stitch in Color B, crocheting over the carried Color A strand as you go. Change to Color B on the last yarn over of the stitch before the fan. Change back to Color A on the last yarn over of the 9th dc. Cut Color B, leaving a 6 in (15.2 cm) tail.
Stitch counting: In the reset rows (Rows 4, 7, 10, 13, 16), each ch-1 counts as a stitch. Every reset row has 25 stitch positions.
Gauge and Checkpoints
Gauge is checked on a short test strip, not a flat square:
- Test piece: Rows 1–4 (the foundation row plus one tier) measures 7 in (17.8 cm) wide and 2.75 in (7.0 cm) tall, lightly blocked.
- Row 1: 25 sc = 7 in (17.8 cm).
- One tier (3 rows): 2.5 in (6.4 cm) tall.
Measurement checkpoints, taken flat and unstretched:
- After Row 4: 2.75 in (7.0 cm)
- After Row 7: 5.25 in (13.3 cm)
- After Row 10: 7.75 in (19.7 cm)
- After Row 13: 10.25 in (26.0 cm)
- After Row 16: 12.75 in (32.4 cm)
A tolerance of 0.25 in (0.6 cm) at each checkpoint is fine.
If your test piece is too wide or too tall, go down one hook size. If it is too small, go up one hook size. If the width is right but the tiers are short, pull up your dc loops slightly taller instead of changing hooks.
Pattern
Foundation
With Color A, ch 26.
Row 1: Sc in the 2nd ch from the hook and in each ch across. Turn. (25 sc)
The panel is built from two tiers that alternate. Tier B has one yellow fan in the center and blue half-fans at the edges. Tier A has two yellow fans. Work the tiers in this order: B, A, B, A, B.
Tier B: Rows 2–4 (Repeat as Rows 8–10 and Rows 14–16)
Row 2 (fan row): Ch 3 (counts as dc), 4 dc in the first st (blue half-fan). Sk 5 sts, sc in the next st. Sk 5 sts, GF in the next st. Sk 5 sts, sc in the next st. Sk 5 sts, 5 dc in the last st. Turn. (21 sts: 10 blue dc, 2 sc, 9 yellow dc)
Check the stitch positions: half-fans at 1 and 25, sc at 7 and 19, and the fan at 13.
Row 3 (arch row):
1. Ch 1, sc in the first dc, ch 3, sk 3 dc, sc in the last dc of the half-fan.
2. Work 5 dc in the next sc.
3. Over the yellow fan: ch 3, sk 3 dc, sc in the next dc, ch 3, sk 1 dc, sc in the next dc, ch 3, sk 3 dc.
4. Work 5 dc in the next sc.
5. Sc in the first dc of the half-fan, ch 3, sk 3 dc, sc in the top of the turning ch.
6. Turn.
(16 sts: 6 sc and 10 dc, plus 5 ch-3 sps)
Row 4 (reset row):
1. Ch 1, sc in the first sc, 2 sc in the ch-3 sp, sc in the next sc. [4]
2. Sc in each of the next 5 dc. [5]
3. Sc in the ch-3 sp, ch 1, sc in the sc, sc in the ch-3 sp, sc in the sc, ch 1, sc in the ch-3 sp. [7]
4. Sc in each of the next 5 dc. [5]
5. Sc in the sc, 2 sc in the ch-3 sp, sc in the last sc. [4]
6. Turn.
(25 sts: 23 sc + 2 ch-1)
The blue shells now sit at positions 5–9 and 17–21, centered on 7 and 19. This is exactly where the Tier A fans will go.
Tier A: Rows 5–7 (Repeat as Rows 11–13)
Row 5 (fan row): Ch 1, sc in the first st. Sk 5 sts, GF in the next st. Sk 5 sts, sc in the next st. Sk 5 sts, GF in the next st. Sk 5 sts, sc in the last st. Turn. (21 sts: 18 yellow dc + 3 sc)
The fans land at positions 7 and 19. The sc land at 1, 13 and 25.
Row 6 (arch row):
1. Ch 3 (counts as dc), 2 dc in the first sc.
2. Over the first fan: ch 3, sk 3 dc, sc in the next dc, ch 3, sk 1 dc, sc in the next dc, ch 3, sk 3 dc.
3. Work 5 dc in the center sc.
4. Repeat the step 2 sequence over the second fan.
5. Work 3 dc in the last sc.
6. Turn.
(15 sts: 11 dc and 4 sc, plus 6 ch-3 sps)
Row 7 (reset row):
1. Ch 1, sc in each of the first 3 dc. [3]
2. Sc in the ch-3 sp, ch 1, sc in the sc, sc in the ch-3 sp, sc in the sc, ch 1, sc in the ch-3 sp. [7]
3. Sc in each of the next 5 dc. [5]
4. Repeat the 7-st mesh from step 2. [7]
5. Sc in each of the last 3 dc, with the last one in the top of the turning ch. [3]
6. Turn.
(25 sts: 21 sc + 4 ch-1)
The center shell now sits at positions 11–15, centered on 13. The next Tier B fan lands there.
Continue the Body
- Rows 8–10: Work Tier B.
- Rows 11–13: Work Tier A.
- Rows 14–16: Work Tier B.
Do not turn after Row 16. Do not fasten off Color A. You now have 16 rows, 7 yellow fans, and 25 sts across the top.
Checkpoint: The body measures 7 x 12.75 in (17.8 x 32.4 cm).
Ginkgo Stems
With Color B and RS facing, insert the hook at the base point of one fan. Work 2 surface sl sts straight down through the blue rows below, about 0.5 in (1.3 cm). Fasten off and weave the tails on the wrong side. Repeat for all 7 fans.
The stems turn each fan into a ginkgo-leaf silhouette.
Border
Border gauge: About 3.6 sc per inch (1.4 sc per cm) on all four edges. This matches the body width, so the edges stay flat.
Round 1 (Color A, RS facing):
1. Top: Ch 1, sc in the first st of Row 16 and in each st across, including the ch-1 sps. (25 sc) Ch 2 for the corner.
2. Side: Work 45 sc evenly down the side, 9 per tier. As a guide, put about 4 sc along the fan row, 3 along the arch row and 2 along the reset row. Treat the foundation row end as part of the corner. Ch 2.
3. Bottom: Work 1 sc in each free loop of the foundation chain. (25 sc) Ch 2.
4. Second side: Work 45 sc up the other side. Ch 2. Sl st to the first sc.
(140 sc + 4 corner ch-2 sps)
Round 2 (scallops):
1. Top: Ch 1, sc in the first sc. Sk 1 sc, 5 dc in the next sc, sk 1 sc, sc in the next sc. Repeat from * to * 6 times in total, ending in the 25th sc.
2. Corner: 5 dc in the corner ch-2 sp.
3. Side: Sc in the first sc of the side. Repeat from * to * 11 times in total.
4. Corner: 5 dc in the corner sp.
5. Bottom: Work as for the top.
6. Corner: 5 dc in the corner sp.
7. Side: Work as for the first side.
8. Corner: 5 dc in the last corner sp. Sl st to the first sc. Fasten off.
Count per edge:
– Top and bottom: 7 sc + 6 scallops (30 dc) = 37 sts each
– Sides: 12 sc + 11 scallops (55 dc) = 67 sts each
– Corners: 4 x 5 dc = 20 sts
Total: 37 + 37 + 67 + 67 + 20 = 228 sts, which is 38 scallops.
Why the math works: Each scallop takes 4 stitches (sk, shell, sk, sc), and each edge needs 1 extra sc to start. The top and bottom have 25 sc, and 25 = 4 x 6 + 1. The sides have 45 sc, and 45 = 4 x 11 + 1. Every edge therefore starts and ends with a sc, and the corner shells sit in the ch-2 sps without crowding. The two border rounds add 0.5 in (1.3 cm) per side. That takes the body from 7 x 12.75 in (17.8 x 32.4 cm) to 8 x 13.75 in (20.3 x 34.9 cm).
Final Blocking
- Weave in all ends first. Hide the yellow tails inside their own fans.
- Mist the panel until it is evenly damp, not dripping.
- Lay it RS up on the blocking mat.
- Pin the four corners to a rectangle measuring 8 x 13.75 in (20.3 x 34.9 cm).
- Pin the tip of every border scallop so the scallops are evenly spaced.
- Gently open each yellow fan into a smooth half-circle, and straighten each stem.
- Open the chain arches with your fingertips so the lattice reads clearly.
- Let it dry completely before unpinning.
Final Quality-Control Checklist
- 7 yellow fans in a 1-2-1-2-1 layout
- Every fan has 9 dc and a 2-sl-st stem
- Every reset row has 25 sts
- No blue strand shows through the yellow fans
- 38 border scallops in total: 6 on the top, 6 on the bottom, 11 on each side, and 4 at the corners
- Final size is 8 x 13.75 in (20.3 x 34.9 cm), within 0.25 in (0.6 cm)
- All ends are secured on the wrong side
Troubleshooting
- Fans cup or ruffle: Your dc are too tight at the base. Loosen your tension or go up a hook size for the fans only.
- Fans don’t line up between tiers: Recount the reset row (25 sts) and remember that each ch-1 counts as a stitch.
- Blue shows through the fans: Hold the carried strand flat along the top of the stitches and keep it loose.
- Sides wave after the border: You probably worked too many sc along the sides. Use exactly 9 per tier.
- Sides pull in after the border: You worked too few sc along the sides. Rework Round 1, spacing the sc more evenly.
- Panel too short: Pull up taller dc in the fan and arch rows, then block to the measurements.
Care
Hand wash in cool water with a mild detergent and roll in a towel to remove water. Dry flat, reshaping the fans and scallops while damp.
Final Notes
The measurements build on each other in this order:
- The 25-st foundation row measures 7 in (17.8 cm).
- Each 3-row tier adds 2.5 in (6.4 cm), and five tiers plus the foundation row give 12.75 in (32.4 cm).
- The 2-round border adds 0.5 in (1.3 cm) per side, for a finished panel of 8 x 13.75 in (20.3 x 34.9 cm).
If you check your test piece and each checkpoint, the fans will stack neatly and the border will lie flat.
Happy crocheting!