

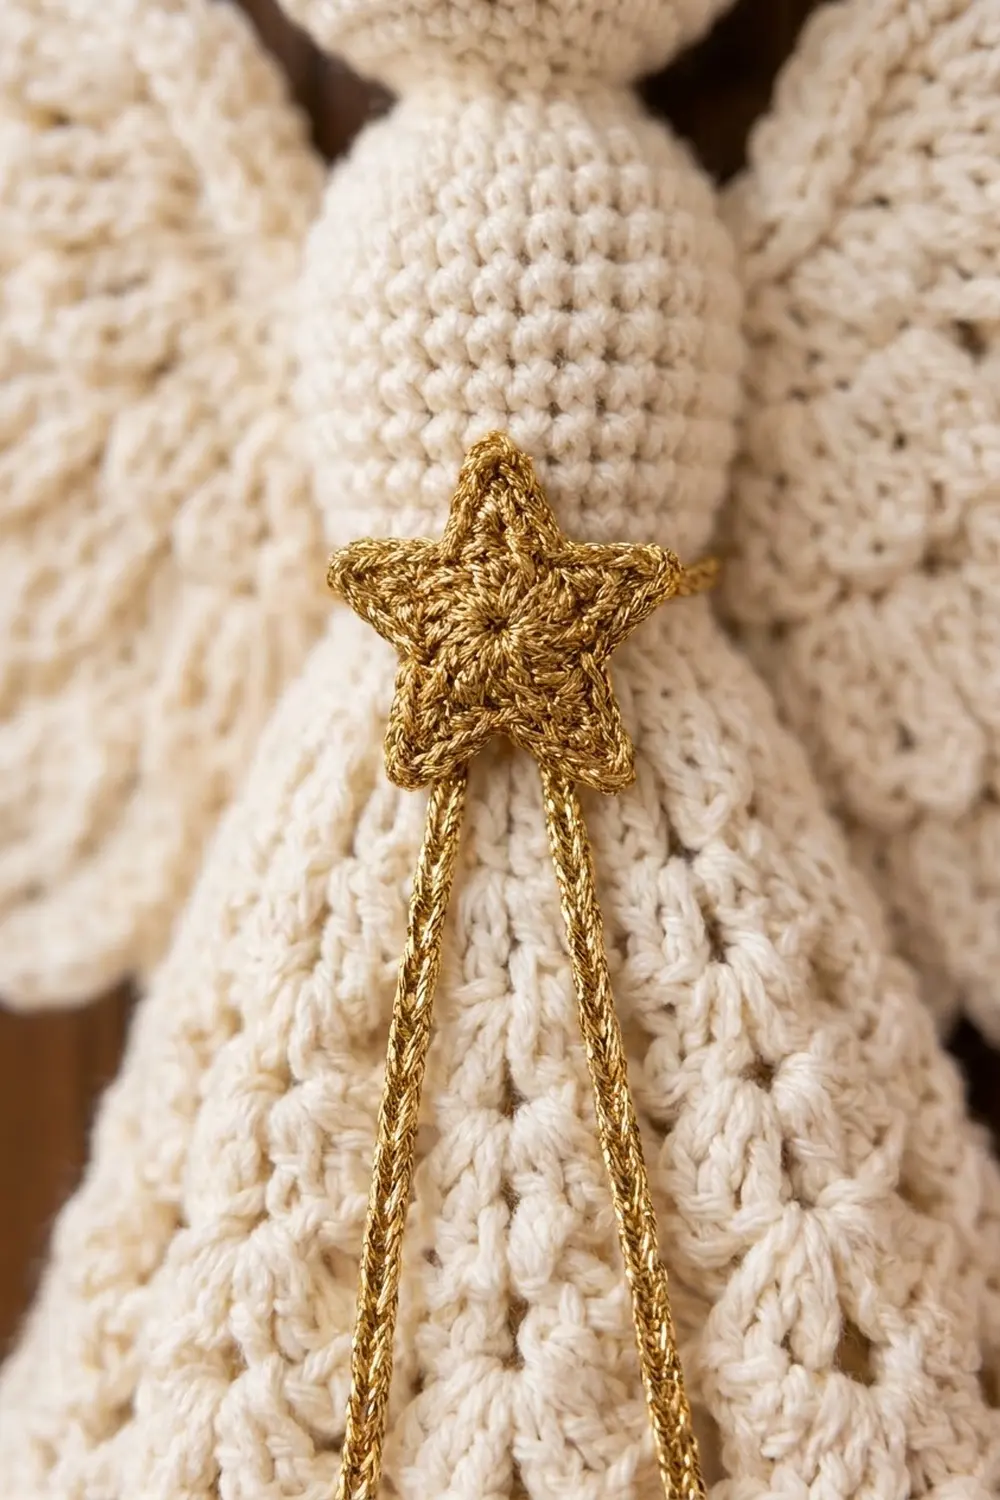
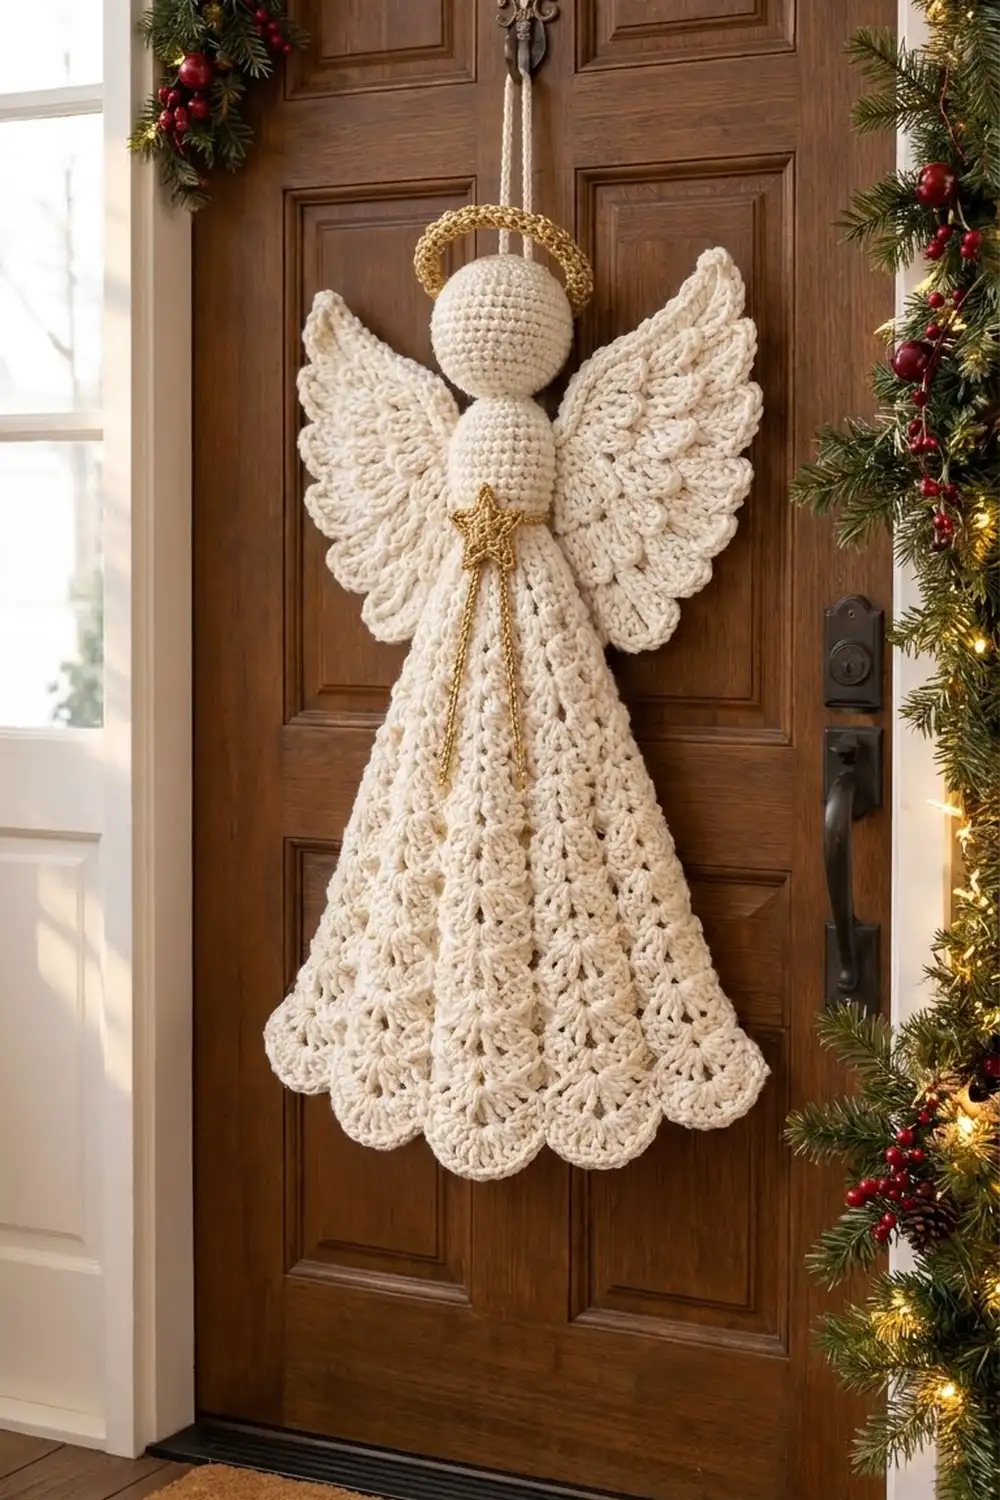
This angel is made to hang on a front door, but it works just as well on a wall or over a mantel. She has a round stuffed head, a small stuffed body, a long lacy skirt with deep scalloped edges and two layered feather wings. Gold accents finish her: a rope-textured halo, a small star at the waist and two thin chain cords hanging down the front.
The palette is simple: soft cream cotton with a little gold metallic yarn. In a warm, neutral entryway the texture is the main feature, and the gold catches the light without looking flashy.
The pattern uses US crochet terms. The finished angel measures about 20.5 in (52.1 cm) tall from the top of the halo to the hem, and 14 in (35.6 cm) wide at the hem.
You will make each part separately and then sew them together. The skirt is worked flat from the top down, the head and body are worked in the round and stuffed, the wings are flat with feathers added afterward, and the gold details are small and quick. Everything is assembled into one hanging angel.
Finished Size and Construction
- Finished size: 20.5 in (52.1 cm) tall x 14 in (35.6 cm) wide at the hem
- Skill level: Intermediate
- Terminology: US crochet terms
- Yarn weight: Worsted (#4) cotton; worsted-weight gold metallic yarn
- Hooks: 5.0 mm (H-8) for the flat parts; 4.0 mm (G-6) for the stuffed parts and gold details
- Number of pieces: 9 components (skirt, head, body, 2 wings, halo, star, gold cord, hanging loop), assembled into 1 angel
- Layout: Halo above the head, head on the body, a wing behind each shoulder, the body on top of the skirt
- Piece sizes: Skirt 16 in (40.6 cm) long; head 3 in (7.6 cm) across; body 2.25 in (5.7 cm) wide x 3 in (7.6 cm) tall; each wing 5.25 in (13.3 cm) x 7.75 in (19.7 cm)
- Skirt before border: 12.75 in (32.4 cm) wide at the hem x 14.75 in (37.5 cm) long
- Border depth: 1.25 in (3.2 cm) of scalloped hem
Materials
Choose a smooth, mercerized or combed worsted cotton. Cotton gives the shells crisp edges and holds its shape on a door. For the gold, use a worsted metallic yarn, or hold two strands of fingering-weight metallic together.
- Cream cotton: 150 g, about 255 m (280 yd)
- Gold metallic: 15 g, about 60 m (66 yd)
Tools:
- 5.0 mm (H-8) and 4.0 mm (G-6) hooks
- Polyester fiberfill, about 20 g
- One 3 in (7.6 cm) plastic or metal ring for the halo
- Stitch markers
- Tapestry needle
- Rust-proof pins and a blocking mat
- Spray bottle
The yarn amounts include a margin of roughly 15% so you have enough for a gauge test and small adjustments.
Abbreviations (US Terms)
- ch – chain
- sl st – slip stitch
- sc – single crochet
- hdc – half double crochet
- dc – double crochet
- tr – treble crochet
- inc – 2 sc in the same stitch
- dec – invisible decrease (sc 2 together through the front loops)
- sc2tog – single crochet 2 together
- BLO / FLO – back loop only / front loop only
- MR – magic ring
- sp – space
- RS / WS – right side / wrong side
- rev sc – reverse single crochet (crab stitch)
Special stitches:
- V-st: (dc, ch 1, dc) in the same stitch or space.
- Shell A: (2 dc, ch 1, 2 dc) in the same space.
- Shell B: (3 dc, ch 1, 3 dc) in the same space.
- Shell C: (3 dc, ch 2, 3 dc) in the same space.
- Feather: 5 dc in the same loop.
Gauge and Checkpoints
- 5.0 mm hook, flat: 15 sc and 16 sc rows = 4 in (10.2 cm). In dc, 4 rows = 2 in (5.1 cm).
- 4.0 mm hook, in the round: 18 sc and 20 rounds = 4 in (10.2 cm).
Test one piece first. Make the first wing core before anything else. After Row 1, the inner edge should measure 7.75 in (19.7 cm). If it is longer, go down half a hook size; if it is shorter, go up half a size.
Checkpoints:
- Skirt Row 1: 4 in (10.2 cm) wide.
- Head: 3 in (7.6 cm) across once stuffed.
- Wing: 4.25 in (10.8 cm) wide after Row 17, before feathers.
If the skirt is too wide, work more tightly in the chain spaces. If it is too narrow, loosen your dc rather than adding stitches, so the column count stays at 7.
Skirt
Use cream yarn and the 5.0 mm hook. The skirt has 7 shell columns. Every row begins with ch 3, which counts as a dc, and ends with a dc in the top of the previous row’s turning chain.
Row 1 (RS): Ch 16. Sc in the 2nd ch from the hook and in each ch across. Turn. (15 sc)
Row 2: Ch 3 (counts as dc). V-st in the next sc. [Ch 1, skip 1 sc, V-st in the next sc] 6 times. Dc in the last sc. Turn. (7 V-sts, 6 ch-1 gaps, 2 edge dc)
Rows 3–7: Ch 3. V-st in the ch-1 sp of the next V-st. [Ch 1, V-st in the next V-st sp] 6 times. Dc in the top of the turning ch. Turn. (16 dc: 14 in the V-sts plus 2 edge dc; 6 ch-1 gaps)
Checkpoint: 3.25 in (8.3 cm) long and about 5.5 in (14.0 cm) wide.
Rows 8–13: Ch 3. Shell A in the next V-st sp (on Row 8) or in the next shell’s center sp (on Rows 9–13). [Ch 1, Shell A in the next center sp] 6 times. Dc in the top of the turning ch. Turn. (30 dc: 28 in the shells plus 2 edge dc; 6 ch-1 gaps)
Checkpoint: 6.25 in (15.9 cm) long and about 7.5 in (19.1 cm) wide.
Rows 14–19: Work as for Rows 8–13, but use Shell B. (44 dc: 42 in the shells plus 2 edge dc; 6 ch-1 gaps)
Checkpoint: 9.25 in (23.5 cm) long and about 9.5 in (24.1 cm) wide.
Rows 20–25: Work as for Rows 14–19, but ch 2 between the shells. (44 dc; 6 ch-2 gaps)
Checkpoint: 12.25 in (31.1 cm) long and about 11.25 in (28.6 cm) wide.
Rows 26–30: Ch 3. Shell C in the next center sp. [Ch 3, Shell C in the next center sp] 6 times. Dc in the top of the turning ch. Turn. (44 dc; 7 ch-2 center sps; 6 ch-3 gaps)
Checkpoint: 14.75 in (37.5 cm) long and 12.75 in (32.4 cm) wide. Do not fasten off; the border starts here.
Each row puts the new shell into the center of the shell below, so the columns line up vertically. The skirt flares because the shells and the gaps between them get bigger, not because columns are added.
Head
Use cream yarn and the 4.0 mm hook. Work in continuous rounds and mark the first stitch of each round.
- Rnd 1: 6 sc in MR. (6)
- Rnd 2: Inc in each st. (12)
- Rnd 3: [Sc 1, inc] 6 times. (18)
- Rnd 4: [Sc 2, inc] 6 times. (24)
- Rnd 5: [Sc 3, inc] 6 times. (30)
- Rnd 6: [Sc 4, inc] 6 times. (36)
- Rnd 7: [Sc 5, inc] 6 times. (42)
- Rnds 8–16: Sc in each st. (42)
- Rnd 17: [Sc 5, dec] 6 times. (36)
- Rnd 18: [Sc 4, dec] 6 times. (30)
- Rnd 19: [Sc 3, dec] 6 times. (24)
- Rnd 20: [Sc 2, dec] 6 times. (18) Stuff firmly.
- Rnd 21: [Sc 1, dec] 6 times. (12)
- Rnd 22: Dec 6 times. (6)
Close the hole and fasten off.
A circumference of 42 sts at 4.5 sts per inch is 9.33 in, which gives a head about 3 in (7.6 cm) across.
Body
Use cream yarn and the 4.0 mm hook.
- Rnds 1–4: Work as for Head Rnds 1–4. (24)
- Rnds 5–8: Sc in each st. (24)
- Rnd 9: [Sc 3, inc] 6 times. (30)
- Rnds 10–14: Sc in each st. (30)
Sl st and fasten off, leaving a 16 in (40.6 cm) tail. Stuff lightly so the body flattens slightly to 2.25 in (5.7 cm) wide. Leave the bottom open.
Wings (Make 2)
Use cream yarn and the 5.0 mm hook. On every WS row, work in the FLO. On every RS row, work in the BLO. This leaves a free loop ridge from each row on the RS. Mark the right-hand end of Row 1 as the lower edge.
First wing:
- Row 1 (RS): Ch 30. Sc in the 2nd ch from the hook and in each ch across. Turn. (29)
- Row 2 (WS): Ch 1. Sc FLO across to the last 2 sts, then sc2tog. Turn. (28)
- Row 3 (RS): Ch 1. Sc2tog, then sc BLO across. Turn. (27)
- Rows 4–17: Repeat Rows 2–3, ending with an RS row. Each row loses 1 st, so Row n has 30 − n sts. (Row 17: 13 sts)
Checkpoint: 4.25 in (10.8 cm) wide.
Row 18 (edge feathers, WS): Ch 1, sc in the first st. [Skip 1, Feather in the next st, skip 1, sc in the next st] 3 times. Fasten off. (3 feathers)
Feather tiers: With RS facing, join yarn in the first free loop of the ridge. Sc in that loop. Then [skip 1 loop, Feather in the next loop, skip 1 loop, sc in the next loop] to the end of the ridge.
- Row 1 ridge: 29 loops, 7 feathers
- Row 5 ridge: 25 loops, 6 feathers
- Row 9 ridge: 21 loops, 5 feathers
- Row 13 ridge: 17 loops, 4 feathers
Each ridge has 4k + 1 loops (where k is the number of feathers), so every tier ends on a sc. Each wing has 25 feathers in total. The feathers overhang about 1 in (2.5 cm), which brings the wing to 5.25 in (13.3 cm) x 7.75 in (19.7 cm).
Second wing: Work the decreases at the opposite end so the wing is a mirror image: on WS rows, sc2tog first; on RS rows, sc2tog last. All counts stay the same.
Halo, Star, Cord and Hanging Loop
Use gold yarn and the 4.0 mm hook.
Halo:
- Rnd 1: Work about 54 sc over the ring until it is covered snugly. Sl st to the first sc.
- Rnd 2: Ch 1, rev sc in each st. (54) Fasten off.
Star:
- Rnd 1: 10 sc in MR. Sl st to join. (10)
- Rnd 2: [Ch 4, sc in the 2nd ch from the hook, hdc in the next ch, dc in the next ch, skip 1 st, sl st in the next st] 5 times. (5 points)
Each point uses 2 sts of Rnd 1, so 5 points use all 10. The star measures about 1.75 in (4.4 cm).
Cord: Make 2 chains of about 22 ch each, about 6 in (15.2 cm) long.
Hanging loop: Using cream yarn held double, ch 45, about 10 in (25.4 cm).
Make All Pieces
| Piece | Qty | Color | Approx. yarn |
|---|---|---|---|
| Skirt | 1 | Cream | 60 g |
| Head | 1 | Cream | 15 g |
| Body | 1 | Cream | 10 g |
| Wings | 2 | Cream | 40 g total |
| Hanging loop | 1 | Cream | 3 g |
| Halo | 1 | Gold | 6 g |
| Star | 1 | Gold | 2 g |
| Cord | 2 | Gold | 2 g total |
Assembly layout:
            [ Halo ]
            [ Head ]
[ Wing L ]  [ Body + Star ]  [ Wing R ]
            [   Skirt     ]
            [ Scalloped hem ]
Joining
Use a mattress or whipstitch with matching yarn. Sew stitch to stitch wherever an edge meets a round.
- Gather the skirt top. Weave a running stitch through the foundation edge of Row 1 and pull it in from 4 in (10.2 cm) to 2.25 in (5.7 cm).
- Attach the body. Pull the open end of the body down over the gathered skirt top so the body overlaps the skirt by 2 in (5.1 cm). Whipstitch the last round of the body to Row 3 of the skirt, front and back.
- Attach the head. Sew the head to the top of the body, working 1 stitch into each of the 18 stitches of body Rnd 3.
- Attach the wings. Place each wing’s inner edge (the Row 1 foundation) behind a shoulder. Angle the tips up and out, with the lower edges pointing down. Sew 3 in (7.6 cm) of the inner edge to the back of the body.
- Add the gold details. Tack the halo to the back of the head, tilted, so about 0.5 in (1.3 cm) shows above the crown. Center the star at the waist and stitch it down. Tuck the top ends of both cords under the star and secure them.
- Add the hanging loop. Fold the loop and sew both ends to the back of the head, behind the halo.
Keep your stitches snug but don’t pull them tight; puckering at the waist will tilt the skirt. Checkpoint: the assembled angel should be 20.5 in (52.1 cm) tall and 14 in (35.6 cm) wide once the hem is complete.
Border
Use the 5.0 mm hook. The border has the same gauge as the skirt: 4 dc rows = 2 in (5.1 cm).
Hem Row 1 (RS): Ch 1, sc in the first dc. [9 tr in the center ch-2 sp of the next Shell C, sc in the next ch-3 gap] 6 times. 9 tr in the last center sp, then sc in the last st. (7 scallops: 63 tr and 8 sc, 71 sts)
Hem Row 2 (WS): Ch 1. Sc in each st, working 2 sc in the 5th (center) tr of each scallop. Fasten off. (71 sts worked 1 per stitch, plus 7 extra = 78 sc)
Side edging (each side): With RS facing, join at the hem corner. Work 1 sc in each of the 2 hem row-ends (2), 2 sc in each of the 29 dc row-ends (58) and 1 sc in the Row 1 end (1). Fasten off. (61 sc per side)
Why the math works:
- Seven columns produce seven scallops, and each gap sc keeps a column line running into the hem.
- Nine tr in each ch-2 center make a scallop wider than the 6-dc shell above it. This adds the final 1.25 in (3.2 cm) of width and depth, taking the hem from 12.75 in (32.4 cm) to 14 in (35.6 cm).
- Two sc per dc row-end matches the height of a dc row, so the side edges lie flat.
Final Blocking
- Spray the skirt and wings until they are damp. Do not wet the stuffed parts.
- Lay the angel face up on the mat.
- Pin the hem to 14 in (35.6 cm) wide, with one pin at the tip of each of the 7 scallops.
- Pin the skirt sides straight from the waist to the hem.
- Open each wing tier and pin a feather at each wing’s outer corner so the wing measures 5.25 in (13.3 cm) wide.
- Let it dry completely, usually overnight, before removing the pins.
Final Quality-Control Checklist
- The skirt has 7 straight columns and 7 even scallops.
- The hem is 14 in (35.6 cm) wide and the skirt is 16 in (40.6 cm) long.
- The head is firm, round and 3 in (7.6 cm) across.
- Both wings have 25 feathers each and are mirror images.
- The halo shows 0.5 in (1.3 cm) above the head.
- The star is centered and both cords hang evenly.
- The hanging loop is secure and the angel hangs straight.
- All ends are woven in.
Troubleshooting
- Skirt ruffles: Your chain gaps are too loose. Redo the last section with tighter chains.
- Skirt curls inward: Your dc are too tight. Go up half a hook size for Rows 20–30.
- Feather tier runs short: You skipped a ridge loop. Count the loops before you start (29, 25, 21, 17).
- Head looks lumpy: Add fiberfill in small pieces and roll the head between your palms.
- Angel leans: Move the hanging loop so it sits directly above the center of the skirt.
- Scallops are uneven: Check that every scallop is 9 tr worked into the center sp, not the gap.
Care
Spot clean with mild soap and cool water, then press dry with a towel. Store flat in a box, with tissue paper inside the wings to keep the feathers open.
Final Notes
Each stage depends on the one before it. The 4 in (10.2 cm) waist grows through 7 shell columns into a 12.75 in (32.4 cm) skirt, and the 1.25 in (3.2 cm) scalloped border brings the hem to 14 in (35.6 cm). The 3 in (7.6 cm) head, 3 in (7.6 cm) body and 16 in (40.6 cm) skirt, with a 2 in (5.1 cm) overlap at the waist and the halo on top, add up to 20.5 in (52.1 cm). If you check your gauge on the first wing, the rest of the measurements will follow.
Happy crocheting!