

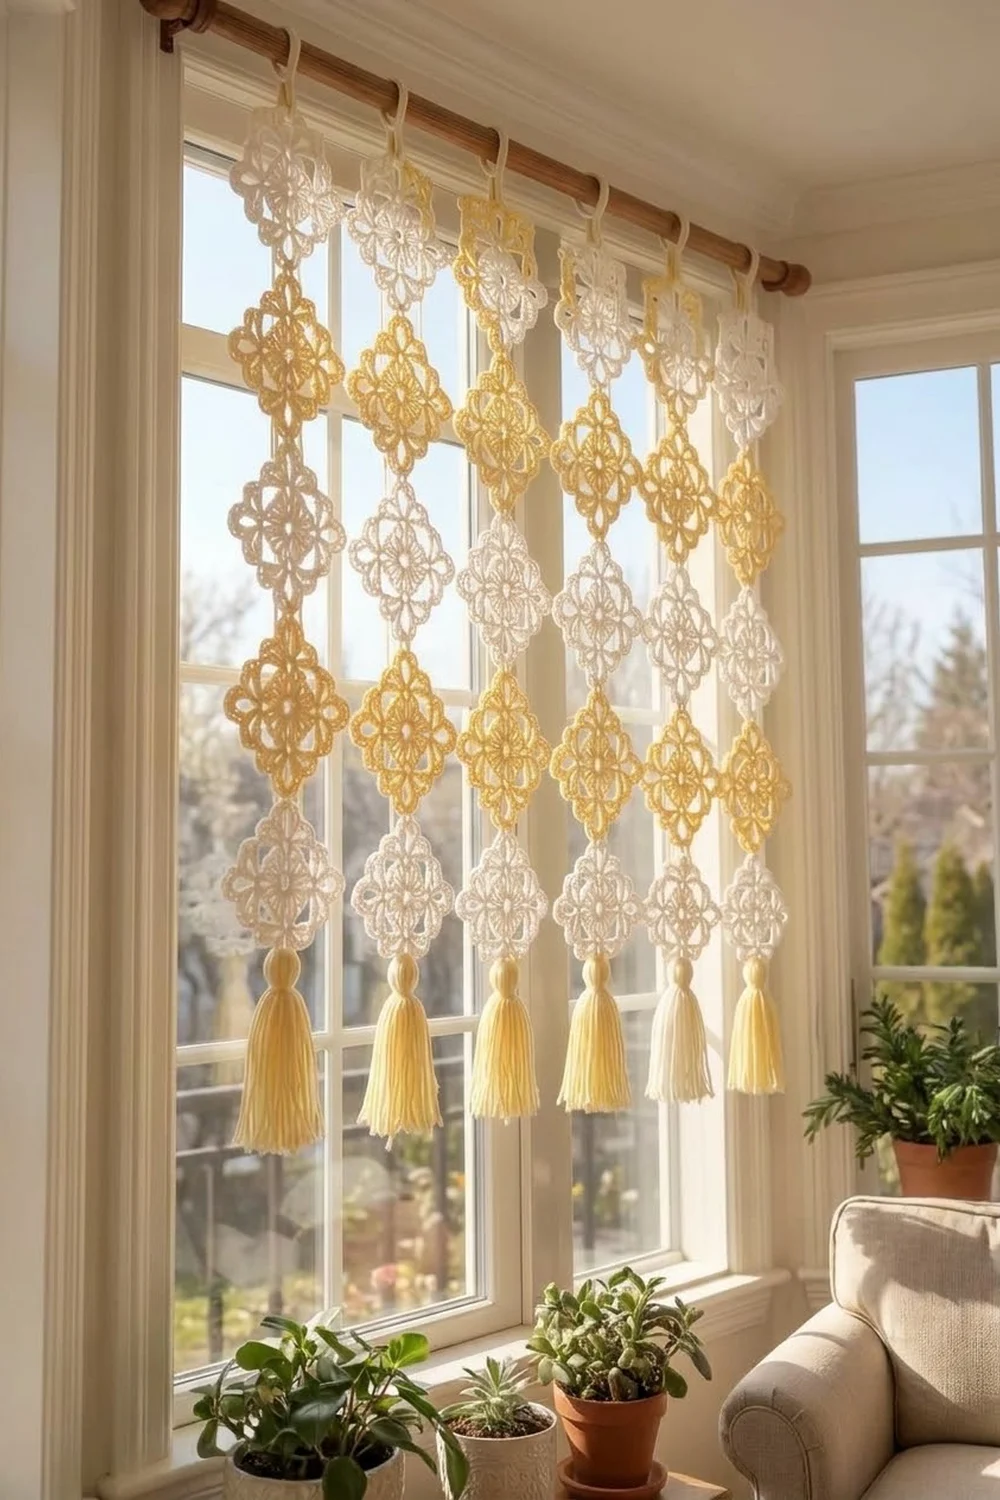
This curtain panel is made from ornate four-pointed star medallions. Each one is an openwork square with a wheel-like filigree center and a picot-trimmed edge. The squares are turned on point and joined corner to corner in six vertical strands, so the whole panel reads as a lattice of diamonds when light comes through it.
Two colors alternate down every strand: cream/ivory and golden yellow. The three left strands carry one more gold motif each than the three right strands, which gives the panel a soft shift from cream on the right to deeper gold on the left. Six golden yellow crocheted tassels hang from the bottom, one centered under each strand.
The pattern uses US crochet terms. The lace panel measures 30 in wide x 35 in long (76.2 x 88.9 cm). With hanging tabs and tassels it measures 42 in (106.7 cm) from rod to tassel tips.
Construction is simple. You make one motif in rounds, then join every following motif on its last round at the corner loops only. You work hanging tabs on the top points, then attach tasseled caps to the bottom points.
Finished Size and Construction
- Finished size (lace only): 30 in x 35 in (76.2 x 88.9 cm)
- Overall length with tabs and tassels: 42 in (106.7 cm)
- Skill level: Intermediate
- Terminology: US crochet terms
- Yarn weight: Sport / fine (weight 2) cotton
- Hook: 3.0 mm
- Number of pieces: 42 motifs, 6 hanging tabs (worked onto motifs), 6 tassels
- Layout: 6 columns x 7 rows, motifs set on point (diamond orientation)
- Motif size: 3.5 in (8.9 cm) per side, about 5 in (12.7 cm) point to point including corner loops
- Size before edge finish: 30 in x 35 in (76.2 x 88.9 cm)
- Edge finish depth: tabs drop 2 in (5.1 cm) above the panel; tassels hang 5 in (12.7 cm) below
Materials
Choose a smooth, mercerized sport-weight cotton or cotton blend. Cotton holds the picots crisply, blocks well, and does not fuzz in sunlight. Avoid acrylic for this project, because it can relax and droop over time when hung.
Yarn (sport weight, about 3.1 m per gram):
– Golden yellow: 150 g (about 465 m). This covers 21 motifs, 3 tabs, and 6 tassels.
– Cream/ivory: 100 g (about 310 m). This covers 21 motifs and 3 tabs.
Each motif uses about 3.5 g (about 11 m). Each tassel with its cap uses about 5 g. Quantities include a margin of roughly 25-30% for swatching and tassel trimming.
Tools:
– 3.0 mm crochet hook
– Tapestry needle
– Scissors
– Stitch markers
– Cardboard rectangle, 5.5 in (14.0 cm) tall, for tassels
– Blocking mats, rustproof pins, and spray bottle
– Ruler or tape measure
– Curtain rod at least 30 in (76.2 cm) wide and up to 1 in (2.5 cm) in diameter
Abbreviations (US Terms)
- ch – chain
- sl st – slip stitch
- sc – single crochet
- dc – double crochet
- MR – magic ring
- sp – space
- st(s) – stitch(es)
- rnd – round
- rep – repeat
Picot: ch 3, sl st in 3rd ch from hook.
Corner join: ch 2, insert hook from front under the neighbor motif’s ch-5 corner loop, sl st, ch 2. This replaces the ch 5 of a corner on the motif you are working.
Gauge and Checkpoints
Make one complete motif first and block it before you start the rest. Gauge matters here. Any small error per motif is multiplied by 6 across the width and by 7 down the length.
Checkpoints (measured flat, lightly blocked):
– Rnd 1: 1 in (2.5 cm) across
– Rnd 2: 1.75 in (4.4 cm) across
– Rnd 3: 2.25 in (5.7 cm) across
– Rnd 4: 2.75 in (7.0 cm) per side
– Rnd 5: 3.25 in (8.3 cm) per side, about 7 sc per inch along the side
– Rnd 6: 3.5 in (8.9 cm) per side, about 5 in (12.7 cm) point to point
If your motif is too big, go down to a 2.75 mm hook. If it is too small, go up to a 3.25 mm hook. A difference of 0.25 in (0.6 cm) per side changes the panel width by about 2 in (5.1 cm), so fix it now.
Motif Pattern
Work in the round with the right side facing. Do not turn.
Rnd 1: MR, ch 3 (counts as dc), 15 dc in ring, sl st to top of ch-3. Pull the ring closed. (16 dc)
Rnd 2: Ch 5 (counts as dc + ch 2), dc in next dc, ch 2; rep from * 14 more times, sl st to 3rd ch of ch-5. (16 dc, 16 ch-2 sps)*
This round works 1 dc into each existing dc, so the count stays at 16. Only the spacing opens up.
Rnd 3: Sl st into first ch-2 sp, ch 1, sc in same sp, ch 3, sc in next ch-2 sp; rep from * 14 more times, ch 3, sl st to first sc. (16 sc, 16 ch-3 loops)*
This forms the filigree ring.
Rnd 4 (squaring round): Sl st into first ch-3 loop, ch 3 (counts as dc), (2 dc, ch 3, 3 dc) in same loop for the corner. Then ch 2, sc in next loop, ch 3, sc in next loop, ch 3, sc in next loop, ch 2*, (3 dc, ch 3, 3 dc) in next loop. Rep from * 2 more times, then rep from * to ** once. Sl st to top of ch-3.
(24 dc, 12 sc, 4 corner ch-3 sps, 8 ch-2 sps, 8 ch-3 sps)
The 16 loops of Rnd 3 split into 4 corners plus 3 side loops per side.
Rnd 5 (conversion round): Ch 1, sc in same st and in next 2 dc. Then *(2 sc, ch 3, 2 sc) in corner sp, sc in next 3 dc, 2 sc in ch-2 sp, sc in sc, 3 sc in ch-3 sp, sc in sc, 3 sc in ch-3 sp, sc in sc, 2 sc in ch-2 sp, sc in next 3 dc. Rep from * 3 more times, omitting the final “sc in next 3 dc” on the last rep. Sl st to first sc.
Per side, between corner ch-3 sps, you have:
– 6 sc worked 1 per existing dc
– 3 sc worked 1 per existing sc
– 10 sc worked into side spaces
– 4 sc added at the corners (2 on each end)
That is 23 sc per side. The round total is 92 sc plus 4 corner ch-3 sps.
Rnd 6 (picot edge, conversion round): Sl st in next 2 sc, then sl st into corner ch-3 sp. Ch 1, (sc, ch 5, sc) in same sp. Then *sc in next 3 sc, picot, sc in next 5 sc, picot, sc in next 7 sc, picot, sc in next 5 sc, picot, sc in next 3 sc, (sc, ch 5, sc) in corner sp. Rep from * 3 more times, omitting the final corner group on the last rep. Sl st to first sc. Fasten off and weave in ends.
Per side, you work 23 sc 1 per existing sc (3 + 5 + 7 + 5 + 3), plus 1 sc at each end inside the corner spaces. The round total is 92 sc + 8 corner sc = 100 sc, plus 16 picots and 4 ch-5 corner loops. The picots are spaced symmetrically: 3-5-7-5-3.
Make All Pieces
Motif count:
– Golden yellow: 21 motifs
– Cream: 21 motifs
– Total: 42 motifs
The first motif is made in full. Every other motif is joined on Rnd 6 (see Joining). Hold each grid as a diamond, with one corner pointing up.
Layout (columns 1-6, left to right as seen from the room):
ROW 1: GOLD GOLD GOLD CREAM CREAM CREAM
ROW 2: CREAM CREAM CREAM GOLD GOLD GOLD
ROW 3: GOLD GOLD GOLD CREAM CREAM CREAM
ROW 4: CREAM CREAM CREAM GOLD GOLD GOLD
ROW 5: GOLD GOLD GOLD CREAM CREAM CREAM
ROW 6: CREAM CREAM CREAM GOLD GOLD GOLD
ROW 7: GOLD GOLD GOLD CREAM CREAM CREAM
Colors alternate down every column. Columns 1-3 hold 4 gold and 3 cream motifs each. Columns 4-6 hold 3 gold and 4 cream each. That one-motif difference creates the cream-to-gold shift across the panel.
Joining
Method: Join as you go on Rnd 6, at corner loops only. Sides never touch, so the open diamond spaces between motifs stay clear.
Order: Work Row 1 left to right, then Row 2 left to right, and so on.
Which corners join:
– The top corner of each motif joins the bottom corner of the motif above it.
– The left corner of each motif joins the right corner of the motif to its left.
– Top and right corners on the edges of the panel stay as plain ch-5 loops.
Stitch logic: At a joining corner, work (sc, corner join, sc) in place of (sc, ch 5, sc). The corner join uses ch 2 + sl st + ch 2, which equals the 5 positions of the neighbor’s ch-5 loop. The joined points therefore sit level, and the stitch count of Rnd 6 does not change.
Tension: Keep the ch-2s at the same tension as your other chains. Tight joins pull the points inward and pucker the motifs. Loose joins make the columns sag.
Checkpoint: After Row 1, the strip should measure 30 in (76.2 cm) from the left point to the right point. That is 6 motifs at a 5 in (12.7 cm) pitch. After all 7 rows, the panel should measure 35 in (88.9 cm) from the top points to the bottom points.
Border (Hanging Tabs and Tassels)
This panel has no continuous border around its outer edge. The edge finish is worked onto individual corner loops only: tabs on the 6 top points and tassels on the 6 bottom points. Because nothing runs along the joined sides, no multi-motif side count is involved.
Border gauge: 6.5 sc and 6 rows per inch (2.5 cm) in rows of sc.
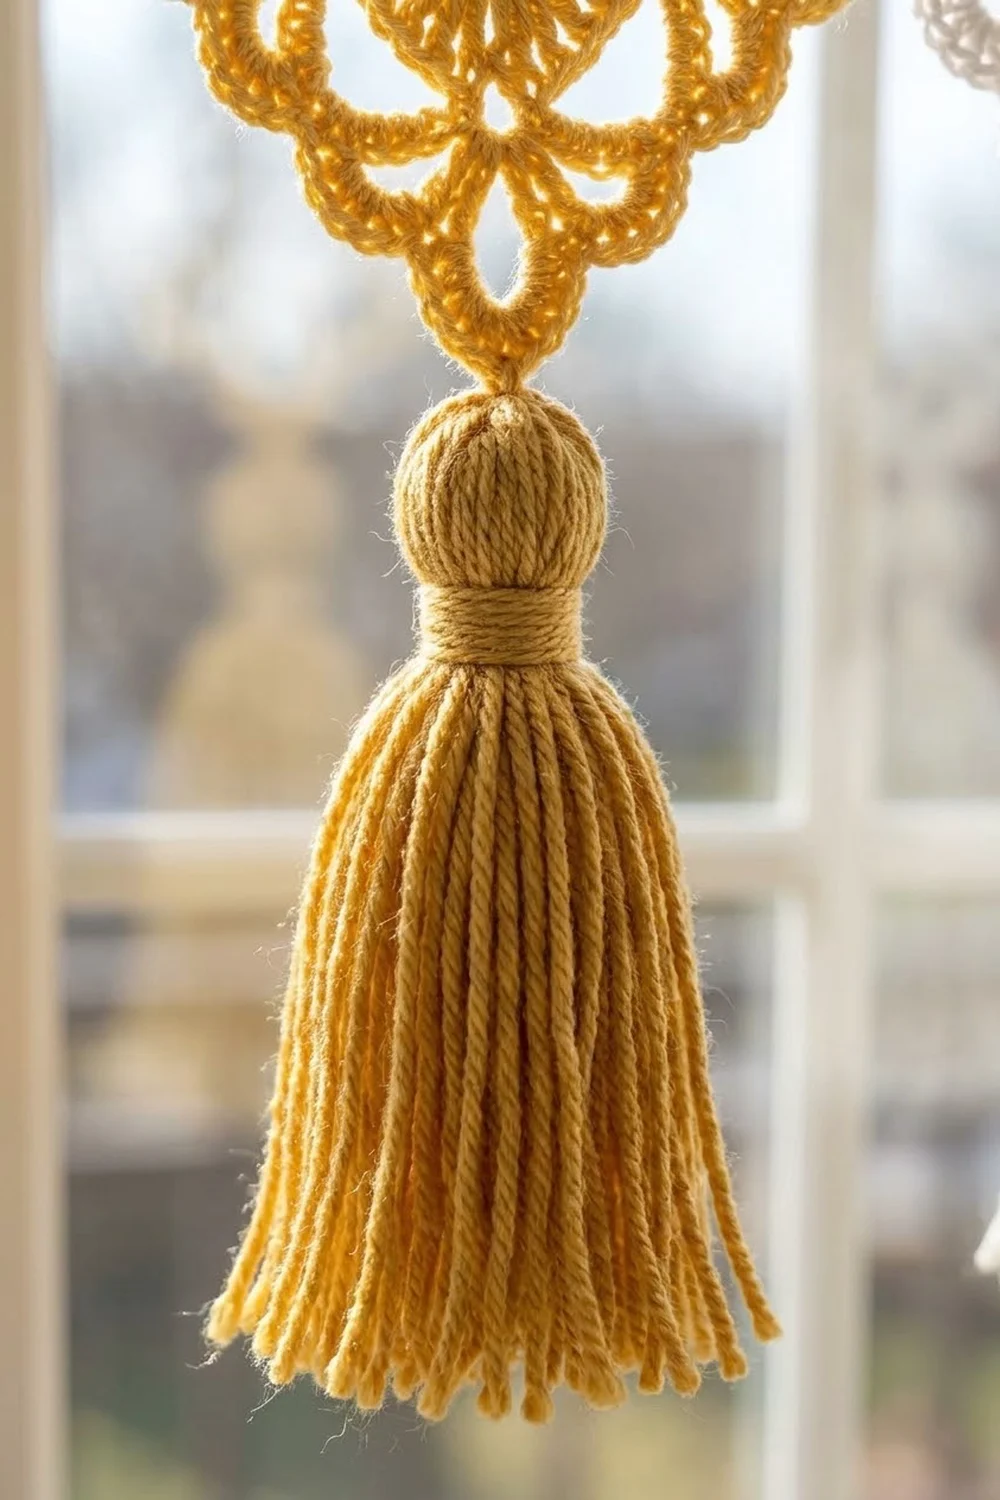
Hanging tabs (make 6, one on each Row 1 top corner, in that motif’s color):
Row 1: Join yarn with sl st in the top ch-5 corner loop. Ch 1, then work 5 sc in the loop. (5 sc)
Rows 2-24: Ch 1, turn, sc in each sc across. (5 sc)
Fasten off, leaving a 10 in (25.4 cm) tail. Fold the tab to the back of the panel and sew Row 24 to the back of Row 1.
Why the math works:
– The 5 sc of Row 1 match the 5 chains of the corner loop, 1 sc per chain, so the tab sits flat without flaring.
– 5 sc at 6.5 sc/in gives a tab 0.75 in (1.9 cm) wide.
– 24 rows at 6 rows/in gives a tab 4 in (10.2 cm) long.
– Folded in half, the tab forms a loop with a 2 in (5.1 cm) drop. This fits a rod up to 1 in (2.5 cm) in diameter.
Tassels (make 6, golden yellow):
- Wrap yarn 40 times around the 5.5 in (14.0 cm) card.
- Thread a 12 in (30.5 cm) strand under the wraps at the top and tie it tightly. Cut the wraps at the bottom.
- Wrap the neck 0.75 in (1.9 cm) below the top and knot securely.
Tassel cap (make 6):
Rnd 1: MR, 6 sc in ring. (6 sc)
Rnd 2: 2 sc in each st. (12 sc)
Rnds 3-5: Sc in each st. (12 sc)
Fasten off, leaving a tail. Slide the cap over the tassel head, covering the neck wrap, and sew it in place. Use the top tie to knot each tassel to a Row 7 bottom corner loop, centered under its column. Trim all strands evenly to 5 in (12.7 cm).
Final Blocking
- Wet the finished panel in cool water and press out the water in a towel. Do not wring it.
- Lay it flat on blocking mats.
- Pin the 6 top points in a straight line 30 in (76.2 cm) long.
- Pin the bottom points 35 in (88.9 cm) below the top points, keeping each column vertical.
- Pin the side corners of every motif so each motif measures 3.5 in (8.9 cm) per side.
- Pin out each picot with its own pin, or at least every other one.
- Let the panel dry completely. Steam the tassels and hang them straight to dry.
- Unpin, then check your measurements again.
Final Quality-Control Checklist
- 42 motifs total, each with 100 sc, 16 picots, and 4 corner loops
- Color layout matches the grid, row by row
- All joins sit at the corner loops only, with no side seams
- Panel measures 30 in x 35 in (76.2 x 88.9 cm)
- 6 tabs, each 5 sc wide and 24 rows long, sewn securely
- 6 gold tassels, each 5 in (12.7 cm) long, centered under their columns
- All ends woven in at least 1 in (2.5 cm) and trimmed
Troubleshooting
- Motif cups: Your Rnd 2 or Rnd 3 chains are too tight. Loosen them, or lengthen the Rnd 3 loops to ch 4 for that motif.
- Motif ruffles: Your chains are too loose. Go down a hook size for Rnds 2-4.
- Corners are rounded: Pin the corner loops firmly when blocking, and check that every corner holds a full 3 dc + 3 dc group.
- Columns twist: A motif was joined at the wrong corner. Check that every join runs top-to-bottom or left-to-right.
- Panel droops after hanging: Cotton relaxes with weight. Re-block it, and make sure the joins were not loose.
- Tassels look uneven: Re-trim them while they hang, after steaming.
Care
Hand wash in cool water with mild detergent and dry flat. Re-block if needed. Rotate the panel or take it down occasionally to reduce sun fading.
Optional: For a wider window, add columns in multiples of 1. Each extra column adds 5 in (12.7 cm) of width.
Final Notes
The measurement chain is simple. Each motif is 3.5 in (8.9 cm) per side and 5 in (12.7 cm) point to point. Six columns give 30 in (76.2 cm) of width, and seven rows give 35 in (88.9 cm) of length. Tabs add 2 in (5.1 cm) above and tassels add 5 in (12.7 cm) below, for 42 in (106.7 cm) overall.
Check your first motif carefully, keep your joins even, and block with care. The light will do the rest.
Happy crocheting!