

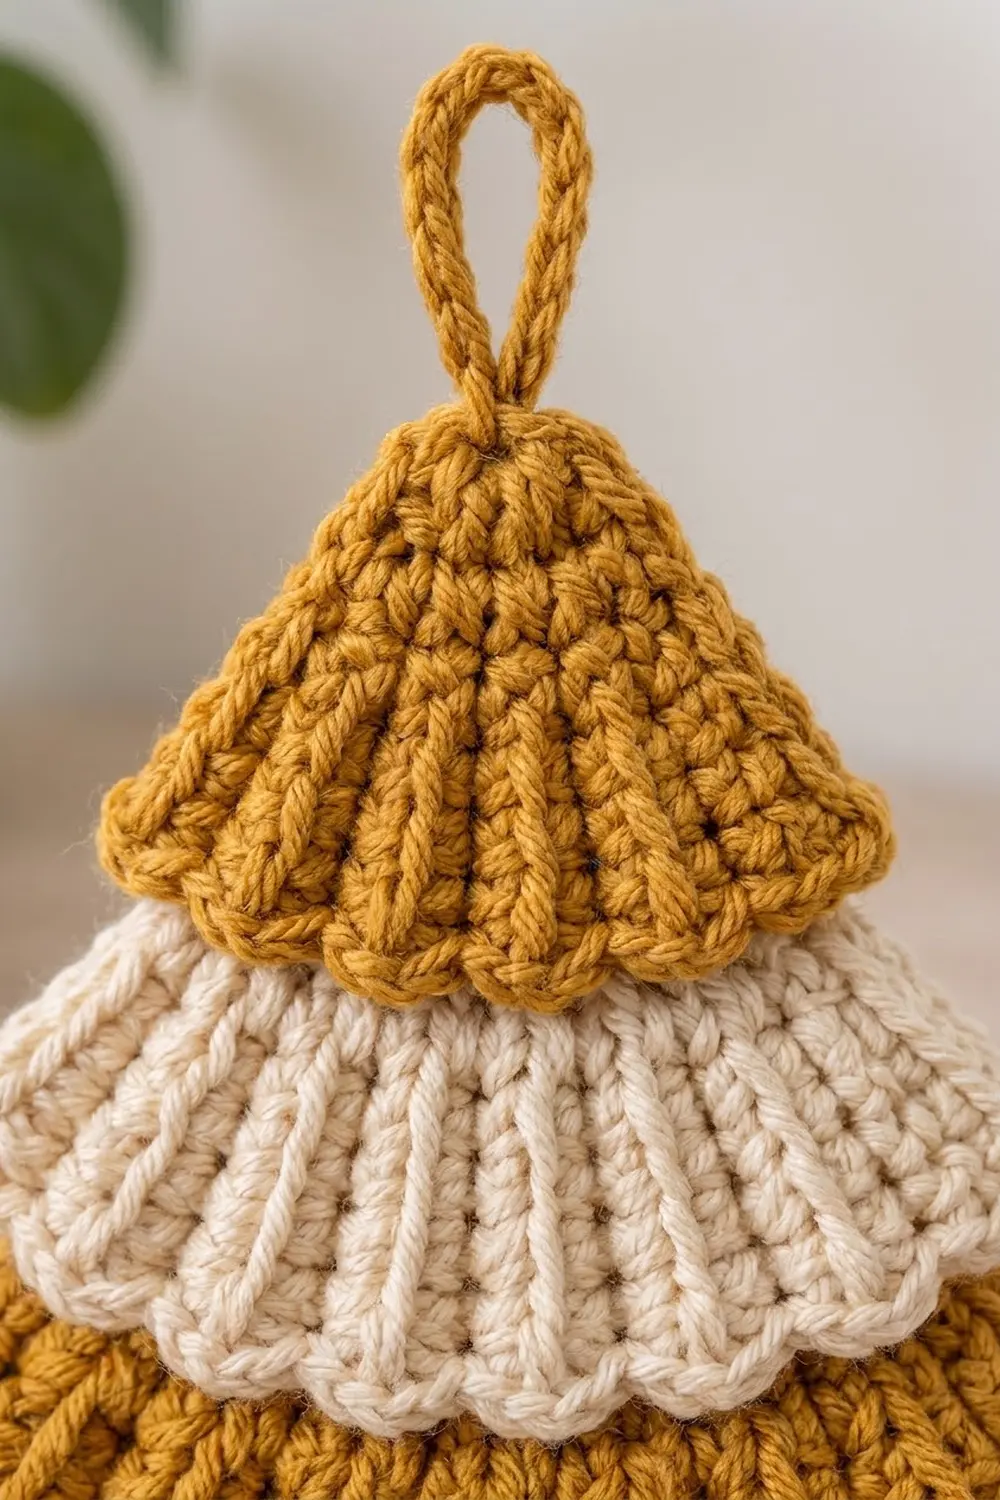
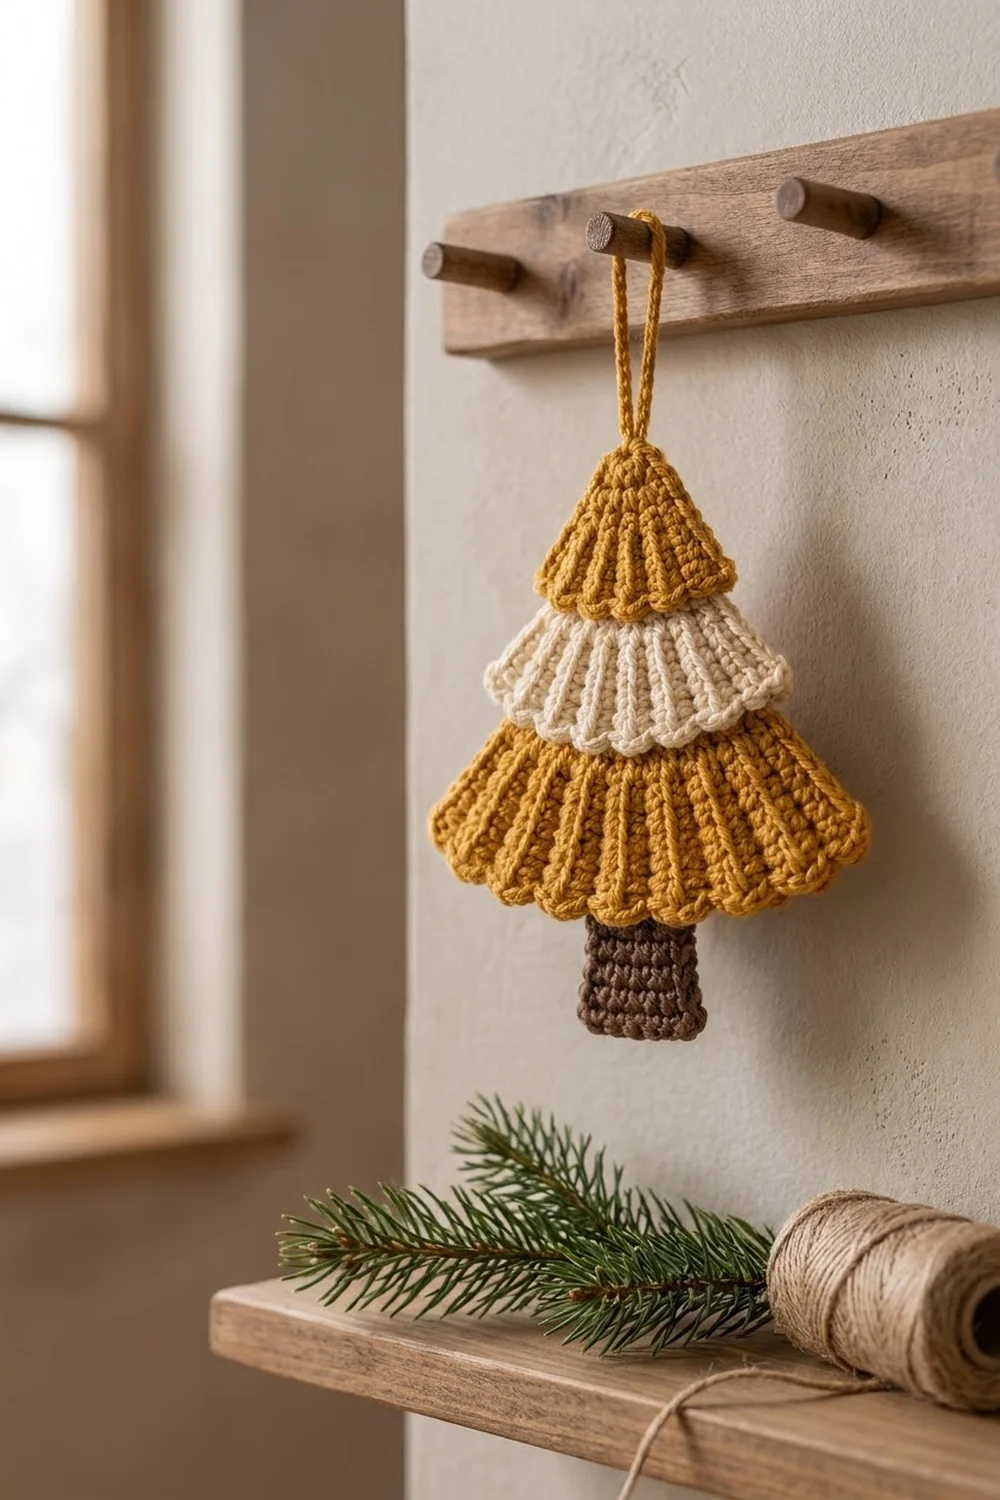
This tree ornament has three stacked tiers in mustard gold, cream, and mustard again, set on a short chocolate-brown trunk. Each tier is a ribbed fan with raised lines that spread out from the point, and its lower edge is finished with soft scallops. The look is warm and modern Scandinavian, and it works on a tree, a wall peg, or a gift tag.
The pattern uses US crochet terms throughout. The finished ornament is about 3.9 in (9.9 cm) wide and 4.5 in (11.4 cm) tall from the top point to the bottom of the trunk. The hanging loop adds about 1 in (2.5 cm).
Each tier is worked flat in rows from an adjustable ring, so the stitches line up into ribs that fan outward. Front and back post stitches keep every rib raised on the right side. A scallop border finishes the curved edge. The trunk is a small tapered piece of single crochet. Then you layer the four pieces and sew them together into one ornament.
The tiers are made separately so each one keeps a clean, crisp scalloped edge. Stacking them also gives the tree a little depth and shadow. You only need a few grams of each color, so this is a good pattern for using up worsted-weight scraps.
Finished Size and Construction
- Finished size: 3.9 in (9.9 cm) wide x 4.5 in (11.4 cm) tall, plus a 1 in (2.5 cm) loop
- Skill level: Easy (you need to know front and back post stitches)
- Terminology: US crochet terms
- Yarn weight: Worsted (#4)
- Hook: 4.0 mm (G-6)
- Number of pieces: 1 ornament made from 4 components (3 tiers + 1 trunk), plus a loop worked in place
- Layout: Tiers stacked vertically, each smaller tier overlapping the point of the tier below; trunk tucked behind the bottom tier
- Tier sizes before border (width across the curved edge x center height):
- Top: 1.7 in (4.3 cm) x 1 in (2.5 cm)
- Middle: 2.6 in (6.6 cm) x 1.5 in (3.8 cm)
- Bottom: 3.5 in (8.9 cm) x 2 in (5.1 cm)
- Tier sizes after border:
- Top: 2.2 in (5.6 cm) x 1.25 in (3.2 cm)
- Middle: 3 in (7.6 cm) x 1.75 in (4.4 cm)
- Bottom: 3.9 in (9.9 cm) x 2.25 in (5.7 cm)
- Border depth: 0.25 in (0.6 cm)
- Trunk: 1.25 in (3.2 cm) wide at the base, 1 in (2.5 cm) wide at the top, 2 in (5.1 cm) long; 1 in (2.5 cm) shows below the tree
Materials
Use a smooth worsted yarn in cotton, a cotton blend, or acrylic. Cotton gives the sharpest ribs and scallops. Avoid fuzzy or brushed yarns, because they blur the raised lines.
- Mustard gold: 8 g / 16 m (top tier, bottom tier, loop)
- Cream: 4 g / 8 m (middle tier)
- Chocolate brown: 3 g / 6 m (trunk)
These quantities include a margin of about 25% for your gauge check and sewing tails.
Tools:
– 4.0 mm (G-6) crochet hook
– Tapestry needle
– Scissors
– Stitch marker
– Rustproof pins and a blocking mat or folded towel
– Ruler or tape measure
Abbreviations (US Terms)
- ch – chain
- sl st – slip stitch
- sc – single crochet
- sc2tog – single crochet 2 together
- dc – double crochet
- FPdc – front post double crochet
- BPdc – back post double crochet
- st(s) – stitch(es)
- RS / WS – right side / wrong side
- rep – repeat
Special stitch – post increase: Work 2 post stitches of the same type (2 FPdc or 2 BPdc) around the same post. This adds 1 stitch and starts a new rib.
Adjustable ring: Wrap the yarn around two fingers to make a loop, work the first row into it, then pull the tail. On these tiers you pull the ring only until the stitches lie as a flat fan. The ring never closes into a circle.
Gauge and Checkpoints
Gauge: 15 dc x 8 rows = 4 in (10.2 cm) in the post-stitch rib, and 16 sc x 18 rows = 4 in (10.2 cm) in single crochet.
Use the bottom tier as your test piece, because it is the largest and has the most rows. Make it first and measure it before you start the other pieces. Lay it flat without stretching and measure along the center line from the ring to the edge.
Checkpoints for the bottom tier:
– After Row 1: the 4 dc fan is about 1 in (2.5 cm) across its curve.
– After Row 2: the center height from the ring to the edge is 1 in (2.5 cm).
– After Row 4: the center height is 2 in (5.1 cm) and the width across the curve is 3.5 in (8.9 cm).
– After the border: the center height is 2.25 in (5.7 cm) and the width is 3.9 in (9.9 cm).
If your tier is too big, go down to a 3.75 mm (F-5) hook. If it is too small, go up to a 4.5 mm (7) hook.
If the tier cups like a bowl, your rows are too short for the increases, so try a larger hook. If it ruffles, your stitches are too loose, so go down a hook size. Small size differences are fine for an ornament, but make all three tiers at the same gauge so they stack neatly.
Bottom Tier (Mustard Gold)
Each row begins with ch 2, which does not count as a stitch. Row 1 is the RS. Work post stitches around the stitches of the row below.
Row 1 (RS): Make an adjustable ring. Ch 2, 4 dc into the ring. Pull the tail until the dc lie side by side in a flat fan. Turn. (4 sts)
Row 2 (WS): Ch 2, 2 BPdc around each st across. Turn. (8 sts)
Row 3 (RS): Ch 2, FPdc around next st, 2 FPdc around next st; rep from * 3 more times. Turn. (12 sts)*
Row 4 (WS): Ch 2, BPdc around each of next 2 sts, 2 BPdc around next st; rep from * 3 more times. Turn. (16 sts)*
BPdc worked on the WS sit forward on the RS, so every stitch is raised on the RS. The stitches stack into 16 ribs that spread out from the ring. Do not fasten off. Go straight to the border.
Middle Tier (Cream)
Work Rows 1–3 exactly as for the bottom tier. (12 sts after Row 3)
After Row 3, the center height is 1.5 in (3.8 cm) and the width is 2.6 in (6.6 cm). Turn and go to the border. This border is worked with the WS facing. The fans look the same from both sides, so that’s fine.
Top Tier (Mustard Gold)
Work Rows 1–2 exactly as for the bottom tier. (8 sts after Row 2)
After Row 2, the center height is 1 in (2.5 cm) and the width is 1.7 in (4.3 cm). Turn and go to the border.
Trunk (Chocolate Brown)
The trunk is worked from the bottom up, in rows.
Foundation: Ch 6.
Row 1: Sc in 2nd ch from hook and in each ch across. Ch 1, turn. (5 sts) The width should be 1.25 in (3.2 cm).
Rows 2–6: Sc in each st across. Ch 1, turn. (5 sts)
Row 7: Sc2tog, sc in each of next 3 sts. Ch 1, turn. (4 sts)
Rows 8–9: Sc in each st across. Ch 1, turn. (4 sts)
Fasten off and leave a 10 in (25.4 cm) tail for sewing.
Checkpoint: The trunk is 2 in (5.1 cm) long (9 rows at 4.5 rows per inch), 1.25 in (3.2 cm) wide at the base, and 1 in (2.5 cm) wide at the top.
Border (Scallop Edge)
Work the border on all three tiers, along the last row only (the curved edge). Leave the two straight sides of each fan plain.
Border gauge: Each scallop uses 2 stitches of the last row and measures about 0.5 in (1.3 cm) across. It adds 0.25 in (0.6 cm) of depth.
Border row (all tiers): Without a turning chain, *3 dc in next st, sl st in next st; rep from * across. Fasten off, leaving a 12 in (30.5 cm) tail on the middle and top tiers for sewing.
Exact counts:
– Bottom tier: 16 sts ÷ 2 = 8 scallops (24 dc + 8 sl st)
– Middle tier: 12 sts ÷ 2 = 6 scallops (18 dc + 6 sl st)
– Top tier: 8 sts ÷ 2 = 4 scallops (12 dc + 4 sl st)
Why the math works: Each tier adds 4 stitches per row. That makes every final count a multiple of 4, and so always even. A 2-stitch repeat uses up every stitch with nothing left over.
The curved edge of the bottom tier is about 4.2 in (10.7 cm) long, which gives 8 scallops of about 0.5 in (1.3 cm) each. The middle edge is about 3.1 in (7.9 cm), for 6 scallops. The top edge is about 2.1 in (5.3 cm), for 4 scallops. The scallops are the same size on every tier, so the tree looks even from top to bottom.
Hanging Loop
- With the RS facing, join mustard gold with a sl st at the point (ring) of the top tier.
- Ch 10, then sl st back into the same point to form a loop.
- Work 14 sc over the chain loop, covering it fully, then sl st into the point.
- Fasten off and weave in the end.
The loop stands about 1 in (2.5 cm) tall.
Assembly
- Lay out: Place the bottom tier RS up. Put the middle tier on top of it so the middle tier’s point sits 0.75 in (1.9 cm) above the bottom tier’s point. That hides the bottom tier’s point completely.
- Middle to bottom: Pin the middle tier in place. Using the cream tail, sew the base of each cream scallop to the bottom tier with small stitches through the back loops only, so nothing shows on the front. Also tack down the middle tier’s two straight sides.
- Top to middle: Place the top tier so its point sits 0.5 in (1.3 cm) above the middle tier’s point. Sew it down the same way with the mustard tail.
- Check the bands: Measure from the top point along the center line.
- The middle tier’s point is at 0.5 in (1.3 cm) and the bottom tier’s point is at 1.25 in (3.2 cm).
- The visible cream band runs from 1.25 in to 2.25 in (3.2 cm to 5.7 cm), so it is 1 in (2.5 cm) deep.
- The visible lower mustard band runs from 2.25 in to 3.5 in (5.7 cm to 8.9 cm), so it is 1.25 in (3.2 cm) deep.
- Trunk: Slide the narrow top of the trunk 1 in (2.5 cm) up behind the bottom tier, centered. Use the brown tail to whipstitch the trunk’s top edge and sides to the back of the bottom tier.
- Final size check: The total height from the top point to the bottom of the trunk is 3.5 in + 1 in = 4.5 in (11.4 cm). The width at the bottom tier is 3.9 in (9.9 cm).
Weave in all remaining ends on the back, inside stitches of the same color.
Final Blocking
- Lightly mist the ornament with water, or hold a steam iron 1 in (2.5 cm) above it. Never press the iron onto the yarn.
- Lay it RS up on a blocking mat.
- Pin the bottom of the trunk and the top point. The distance between them should be 4.5 in (11.4 cm).
- Pin out the two outer tips of the bottom tier so it measures 3.9 in (9.9 cm) across.
- Shape each scallop with your fingertip so it is round. Use a pin to straighten the ribs so they spread out evenly.
- Let it dry completely before you unpin, which takes about 2 to 4 hours.
Final Quality-Control Checklist
- Bottom, middle, and top tiers have 8, 6, and 4 scallops.
- Ribs are raised on the RS of every tier, with no flat rows.
- No tier point shows through the tier above it.
- The cream band is 1 in (2.5 cm) deep and the lower mustard band is 1.25 in (3.2 cm) deep.
- The trunk is centered and shows 1 in (2.5 cm) below the tree.
- The loop is centered on the top point and fully covered with sc.
- No sewing stitches show on the front, and all ends are woven in.
- The overall size is 3.9 in x 4.5 in (9.9 cm x 11.4 cm).
Troubleshooting
The fan won’t lie flat, or there’s a hole at the point: Pull the adjustable ring tighter after Row 1, then secure the tail.
Ribs look flat on one row: You probably worked FPdc on a WS row. On WS rows, use BPdc only.
Stitch count is off: Count after every row (4, 8, 12, 16). Place a marker in the first stitch of each row so you don’t skip the end stitch.
Scallops are crowded or a stitch is left over: Recount the last row. It must be 16, 12, or 8 before you start the border.
Tiers curl at the tips: Block again, pinning the tips. If they still curl, work the border with slightly looser tension.
Trunk is leaning: Remove the stitches and re-center the trunk before you sew it again. To find the center, measure 1.95 in (5.0 cm) in from each outer tip of the bottom tier.
Ornament tilts when hung: The loop is off-center. Re-attach it exactly at the ring of the top tier.
Care
Hand wash in cool water with mild soap, press out the water in a towel, and dry flat. Reshape the scallops while the ornament is damp.
Final Notes
Each fan row adds 0.5 in (1.3 cm) of height and 4 stitches. The bottom, middle, and top tiers end at 16, 12, and 8 stitches, with center heights of 2 in, 1.5 in, and 1 in (5.1 cm, 3.8 cm, and 2.5 cm).
The 2-stitch scallop border adds 0.25 in (0.6 cm) and turns those counts into 8, 6, and 4 scallops. In the stack, the middle point sits 0.5 in (1.3 cm) below the top point and the bottom point sits 1.25 in (3.2 cm) below it. The trunk adds a 1 in (2.5 cm) drop, so the finished tree is 3.9 in x 4.5 in (9.9 cm x 11.4 cm). If your bottom tier matches gauge, the rest of the ornament should come out the right size.
Happy crocheting!