
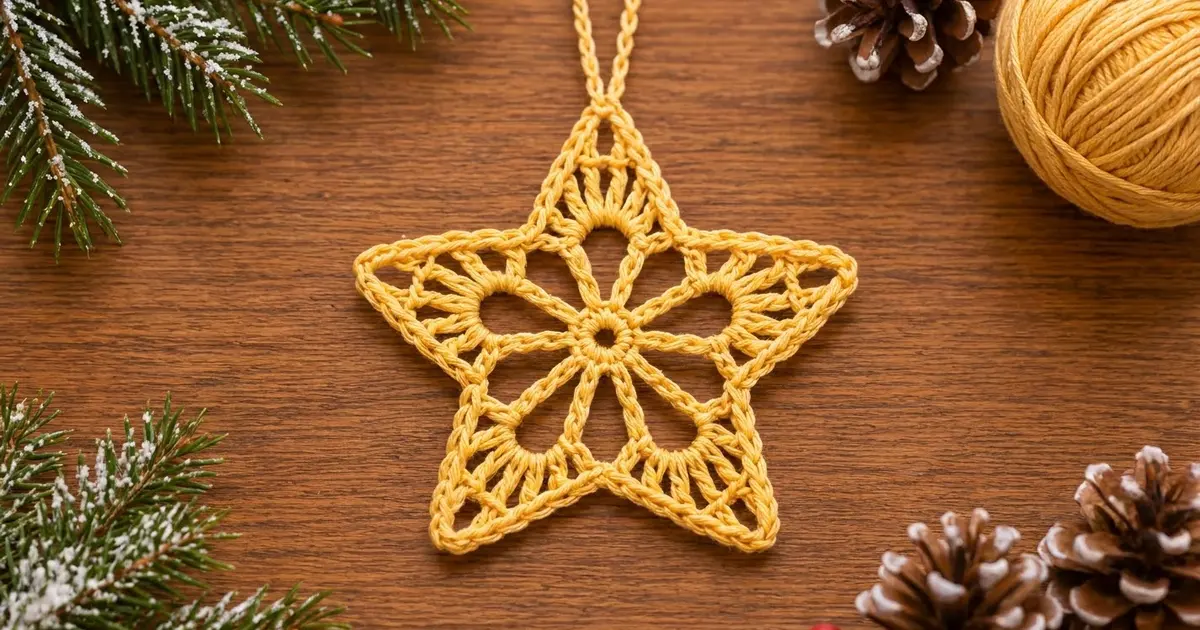
This lace star is a quick, elegant ornament. Five open teardrop petals spread out from a small center ring, and tall stitches fan out between them to fill the valleys. A neat single-crochet edge finishes the classic five-point outline. It’s light and airy, and it looks lovely hanging on a tree branch, a gift tag or a window.
The sample is golden yellow. Cream, soft pink and sage green work just as well, and a mixed set makes a cheerful little collection. Mercerized cotton gives the best stitch definition and the crispest points.
This pattern uses US crochet terms. The finished star is about 4.25 in (10.8 cm) from point to point and about 4 in (10.2 cm) tall, not counting the hanging loop.
You make the star in one piece and in the round: a center ring, five chain loops, a petal-outline round, a shaping round that turns the flower into a star, and a single-crochet edge. Last, you add a hanging loop. There is no sewing and no joining.
Finished Size and Construction
- Finished size: 4.25 in (10.8 cm) point to point; 4 in (10.2 cm) tall
- Hanging loop: hangs about 1.5 in (3.8 cm) above the top point
- Skill level: Easy–Intermediate
- Terminology: US
- Yarn weight: Sport (#2), mercerized cotton
- Hook: 3.0 mm (US C/2 or D/3)
- Number of pieces: 1
- Layout: One single star motif, worked in the round
- Piece size before the edge (after Round 4): 3.75 in (9.5 cm) point to point
- Edge depth (Round 5): about 0.25 in (0.6 cm)
Materials
Yarn: Use a smooth sport-weight mercerized cotton, roughly 50 g ≈ 155 m. Cotton holds the points crisply and blocks flat. Acrylic works, but the lace will look softer and the points will be rounder.
Yarn per star:
– Golden yellow (main sample): 8 g / 25 m
– Optional colorways (one star each): cream, soft pink or sage green, 8 g / 25 m each
These amounts include a margin for your gauge swatch and weaving in ends.
Tools:
– 3.0 mm crochet hook
– Tapestry needle
– Scissors
– Stitch marker
– Rust-proof pins and a foam blocking mat
– Spray bottle with water
– Optional: spray starch, for a stiffer ornament
Abbreviations (US Terms)
- MR – magic ring
- ch – chain
- sl st – slip stitch
- sc – single crochet
- hdc – half double crochet
- dc – double crochet
- tr – treble crochet
- sp – space
- st(s) – stitch(es)
- sc3tog – single crochet 3 together
- tr2tog – treble 2 together
Special stitch: tr2tog. Yarn over twice, insert hook in the next st, pull up a loop (4 loops on hook), [yarn over, pull through 2 loops] twice (2 loops remain). Repeat once in the next st (3 loops on hook). Yarn over and pull through all 3 loops. This makes one tall stitch with two legs, and it sharpens each inner corner of the star.
sc3tog: [Insert hook in the next st, pull up a loop] 3 times (4 loops on hook). Yarn over and pull through all 4 loops.
Gauge and Checkpoints
Gauge isn’t critical for an ornament, but it decides whether the star lies flat. Make one star first and check it at each stage below before you make a set.
Base gauge: Round 1 (15 dc in a magic ring) is about 0.75 in (1.9 cm) across, measured from outer edge to outer edge.
Checkpoints:
– After Round 1: center ring is 0.75 in (1.9 cm) across.
– After Round 3: petal tip to opposite petal tip is about 2.9 in (7.4 cm). Each petal is about 1.5 in (3.8 cm) long from the ring.
– After Round 4: 3.75 in (9.5 cm) point to point.
– After Round 5: 4.25 in (10.8 cm) point to point.
If your star is too big: go down a hook size to 2.75 mm, or tighten your chains in Round 2. Loose chains make long, floppy petals.
If it’s too small or cups up: go up to 3.25 mm. In Round 2, chain a little more loosely.
Edge gauge: about 6 sc = 1 in (2.5 cm) along the finished edge.
Pattern
Round 1 – Center Ring
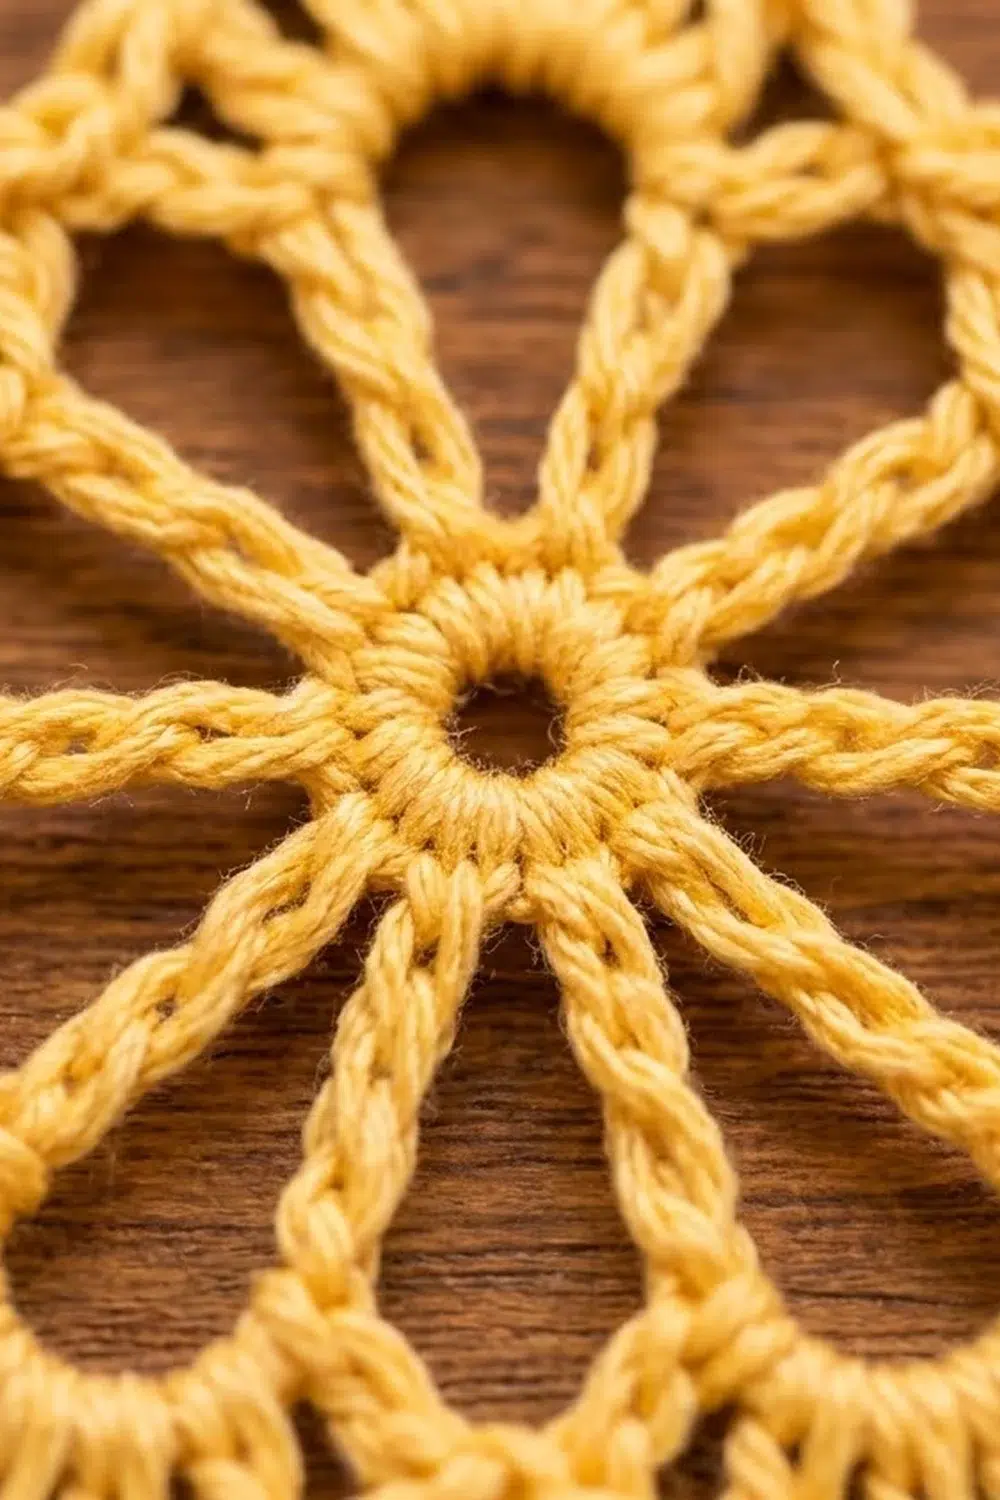
Make a MR. Ch 3 (counts as first dc), work 14 dc into the ring. Pull the ring closed, leaving a small open center about 0.25 in (0.6 cm) wide. Join with sl st to the top of the beginning ch-3.
Count: 15 dc.
Round 2 – Petal Loops
Ch 1. (Sc, ch 14, sc) in the next st, then sc in each of the next 2 sts. Repeat from * 4 more times. Join with sl st to the first sc.
Each loop starts and ends in the same stitch, so it stands out like a spoke. Four sc sit between neighboring loops: the closing sc of one loop, 2 plain sc, and the opening sc of the next loop.
Count: 20 sc and 5 ch-14 loops. Check: 5 repeats × 3 stitches used = all 15 sts of Round 1.
Lay the piece flat. You should have five evenly spaced chain loops, like the second photo in the step sequence.
Round 3 – Petal Outline
Sl st into the first ch-14 loop.
In the ch-14 loop work [8 sc, ch 3, 8 sc]. Skip the next sc (the loop’s closing sc), sc in each of the next 2 sc, then skip the next sc (the next loop’s opening sc). Repeat from * 4 more times. Join with sl st to the first sc.
Packing 16 sc into each loop pulls it into a smooth, hollow teardrop with a ch-3 tip. The skipped stitches keep the petals from crowding the center.
Count: 90 sc and 5 ch-3 tips. That’s 5 petals × 16 sc = 80 sc, plus 5 × 2 sc between petals = 10 sc.
Checkpoint: about 2.9 in (7.4 cm) from tip to opposite tip.
Round 4 – Star Shaping (Conversion Round)
This round turns the flower into a star. Stitches get taller as they move from each tip toward the valley. That fills the space between petals with fanned stitches and straightens each star edge.
Sl st in each of the next 8 sc, then sl st into the first ch-3 tip.
Ch 1. In the ch-3 tip work (2 sc, ch 3, 2 sc). Down the second half of this petal, work sc in the next 3 sts, hdc in the next 3 sts and dc in the next 2 sts. Tr2tog over the 2 sc between petals. Up the first half of the next petal, work dc in the next 2 sts, hdc in the next 3 sts and sc in the next 3 sts. Repeat from * 4 more times, ending at the first ch-3 tip. Join with sl st to the first sc.
Count, shown as a conversion: (80 sts worked 1-per-existing-stitch along the petal sides) + (5 tr2tog worked over the 10 between-petal sc) + (20 sc added into the tip spaces) = 105 sts, plus 5 ch-3 point spaces.
Per point, that’s 21 sts: 4 tip sc + 8 + 1 tr2tog + 8.
Checkpoint: 3.75 in (9.5 cm) from point to point. The valleys should sit at the tr2tog stitches, and you should see the tall stitches fanning out between the petals.
Border
The edge is one round of sc that smooths the outline, sharpens the inner corners and gives the star its firm, rope-like rim.
Edge gauge: 6 sc = 1 in (2.5 cm). Each straight edge from point to valley is about 1.6 in (4.1 cm), and it takes about 9.5 sc, which fits that gauge.
Round 5 – Edging (Trim Round)
Sl st in the next 2 sc to reach the first ch-3 point space.
Ch 1, then (sc, ch 3, sc) in the ch-3 sp. Sc in the next 2 sc and sc in the next 7 sts (3 sc, 3 hdc, 1 dc). Sc3tog over the next 3 sts (dc, tr2tog, dc). Sc in the next 7 sts (1 dc, 3 hdc, 3 sc) and sc in the next 2 sc. At the next point, work (sc, ch 3, sc) in the ch-3 sp.
Repeat from * around. After the fifth valley side, don’t work another point. Join with sl st to the first sc.
Count per side: each V between two points has 2 + 7 + 1 + 7 + 2 = 19 sts. Each point adds 2 sc around its ch-3, so each point-and-V repeat totals 21 sts.
Count, shown as a trim round: (90 sts worked 1-per-existing-stitch) + (5 sc3tog worked over 15 sts) + (10 sc added into the point spaces) = 105 sts, plus 5 ch-3 point spaces.
Why the math works: Round 4 has 105 sts. Ninety of them get one sc each, and the other 15 (three at each valley) become 5 sc3tog, so 15 sts become 5 and you lose 10. The points gain 10 new sc, 2 at each of the five ch-3 spaces. Losing 10 and gaining 10 keeps the total at 105. Losing stitches pulls the valleys in, and adding them lets the points grow outward. That’s what keeps the star flat with crisp angles.
Checkpoint: 4.25 in (10.8 cm) from point to point.
Hanging Loop
Sl st across to the ch-3 sp of the point you want at the top. Ch 24, then sl st into the same ch-3 sp to close the loop.
Work 30 sc over the ch-24 loop so the chain is fully covered, then sl st into the ch-3 sp. Fasten off, leaving an 8 in (20.3 cm) tail.
The loop hangs about 1.5 in (3.8 cm) above the point.
Weave in all ends along the back of the edge stitches. Leave the magic-ring tail until after blocking, then tighten the center once more and weave it in.
Final Blocking
- Soak: Dip the star in cool water and press out the excess gently. Don’t wring it.
- Shape: Lay it face up on a blocking mat. Gently open each teardrop petal with your fingertip.
- Pin the points: Pin each of the five ch-3 points so the star measures 4.25 in (10.8 cm) from point to point. Space the points evenly about 1.5 in (3.8 cm) out from the center.
- Pin the valleys: Pin each sc3tog valley slightly inward so the edges run straight from point to valley, about 1.6 in (4.1 cm) each.
- Open the center: Push a pin or toothpick through the center ring so it stays round, 0.75 in (1.9 cm) across.
- Starch (optional): Mist lightly with spray starch for a stiffer ornament.
- Dry: Leave it pinned until completely dry, usually 4–6 hours.
- Finish: Unpin and tighten the magic-ring tail if needed, then weave it in.
Final Quality-Control Checklist
- The center ring is round and open, about 0.75 in (1.9 cm) across.
- There are five hollow teardrop petals of equal length, each pointing to a star point.
- Tall stitches fan out evenly in all five valleys.
- Round 4 counts 105 sts plus 5 ch-3 spaces.
- Round 5 counts 105 sts plus 5 ch-3 spaces, with 19 sts on every V side.
- The finished star is 4.25 in (10.8 cm) from point to point and lies flat.
- All five points are equally sharp, and all five valleys are equally crisp.
- The hanging loop is fully covered with sc and attached securely.
- All ends are woven in invisibly.
Troubleshooting
The star cups or ruffles. Your Round 2 chains are probably too long or loose. Redo Round 2 with firmer chains, or go down a hook size.
The star curls toward the front. The edge is too tight. Rework Round 5 a little more loosely, or use a 3.25 mm hook for that round only.
The petals are uneven. Count each ch-14 loop. One extra chain makes a visibly longer petal.
The valleys look rounded. Make sure you worked tr2tog in Round 4 and sc3tog in Round 5. Two separate tr or plain sc will soften the corners.
Points look blunt. Check that each point has a ch-3 in both Round 4 and Round 5, and pin the points firmly when blocking.
The stitch count is off in Round 4. Each point repeat should be 21 sts. Count petal by petal and find the side that doesn’t have 8 sts.
The center hole is too big. Pull the magic-ring tail tight before weaving it in.
Care
Hand wash in cool water with mild soap, press out the water in a towel, and dry flat, re-pinning the points if needed. Store flat or hanging so the points stay crisp.

Final Notes
Each stage builds on the one before:
- The 0.75 in (1.9 cm) center ring holds 15 dc.
- Round 2 adds five ch-14 loops.
- Round 3 fills them into teardrop petals that are 2.9 in (7.4 cm) from tip to tip.
- Round 4 turns the flower into a 3.75 in (9.5 cm) star with 105 sts.
- Round 5 keeps 105 sts and finishes the star at 4.25 in (10.8 cm).
Check each measurement as you go, block the points carefully, and your star will hang flat and bright. Make one in golden yellow, or a whole set in cream, pink and sage.
Happy crocheting!