

This little bell is a warm, textured ornament you can finish in one evening. Rows of plump puff stitches sit inside an airy chain mesh. The bell flares into a scalloped shell hem and ends with a tiny puff-ball clapper hanging below. The single golden tan shade gives it a gingerbread, vintage-Christmas feel that looks lovely against green branches and warm lights.
The ornament is worked flat in one piece, from the top down, in US crochet terms. It measures about 4.75 in (12.1 cm) wide at the hem and 4.125 in (10.5 cm) tall from crown to hem. The hanging loop adds about 2 in (5.1 cm) above, and the clapper hangs about 0.75 in (1.9 cm) below.
The construction is simple. A small chain ring forms the crown. Four rows of puff stitches each add one puff, and a shell row creates the scalloped hem. A trim row sharpens the scallops. A single-crochet border runs up one side, across the top (where you add the loop), and down the other side. Last, you add the clapper at the center of the hem.
There is only one piece, so there is no joining. Once you have made one bell, the rest are quick.
Finished Size and Construction
- Finished size: 4.75 in (12.1 cm) wide × 4.125 in (10.5 cm) tall
- Total hanging length: about 6.875 in (17.5 cm), including the loop and clapper
- Skill level: Easy–Intermediate (puff stitches, shells, working into row ends)
- Terminology: US crochet terms
- Yarn weight: DK (light worsted, #3)
- Hook: 3.5 mm (E-4)
- Number of pieces: 1
- Layout: single flat bell, worked top-down in rows
- Piece size before border: 4.5 in (11.4 cm) wide × 4 in (10.2 cm) tall
- Border depth: 0.125 in (0.3 cm) on the sides and top
Materials
Yarn: Use a smooth DK cotton or cotton blend. Cotton gives crisp puffs and well-defined scallops, and it holds its shape on a tree. Fuzzy or very splitty yarns hide the lace and make puffs hard to pull through.
- Golden tan / camel: 20 g, about 45 m (49 yd) per ornament
The bell itself uses about 15 g (35 m). The quantity above includes a margin for your gauge swatch and tails.
Tools:
- 3.5 mm (E-4) crochet hook
- Tapestry needle
- Scissors
- Rustproof pins and a foam blocking mat
- Spray bottle with water
- Optional: fabric stiffener or a light starch spray
Abbreviations (US Terms)
- ch – chain
- sl st – slip stitch
- sc – single crochet
- dc – double crochet
- sp(s) – space(s)
- st(s) – stitch(es)
- yo – yarn over
- RS / WS – right side / wrong side
Puff stitch (puff): [Yo, insert hook in the indicated space, yo, pull up a loop to about 0.5 in (1.3 cm) tall] 4 times (9 loops on hook). Yo and pull through all 9 loops, then ch 1 to close. The closing ch 1 is part of the puff. It does not count as a chain space.
Puff ball (clapper): [Yo, insert hook in the indicated ch, yo, pull up a loop to 0.5 in (1.3 cm)] 6 times (13 loops on hook). Yo and pull through all 13 loops, then ch 1 to close.
Gauge and Checkpoints
Gauge matters less for an ornament than for a garment. Still, it controls how the bell hangs and whether the scallops lie flat.
Test first: Work Rows 1–2 as a gauge piece. Pull your puff loops up to a consistent height every time.
- After Row 1: 1.25 in (3.2 cm) wide × 0.75 in (1.9 cm) tall
- After Row 2: 2 in (5.1 cm) wide × 1.5 in (3.8 cm) tall
- After Row 3: 2.75 in (7.0 cm) wide × 2.25 in (5.7 cm) tall
- After Row 4: 3.5 in (8.9 cm) wide × 3 in (7.6 cm) tall
- After Row 5: 4.25 in (10.8 cm) wide × 3.75 in (9.5 cm) tall
- After Row 6: 4.5 in (11.4 cm) wide × 4 in (10.2 cm) tall
Each puff row is about 0.75 in (1.9 cm) tall.
Too big? Go down to a 3.25 mm (D-3) hook, or pull your puff loops up shorter.
Too small? Go up to a 3.75 mm (F-5) hook, or pull the loops up a little taller.
Correct width but rows too short? Lengthen only the puff loops and leave the hook size alone.
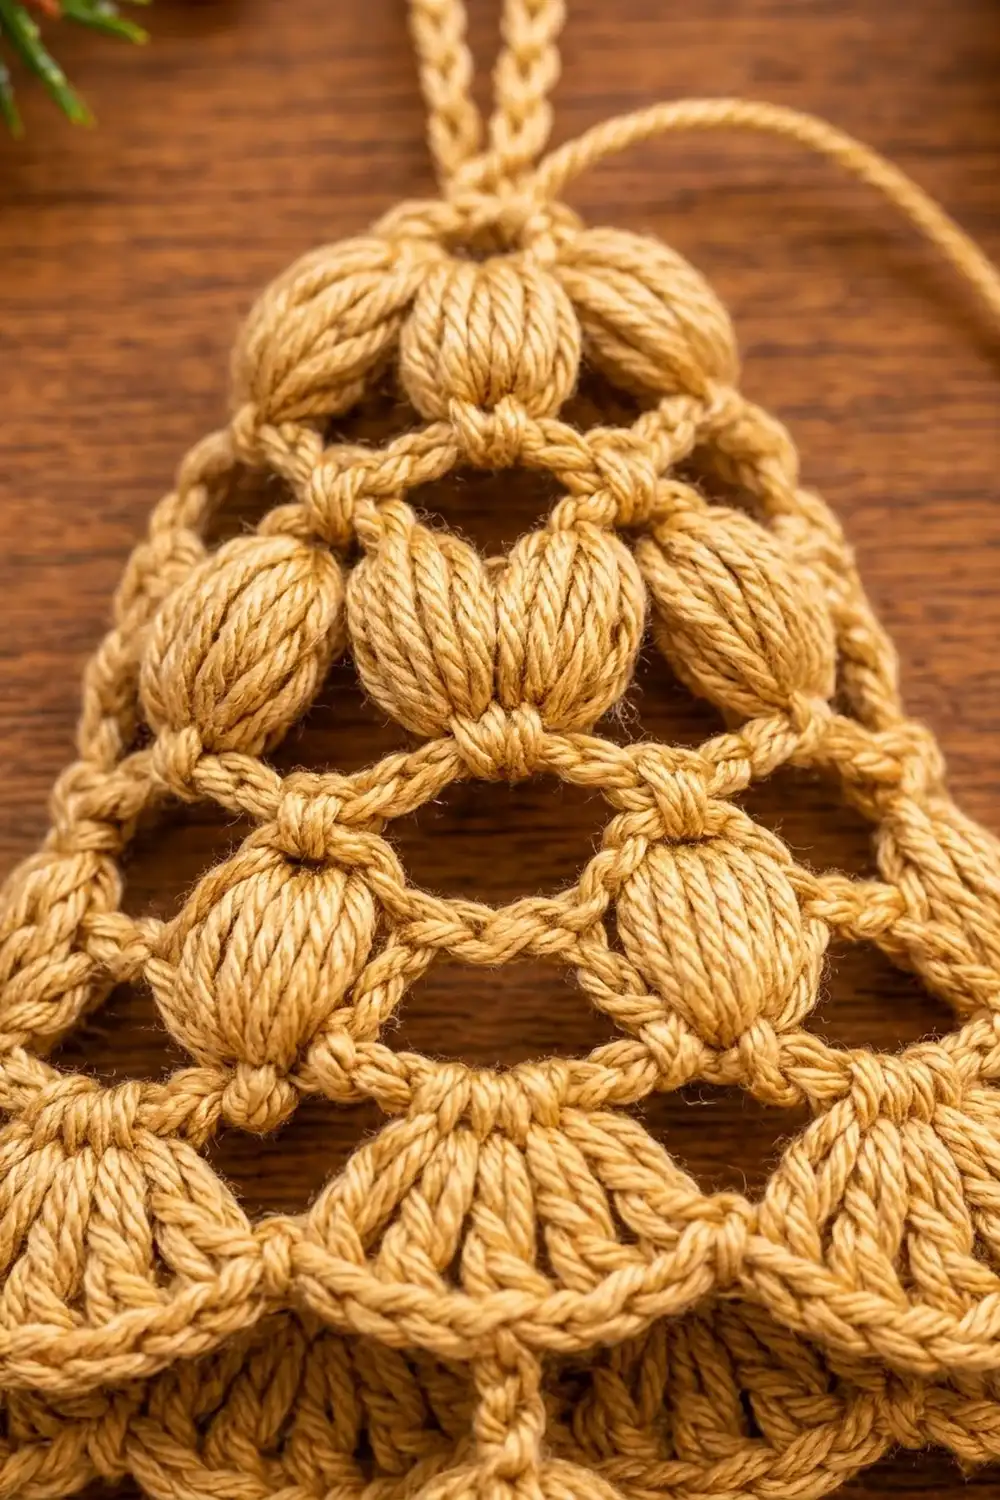
Pattern: Bell Body
Foundation ring: Ch 5, sl st in the first ch to form a ring.
Row 1 (RS): Ch 3 (counts as dc), ch 1, puff in ring, ch 2, puff in ring, ch 1, dc in ring.
Count: 2 dc, 2 puffs, 1 ch-2 sp, 2 ch-1 sps.
This row makes the narrow crown. Push the stitches together so they cover the bottom half of the ring. The upper half stays exposed for the border.
Row 2 (WS): Ch 3 (counts as dc), turn. Ch 1, puff in the first ch-1 sp, ch 2, puff in the ch-2 sp, ch 2, puff in the last ch-1 sp, ch 1, dc in the 3rd ch of the turning ch.
Count: 2 dc, 3 puffs, 2 ch-2 sps, 2 ch-1 sps.
Row 3 (RS): Ch 3 (counts as dc), turn. Ch 1, puff in the first ch-1 sp, [ch 3, puff in the next ch-2 sp] 2 times, ch 3, puff in the last ch-1 sp, ch 1, dc in the 3rd ch of the turning ch.
Count: 2 dc, 4 puffs, 3 ch-3 sps, 2 ch-1 sps.
The longer ch-3 spaces start the bell’s flare and open up the lacy diamond mesh between the puffs.
Row 4 (WS): Ch 3 (counts as dc), turn. Ch 1, puff in the first ch-1 sp, [ch 3, puff in the next ch-3 sp] 3 times, ch 3, puff in the last ch-1 sp, ch 1, dc in the 3rd ch of the turning ch.
Count: 2 dc, 5 puffs, 4 ch-3 sps, 2 ch-1 sps.
Each row has one more puff than the row before it: 2, 3, 4, 5. This steady increase is what gives the bell its tapered shape.
Pattern: Scalloped Hem
Row 5 (RS, shell row): Ch 1, turn. Sc in the first dc, 4 dc in the next ch-1 sp (half shell), sc in the top of the next puff. [7 dc in the next ch-3 sp, sc in the top of the next puff] 4 times. 4 dc in the last ch-1 sp (half shell), sc in the 3rd ch of the turning ch.
Count: 36 dc (4 full shells × 7 = 28, plus 2 half shells × 4 = 8) + 7 sc = 43 sts.
Each sc is anchored on top of a puff, so each shell fans out between two puff columns. The half shells round off the outer corners of the bell.
Row 6 (WS, trim row): Ch 1, turn. Sc in each st across, but work 2 sc in the center (4th) dc of each 7-dc shell.
Count: 43 sc (1 per existing st) + 4 extra sc (1 per full shell) = 47 sc.
The 4 extra stitches let each scallop curve without cupping. This row gives the hem its outlined edge.
Do not fasten off. The border starts from here.
Center check: The 24th of the 47 sc is the exact center of the hem. It sits directly above the middle (3rd) puff column, with 23 sc on each side. Place a stitch marker in it now; the clapper attaches here.
Border
Border gauge: about 4 sc per 1 in (2.5 cm) along the slanted sides.
Border round (RS): Ch 1 and turn the work to go up the side edge.
- Side 1: Work 1 sc in the end of Row 6 and 3 sc around the end of Row 5. Then work 3 sc around the turning-ch/dc post at the end of each of Rows 4, 3, 2 and 1 (12 sc). Side total: 1 + 3 + 12 = 16 sc.
- Top: Work 2 sc around the exposed top half of the foundation ring. In the same space, work 1 sc, ch 26, and sl st into that sc to form the hanging loop. Work 2 more sc in the ring. Top total: 5 sc (the loop chain is not counted).
- Side 2: Work 3 sc around each of Rows 1, 2, 3 and 4 (12 sc), then 3 sc around the end of Row 5 and 1 sc in the end of Row 6. Side total: 12 + 3 + 1 = 16 sc.
Border total: 16 + 5 + 16 = 37 sc.
Fasten off.
Corners: The side counts already include the stitches at both ends of each side. Add no separate corner stitches. The top is a curved ring, not a square corner, and the hem corners are already finished by the half shells and Row 6.
Why the math works: Each puff row is about 0.75 in (1.9 cm) tall. At 4 sc per inch, that calls for 3 sc per row. Rows 1–5 give 5 × 3 = 15 sc, and Row 6 is only about 0.25 in (0.6 cm) tall, so it gets 1 sc. That makes 16 sc per side and keeps the edges flat, neither ruffled nor pulled in. The 5 sc across the ring fit the crown’s width of about 1.25 in (3.2 cm). Ch 26 folds into a loop about 2 in (5.1 cm) tall.
Clapper
- Join the yarn with a sl st in the marked 24th sc of Row 6.
- Ch 2 for the stem, then ch 3 more.
- Work a puff ball in the 3rd ch from the hook.
- Fasten off, leaving a 6 in (15.2 cm) tail.
- Thread the tail through the base of the ball, cinch it lightly to round the ball, and weave the tail up into the stem.
The finished ball is about 0.5 in (1.3 cm) across. Including the stem, the clapper hangs about 0.75 in (1.9 cm) below the hem.
Final Blocking
- Weave in all tails before blocking. Hide them inside the puffs or along the border.
- Spray the bell until it is evenly damp, but not dripping.
- Lay it flat with the RS up. Pin the crown, then pin the two hem corners so the hem measures 4.75 in (12.1 cm) across.
- Pin each scallop at its lowest point to give it a rounded curve.
- Gently open each chain space with a fingertip so the diamond mesh shows clearly.
- Check that the height from the top of the crown to the hem is 4.125 in (10.5 cm).
- Optional: mist with starch or brush on a thin coat of diluted stiffener so the bell hangs crisp.
- Let it dry completely before you unpin it. Leave the loop and clapper unpinned so they dry naturally.
Final Quality-Control Checklist
- Puffs per row from the top down: 2, 3, 4, 5
- Row 5 has 4 full shells, 2 half shells and 43 sts
- Row 6 has 47 sc
- The border has 16 sc per side and 5 sc across the top, for 37 sc total
- The hanging loop is centered over the middle puff column
- The clapper hangs from the 24th sc, directly under the loop
- The bell measures 4.75 in (12.1 cm) × 4.125 in (10.5 cm) after blocking
- The sides are straight and flat, with no rippling
- All tails are woven in securely
Troubleshooting
Puffs look thin or uneven: Pull every loop up to the same 0.5 in (1.3 cm) height, and close every puff with the ch 1.
Bell is lopsided: Recount your chain spaces. Each row should start and end with ch 1 next to the edge dc.
Hem cups upward: You may have skipped the extra sc in a shell center on Row 6. Check that you have 47 sc.
Hem ruffles: Your shells are too loose. Go down half a hook size for Rows 5–6 only.
Sides wave: You worked more than 3 sc per row end. Take out the border and work 16 sc per side.
Sides pull inward: You worked too few sc per row end, or your sc are too tight. Keep 3 sc per row and loosen your tension slightly.
Loop twists: Before you join the loop, check that the ch 26 is not twisted.
Clapper is off-center: Count from either end of Row 6. The clapper goes in sc 24 of 47, with 23 sc on each side.
Care
Spot clean or hand wash in cool water, press out the water in a towel, and dry flat, reshaping the scallops as it dries. Store the bell flat or hang it by its loop. Don’t crush it in a box, because that flattens the puffs.
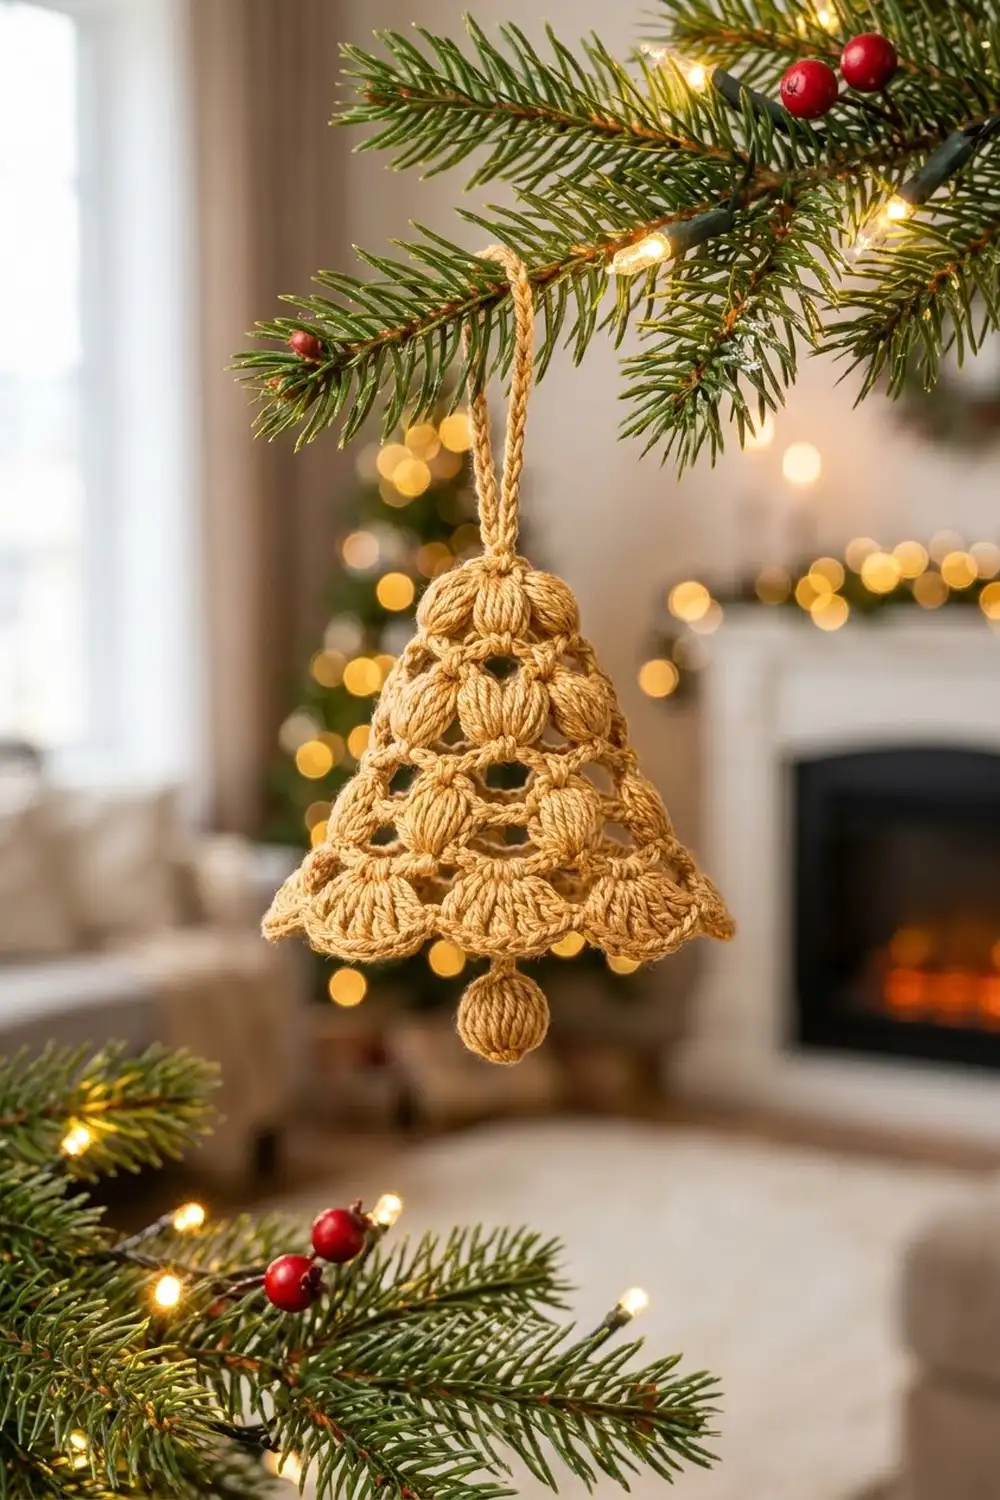
Final Notes
Here is the full measurement chain. The gauge piece (Rows 1–2) measures 2 in (5.1 cm) wide. Row 4 brings the body to 3.5 in (8.9 cm) wide, and the shell and trim rows bring it to 4.5 in (11.4 cm) wide × 4 in (10.2 cm) tall. The 37-stitch border adds 0.125 in (0.3 cm), for a finished bell of 4.75 in (12.1 cm) × 4.125 in (10.5 cm). With the 2 in (5.1 cm) loop and the 0.75 in (1.9 cm) clapper, the ornament hangs about 6.875 in (17.5 cm) long.
If you check each of these numbers as you go, every bell will match the last. That makes this an easy pattern to repeat for a whole tree, a gift tag topper or a tiny wreath accent.
Happy crocheting!