

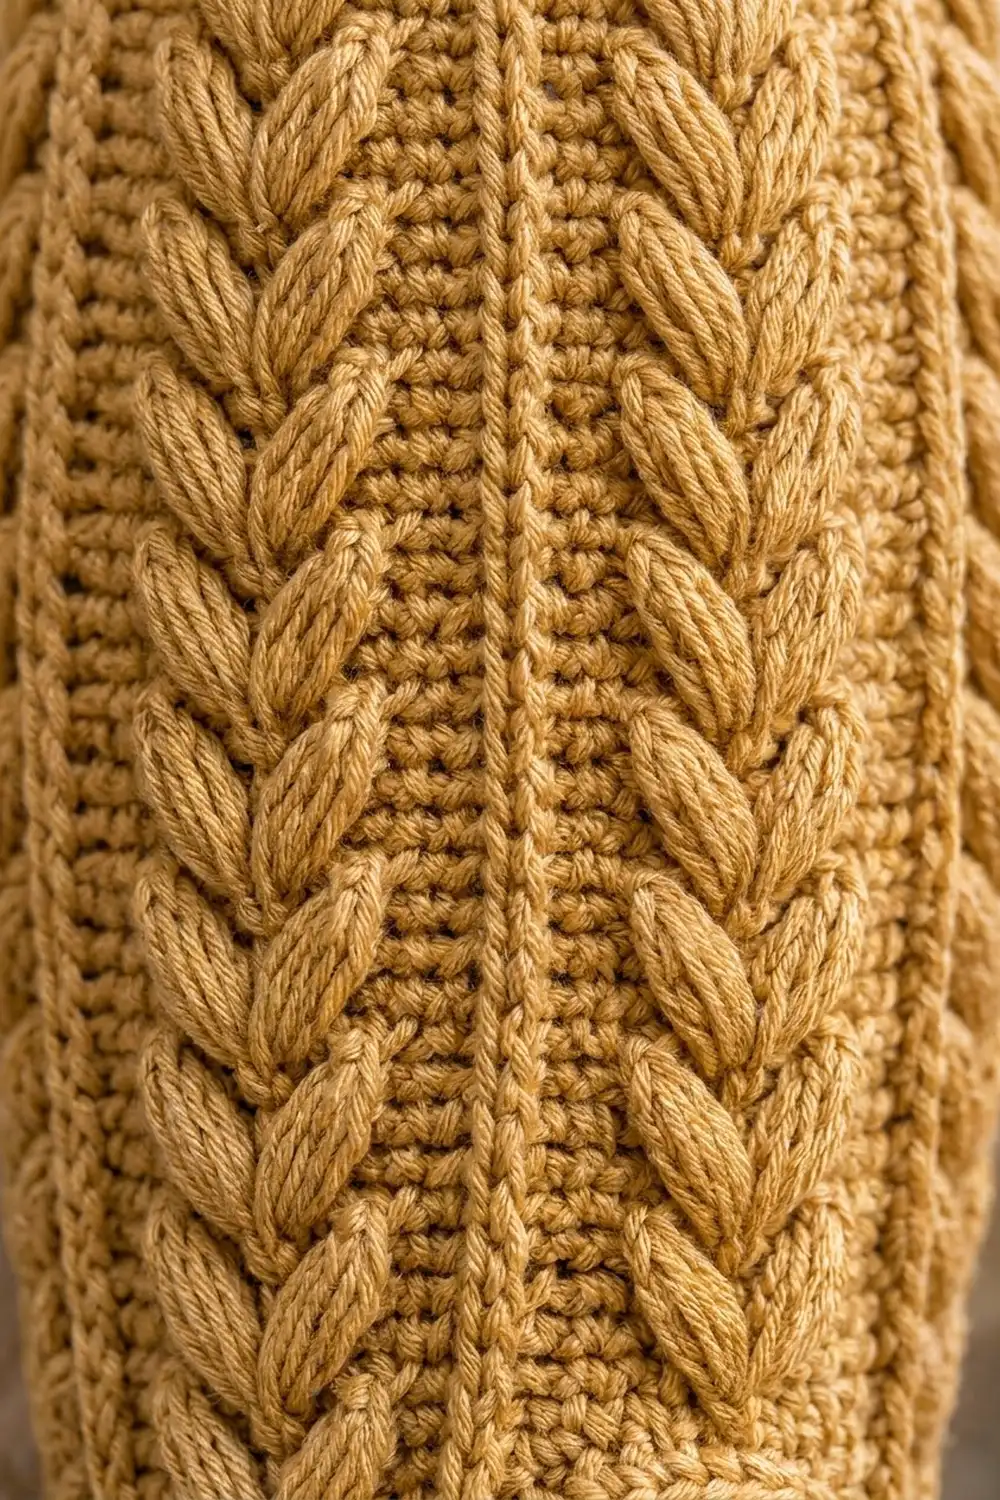
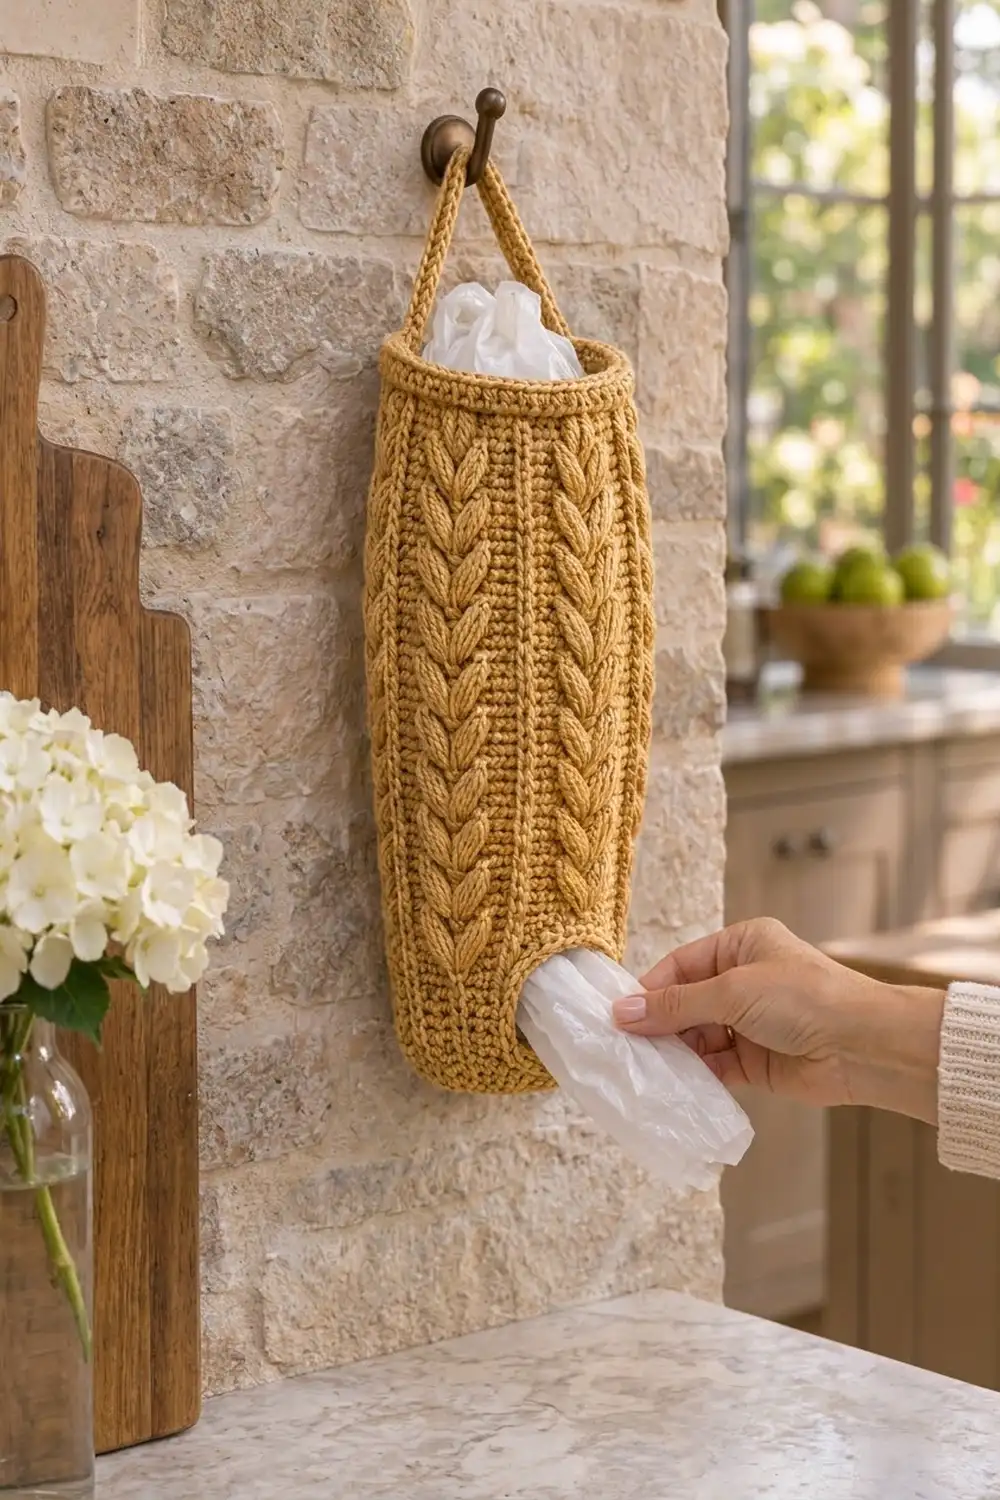
This plastic bag holder looks like a column of wheat sheaves. Six raised leaf columns run from the base to the rim, and slim ribs separate them. The leaves are front-post puff stitches set in V pairs, so they stand out from the firm half double crochet background.
The sample is a warm golden mustard, and the design works just as well in sage green or any solid kitchen color. Solid colors are best, because variegated yarn hides the leaves. All terms are US crochet terms.
The finished holder is about 7 in (17.8 cm) wide when laid flat and 16 in (40.6 cm) tall, not counting the handle. The handle adds a loop about 3 in (7.6 cm) tall.
You make it in one piece, from the bottom up. First you work an oval base. Then the body is worked as a tube, with a few short turned rows that leave a bag opening on the front. The piece finishes with a single crochet rim and a strap handle worked straight off the back of the rim. There is no sewing apart from fixing the end of the handle.
Finished Size and Construction
- Finished size: 7 in (17.8 cm) wide flat × 16 in (40.6 cm) tall
- Skill level: Intermediate
- Terminology: US
- Yarn weight: Worsted (#4)
- Hook: 5.0 mm (H-8)
- Number of pieces: 1 (base, body, rim and handle are all worked as one)
- Layout: Single tube, opening centered on the front, handle centered on the back
- Body circumference: 48 sts = 13.7 in (34.8 cm)
- Size before border: 15.2 in (38.6 cm) tall after the last half double crochet round
- Border (rim) depth: 0.75 in (1.9 cm)
Materials
Yarn: Use a smooth worsted-weight yarn, either acrylic or a cotton blend at about 190 m per 100 g. Smooth yarn gives clear leaf definition. Avoid fuzzy or brushed yarns.
- Golden Mustard (main color): 200 g, about 380 m (415 yd)
- Optional second colorway, Sage Green: the same amount, if you make a matching holder
These quantities include a margin of about 10%. The puff leaves use a lot of yarn, so don’t cut the amount down.
Tools:
– 5.0 mm (H-8) crochet hook
– 4 locking stitch markers
– Tapestry needle
– Scissors
– Measuring tape
– Pins and a spray bottle for blocking
Abbreviations (US Terms)
- ch: chain
- sl st: slip stitch
- sc: single crochet
- hdc: half double crochet
- BLO: back loop only
- FPdc: front post double crochet
- BPdc: back post double crochet
- st(s): stitch(es)
- RS / WS: right side / wrong side
Special stitch: Leaf (LF). Repeat this step 3 times: yarn over, insert the hook from front to back to front around the post of the stem stitch 2 rounds below, yarn over, and draw up a loop to the height of the current round. You now have 7 loops on the hook. Yarn over and draw through all 7 loops. Skip the stitch behind the LF.
Each LF counts as 1 st. In each leaf column, both LFs wrap around the same stem stitch, one before the center hdc and one after it. This makes them lean outward in a V.
Standing hdc: Start with a slip knot on the hook, yarn over, and work the hdc as usual.
Gauge and Checkpoints
- Body gauge: 14 sts and 10 rounds = 4 in (10.2 cm) in pattern. One round measures 0.4 in (1.0 cm).
- Rim and handle gauge: 16 sc and 18 rows = 4 in (10.2 cm).
Test the base first. It works as your swatch.
- After base Rnd 3: about 6 × 2 1/2 in (15.2 × 6.4 cm).
- After Rnd 6: circumference 13.7 in (34.8 cm), so the tube measures 6.9 in (17.5 cm) when flattened.
- After Rnd 20: body height 6.8 in (17.3 cm), measured from the base ridge.
- After Rnd 30: 10.8 in (27.4 cm).
- After Rnd 41: 15.2 in (38.6 cm).
If the piece is too big, go down a hook size (4.5 mm). If it is too small, go up to 5.5 mm. Don’t change the stitch counts, because the leaf repeat needs exactly 48 sts.
Base
Ch 16.
Rnd 1: Hdc in 3rd ch from hook (the skipped ch-2 does not count as a st), hdc in next 12 ch, 4 hdc in last ch. Rotate and work along the other side of the foundation chain: hdc in next 12 ch, 3 hdc in the same ch as the first hdc. Join with sl st to the first hdc. (32 sts)
Rnd 2: Ch 1 (does not count here or anywhere else), 2 hdc in first st, hdc in next 12, 2 hdc in each of next 4, hdc in next 12, 2 hdc in each of last 3. Join. (40 sts)
Rnd 3: Ch 1, 2 hdc in first st, hdc in next st, hdc in next 12, [2 hdc in next, hdc in next] 4 times, hdc in next 12, [2 hdc in next, hdc in next] 3 times. Join. (48 sts)
Fasten off. Check the base against the measurement above.
Body
The 8-stitch repeat is: leaf column (7 sts) + rib (1 st). There are 6 repeats.
Rnd 4 (set-up): Count 6 sts on from the join and attach the yarn with a standing hdc in the BLO of the 7th st. Hdc in the BLO of each st around. Join. (48 sts)
This start position centers stitches 1–7 on a long side of the oval, which will be the front. The unworked front loops form a crisp ridge at the base edge.
Rnd 5: Ch 1, hdc in next 7, FPdc around next st, repeat from * 5 more times. Join. (48 sts)
Rnd 6 (leaf): Ch 1, hdc in next 2, LF, hdc in next st (this is the stem), LF, hdc in next 2, FPdc around the FPdc, repeat from * 5 more times. Join. (48 sts: 6 ribs, 12 LF, 30 hdc)
On this round the LFs wrap around the 4th st of each column in Rnd 4.
Bag Opening Rows
Work these rows back and forth over sts 8–48 only. Leave sts 1–7, the front leaf column, unworked.
Row 7 (WS): Ch 1, turn. Starting in st 48, work BPdc around the rib, hdc in next 7, BPdc around next rib, repeat from * 4 more times. End on st 8. (41 sts)
Row 8 (RS): Ch 1, turn. FPdc around the rib, hdc in next 2, LF, hdc, LF, hdc in next 2, FPdc, repeat from * 4 more times. (41 sts)
Rows 9 and 11: Work as Row 7.
Rows 10 and 12: Work as Row 8.
At the end of Row 12 you are at st 48. Ch 7 and do not join. This chain bridges the opening, which is 2 in (5.1 cm) wide and 2.4 in (6.1 cm) tall. The bottom of the opening sits 1.2 in (3.0 cm) above the base ridge.
Upper Body
From here on, each round starts with the rib.
Rnd 13: FPdc around the first rib of Row 12, hdc in next 7, FPdc, repeat from * 4 more times, hdc in each of the 7 ch. Join to the first FPdc. (48 sts)
Rnd 14: Ch 1, FPdc around the FPdc, hdc in next 2, LF, hdc, LF, hdc in next 2, repeat from * 4 more times, FPdc, hdc in next 7. Join. (48 sts)
Above the opening the column is worked as plain hdc on this round only, because there is no stem 2 rounds below.
Rnds 15–41, odd rounds (plain): Ch 1, FPdc around the FPdc, hdc in next 7 6 times. Join. (48 sts)
Rnds 16–40, even rounds (leaf): Ch 1, FPdc around the FPdc, hdc in next 2, LF, hdc, LF, hdc in next 2 6 times. Join. (48 sts)
The leaves above the opening start again on Rnd 16.
Checkpoint: Rnd 41 is a plain round. The body is 15.2 in (38.6 cm) tall from the base ridge, with 48 sts.
Border (Rim, Opening Edging and Handle)
Border gauge: 16 sc = 4 in (10.2 cm), and each sc round measures 0.25 in (0.6 cm).
Top Rim
Rnds 42–44: Ch 1, sc in each st around. Join. (48 sc each round: 24 on the front half and 24 on the back half when flattened)
Do not fasten off yet; you’ll use the same yarn for the handle.
Why the math works: you work one sc into each hdc, so the count stays at 48. However, sc gauge is tighter than hdc gauge. At 16 sc per 4 in, 48 sc measure 12 in (30.5 cm) around, so the top is 6 in (15.2 cm) wide flat. This gentle draw-in gives the rounded, slightly narrower top that keeps bags from spilling out. The 3 rounds add 0.75 in (1.9 cm), so 15.2 + 0.75 = about 16 in (40.6 cm) in total.
Handle
Lay the holder flat with the opening centered on the front. Rnd 44 starts at the rib to the right of the opening column, so the back center falls between sts 20 and 21.
Row 1: Sl st along to st 13. Ch 1, sc in sts 13–17. (5 sc)
Rows 2–36: Ch 1, turn, sc in each st. (5 sc)
The strap is 1.25 in (3.2 cm) wide and 8 in (20.3 cm) long.
Without twisting the strap, bend it into an arch. Sl st the last row to sts 25–29 of Rnd 44 through both layers. Fasten off. This leaves 7 sts, or 2 in (5.1 cm), between the legs of the handle, centered on the back.
Opening Edging
With the RS facing, join the yarn at a bottom corner of the opening.
Rnd 1: Ch 1. Work sc evenly around the opening:
– 7 sc along the bottom edge (one in each st of Rnd 6)
– 12 sc up the side (2 per row end)
– 7 sc along the chain (one in each ch)
– 12 sc down the other side
Join. (38 sc)
Rnd 2: Sl st loosely in each sc. Fasten off.
Why the math works: 2 sc per row end over 6 rows of 0.4 in (1.0 cm) gives 12 sc over 2.4 in (6.1 cm). That matches the 5 sc per inch of the rim gauge closely enough to lie flat. The edging softens the corners into a rounded opening of about 1.5 × 1.9 in (3.8 × 4.8 cm).
Final Blocking
- Weave in all the ends along the ribs on the WS.
- Mist the holder lightly until it is damp. Don’t soak it.
- Stuff it firmly with a rolled towel so that it reaches 7 in (17.8 cm) wide flat.
- Gently pull it to 16 in (40.6 cm) tall and stand the ribs straight and vertical.
- Pinch each leaf pair into a crisp V with your fingers.
- Round the opening over a 1.5 in (3.8 cm) object, such as a small jar lid.
- Let it dry completely, then take out the towel.
Final Quality-Control Checklist
- 48 sts on every body round and on every rim round
- 6 straight ribs with no drift to the left or right
- 12 LFs on every leaf round, with only 10 on Rows 8, 10 and 12, and on Rnd 14
- The opening is centered on the front and the handle is centered on the back
- The base ridge is even all around
- The handle is untwisted and secured through both layers
- Height is 16 in (40.6 cm) and flat width is 7 in (17.8 cm)
Troubleshooting
Ribs slant: Joining into the wrong stitch shifts the round. Always join to the first stitch of the round and start again directly above it.
Leaves look flat: Pull the puff loops up to the full height of the current round, and wrap them around the stem post, not into its top.
Holes behind the leaves: You forgot to skip the stitch behind the LF. Count 48 sts on that round.
Opening edges ruffle: Use fewer sc per side, for example 11 instead of 12.
Top flares: Go down 0.5 mm in hook size for the rim only.
The tube is too narrow: You are pulling the post stitches too tight. Relax your tension or go up a hook size.
Care
Hand wash in cool water and lay it flat to dry, reshaping it over a rolled towel. Don’t tumble dry, as the heat flattens the leaves.
Final Notes
Here is the measurement chain for the whole project:
– The base is 6 × 2 1/2 in (15.2 × 6.4 cm) and holds 48 sts.
– The tube measures 13.7 in (34.8 cm) around, which is 6.9 in (17.5 cm) wide flat.
– 38 hdc rounds give 15.2 in (38.6 cm) of height.
– The 0.75 in (1.9 cm) rim brings the total to 16 in (40.6 cm) and draws the top in to 6 in (15.2 cm).
– The 8 in (20.3 cm) strap becomes the hanging loop.
If you hit each checkpoint, the finished holder will match. Happy crocheting!