

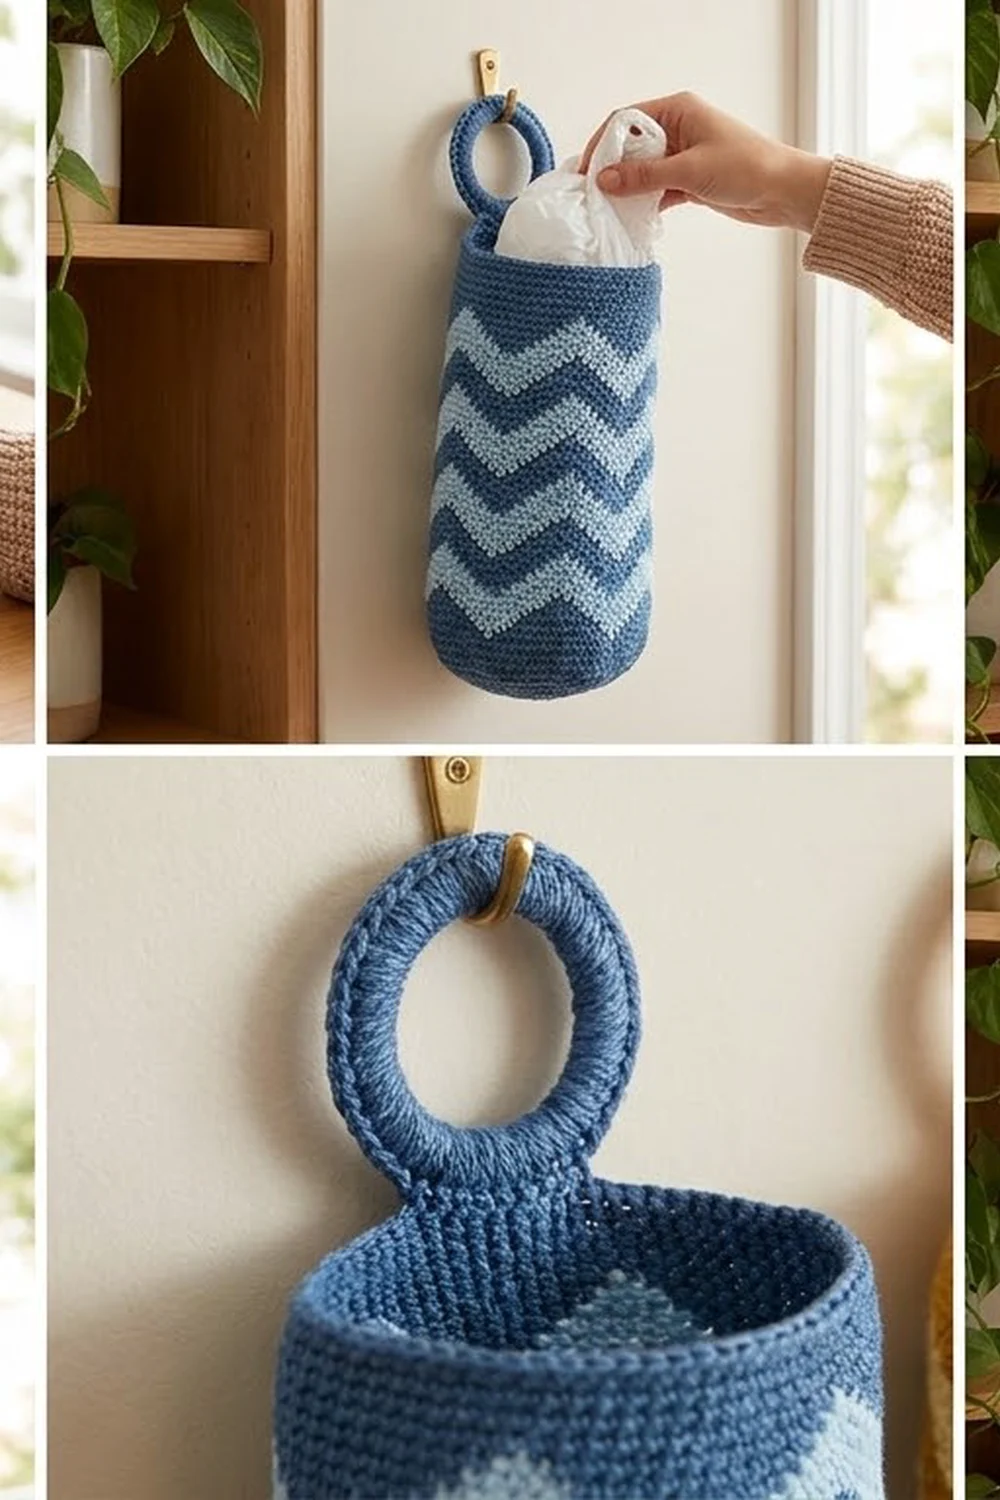
Plastic bags have a way of taking over a kitchen drawer. This tall, slim holder gives them one tidy home. You stuff bags in at the top, pull them out one at a time from the bottom, and hang the holder on a hook by its covered ring.
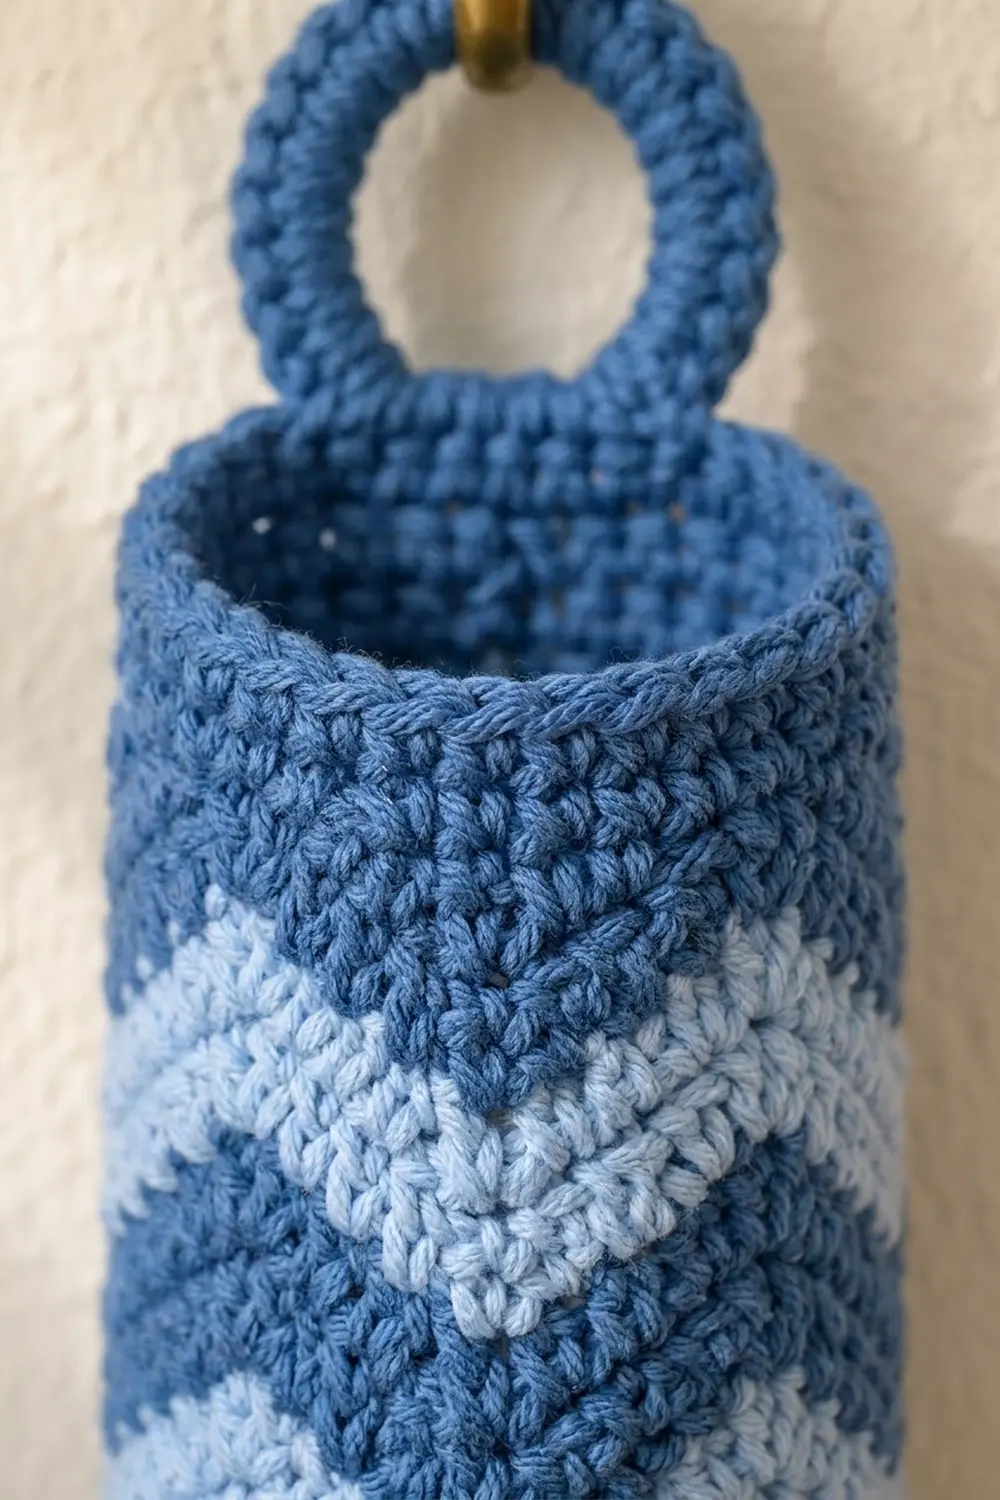
The Harbor Wave design uses two blues, a deep denim and a soft sky blue, in crisp chevron stripes that wrap all the way around the tube. Solid denim bands finish both ends, so the top and bottom edges stay straight even though the stripes zigzag. The same pattern also looks cheerful in mustard gold and butter yellow.
The pattern is written in US crochet terms. The finished holder measures 6 in (15.2 cm) wide when laid flat, 12 in (30.5 cm) around, and 16 in (40.6 cm) long, not counting the ring.
Construction is simple:
– Crochet the tube from the bottom up in joined rounds of single crochet ripple.
– Add a straight leveling round at each end.
– Finish the top with a corded rim and the bottom with a gathered cuff.
– Cover a ring with single crochet, work a short tab off it, and sew the tab inside the back of the rim.
Finished Size and Construction
- Finished size: 6 in (15.2 cm) wide flat x 16 in (40.6 cm) long
- Circumference: 12 in (30.5 cm)
- Skill level: Easy to intermediate (basic stitches plus decreases and simple color changes)
- Terminology: US crochet terms
- Yarn weight: Worsted (#4)
- Hook: 5.0 mm (H-8)
- Number of pieces: 2 (1 tube body, 1 ring hanger with tab)
- Layout: One vertical tube, with the ring centered above the back of the rim
- Body size before border: 6 in (15.2 cm) wide flat x 14.9 in (37.8 cm) long
- Border depth: top rim about 0.4 in (1.0 cm); bottom cuff about 0.7 in (1.8 cm)
- Ring: 2 in (5.1 cm) ring, about 2.75 in (7.0 cm) across once covered
Materials
Choose a smooth worsted weight yarn with good stitch definition. Acrylic is washable and holds its shape well. Cotton or a cotton blend gives a firmer, crisper tube. Avoid fuzzy or loosely plied yarns, because the chevron points need to read clearly.
- Color A, Denim Blue: 70 g (about 126 m)
- Color B, Light Sky Blue: 40 g (about 72 m)
Quantities include a margin of roughly 15 percent for testing gauge and weaving in ends.
Tools:
- 5.0 mm (H-8) crochet hook, or the size needed for gauge
- One 2 in (5.1 cm) plastic or wooden ring
- 4 stitch markers (one in a contrasting color for the start of the round)
- Tapestry needle
- Scissors
- Measuring tape
- Rust-proof pins and a spray bottle for blocking
Abbreviations (US Terms)
- ch – chain
- sl st – slip stitch
- sc – single crochet
- hdc – half double crochet
- dc – double crochet
- st(s) – stitch(es)
- rnd(s) – round(s)
- rep – repeat
- A / B – color A / color B
Special stitches:
- sc2tog (single crochet 2 together): [insert hook in next st, yarn over, pull up a loop] twice, yarn over, pull through all 3 loops on hook. 2 sts become 1.
- sc3tog (single crochet 3 together): [insert hook in next st, yarn over, pull up a loop] 3 times, yarn over, pull through all 4 loops on hook. 3 sts become 1. This forms each chevron valley.
- Reverse sc (crab stitch): working from left to right (if you are right-handed), insert hook in the next st to the right, pull up a loop, yarn over, pull through both loops. This creates a corded edge.
- Color change: work the last st of the round until 2 loops remain, drop the old color, pull the new color through, then join with the new color. Carry the unused color loosely up the inside of the tube.
Gauge and Checkpoints
Gauge: 16 sc and 18 rnds = 4 in (10.2 cm) in sc worked in the round.
In the ripple section, one 12-stitch chevron repeat measures 3 in (7.6 cm) across. Each 6-round stripe measures about 1.3 in (3.3 cm) tall.
Because this is a single tube, the tube itself is your test piece. Work Rnds 1–14, then stop and measure before you commit to the full length.
Checkpoints:
- After Rnd 2: the tube measures 12 in (30.5 cm) around, or 6 in (15.2 cm) flat.
- After Rnd 14: the tube is about 3.1 in (7.9 cm) tall, measured straight up the side.
- After Rnd 38: about 8.4 in (21.3 cm) tall.
- After Rnd 67 (body complete): 14.9 in (37.8 cm) tall.
- After borders: 16 in (40.6 cm) tall.
If your tube is too big (more than 6.25 in or 15.9 cm flat), go down a hook size and restart.
If it is too small (less than 5.75 in or 14.6 cm flat), go up a hook size.
Do not change the stitch count. The chevron repeat depends on exactly 48 stitches.
If only the height is off, add or remove whole stripe pairs (12 rnds, about 2.7 in or 6.9 cm). Keep the stripe sequence ending with color A.
Body
The body is worked from the bottom up in joined rounds. Do not turn. Place the contrasting marker in the first stitch of each round.
Chevron logic: every ripple round has four 12-stitch repeats. Each repeat has one peak (3 sc in one stitch, +2) and one valley (sc3tog, −2), so every ripple round stays at 48 sts. The round always starts in the center stitch of a peak, so the peaks and valleys stack in straight columns with no drift.
Rnd 1 (A): Ch 48, sl st in first ch to form a ring, taking care not to twist. Ch 1, sc in each ch around, join with sl st to first sc. (48 sc)
Rnd 2, base leveling round (A): Ch 2 (does not count as a st), dc in next 3 sts, hdc in next 2 sts, sc in next 3 sts, hdc in next 2 sts, dc in next 2 sts; rep from * 3 more times. Join with sl st to first dc, changing to B. (48 sts: 20 dc, 16 hdc, 12 sc)*
This round builds the chevron shape into the fabric so that Rnd 1 stays straight. The first dc of each repeat sits under a future peak, and the 3 sc sit under a future valley.
Rnd 3, first ripple round (B): Ch 1, 2 sc in first st (the first dc), sc in next 4 sts, sc3tog, sc in next 4 sts, 3 sc in next st; rep from * 2 more times, sc in next 4 sts, sc3tog, sc in next 4 sts, sc in same st as the first 2 sc. Join with sl st to first sc. (48 sc)*
Check the placement: each sc3tog is centered on the middle sc of a 3-sc group from Rnd 2, and each 3-sc peak is worked into the first dc of a repeat.
Ripple round (used for Rnds 4–62): Ch 1, 2 sc in first st (the center sc of the last peak), sc in next 4 sts, sc3tog, sc in next 4 sts, 3 sc in next st; rep from * 2 more times, sc in next 4 sts, sc3tog, sc in next 4 sts, sc in same st as the first 2 sc. Join with sl st to first sc. (48 sc)*
Each sc3tog is always centered over the previous sc3tog. Each 3-sc group is always worked into the center sc of the previous peak. The final “sc in same st” completes the peak that is split across the round join.
Work the ripple round in this color sequence. Change color on the join of the last round of each stripe.
- Rnds 4–8: B (stripe 1 is Rnds 3–8, 6 rnds)
- Rnds 9–14: A
- Rnds 15–20: B
- Rnds 21–26: A
- Rnds 27–32: B
- Rnds 33–38: A
- Rnds 39–44: B
- Rnds 45–50: A
- Rnds 51–56: B
- Rnds 57–62: A
That makes 10 stripes of 6 rnds each, 5 in B and 5 in A. Cut B after Rnd 56, leaving a 6 in (15.2 cm) tail. (48 sc after every ripple round)
Rnd 63, top leveling round (A): Ch 1, sc in next 3 sts, hdc in next 2 sts, dc in next 3 sts, hdc in next 2 sts, sc in next 2 sts; rep from * 3 more times. Join with sl st to first sc. (48 sts: 20 sc, 16 hdc, 12 dc)*
The first sc of each repeat lands on a peak center. The middle dc of each 3-dc group lands on a valley, which fills the valley and levels the edge.
Rnds 64–67 (A): Ch 1, sc in each st around, join with sl st to first sc. (48 sc) Do not fasten off. Continue to the top border.
Body checkpoint: 6 in (15.2 cm) flat x 14.9 in (37.8 cm) tall, with straight top and bottom edges.
Ring Hanger
Ring cover (A): Make a slip knot on the hook. Insert the hook through the center of the 2 in (5.1 cm) ring, yarn over, pull up a loop, then yarn over and pull through both loops. Work 39 more sc over the ring the same way, pushing the stitches together so the ring is fully covered. Join with sl st to first sc. (40 sc)
Tab: Continue in rows on the ring cover.
Row 1: Ch 1, sc in the first 6 sts of the ring cover, turn. (6 sc)
Rows 2–8: Ch 1, sc in each st across, turn. (6 sc)
Fasten off, leaving a 12 in (30.5 cm) tail for sewing. The tab measures 1.5 in (3.8 cm) wide x 1.8 in (4.6 cm) long.
Border
Border gauge: the border uses the body gauge, 16 sc = 4 in (10.2 cm). Flatten the tube with the round join at the center back. The front and back each have 24 sts, which is 6 in (15.2 cm) across.
Top rim
Rnd 1 (A): Ch 1, sc in each st around, join with sl st to first sc. (48 sc: 24 front, 24 back)
Rnd 2 (A): Ch 1, reverse sc in each st around, join with sl st to first st. (48 reverse sc: 24 front, 24 back) Fasten off.
Bottom cuff
Rnd 1 (A): Turn the tube upside down. Join A in the free loop of the foundation chain at the round join. Ch 1, sc in each free loop around, join with sl st to first sc. (48 sc: 24 front, 24 back)
Rnd 2, trim round (A): Ch 1, sc in next 4 sts, sc2tog; rep from * 7 more times. Join with sl st to first sc. (40 sts = 32 sc worked 1-per-stitch + 8 sc2tog; 20 front, 20 back)*
Rnd 3 (A): Ch 1, sc in each st around, join with sl st to first sc. (40 sc) Fasten off.
Why the math works:
– Both borders start from 48 sts, exactly the body count, so the rims lie flat with no ruffling.
– The top rim neither adds nor removes stitches, so the opening stays 12 in (30.5 cm) around for easy stuffing.
– The bottom cuff removes 8 sts evenly, one in every 6 sts. That brings the opening to 40 sts, or 10 in (25.4 cm) around and about 3.2 in (8.1 cm) across. This is snug enough to hold bags in but loose enough to pull one out.
The leveling rounds also balance each other. Every column gets one dc and one sc across Rnds 2 and 63: dc below each peak with sc above it, and sc below each valley with dc above it. As a result, the sides of the tube stay the same length as the center front.
Attach the ring:
1. Find the center back of the tube (the round join).
2. Slide the tab inside the top of the tube so the ring stands above the rim. Let 1 in (2.5 cm) of the tab overlap inside, leaving 0.8 in (2.0 cm) between the ring and the rim.
3. Whipstitch all 4 edges of the overlap to the inside of Rnds 64–67 and top border Rnd 1. Catch only the back loops so nothing shows on the outside.
4. Sew 2 rows of stitches across the tab for strength.
Final Blocking
- Weave in all ends on the inside of the tube, keeping each end in its own color where possible.
- Roll a towel into a firm tube about 3 in (7.6 cm) across and slide it inside the holder.
- Mist the holder evenly with water until it is damp but not soaking.
- Lay it flat with the round join at the center back. Smooth it to 6 in (15.2 cm) wide x 16 in (40.6 cm) long.
- Pin the top rim and bottom cuff straight, and nudge each chevron point so the stripes look even.
- Leave it until completely dry, then remove the towel and pins.
- For cotton, you can use light steam from an iron held above the fabric instead of misting. Never press acrylic with a hot iron.
Final Quality-Control Checklist
- Every ripple round has 48 sts.
- All chevron peaks and valleys stack in straight vertical columns.
- There are 10 stripes of 6 rnds each, alternating B and A.
- The top and bottom edges are straight, not wavy.
- The tube measures 6 in (15.2 cm) flat and 16 in (40.6 cm) long.
- The top rim has 48 reverse sc, and the bottom cuff has 40 sc.
- The bottom opening is about 3.2 in (8.1 cm) across.
- The ring is centered over the back join, and the tab is sewn firmly on all 4 edges.
- No carried yarn shows on the outside.
Troubleshooting
Chevrons drift sideways: the sc3tog is not centered. Always work it over the st before the previous valley, the valley itself, and the st after.
Stitch count changes: check that every repeat has one 3-sc peak and one sc3tog. The last st of each round must be the “sc in same st as the first 2 sc.”
Top or bottom edge is wavy: a leveling round was misaligned. The dc groups in Rnd 2 must sit under the peaks, and the dc groups in Rnd 63 must sit over the valleys.
Visible jog at the join: this is normal in joined rounds. Keep the join at the back, where the ring tab helps hide it.
Bags will not come out: the cuff is too tight. Rework cuff Rnd 2 as (sc 10, sc2tog) 4 times for 44 sts (40 sc + 4 sc2tog, 22 front, 22 back). This makes an opening 11 in (27.9 cm) around.
Bags fall out: add one more cuff round of (sc 3, sc2tog) 8 times, for 32 sts.
Ring tab stretches: sew a second row of stitches across the tab, or use cotton for the ring cover.
Care
Machine wash acrylic on a gentle, cool cycle and lay it flat to dry. Hand wash cotton and reshape it while damp. Do not tumble dry.
Final Notes
The whole holder rests on one measurement chain:
– 16 sc = 4 in (10.2 cm), so 48 sts make a 12 in (30.5 cm) tube that lies 6 in (15.2 cm) flat.
– Four 12-stitch repeats of 3 in (7.6 cm) each fill that circumference exactly.
– 18 rnds = 4 in (10.2 cm), so the 67 body rounds reach 14.9 in (37.8 cm).
– The top rim and bottom cuff bring the holder to 16 in (40.6 cm).
Hang it near the door or under the sink, fill it from the top, and pull bags from the bottom.
Happy crocheting!