

This hanging paper towel holder brings a small, cheerful Christmas touch to the kitchen. Two cream cords hang from a wooden ring in a neat triangle. They hold one dowel for a paper towel roll and a second dowel for a tea towel. Eight mini stockings run along the cords, and a larger stocking with a cream heel and toe decorates the towel.
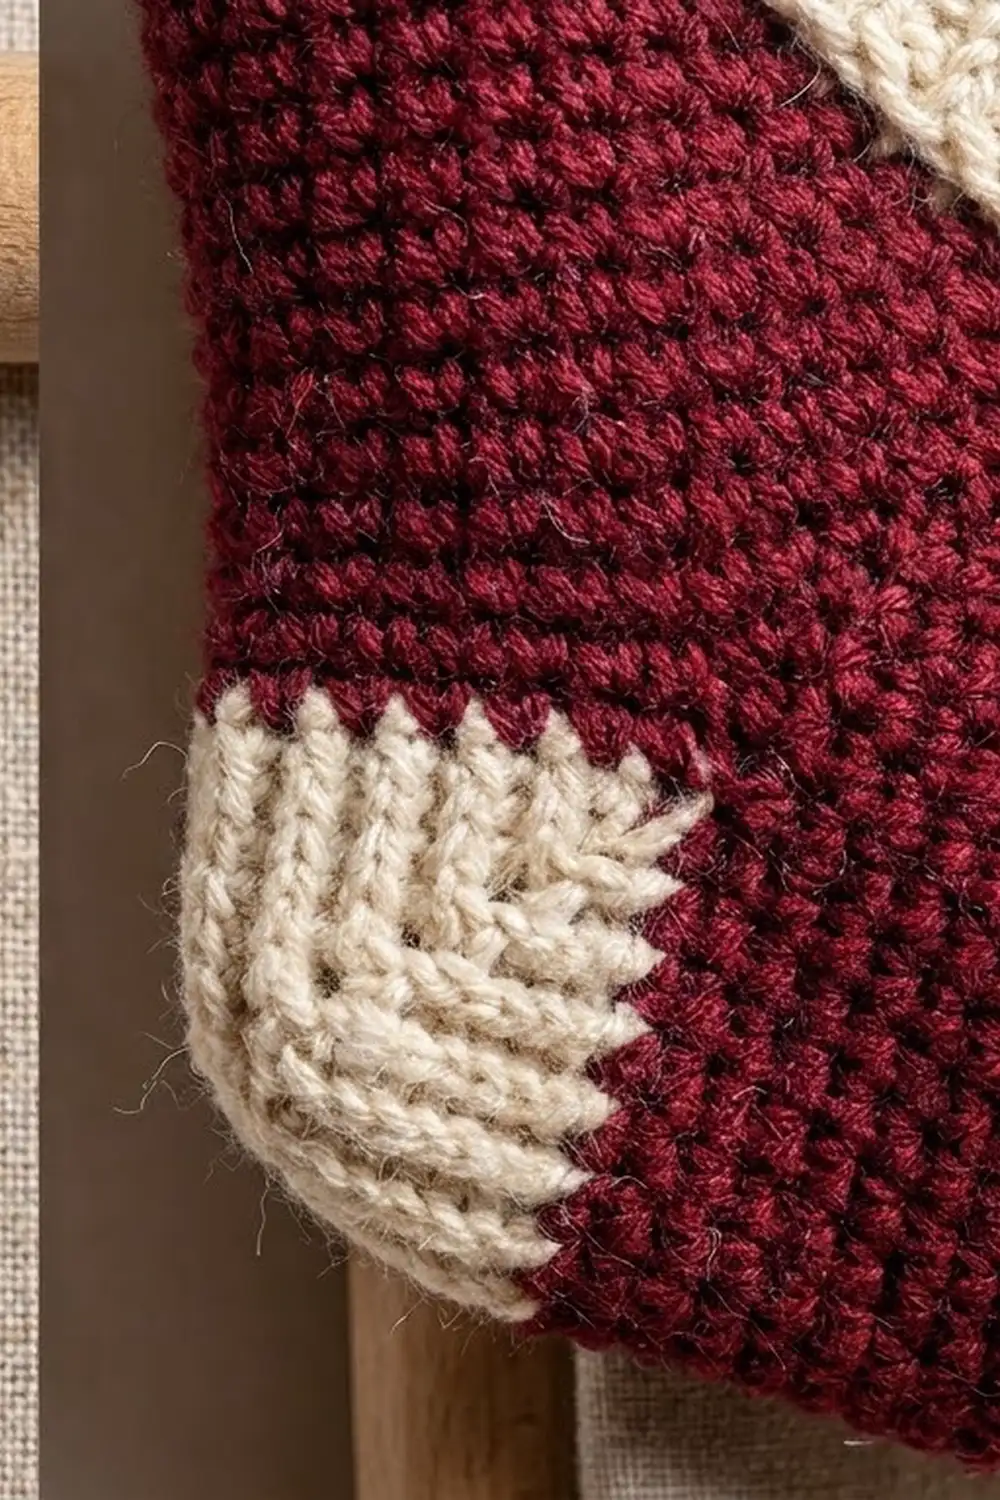
The colors are classic and soft: burgundy red and warm cream, with natural wood. The stockings are worked in tight single crochet so they look crisp and lie flat. Each cuff is worked through back loops only, which gives it a ribbed, knit-like edge.
The pattern uses US crochet terms. The finished holder measures about 25 in (63.5 cm) tall from the top of the ring to the lower dowel, and 14 in (35.6 cm) wide.
Construction is simple. You make two cords and nine flat stockings, then join everything to the hardware with a yarn needle. No piece is larger than your palm, so this is a good weekend project.
Finished Size and Construction
- Finished holder: about 25 in (63.5 cm) tall × 14 in (35.6 cm) wide
- Skill level: Easy to Intermediate (the feature stocking uses simple color changes)
- Terminology: US
- Yarn weight: Worsted (#4)
- Hook: 4.0 mm (G-6)
- Number of crocheted pieces: 11 (2 cords, 8 mini stockings, 1 feature stocking)
- Layout: each cord carries 4 mini stockings: 3 on the upper leg and 1 on the drop between the dowels
- Mini stocking: 1.8 in (4.6 cm) tall × 1.3 in (3.3 cm) wide
- Feature stocking: 2.8 in (7.1 cm) tall × 2.4 in (6.1 cm) wide
- Size before cuff (mini / feature): 1.4 in (3.6 cm) / 2.2 in (5.6 cm) tall
- Cuff depth (mini / feature): 0.4 in (1.0 cm) / 0.6 in (1.5 cm)
- Cord: 32.5 in (82.6 cm) long × about 3/8 in (1.0 cm) thick
Materials
Choose a smooth worsted-weight cotton or a cotton-acrylic blend. Cotton holds its shape on a working kitchen wall and does not stretch much under the weight of the dowels. Avoid fuzzy yarns, because they hide the ribbed cuff texture.
- Cream: 30 g / 54 m (about 59 yd) for the cords, cuffs, heel, toe and sole
- Burgundy red: 25 g / 45 m (about 49 yd) for the stocking bodies
Both amounts include a margin of about 25% for swatching and joining.
Tools and hardware:
- 4.0 mm (G-6) crochet hook
- Tapestry needle
- Scissors and stitch markers
- 1 wooden ring, 3 in (7.6 cm) across, with stock about 3/8 in (1.0 cm) thick
- 2 wooden dowels, each 1 in (2.5 cm) in diameter and 14 in (35.6 cm) long
- Measuring tape
- Rustproof pins and a blocking mat
Abbreviations (US Terms)
- ch – chain
- sc – single crochet
- sc2tog – single crochet 2 together
- BLO – back loop only
- st(s) – stitch(es)
- RS / WS – right side / wrong side
Special stitch: back-bump sc. Turn the chain over. Each chain has a small horizontal bar on the back, called the back bump. Insert the hook under that bump only and complete a single crochet. This leaves the neat V’s on the front of the chain showing, which gives the cord its braided look.
Gauge and Checkpoints
Stocking gauge: 18 sc and 20 rows = 4 in (10.2 cm). That works out to 4.5 sts and 5 rows per inch.
Cord gauge: 4 back-bump sc = 1 in (2.5 cm) along the cord.
Make one mini stocking before anything else. It is a fast gauge test and shows whether your tension suits the design.
- After Row 4 (mini): the leg should measure 0.9 in (2.3 cm) wide × 0.8 in (2.0 cm) tall.
- After Row 7 (mini): the stocking should be 1.4 in (3.6 cm) tall, with a foot 1.3 in (3.3 cm) long.
- After the cuff: it should be 1.8 in (4.6 cm) tall in total.
- After the first 20 sts of the cord: that section should measure 5 in (12.7 cm).
If your pieces come out too big, go down 0.5 mm in hook size. If they are too small, go up 0.5 mm. Size matters most on the cord, because the hardware loops must fit the dowels.
Cord (Make 2, Cream)
Ch 131.
Row 1: Sc in the back bump of the 2nd ch from the hook and in the back bump of each ch across. You will have 130 sc. Fasten off and leave a 12 in (30.5 cm) tail at each end.
The finished cord is 32.5 in (82.6 cm) long. Place stitch markers at the following points, counting from the starting end:
- Sts 1–14: ring loop, 3.5 in (8.9 cm)
- Sts 15–74: upper leg, 15 in (38.1 cm)
- Sts 75–88: upper dowel loop, 3.5 in (8.9 cm)
- Sts 89–116: drop, 7 in (17.8 cm)
- Sts 117–130: lower dowel loop, 3.5 in (8.9 cm)
Check the total: 14 + 60 + 14 + 28 + 14 = 130 sts.
Mini Stocking (Make 8)
The stocking is worked flat from the top of the leg down to the toe. The cuff is added last.
With red, ch 5.
Row 1: Sc in the 2nd ch from the hook and in each ch across. Turn. (4 sc)
Rows 2–4: Ch 1, sc in each st across. Turn. (4 sc per row) At the end of Row 4, ch 3 for the toe.
Row 5: Sc in the 2nd ch from the hook and in the next ch (2 sc), then sc in each of the 4 leg sts. Turn. (6 sc)
Row 6: Ch 1, sc in each st across. Turn. (6 sc)
Row 7: Ch 1, sc2tog, sc in the next 2 sts, sc2tog. (4 sc) Fasten off red.
Decreasing at both ends of Row 7 rounds off the toe and the heel. The foot is 1.3 in (3.3 cm) long.
Cuff: See the Border section below.
Feature Stocking (Make 1)
This stocking uses intarsia: you work each color from its own small bobbin and do not carry the unused color across the back. Change colors on the last yarn-over of the stitch before the new color starts.
With red, ch 8.
Row 1: Sc in the 2nd ch from the hook and in each ch across. Turn. (7 sc)
Rows 2–6: Ch 1, sc in each st across. Turn. (7 sc per row) At the end of Row 6, ch 5 for the toe.
Row 7: Sc in the 2nd ch from the hook and in the next 3 ch (4 sc), then sc in each of the 7 leg sts. Turn. (11 sc)
Rows 8–10: Ch 1. Work 3 sc in cream at the toe end, 5 sc in red across the center, and 3 sc in cream at the heel end. The heel end is the same edge as the back of the leg. Work these rows in whichever direction they fall. Turn. (11 sc per row)
Row 11 (cream only): Ch 1, sc2tog, sc in the next 7 sts, sc2tog. (9 sc) Fasten off.
Before the cuff, the stocking is 2.2 in (5.6 cm) tall and the foot is 2.4 in (6.1 cm) long. Rows 8–10 give you the cream heel and toe blocks. Row 11 joins them with a cream sole, and its decreases round the corners.
Make All Pieces
- Cream: 2 cords, 9 cuffs, and the heel, toe and sole of the feature stocking
- Red: 8 mini stocking bodies and 1 feature stocking body
Layout, reading from the top down. M marks a mini stocking. The toes point outward, away from the center.
              [ RING ]
             /        \
         M  /          \  M      st 26
        M  /            \  M     st 44
       M  /              \  M    st 62
      ===O================O===   upper dowel (sts 75-88)
         |                |
       M |                | M    st 102
      ===O================O===   lower dowel (sts 117-130)
          [feature stocking on towel]
To make the toes point outward on both sides, simply flip the stockings for one cord. Single crochet looks almost the same on both sides.
Joining
Ring loop: Wrap sts 1–14 of the cord over the ring. Sts 6–9 should hug the wood. Whipstitch sts 1–5 flat against sts 10–14, joining them stitch to stitch: st 1 to st 14, st 2 to st 13, and so on. Weave in the tail. Repeat with the second cord so the two loops sit side by side on the ring.
Dowel loops: Fold sts 75–88 into a ring and sew st 75 to st 88 with three firm passes. Do the same with sts 117–130, sewing st 117 to st 130. Each loop is 3.5 in (8.9 cm) around, which slips over a 1 in (2.5 cm) dowel with a little ease. Use the end tail to sew the lower loop.
Stockings: On each cord, pin a mini stocking at st 26, st 44, st 62 and st 102. These positions are 4.5 in (11.4 cm) apart on the upper leg. Sew the back top corner of each cuff to the outer side of the cord through both cuff rows. Make 4 small stitches into the cord itself, not around it.
Tension: Keep your stitches snug but not puckered. The stocking should swing slightly without twisting around the cord.
Hang: Slide the dowels through the loops so each loop sits 0.5 in (1.3 cm) in from the dowel end. The loops on each dowel will be 13 in (33.0 cm) apart, which is 6.5 in (16.5 cm) on each side of center. With a 15 in (38.1 cm) upper leg, the triangle stands about 13.5 in (34.3 cm) tall.
Size checkpoint: Measure from the top of the ring to the lower dowel. It should be close to 25 in (63.5 cm).
Tack the feature stocking to the towel with 4 or 5 small stitches at the cuff corners and the sole, so it is easy to remove.
Border (Cuff Trim)
The cuffs are the only trim on this design. They are worked at the stocking gauge of 4.5 sts per inch.
Mini cuff: Turn the stocking upside down. Join cream in the first free loop of the foundation chain.
- Row 1 (conversion row): Ch 1, 2 sc in the first loop, sc in the next 2 loops, 2 sc in the last loop. That is 4 sc worked into the existing loops plus 2 added sts, for 6 sc. Turn.
- Row 2: Ch 1, sc in the BLO of each st across. (6 sc) Fasten off.
Feature cuff: Join cream in the first free loop of the foundation chain.
- Row 1 (conversion row): Ch 1, 2 sc in the first loop, sc in the next 5 loops, 2 sc in the last loop. That is 7 sc worked into the existing loops plus 2 added sts, for 9 sc. Turn.
- Rows 2–3: Ch 1, sc in the BLO of each st across. Turn. (9 sc per row) Fasten off.
Why the math works: The mini cuff has 6 sts ÷ 4.5 = 1.3 in (3.3 cm), and the leg below it is 0.9 in (2.3 cm) wide. The feature cuff has 9 sts ÷ 4.5 = 2.0 in (5.1 cm), and its leg is 1.6 in (4.1 cm) wide. In both cases the cuff sticks out about 0.2 in (0.5 cm) on each side. That small overhang gives the classic stocking shape without ruffling.
Final Blocking
- Lightly mist all 9 stockings with water.
- Pin each one flat on the blocking mat. Mini stockings should be 1.8 in (4.6 cm) tall and the feature stocking 2.8 in (7.1 cm) tall.
- Gently round the heel and toe with your fingertips.
- Pin each cord out straight, stretching it slightly to 32.5 in (82.6 cm).
- Let everything dry completely before joining.
- After joining, hang the holder for one day without paper towels so the cords settle.
Final Quality-Control Checklist
- Each cord has 130 sts and measures 32.5 in (82.6 cm).
- The mini stockings have 6 cuff sts and the feature stocking has 9.
- All stocking toes point outward.
- On both cords, the stockings sit at sts 26, 44, 62 and 102.
- The dowel loops slide on easily and do not slip off.
- Both legs hang at the same length, so the dowels are level.
- All yarn ends are woven in securely.
Troubleshooting
- Cord twists: You worked into the front loops instead of the back bumps. Make the cord again, or block it under light tension.
- Dowels hang crooked: Count the leg stitches on both cords and re-sew the loops at the correct stitch numbers.
- Cuff ruffles: Leave out one of the two increases, or go down one hook size for the cuff only.
- Color jogs show at the heel: Change colors on the final yarn-over of the stitch before, and give each bobbin a gentle tug.
- Toe looks pointed: Make sure Row 7 (mini) or Row 11 (feature) decreases at both ends.
Care
Remove the hardware and hand wash the crochet pieces in cool water. Lay them flat to dry and reshape them while damp.

Final Notes
Everything rests on your gauge. With 4.5 sts per inch, the mini stockings come out at 1.8 in (4.6 cm) and the feature stocking at 2.8 in (7.1 cm). With 4 sts per inch on the cord, a 130-st cord is 32.5 in (82.6 cm) long, which gives you 15 in (38.1 cm) legs, 7 in (17.8 cm) drops and 3.5 in (8.9 cm) loops. Together these give a finished holder about 25 in (63.5 cm) tall and 14 in (35.6 cm) wide. Check each stage as you go and the whole holder will hang straight and level.
Happy crocheting!