

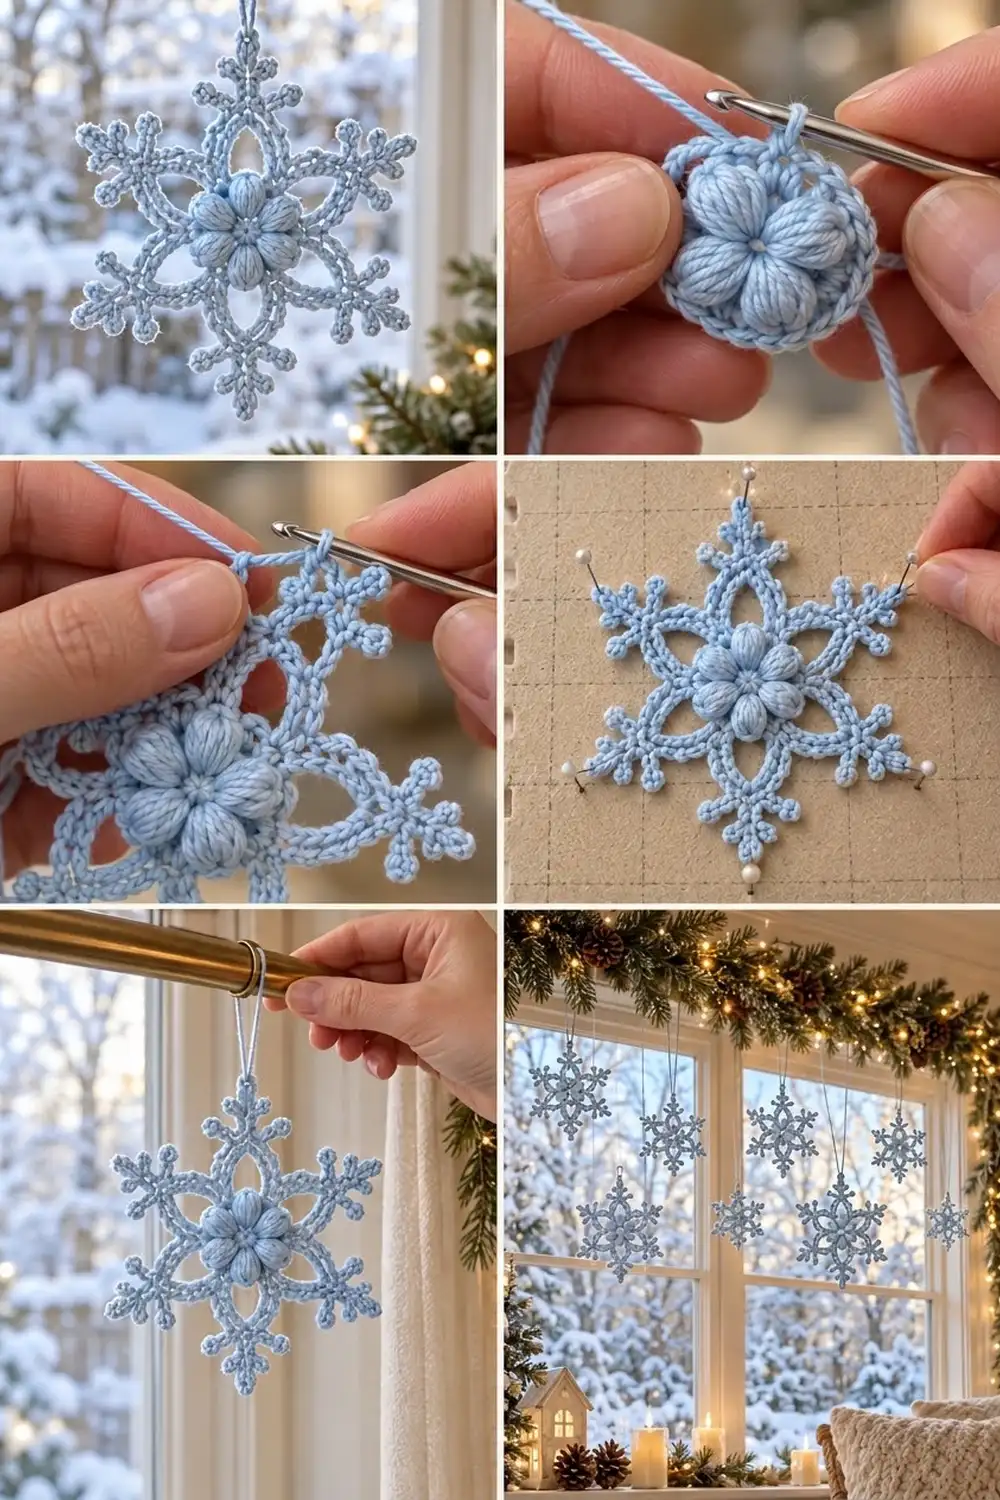
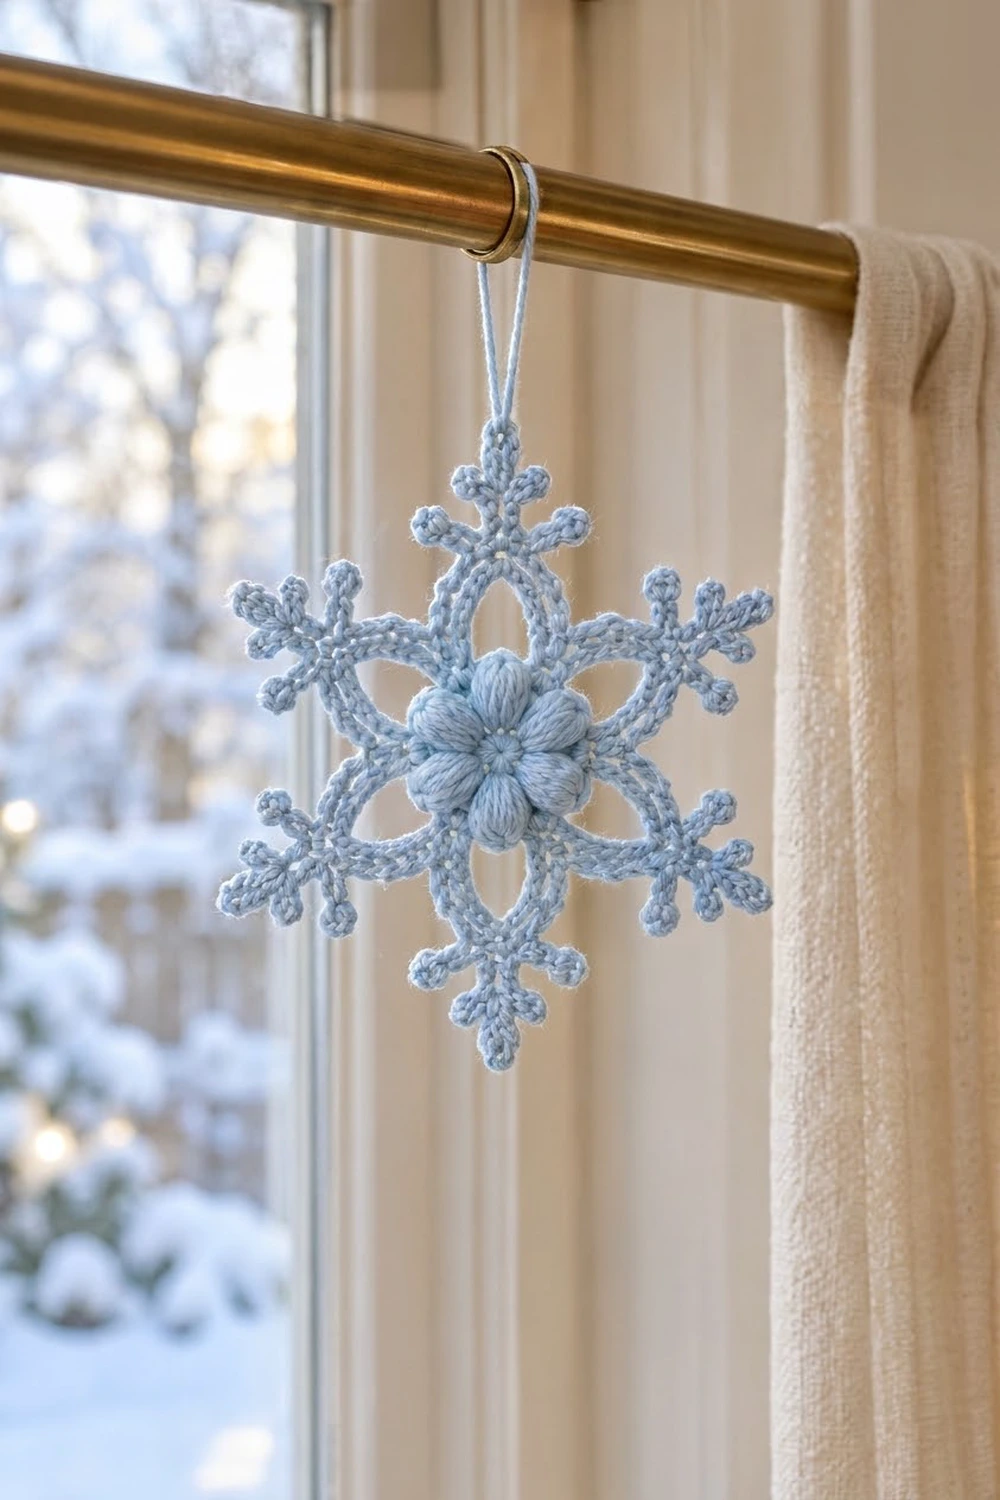
The Frosted Puff Snowflake is a small, lacy ornament with a puffy flower at its center. Six rounded puff stitches make the flower. Around it sit six open teardrop windows framed by firm, corded stitches, and six branched arms with picot tips finish the star.
It is shown here in one color, a soft light ice blue that looks like frost on glass. The style is classic and wintry with a bit of texture. The puffs give it depth, and the picot arms keep it delicate. Hang one in a window, tie one to a gift, or make a dozen for the tree.
This pattern uses US crochet terms. The finished snowflake measures about 5 in (12.7 cm) from tip to opposite tip after blocking.
You work the whole thing in the round as one piece. First comes a puff flower in a magic ring, then a single crochet ring. Next, chain loops form the teardrop windows, and a shaped round covers each loop to make a point. The last round adds the six arms with picots, using slip stitches to move between them. You fasten off once, block, and add a hanging loop.
Finished Size and Construction
- Finished size: 5 in (12.7 cm) tip to tip, after blocking
- Skill level: Easy-intermediate (puff stitches, picots, working in the round)
- Terminology: US crochet terms
- Yarn weight: Fine / sport weight (#2) cotton or cotton blend
- Hook: 2.75 mm (US C-2)
- Number of pieces: 1 (single motif)
- Layout: One six-pointed snowflake, worked center-out
- Piece size: 5 in (12.7 cm) tip to tip
- Size before arms (end of Round 4): 2.75 in (7.0 cm) point to point
- Arm depth (final round): about 1.125 in (2.9 cm) per arm
Materials
Yarn advice: Use a smooth, tightly plied mercerized cotton in sport weight. Cotton holds its shape after blocking, so the points stay crisp, and it shows puff stitches clearly. Don’t use fuzzy acrylic or mohair, which blur the picots and windows.
- Color A – Light Ice Blue: 5 g (about 15 m / 16.4 yd) per snowflake
The quantity includes a margin for your gauge swatch, the hanging loop, and weaving in ends. One snowflake actually uses about 4 g.
Tools:
- 2.75 mm (US C-2) crochet hook
- Tapestry needle
- Scissors
- Stitch marker
- Blocking board or foam mat
- Rust-proof pins (at least 12)
- Spray bottle with water, or fabric stiffener (optional)
- Ruler or tape measure
Abbreviations (US Terms)
- ch – chain
- sl st – slip stitch
- sc – single crochet
- hdc – half double crochet
- dc – double crochet
- sp – space
- st(s) – stitch(es)
- sk – skip
- yo – yarn over
- rep – repeat
Special stitches:
- Puff stitch (puff): [Yo, insert hook in ring, yo and pull up a loop to about 0.5 in (1.3 cm) tall] 4 times (9 loops on hook), yo and pull through all 9 loops, ch 1 to close. The closing ch 1 belongs to the puff and is not counted as a separate stitch.
- Picot: Ch 3, sl st in 3rd ch from hook.
- Branch: Ch 4, picot, sl st in each of the 4 ch just made, working back toward the stem.
- Arm: Ch 11 (stem). [Picot] 3 times. Sl st in the 11th stem ch (the last stem ch, right at the base of the first picot) to close the tip cluster. Working down the stem: sl st in next 3 stem ch, [branch] 2 times, sl st in next 3 stem ch, [branch] 2 times, sl st in next 4 stem ch. The stem now ends back at its base. Each arm has 7 picots: 3 at the tip and 4 on the branches.
Gauge and Checkpoints
Gauge isn’t critical for an ornament, but it controls the final size and how well the windows open. Make one full test snowflake before starting a batch.
Center gauge: Rounds 1–2 = 1.25 in (3.2 cm) across.
Checkpoints:
- After Round 1: Puff flower is about 1 in (2.5 cm) across.
- After Round 2: Ring is about 1.25 in (3.2 cm) across, and lies flat.
- After Round 3: Chain loops reach about 2.5 in (6.4 cm) point to point when gently stretched.
- After Round 4: Covered points measure about 2.75 in (7.0 cm) point to point.
- After Round 5 and blocking: 5 in (12.7 cm) tip to tip.
If your center is too big: Go down to a 2.5 mm hook, or pull up shorter puff loops.
If your center is too small: Go up to a 3.0 mm hook.
If the size is off by more than 0.25 in (0.6 cm) at the Round 2 checkpoint, change hooks before you go on. A small error in the center gets bigger at the tips.
Pattern: Center and Windows
Round 1 – Puff Flower
Make a magic ring.
Ch 2 (does not count as a st). [Puff in ring, ch 1] 6 times. Pull the ring closed tightly, leaving only a tiny center hole. Sl st in top of first puff to join.
Count: 6 puffs and 6 ch-1 sps.
Push each puff so its rounded side faces you. That side is the right side.
Round 2 – Single Crochet Ring (conversion round)
Ch 1 (does not count as a st). *Sc in top of next puff, 2 sc in next ch-1 sp; rep from * 5 more times. Sl st in first sc to join.
Count: 18 sc = 6 sc worked 1 per puff + 12 sc added in the ch-1 sps.
The ring should lie flat and frame the flower. If it ruffles, you are working too loosely. If it cups, you are working too tightly. Place a stitch marker in the first sc.
Round 3 – Window Loops
Ch 1. Sc in same st as join. *Ch 9, sk next 2 sc, sc in next sc; rep from * 4 more times. Ch 9, sk last 2 sc, sl st in first sc to join.
Count: 6 sc and 6 ch-9 loops.
Check the math: each repeat uses 1 sc + 2 skipped sts = 3 sts, and 3 × 6 = 18. That matches Round 2 exactly. Each ch-9 loop arches over 2 skipped sc. The gap between the loop and the ring becomes one teardrop window.
Round 4 – Pointed Window Frames
Sl st in first ch-9 loop. Ch 1 (does not count as a st).
In each ch-9 loop around, work: 2 sc, 2 hdc, dc, ch 2, dc, 2 hdc, 2 sc.
Sl st in first sc to join. Do not fasten off.
Count: 60 sts and 6 ch-2 sps (10 sts per loop × 6 loops).
The rising stitch heights (sc, hdc, dc) and the ch-2 at the top pull each loop into a pointed teardrop. Each point faces outward, and the arms will grow from those ch-2 sps. Adjacent frames meet at the Round 3 sc, which gives the corded V-shapes between windows.
Shape each point between your fingers now. The piece should measure about 2.75 in (7.0 cm) point to point.
Border: Picot Arm Round
Since this is a single motif, the final round is the border. It adds six branched arms and outlines every frame with slip stitches, which gives the snowflake its crisp, corded look.
Border gauge: One finished arm, from the base sc to the tip of the center picot, measures about 1.125 in (2.9 cm) after blocking.
Round 5 – Arms and Outline
Sl st in each of the next 5 sts (2 sc, 2 hdc, dc). Sl st into the ch-2 sp.
First arm: Ch 1, sc in the ch-2 sp, work Arm, sc in the same ch-2 sp.
*Next arm: Sl st in each of the next 10 sts (dc, 2 hdc, 2 sc of this frame; 2 sc, 2 hdc, dc of the next frame). Sl st into next ch-2 sp. Sc in the ch-2 sp, work Arm, sc in the same ch-2 sp.
Rep from * 4 more times (6 arms total).
Sl st in each of the next 5 sts, reaching the first sl st of the round. Sl st in that sl st and fasten off. Leave a 6 in (15.2 cm) tail.
Count per arm: 2 sc at the base, 11 stem ch, 7 picots (3 tip + 4 branch).
Round totals: 6 arms, 12 base sc, 42 picots, and 60 outline sl sts.
Why the math works: Round 4 has 60 sts arranged as 6 frames of 10 sts, with one ch-2 sp at the center of each frame. The opening 5 sl sts reach the first ch-2 sp. Each later travel section of 10 sl sts covers the back half of one frame (5 sts) plus the front half of the next (5 sts). That takes you to the next ch-2 sp. So 5 + (5 × 10) + 5 = 60 sl sts, and every Round 4 stitch is outlined exactly once. On the stem, 1 ch closes the tip cluster and 3 + 3 + 4 = 10 sl sts go back down, so 11 stem ch are used with none left over.
Final Blocking
Blocking is what turns a curly lace motif into a flat, sharp snowflake.
- Weave in ends. Weave the magic ring tail through the back of the puffs, and the final tail along the back of one outline. Don’t trim the ends yet.
- Wet the piece. Soak it in cool water for 5 minutes, then gently squeeze it out in a towel. Don’t wring it. If you want it stiffer, use diluted fabric stiffener instead of plain water.
- Pin the center. Lay it right side up on the blocking board. Put one pin through the center hole to anchor it.
- Pin the arms. Pin the center tip picot of each arm so it sits 2.5 in (6.4 cm) from the center pin. That gives 5 in (12.7 cm) tip to tip. Use the grid on your board to space the arms 60 degrees apart.
- Open the branches. Fan each pair of branches outward in a V, one to each side of the stem. Pin a branch picot if it won’t stay in place.
- Shape the windows. Use a pin tip to open each teardrop window so it points straight toward its arm.
- Dry fully. Leave it pinned for at least 12 hours. Unpin, then trim the woven ends close.
- Add the hanging loop. Thread a 10 in (25.4 cm) strand of Color A through the center tip picot of one arm. Knot the ends together to make a loop about 4 in (10.2 cm) long, and trim the excess.
Final Quality-Control Checklist
- [ ] Six puffs, all the same size, rounded side facing front
- [ ] Center hole closed tight, with the ring tail secured
- [ ] Round 2 lies flat and measures 1.25 in (3.2 cm)
- [ ] Six open teardrop windows, all the same size, each pointing at an arm
- [ ] Six arms, each with 3 tip picots and 2 pairs of branch picots
- [ ] Slip-stitch outline is even all around, with no skipped sts
- [ ] Finished size is 5 in (12.7 cm) tip to tip, within 0.25 in (0.6 cm)
- [ ] Piece is completely dry and flat, and ends are trimmed
- [ ] Hanging loop is knotted securely through a tip picot
Troubleshooting
Puffs look flat or uneven. Pull every loop up to the same height before closing, about 0.5 in (1.3 cm). Close firmly with the ch 1.
Center hole is too big. Pull the magic ring tail harder before joining Round 1. Then weave the tail once around the hole and tug it closed.
Round 2 ruffles. Work 1 sc instead of 2 in one or two ch-1 sps only if the ruffle is severe. Better still, go down a hook size so the count stays at 18.
Windows look round instead of pointed. Make sure there is a ch 2 between the two dc at the top of each frame. Pinch the point while it’s still wet.
Arms curl or twist. Slip stitches worked too tightly shorten the stem. Loosen your tension on the way back down, and block with stiffener.
Picots disappear. Work each picot sl st into the 3rd ch from the hook, not into the stem. Check your count: 7 picots per arm.
Snowflake ends up smaller than 5 in (12.7 cm). Go up to a 3.0 mm hook for Rounds 3–5 only, and keep the center at 2.75 mm.
Outline puckers between arms. You may have skipped or doubled a sl st. There should be exactly 10 sl sts between arms.
Care
Hand wash in cool water with mild soap, press out water in a towel, and dry flat pinned to shape. If you used stiffener, re-block after washing to restore the crisp points.
Final Notes
The size of this snowflake builds in a clear chain. The 6-puff flower is 1 in (2.5 cm) across. The 18-stitch ring brings it to 1.25 in (3.2 cm). Six ch-9 window loops reach about 2.5 in (6.4 cm), and the 60-stitch pointed frames finish at 2.75 in (7.0 cm). Six arms of about 1.125 in (2.9 cm) each bring the blocked snowflake to 5 in (12.7 cm) tip to tip.
Check your size at Round 2 and again at Round 4, and the final measurement will follow. Once your test snowflake matches, the rest of a batch goes quickly. A set of six to twelve makes a lovely frosted window display.
Happy crocheting!