

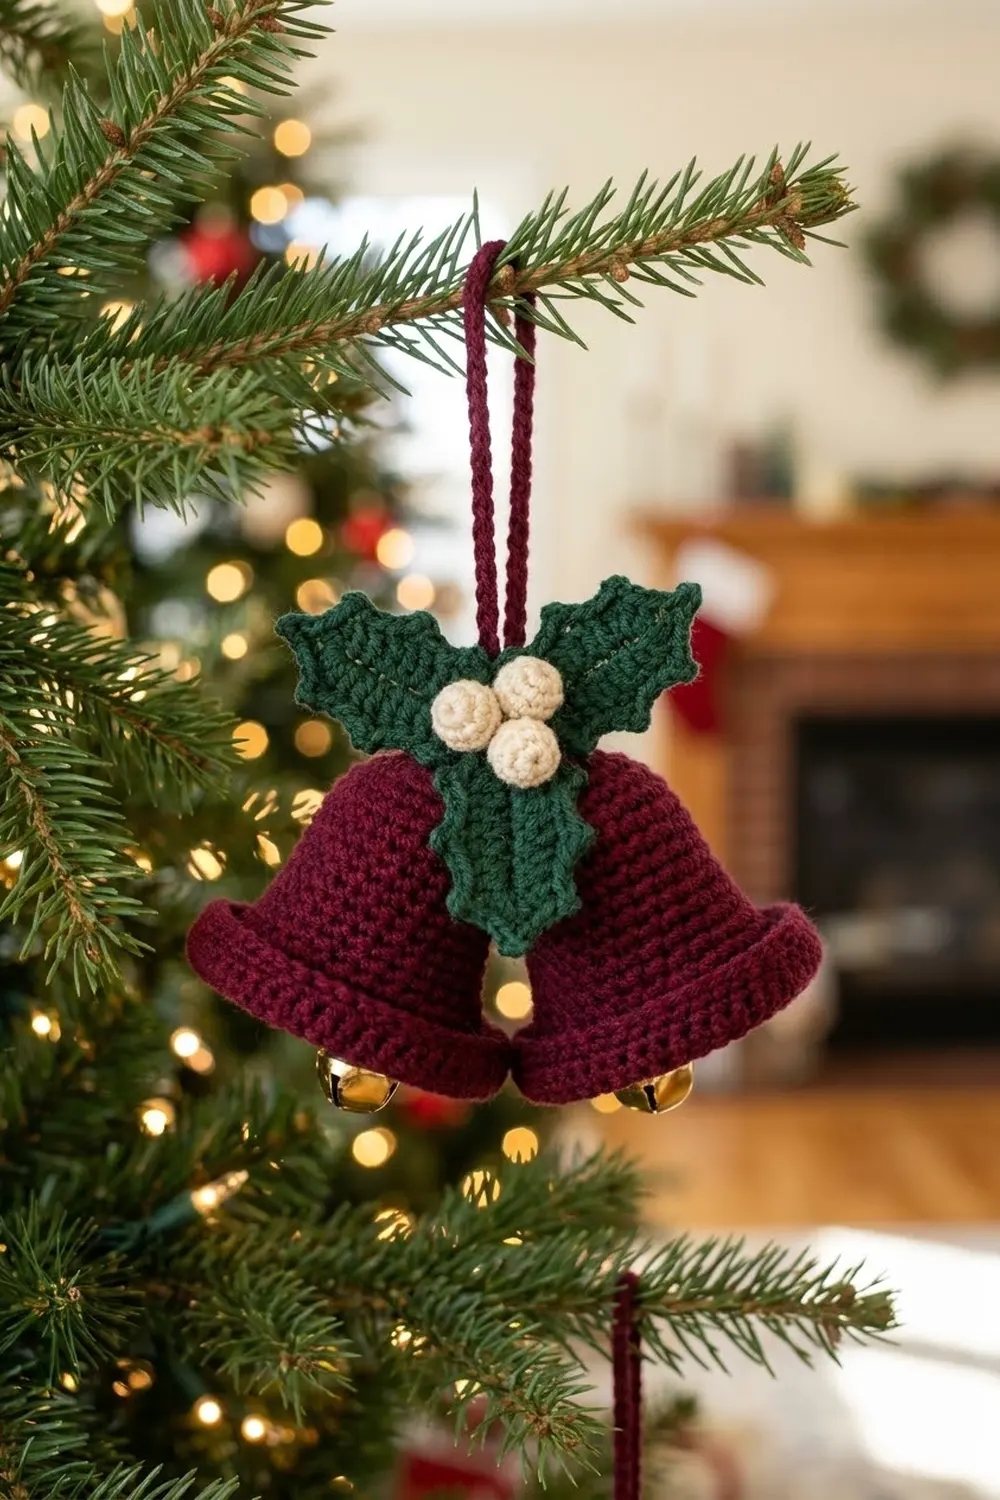
The Holly Jingle Bells ornament is a pair of plump burgundy bells sitting side by side. They are trimmed with dark green holly leaves and a cluster of three cream berries. A real gold jingle bell hangs inside each one, so the ornament rings softly when the branch moves.
The palette is classic and cozy: deep burgundy, forest green, and warm cream. The bells are worked in tight single crochet, which gives a firm, even texture that holds its shape without wire. The rim is finished with a crab stitch edge that rolls slightly outward, like a cast bell lip.
This pattern uses US crochet terms. The finished ornament measures about 5.5 in (14.0 cm) wide by 5 in (12.7 cm) tall, plus a 3 in (7.6 cm) hanging loop. Each bell is about 2.5 in (6.4 cm) tall, with a rim about 3 in (7.6 cm) across.
Construction is simple. You work each bell top-down in continuous rounds from a magic ring, then finish the rim with a two-round border. Next you make four flat holly leaves around a foundation chain, three small stuffed berries, and one slip-stitch cord. Then you sew everything into a single ornament.
Finished Size and Construction
- Finished ornament: 5.5 in (14.0 cm) wide x 5 in (12.7 cm) tall, plus a 3 in (7.6 cm) loop
- Skill level: Easy–Intermediate (rounds, picots, crab stitch, basic sewing)
- Terminology: US crochet terms
- Yarn weight: DK / light worsted (#3)
- Hook: US E-4 (3.5 mm)
- Number of pieces: 10 (2 bells, 4 leaves, 3 berries, 1 cord), assembled into 1 ornament
- Layout: two bells side by side, leaves fanned behind, berries at the center front
- Bell size: 2.5 in (6.4 cm) tall, 3 in (7.6 cm) rim diameter
- Bell before border: 2.2 in (5.6 cm) tall, 2.6 in (6.6 cm) rim diameter
- Border depth: 2 rounds, about 0.3 in (0.8 cm)
Materials
Choose a smooth DK yarn in cotton or a cotton-acrylic blend. These yarns show single crochet texture clearly and keep the bell’s shape. Avoid fuzzy yarns because they blur the crab stitch rim. The amounts below assume about 230 m per 100 g.
- Burgundy (A): 20 g / 46 m (bells and cord)
- Dark green (B): 10 g / 23 m (holly leaves)
- Cream (C): 5 g / 12 m (berries)
Quantities include a margin of about 25% for gauge differences and sewing tails.
Tools:
– US E-4 (3.5 mm) crochet hook
– 2 gold jingle bells, 0.6 in (1.5 cm)
– Small amount of polyester fiberfill
– Tapestry needle
– Locking stitch marker
– Sewing pins
– Scissors
– Optional: spray starch
Abbreviations (US Terms)
- ch – chain
- sl st – slip stitch
- sc – single crochet
- hdc – half double crochet
- dc – double crochet
- inc – 2 sc in the same stitch
- dec – invisible decrease (insert hook in the front loops of the next 2 stitches, yarn over, pull through both front loops, yarn over, pull through 2 loops)
- MR – magic ring
- FLO – front loop only
- st(s) – stitch(es)
Special stitches:
- Picot (P): Ch 3, sl st in the 3rd ch from the hook.
- Crab stitch (reverse sc): Work single crochet from left to right (right to left if you are left-handed). Insert the hook in the next stitch to the right, pull up a loop, yarn over, and pull through both loops. This makes a twisted, corded edge.
Gauge and Checkpoints
Gauge: 11 sc x 12 rounds = 2 in (5.1 cm) in continuous rounds. That works out to 5.5 sts and 6 rounds per inch.
Make one complete bell before anything else. It is your gauge swatch, and its measurements set every other size in the ornament.
Checkpoints:
1. After Round 3: The flat top circle measures 1 in (2.5 cm) across.
2. After Round 11: The bell measures 1.3 in (3.3 cm) from the edge of the top circle down the side.
3. After Round 16 (before border): The bell is 2.2 in (5.6 cm) tall and the rim is 2.6 in (6.6 cm) across.
4. After the border: The bell is 2.5 in (6.4 cm) tall and the rim is 3 in (7.6 cm) across.
If your bell is too big, go down to a 3.25 mm hook (US D-3). If it’s too small or feels stiff, go up to a 3.75 mm hook (US F-5). Change the hook rather than the stitch counts so the shaping stays the same. If the fabric shows gaps, your tension is too loose for this yarn. Go down a hook size so the stuffing-free bell keeps its shape.
Bell (Make 2)
Use color A. Work in continuous rounds without joining. Place the marker in the first stitch of each round and move it up as you go.
Round 1: MR, 6 sc in the ring. Pull the ring closed. (6 sts)
Round 2: Inc in each st around. (12 sts)
Round 3: (Sc 1, inc) 6 times. (18 sts)
Checkpoint: The flat circle measures 1 in (2.5 cm) across. This is the domed bell top.
Rounds 4–7: Sc in each st around. (18 sts in each round)
The sides now turn downward and the top cups slightly. This forms the narrow shoulder of the bell.
Round 8: (Sc 2, inc) 6 times. (24 sts)
Rounds 9–11: Sc in each st around. (24 sts in each round)
Checkpoint: The side measures 1.3 in (3.3 cm) below the top circle.
Round 12: (Sc 3, inc) 6 times. (30 sts)
Rounds 13–14: Sc in each st around. (30 sts in each round)
Round 15: (Sc 4, inc) 6 times. (36 sts)
Round 16: (Sc 3, inc) 9 times. (45 sts)
This round adds 9 stitches at once, so the fabric starts to flare outward into the bell mouth.
Checkpoint: The bell is 2.2 in (5.6 cm) tall and the rim is 2.6 in (6.6 cm) across. There are 13 side rounds below the 3-round top. At 6 rounds per inch, 13 rounds is about 2.2 in.
Don’t fasten off yet. Continue straight into the border (see Border section).
Holly Leaf (Make 4)
Use color B. Each leaf is worked around both sides of a foundation chain. The finished leaf is 2 in (5.1 cm) long and 1 in (2.5 cm) wide at its widest point, with three picot points on each side and one at the tip.
Foundation: Ch 13.
Side 1 (tip to stem): Start in the 2nd ch from the hook and work into the next 12 ch as follows:
Sl st, sc, hdc, dc, dc, P, dc, dc, P, dc, dc, P, dc, hdc, sc, 3 sc in the last ch.
That’s 11 sts plus 3 picots along the side, then 3 sc at the stem end. The 3 sc turn you around to the other side of the chain.
Side 2 (stem to tip): Rotate the piece and work into the 11 free loops on the underside of the chain:
Sc, hdc, dc, P, dc, dc, P, dc, dc, P, dc, dc, hdc, sc, sl st.
That’s 11 sts plus 3 picots. The picots mirror Side 1 exactly.
Tip: Ch 3, sl st in the 3rd ch from the hook (tip picot). Sl st in the first sl st of Side 1.
Leaf total: 25 sts + 7 picots. Fasten off, leaving an 8 in (20.3 cm) tail for sewing.
The dc stitches make the wide middle of the leaf, and the sl st and sc at each end taper it to points. The picots form the spiky holly edge.
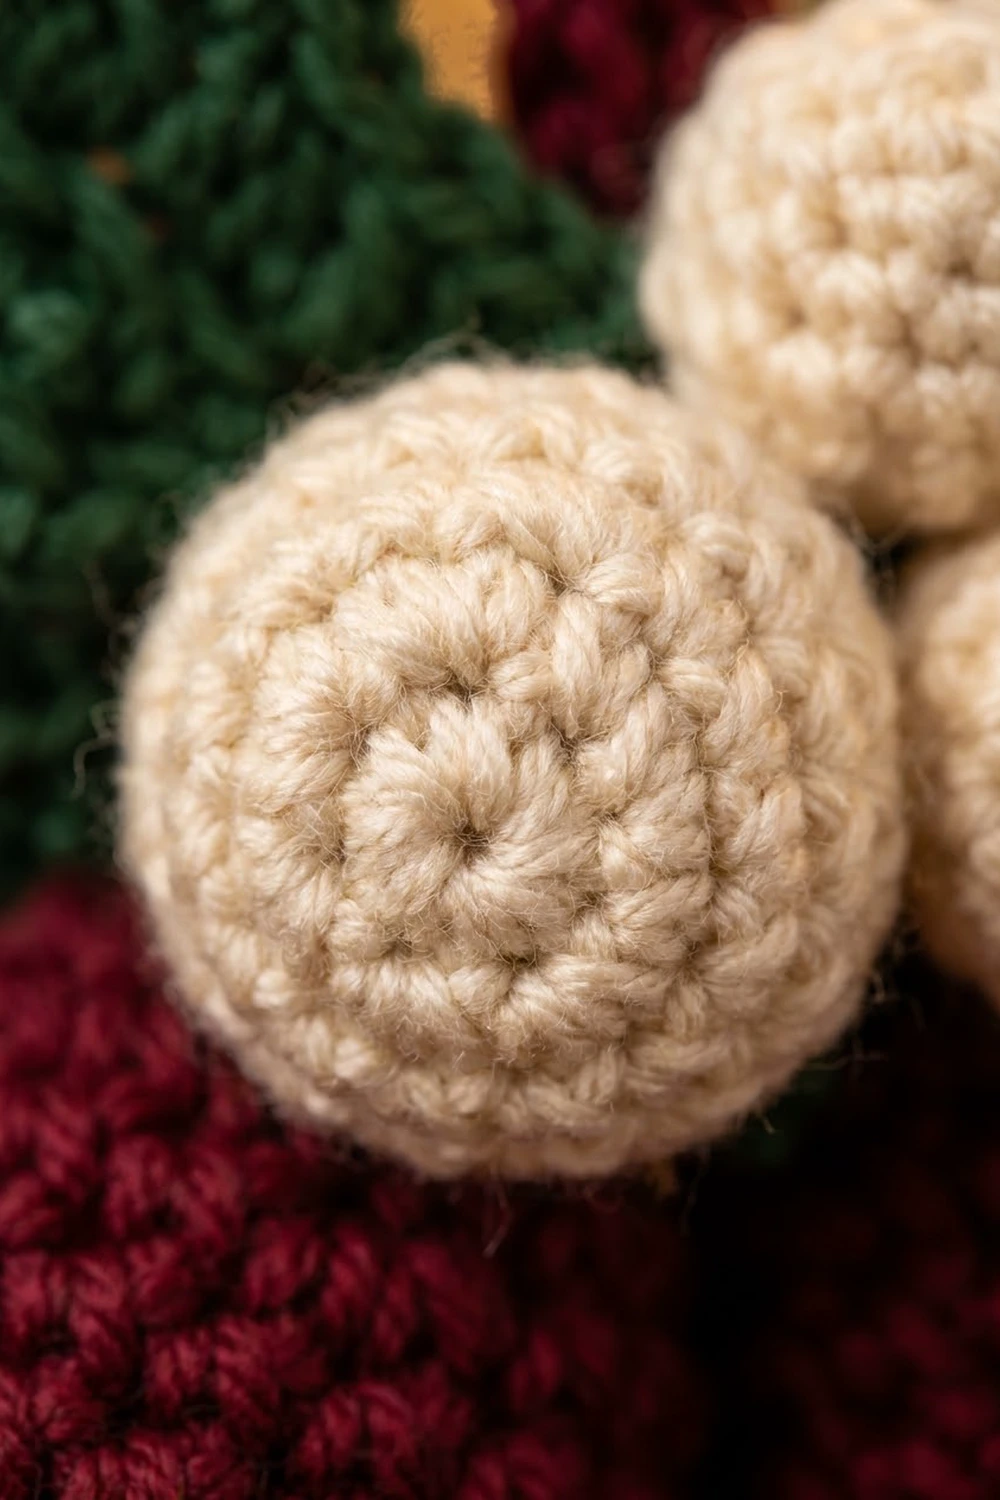
Berry (Make 3)
Use color C. Each berry is a small stuffed ball about 0.75 in (1.9 cm) across.
Round 1: MR, 6 sc in the ring. (6 sts)
Round 2: Inc in each st around. (12 sts)
Rounds 3–4: Sc in each st around. (12 sts in each round)
Stuff firmly with a small pinch of fiberfill.
Round 5: Dec 6 times. (6 sts)
Fasten off, leaving an 8 in (20.3 cm) tail. Weave the tail through the front loops of the last 6 sts and pull tight to close the hole. Keep the tail for sewing.
Hanging Cord (Make 1)
Use color A.
Ch 40. Sl st in the back bump of the 2nd ch from the hook and in each ch across. (39 sl sts)
Fasten off. The cord is about 6.5 in (16.5 cm) long. The slip stitches make it firm and round, and it won’t stretch under the ornament’s weight.
Make All Pieces
Before assembly, check that you have all 10 pieces:
- Color A (burgundy): 2 bells (bordered), 1 cord
- Color B (green): 4 holly leaves
- Color C (cream): 3 berries
Layout (front view):
              [ Cord loop ]
   [Leaf]        (Berry)        [Leaf]
 [Leaf]      (Berry)(Berry)       [Leaf]
        [ Bell L ][ Bell R ]
         (jingle)  (jingle)
The two upper leaves point up and out at about 45°. The two lower leaves spread sideways behind the bell shoulders. All four stem ends meet behind the berries.
Joining and Assembly
Step 1: Jingle bells. Cut a 6 in (15.2 cm) strand of color A and thread it through the jingle bell’s loop. With a tapestry needle, pass both ends up through the center of the bell’s magic ring and out the top. Adjust the length so the jingle bell hangs 2 in (5.1 cm) below the top, just level with the rim. Tie the ends together securely on top of the bell. Repeat for the second bell.
Step 2: Join the bells. Place the bells side by side so their seams face the back. Line up the two adjacent sides stitch-to-stitch, from Round 4 down to Round 9. That’s 6 rounds, or 1 in (2.5 cm). Whipstitch through the outer loops of each matching pair of stitches, one stitch on the left bell to one stitch on the right bell. Pull just firmly enough that the bells touch without puckering. Below Round 9 the bells flare apart naturally, so leave that part unsewn.
Size checkpoint: The joined pair measures 5.5 in (14.0 cm) across the rims. The 3 in (7.6 cm) rims overlap about 0.5 in (1.3 cm) at the center.
Step 3: Cord. Fold the cord in half. Sew both ends to the top center where the two bell tops meet, stitching through both bells. The loop stands 3 in (7.6 cm) above the ornament.
Step 4: Leaves. Pin the leaves following the layout, with their stem ends meeting behind the cord base. Sew each leaf to the back of the bell tops with small stitches along its center 0.5 in (1.3 cm) only. That way the leaf tips stay free and lift slightly.
Step 5: Berries. Sew one berry centered over the leaf stems. Sew the other two just below it, side by side and resting on the bell tops. Stitch each berry to the leaves and to its neighbors so the cluster doesn’t rotate.
Weave in all ends inside the bells or behind the leaves.
Border (Bell Rim)
Work the border on each bell directly after Round 16, before assembly. Each bell has its own border. Border gauge is the same as the body: 5.5 sts per inch.
Round 17 (flare round): (Sc 4, inc) 9 times.
That’s 45 sts worked one per existing stitch, plus 9 added stitches, for 54 sts total.
Each repeat is 5 sts in Round 16 (sc 3, inc) and 5 sts in Round 17 (sc 4 + 1 st of the inc). Both rounds have exactly 9 repeats, but the increases fall 1 stitch later each time. That offset keeps them from stacking into visible corners, so the rim stays round instead of turning into a 9-sided shape.
Sl st in the next st to end the spiral evenly.
Round 18 (crab stitch): Ch 1. Crab stitch in each st around. (54 sts)
Sl st to the first crab stitch. Fasten off and weave in the end on the inside.
Why the math works: At 5.5 sts per inch, the 45-stitch rim is 8.2 in (20.8 cm) around, or 2.6 in (6.6 cm) across. Round 17 adds 9 sts, bringing the edge to 54 sts, which is 9.8 in (24.9 cm) around. Crab stitch pulls the edge in a little and rolls it outward, so the rim settles at 3 in (7.6 cm) across.
The two border rounds add 2 rounds of height, or about 0.3 in (0.8 cm). That brings the bell from 2.2 in (5.6 cm) to 2.5 in (6.4 cm). The two rims are not joined to each other, so there’s no shared border count and no seam stitches to add.
Final Blocking
- Lightly mist each bell with water, or hold a steam iron 1 in (2.5 cm) above the fabric. Never press the iron onto the yarn.
- Stuff each bell loosely with plastic wrap or a rolled cloth to round out its shoulder and flare. Remove it once the bell is dry.
- Pin each leaf flat on a foam board. Put a pin through every picot point to sharpen the holly edge.
- Spray the leaves with starch if you want, and let everything dry completely.
- Roll each berry gently between your palms to even out its shape.
- Assemble after blocking, so the leaves and rims keep their crisp shape.
Final Quality-Control Checklist
- Each bell is 2.5 in (6.4 cm) tall with a 3 in (7.6 cm) rim.
- Both bells are the same size, within 0.1 in (0.3 cm).
- The crab stitch edge is continuous, with no skipped stitches.
- Each leaf shows 7 clear picots: 3 per side plus the tip.
- The berries are firm, round, and closed with no stuffing showing.
- The jingle bells hang level with the rims and ring freely.
- The bell seam runs straight from Round 4 to Round 9.
- The loop is centered, and the ornament hangs straight without tipping.
- All ends are hidden.
Troubleshooting
The rim ruffles. Your tension loosened in Round 17. Redo Round 17 and Round 18 with a hook one size smaller.
The rim cups inward. Your crab stitch is too tight. Work Round 18 more loosely, or use a hook one size larger for that round only.
Increases show as corners. Make sure the Round 17 repeats are staggered (sc 4, inc) and not stacked on top of the Round 16 increases.
The leaves curl. Block them flat with pins and starch. Also check that you worked all 11 stitches on each side.
The ornament tilts. The cord isn’t centered. Re-sew both ends exactly between the bell tops.
The jingle bell doesn’t ring. The strand is too short and the bell is pressed against the fabric. Lengthen it by 0.5 in (1.3 cm).
Care
Spot clean with a damp cloth and mild soap, then let air dry. Don’t machine wash, because the stuffing and jingle bells can be damaged.
Final Notes
Everything in this ornament follows from one measurement: 5.5 sts and 6 rounds per inch. That gauge gives you a 1 in (2.5 cm) bell top and a 2.2 in (5.6 cm) bell with a 2.6 in (6.6 cm) rim before the border. The 54-stitch crab stitch border brings each bell to 2.5 in (6.4 cm) tall with a 3 in (7.6 cm) rim. Two bells joined along a 1 in (2.5 cm) seam make a 5.5 in (14.0 cm) wide ornament, topped by 2 in (5.1 cm) leaves, 0.75 in (1.9 cm) berries, and a 3 in (7.6 cm) loop. If your first bell hits its checkpoints, the rest will fit together.
Happy crocheting!