

This openwork candy cane is a light, airy ornament made from a firm green cord. Instead of solid stripes, open diagonal bars cross the shaft, and three short curved bars fill the hook. A corded hanging loop sits on top of the curve.
The colors are classic holiday green with a bright red accent. Small red scallops trim the bottom of the shaft and the tip of the hook, like the ends of a candy cane wrapped in berry-red lace. The look is crisp, graphic, and a little vintage.
The pattern uses US crochet terms. The finished ornament measures about 4.75 in (12.1 cm) tall and 2 in (5.1 cm) wide at the hook. With the hanging loop, it is 5.75 in (14.6 cm) tall.
The construction is simple. First, you crochet one chain ring and work a round of single crochet to make a closed cord outline. Next, you shape that ring into a cane and add the bars with slip stitches and short corded chains. Last, you add the hanging loop and two short red scallop trims.
Finished Size and Construction
- Finished size: 4.75 in (12.1 cm) tall x 2 in (5.1 cm) wide; 5.75 in (14.6 cm) tall with the loop
- Skill level: Easy+ (simple stitches, careful stitch placement)
- Terminology: US crochet terms
- Yarn weight: DK (#3), firm cotton or cotton blend
- Hook: 3.5 mm (E-4)
- Number of pieces: 1 single ornament
- Layout: one piece, no joining
- Piece size before trim: 4.5 in (11.4 cm) tall x 2 in (5.1 cm) wide
- Shaft width: 0.75 in (1.9 cm)
- Trim (“border”) depth: about 0.25 in (0.6 cm) at the bottom and at the hook tip
Materials
Choose a smooth, tightly plied DK cotton or cotton blend. Mercerized cotton gives the crisp, rope-like cord shown. Soft acrylic will work, but the bars may sag and the hook will need firmer blocking.
- Green (Color A): 6 g, about 13 m
- Red (Color B): 2 g, about 4 m
These amounts include a margin for swatching and weaving in. One 50 g ball of each color makes many ornaments.
Tools:
- 3.5 mm (E-4) crochet hook
- Tapestry needle
- Locking stitch markers (at least 5)
- Scissors
- Blocking board or foam mat
- Rustproof pins
- Spray bottle with water, or light spray starch (optional)
Abbreviations (US Terms)
- ch – chain
- sl st – slip stitch
- sc – single crochet
- hdc – half double crochet
- dc – double crochet
- st(s) – stitch(es)
- rnd – round
Special stitches
Scallop: (hdc, 2 dc, hdc) all in the same stitch. One scallop uses 1 st and makes 4 sts.
Shaft bar: Sl st in the starting st, ch 4, sl st in the target st, then sc in each of the 4 ch back toward the starting st. You end beside the starting st.
Hook bar: Same as the shaft bar, but ch 3 and sc in each of the 3 ch.
Gauge and Checkpoints
Cord gauge: 5 sc = 1 in (2.5 cm) along a chain.
Test swatch: Ch 21. Sc in the second ch from the hook and in each ch across: 20 sc. The cord should measure 4 in (10.2 cm). Anything from 3.75 in (9.5 cm) to 4.25 in (10.8 cm) is acceptable.
Make this test piece before you start the ornament. Gauge sets both the size of the cane and how well the bars hold the curve.
- Too long? Go down to a 3.25 mm hook, or tighten your chains.
- Too short? Go up to a 3.75 mm hook. A cord that is too tight will curl and resist the shaping.
Checkpoints:
- After Rnd 1, flatten the ring into a long double strand. It should measure about 6.2 in (15.7 cm), which is 31 sts on each side.
- After shaping and adding the bars, the cane should measure 4.5 in (11.4 cm) tall x 2 in (5.1 cm) wide, and the shaft should be 0.75 in (1.9 cm) wide.
- After the trims, the height grows to 4.75 in (12.1 cm). The loop adds about 1 in (2.5 cm).
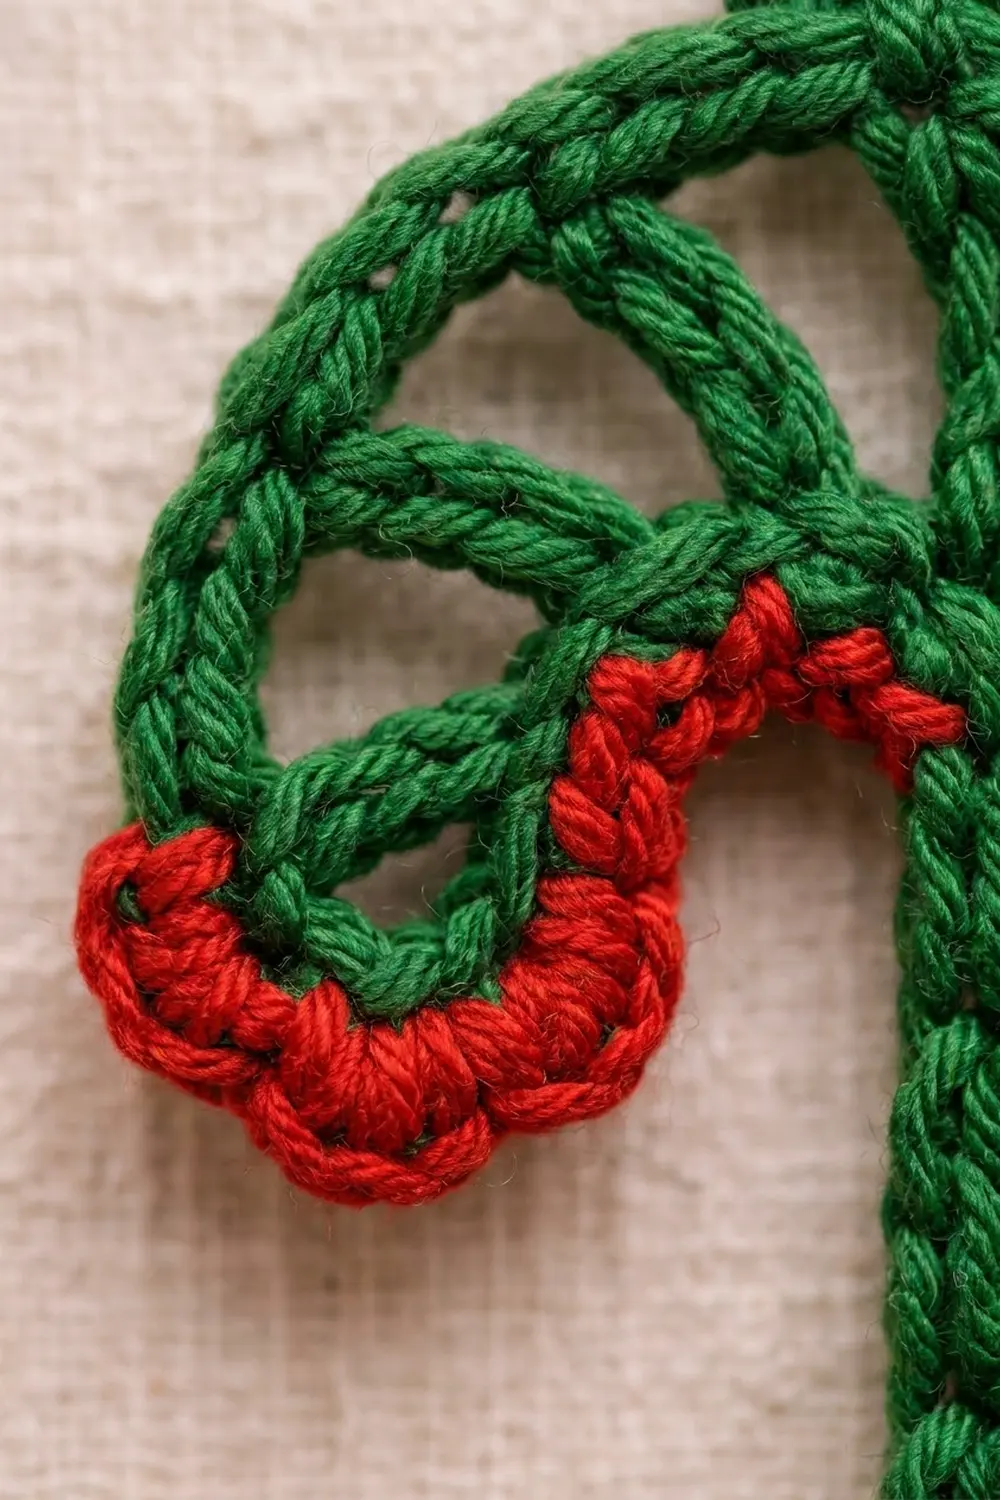
Stitch Map
The whole ornament is built on one ring of 62 sc. Number the stitches as you go. Each section is listed in working order around the ring:
| Section | Stitches | Count |
|---|---|---|
| Bottom end | 1–3 | 3 |
| Right rail (outer side of shaft, going up) | 4–21 | 18 |
| Outer hook curve (over the top, down to tip) | 22–36 | 15 |
| Hook tip end | 37–39 | 3 |
| Inner hook curve (back toward the shaft) | 40–44 | 5 |
| Left rail (inner side of shaft, going down) | 45–62 | 18 |
| Total | 62 |
Check: 3 + 18 + 15 + 3 + 5 + 18 = 62.
Both rails have 18 sts, so the shaft stays straight. The outer curve has 15 sts and the inner curve only 5. That difference is what makes the hook bend.
Place markers in sts 4, 22, 37, 40, and 45 to mark the start of each section.
Pattern: Outline Cord
Foundation: With Color A, ch 62. Join with a sl st to the first ch to form a ring, taking care not to twist the chain.
Rnd 1: Ch 1 (does not count as a st), sc in each ch around. Join with a sl st to the first sc. (62 sc)
The sc tops sit on the outer edge of the ring, and the foundation chain sits on the inner edge. Keep track of this: all bars go into the inner edge, and all trims go into the outer edge.
Fasten off, leaving a 4 in (10.2 cm) tail.
Shape the ring: Lay the ring flat. Fold it so sts 1–3 form the rounded bottom end. Run sts 4–21 straight up the right side and sts 45–62 straight up the left side, about 0.5 in (1.3 cm) apart, center to center. Curve sts 22–36 over the top and down to the left. Let sts 37–39 form the tip, and let sts 40–44 curve back under the hook to meet st 45.
Pin the shape lightly if it helps you see it.
Pattern: Bars
Work every sl st in this rnd into the inner edge (the foundation-chain side) of the outline sts.
The shaft bars connect the right rail to the left rail on a slant. Each bar starts 3 sts higher on the right rail than where it lands on the left rail. That offset creates the diagonal candy-cane stripe.
Rnd 2: Join Color A with a sl st in the inner edge of st 4.
- Sl st in sts 5–7.
- Shaft bar from st 8 to st 61.
- Sl st in sts 9–10. Shaft bar from st 11 to st 58.
- Sl st in sts 12–13. Shaft bar from st 14 to st 55.
- Sl st in sts 15–16. Shaft bar from st 17 to st 52.
- Sl st in sts 18–19. Shaft bar from st 20 to st 49.
- Sl st in sts 21–23.
- Hook bar from st 24 to st 44.
- Sl st in sts 25–28. Hook bar from st 29 to st 42.
- Sl st in sts 30–33. Hook bar from st 34 to st 40.
Fasten off, leaving a 4 in (10.2 cm) tail.
Rnd 2 count: 31 sl sts along the outer rail (one in each of sts 4–34, counting the sl st that starts each bar) + 20 sc in the 5 shaft bars (4 sc each) + 9 sc in the 3 hook bars (3 sc each). (31 sl sts + 29 bar sc)
Why the bars line up: A right-rail stitch number is 3 + its position counted up from the bottom. A left-rail stitch number is 63 – its position counted up from the bottom. Bar 1 starts at right position 5 (st 8) and ends at left position 2 (st 61). Every bar keeps that same 3-position offset, so all five stripes are parallel and evenly spaced 0.6 in (1.5 cm) apart.
The hook bars run from the outer curve (sts 24, 29, and 34, spaced 5 sts apart) to the inner curve (sts 44, 42, and 40, spaced 2 sts apart). They fan out like spokes and lock the curve in place.
Checkpoint: The cane should now hold its shape on its own and measure 4.5 in (11.4 cm) x 2 in (5.1 cm).
Pattern: Hanging Loop
St 29 sits at the very top of the hook curve.
Join Color A with a sl st in the outer edge of st 29. Ch 12, then sl st in the same st to form a loop. Work 16 sc over the loop (around the chain, not into it). Sl st in st 29 again. (16 sc)
Fasten off. The corded loop stands about 1 in (2.5 cm) above the cane.
Border: Red Scallop Trims
This ornament has no border all the way around. Instead, two short red trims cover the two ends of the cane. Work each trim into the outer edge (the sc tops) of the outline.
Trim gauge: One scallop plus one sl st covers 2 outline sts, or about 0.4 in (1 cm).
Bottom trim: Join Color B with a sl st in the outer edge of st 61.
Scallop in st 62, sl st in st 1, scallop in st 2, sl st in st 3, scallop in st 4, sl st in st 5.
Fasten off. (7 outline sts used: 4 sl sts + 3 scallops of 4 sts each = 16 sts)
Hook tip trim: Join Color B with a sl st in the outer edge of st 35.
Scallop in st 36, sl st in st 37, scallop in st 38, sl st in st 39, scallop in st 40, sl st in st 41.
Fasten off. (7 outline sts used: 4 sl sts + 3 scallops of 4 sts each = 16 sts)
Why the math works: Each trim covers 7 sts: the 3 end sts plus 2 sts on each side. Because 7 is odd, you can start and end with a sl st and alternate scallops and sl sts in between: 4 sl sts + 3 scallops = 7 sts used. The 3 scallops sit on the curved end and wrap just around it, like the end of a real wrapped cane.
The bars that end at sts 61 and 40 are on the inner edge, so they don’t clash with the trims on the outer edge.
Checkpoint: The total height is now 4.75 in (12.1 cm). The width stays at 2 in (5.1 cm) because the tip trim hangs downward.
Final Blocking
- Weave in all tails along the inside of the cord, splitting the plies so they can’t slip out.
- Mist the ornament lightly with water until it is damp but not soaked.
- Lay it on a blocking board, right side up.
- Pin the bottom end. Then pin both rails straight, keeping the shaft 0.75 in (1.9 cm) wide from outer edge to outer edge.
- Pin the top of the hook curve so the cane measures 4.5 in (11.4 cm) from the bottom of the green cord to the top of the curve.
- Pin the hook tip so the hook is 2 in (5.1 cm) wide.
- Open each red scallop with your fingertip so it lies flat.
- Spray lightly with starch if you want a stiff ornament.
- Let it dry completely, then unpin.
Final Quality-Control Checklist
- Rnd 1 has exactly 62 sc and no twist in the ring.
- Both rails have 18 sts and lie straight.
- All 5 shaft bars slant the same way and are evenly spaced.
- The 3 hook bars fan from the outer curve to the inner curve.
- The loop is centered on st 29 at the top of the hook.
- Each trim has 3 scallops and starts and ends with a sl st.
- The size is 4.75 in (12.1 cm) x 2 in (5.1 cm), or 5.75 in (14.6 cm) tall with the loop.
- All tails are hidden and trimmed.
Troubleshooting
The ring is twisted. A twist can’t be fixed later. Frog (pull out) Rnd 1 and rejoin the chain, checking that the bumps all face the same way.
The hook won’t curve. Recount the outer and inner curves (15 and 5 sts). If the hook bars are too long, rework them with ch 2 instead of ch 3.
The shaft bows sideways. The bars aren’t in the right places. Check that they start at sts 8, 11, 14, 17, and 20 and end at sts 61, 58, 55, 52, and 49.
The bars sag. Your chains are loose. Rework the bars with a hook one size smaller, or use starch when blocking.
The scallops ruffle. Work the dc stitches a little shorter, or replace the 2 dc with 2 hdc.
The ornament is too large. Check your gauge. If 20 sc measure more than 4.25 in (10.8 cm), the cane will come out noticeably bigger.
Care
Hand wash in cool water with mild soap, press out the water in a towel, and re-pin the ornament to dry. Store it flat or hanging, away from heavy ornaments that could crush the curve.
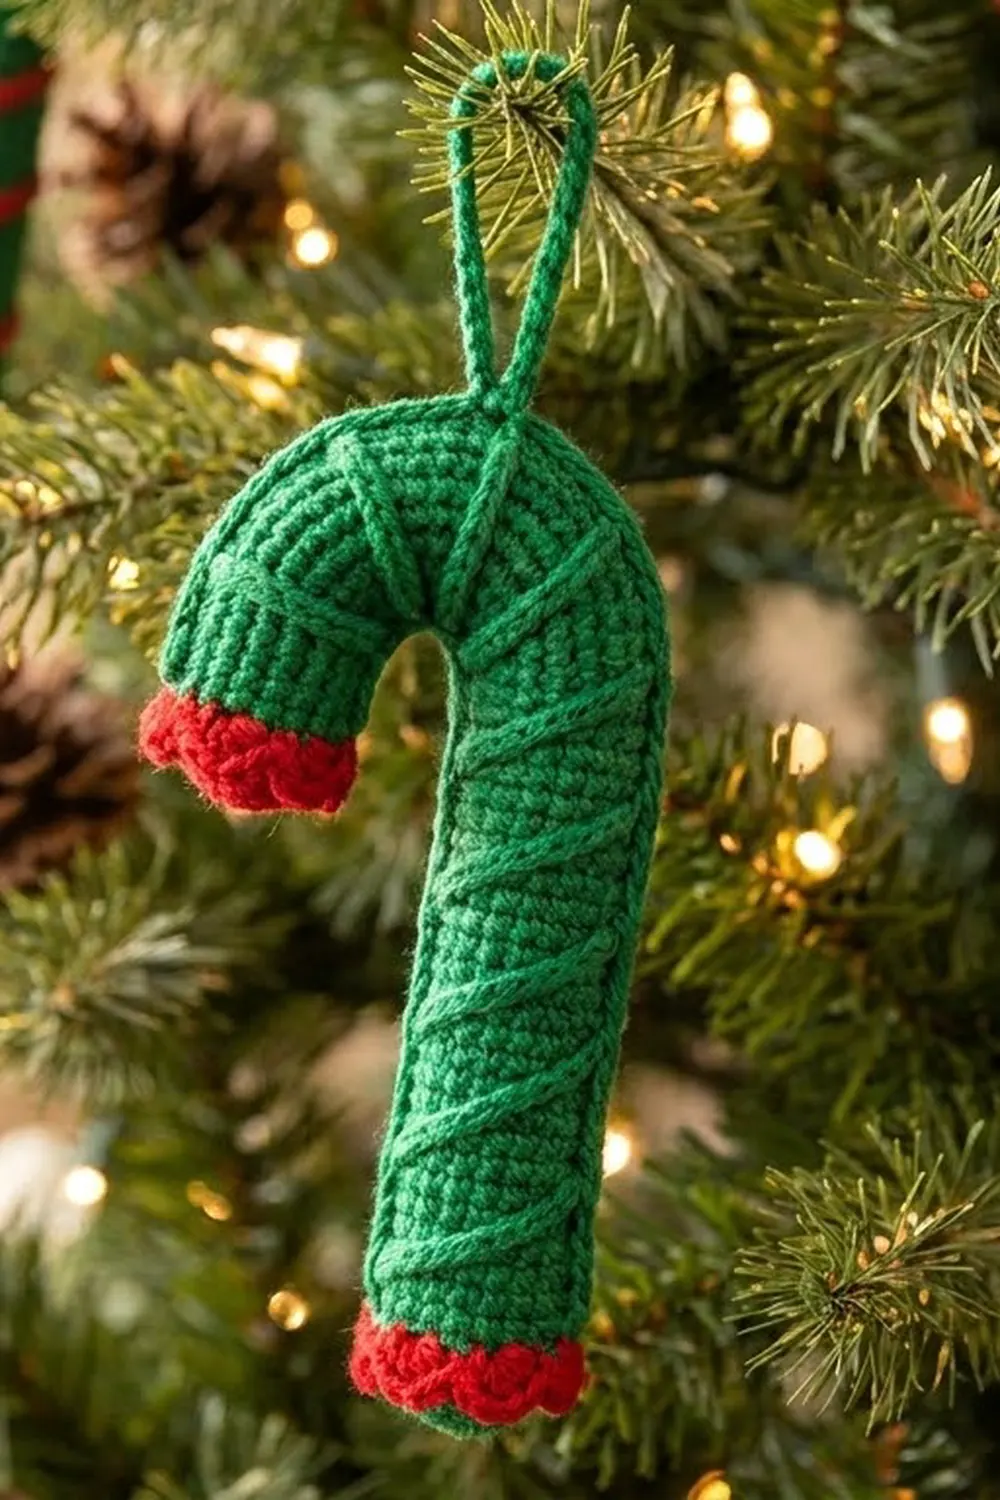
Final Notes
This candy cane depends on one chain of measurements. The gauge is 5 sc per 1 in (2.5 cm). That gives a 62-st outline ring with two 18-st rails, each 3.6 in (9.1 cm) long. The 15-st outer curve and 5-st inner curve form the hook, and eight bars lock the shape at 4.5 in (11.4 cm) x 2 in (5.1 cm). The red trims bring the height to 4.75 in (12.1 cm), and the loop brings it to 5.75 in (14.6 cm).
Check your swatch and count your 62 stitches, and the rest falls into place. Make one for every branch of the tree.
Happy crocheting!