
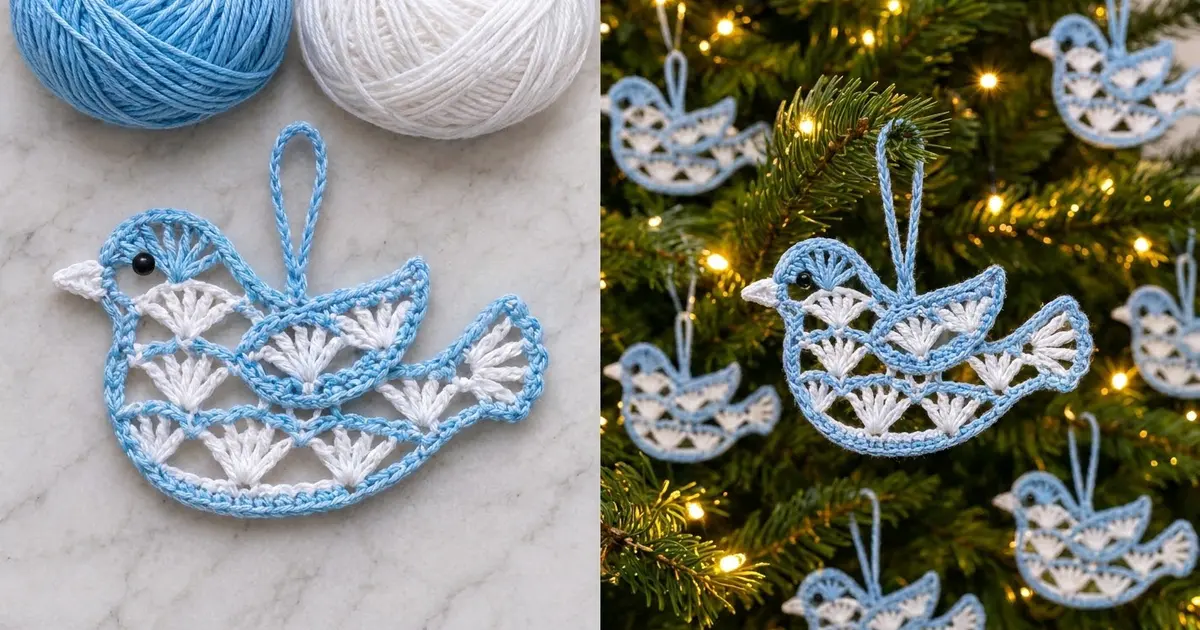
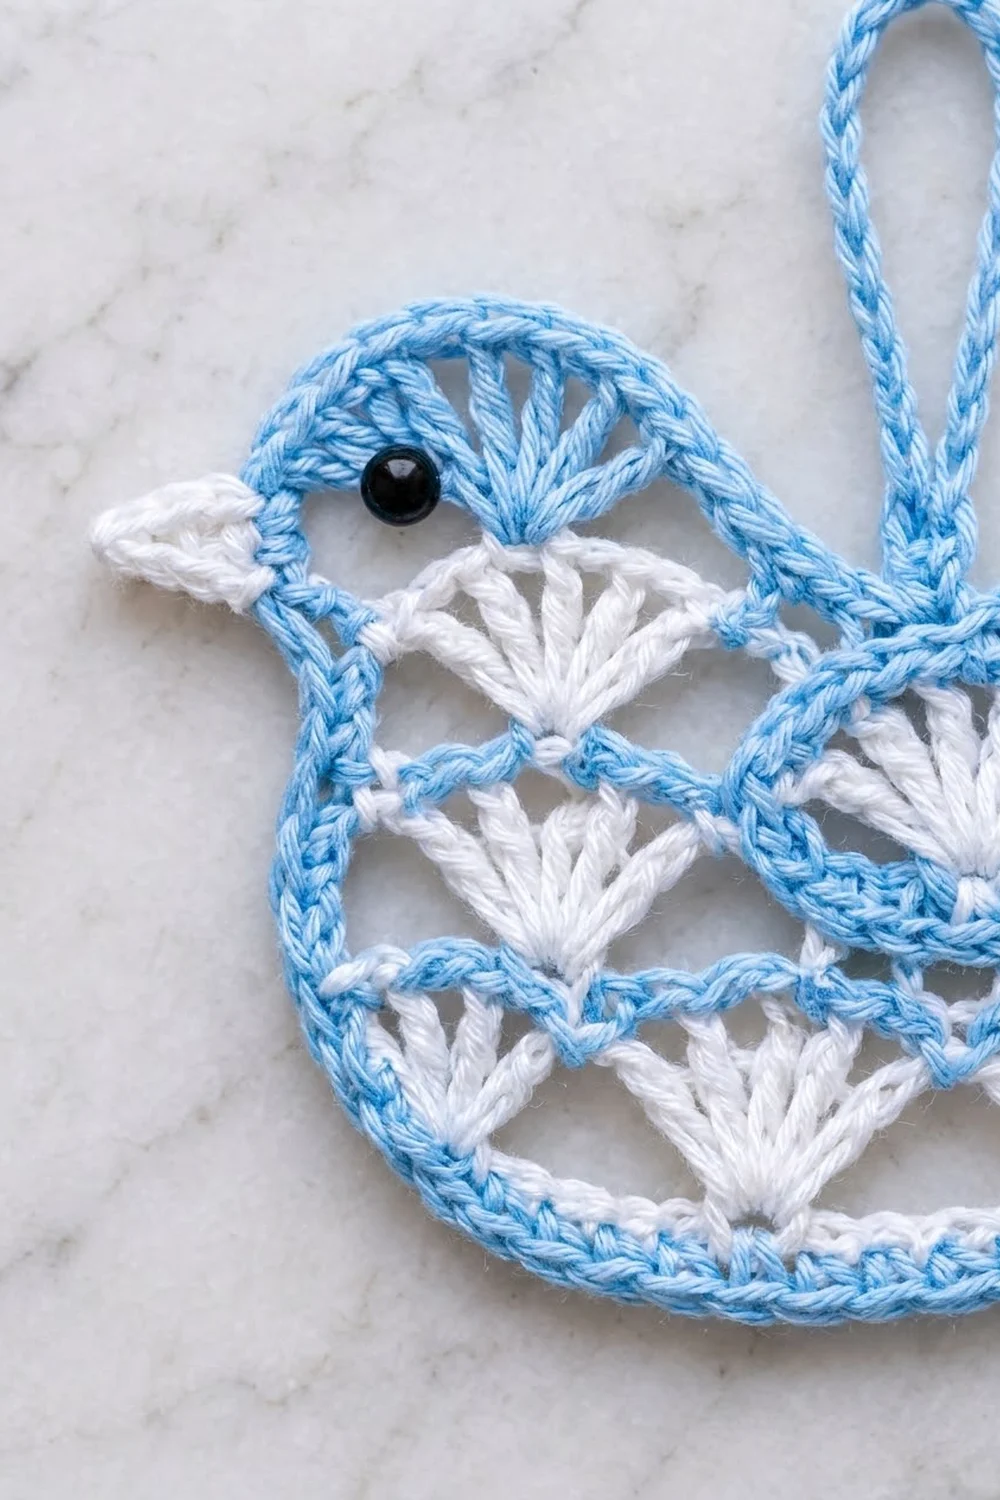
This little bluebird is a flat lace ornament. Rows of white fan shells sit between wavy light blue lines, so the body looks like soft feathers. A thick blue outline, a separate wing ring, a white triangle beak and a black bead eye turn the lace panel into a bird.
The palette is only two colors: light blue and white. That gives a fresh, wintry look that suits a Christmas tree, a gift tag or a window. The pattern uses US crochet terms throughout.
The finished bird measures 5.5 in (14.0 cm) long and 3.5 in (8.9 cm) tall, not counting the beak and loop. With the beak, it is 6 in (15.2 cm) long.
You work the body flat in rows, changing color every row. Next you add a white head fan and a white tail fan. A two-round blue border then joins everything into one smooth silhouette. Finally, you sew on the wing outline, beak, eye and hanging loop.
Finished Size and Construction
- Finished size: 5.5 in x 3.5 in (14.0 cm x 8.9 cm); 6 in (15.2 cm) long with the beak
- Skill level: Easy-intermediate
- Terminology: US crochet terms
- Yarn weight: Sport weight (#2) mercerized cotton
- Hook: 2.75 mm (C-2)
- Number of pieces: 1 main body, plus 3 small add-ons (wing outline, beak, hanging loop)
- Layout: Single ornament; no motif joining
- Body panel after Row 7: 4 in x 2.5 in (10.2 cm x 6.4 cm)
- Size before border: 5 in x 3 in (12.7 cm x 7.6 cm), including the head and tail fans
- Border depth: 0.25 in (0.6 cm) on every edge
Materials
Choose a smooth mercerized cotton. It gives crisp fans, holds its shape after blocking and does not shed on the tree. Avoid fuzzy or very splitty yarns, because the open fans need clear stitch definition.
- Light blue: 6 g / about 19 m
- White: 4 g / about 12 m
- One 4 mm black sew-on bead (or black embroidery floss for a French knot)
- 2.75 mm (C-2) crochet hook
- Tapestry needle and a fine sewing needle for the bead
- Scissors
- Rust-proof pins and a blocking mat or foam board
- Spray bottle with water
The quantities include a small margin for swatching and weaving in ends. One 50 g ball of each color makes many birds.
Abbreviations (US Terms)
- ch – chain
- sl st – slip stitch
- sc – single crochet
- dc – double crochet
- tr – treble crochet
- sc2tog – single crochet 2 together
- st(s) – stitch(es)
- rep – repeat
Special stitch:
- Fan: 7 tr worked into the same stitch.
- Half fan: 4 tr worked into the same stitch. When it opens a row, the beginning ch-4 counts as the first tr.
Gauge and Checkpoints
Gauge is 25 sc = 4 in (10.2 cm). One fan row plus one sc row makes a band 0.75 in (1.9 cm) tall.
Before you make a batch, make one complete bird and measure it at these checkpoints:
- After Row 1: 25 sc = 4 in (10.2 cm) wide
- After Row 3: 1 in (2.5 cm) tall
- After Row 5: 1.75 in (4.4 cm) tall
- After Row 7: 4 in x 2.5 in (10.2 cm x 6.4 cm)
- After the head and tail fans: 5 in x 3 in (12.7 cm x 7.6 cm)
- After the border: 5.5 in x 3.5 in (14.0 cm x 8.9 cm)
Too big: Go down to a 2.5 mm hook, or check that your tr stitches are not loose and loopy.
Too small: Go up to a 3.0 mm hook. Small differences of up to 0.25 in (0.6 cm) can be fixed when you block.
Body Panel
Each row is one color. Fasten off at the end of every row and join the next color at the start of the following row. Leave 4 in (10.2 cm) tails. The border will cover the tails, and you can work over them.
The head end is the end where Row 1 begins, farthest from the slip knot. The tail end is the slip-knot end.
Foundation (blue): Ch 26.
Row 1 (blue): Sc in the 2nd ch from the hook and in each ch across. Fasten off. (25 sc)
Row 2 (white): Join white in the first st and do not turn the work over again before working. Ch 1, sc in the same st. *Skip 2 sts, fan in the next st, skip 2 sts, sc in the next st*. Rep from * 3 more times. Fasten off. (4 fans, 5 sc = 33 sts)
The fans are centered on Row 1 sts 4, 10, 16 and 22.
Row 3 (blue): Join blue in the first st. Ch 1, sc in each st across. Fasten off. (33 sc)
Working into the tops of the fans makes the blue line rise over each fan and dip at each sc between fans. This creates the scalloped wave.
Row 4 (white): Join white in the first st. Ch 4 (counts as tr), 3 tr in the same st to make a half fan. Skip 3 sts, sc in the next st (the center of a fan). *Skip 3 sts, fan in the next st (a valley), skip 3 sts, sc in the next st*. Rep from * 2 more times. Skip 3 sts, half fan in the last st. Fasten off. (3 fans, 2 half fans, 4 sc = 33 sts)
These fans sit in the valleys of the row below, which offsets this band by half a fan.
Row 5 (blue): Join blue in the first st, which is at the head end. Ch 1, sc in each st across. Fasten off. (33 sc)
The last st of this row is at the tail end. Mark it with a stitch marker; this is st 33, where you will work the tail fan.
Row 6 (white): Join white in the first st. Ch 1, sc in the same st. *Skip 3 sts, fan in the next st, skip 3 sts, sc in the next st*. Rep from * 3 more times. Fasten off. (4 fans, 5 sc = 33 sts)
The fans land on Row 5 sts 5, 13, 21 and 29, directly above the Row 4 sc. This lines them up with the Row 2 fans.
Row 7 (blue): Join blue in the first st, which is at the head end. Ch 1, sc in each st across. Fasten off. (33 sc)
Number Row 7 from the head end, so st 1 is at the head and st 33 is at the tail.
Checkpoint: The panel should measure 4 in x 2.5 in (10.2 cm x 6.4 cm).
Head Fan
Head (white): With the right side facing, join white in Row 7 st 1. Ch 1, sc in the same st. Skip 3 sts, 9 dc in st 5, skip 3 sts, sc in st 9. Fasten off. (9 dc, 2 sc = 11 sts)
This raises a rounded crown 0.5 in (1.3 cm) above the back line.
Tail Fan
Tail (white): Join white in the marked Row 5 st 33 at the tail end, so the stitches face outward. Ch 4 (counts as tr), 10 tr in the same st. Fasten off. (11 tr)
The tail fans out sideways from the middle of the body and extends about 1 in (2.5 cm) past the panel. Angle it slightly upward when you block.
Checkpoint: The piece should measure 5 in x 3 in (12.7 cm x 7.6 cm).
Border
Border gauge: Work 1 sc in each top or bottom stitch, 1 sc along the side of each sc row and 3 sc along the side of each tr row or tr post.
Rnd 1 (blue): With the right side facing, join blue in the first foundation loop at the head end. Work these sections in order:
- Belly: 3 sc in the first foundation loop, 1 sc in each of the next 23 loops, 3 sc in the last loop. (29 sc)
- Tail-end lower side: Up the sides of Rows 1–4: 1 + 3 + 1 + 3. (8 sc)
- Tail: 3 sc along the post of the first tr, 2 sc in the top of the first tr, 1 sc in each of the next 9 tr, 2 sc in the last tr, 3 sc along the post of the last tr. (19 sc)
- Tail-end upper side: Up the sides of Rows 6–7: 3 + 1. (4 sc)
- Top back: 1 sc in each of Row 7 sts 33 through 10. (24 sc)
- Head: 1 sc in the head-row sc, 1 sc in each of the 9 dc, 1 sc in the last head-row sc. (11 sc)
- Head-end side: Down the sides of Rows 7–1: 1 + 3 + 1 + 3 + 1 + 3 + 1. (13 sc)
Join with a sl st to the first sc. (108 sc)
The total is 29 + 8 + 19 + 4 + 24 + 11 + 13 = 108.
Rnd 2 (blue): Sl st in each sc around, keeping the tension relaxed. Join and fasten off. (108 sl st)
Why the math works: Along the belly, top back, head and tail tips there is exactly 1 sc per stitch, so those edges stay as long as the rows beneath them. The 3-sc groups at the two belly corners add 4 sts in total, which lets the edge turn without cupping. Each tr row or post gets 3 sc because a tr is about three times as tall as an sc, so the sides lie flat. The slip stitch round adds a raised, chain-like line without adding width. The border adds 0.25 in (0.6 cm) on every edge, which takes the bird from 5 in x 3 in (12.7 cm x 7.6 cm) to 5.5 in x 3.5 in (14.0 cm x 8.9 cm).
Wing Outline
Wing (blue): Ch 36. Join into a ring with a sl st, taking care not to twist the chain.
- Rnd 1: Ch 1, sc in each ch, join. (36 sc)
- Rnd 2: Sl st in each sc around, join and fasten off. Leave a 12 in (30.5 cm) tail for sewing. (36 sl st)
Pinch one side of the ring into a point to form a teardrop 2.25 in (5.7 cm) long and 1.25 in (3.2 cm) tall.
Placement: Center the wing on the body with the point toward the tail. Its rounded end sits just behind the head, and its top edge rests along Row 7. Tack it to the body every 0.25 in (0.6 cm) with small stitches, keeping the white fans visible through the center.
Beak
Beak (white): Ch 4.
- Row 1: Sc in the 2nd ch from the hook and in the next 2 ch. (3 sc)
- Row 2: Ch 1, turn, sc2tog, sc. (2 sts)
- Row 3: Ch 1, turn, sc2tog. (1 st)
Fasten off and leave a tail. The beak is about 0.5 in (1.3 cm) long. Sew its 3-st base to the head-end edge, outside the border, level with Row 7.
Eye and Hanging Loop
Eye: Sew the 4 mm black bead to the head fan, 0.4 in (1.0 cm) in from the head-end edge. Pass the thread through it twice. If you prefer, work a French knot in black floss in the same place.
Loop (blue): Ch 31. Sl st in the 2nd ch from the hook and in each ch across, 30 sl st in total. The strip is about 4.75 in (12.1 cm) long. Fold it in half and sew both ends to the back of the top edge, behind Row 7 st 17. The loop should rise about 2 in (5.1 cm) above the bird.
Final Blocking
- Weave in all remaining ends on the wrong side, following the blue lines.
- Lightly wet the bird or mist it until it is evenly damp.
- Pin it right side up to 5.5 in x 3.5 in (14.0 cm x 8.9 cm).
- Pin the tip of each fan so the fans open evenly.
- Angle the tail upward and pin each of its 5 outer tr tips.
- Pin the head into a smooth curve and straighten the belly.
- Let it dry completely, which takes 4–6 hours.
- For a stiffer ornament, brush on a diluted fabric stiffener, re-pin and let it dry again.
Final Quality-Control Checklist
- Rows 2 and 6 each have 4 fans, Row 4 has 3 fans plus 2 half fans, and every row has 33 sts
- The head has 9 dc and the tail has 11 tr
- Border Rnd 1 has 108 sc and Rnd 2 has 108 sl st
- The bird measures 5.5 in x 3.5 in (14.0 cm x 8.9 cm)
- The wing is tacked down evenly, with no gaps or bulges
- The beak, eye and loop are firmly attached
- No yarn ends are visible on the front
Troubleshooting
- The fans curl or cup: Your tr stitches are too tight. Loosen your yarn-overs or go up a hook size for the white rows only.
- The body waves along the belly: Recheck the belly count (29). Too many sc ruffles the edge.
- The side edges pucker: Make sure each tr row got 3 sc, not 2.
- The tail droops: Block it angled upward, or use stiffener.
- The wing is too loose: Tack it more often, about every 0.2 in (0.5 cm).
- The bird hangs crooked: Move the loop until the bird balances, usually 1–2 sts toward the tail.
Care
Hand wash in cool water and lay flat to dry, reshaping it while damp. Store the bird flat between tissue paper so the fans stay crisp.

Final Notes
The measurements build in this order:
- 25 sc foundation = 4 in (10.2 cm)
- Seven rows = a 4 in x 2.5 in (10.2 cm x 6.4 cm) panel
- Head and tail fans = 5 in x 3 in (12.7 cm x 7.6 cm)
- 108-stitch border = 5.5 in x 3.5 in (14.0 cm x 8.9 cm)
If each checkpoint matches, the finished bluebird will match too. Make one, then fill a whole branch with them. Happy crocheting!