

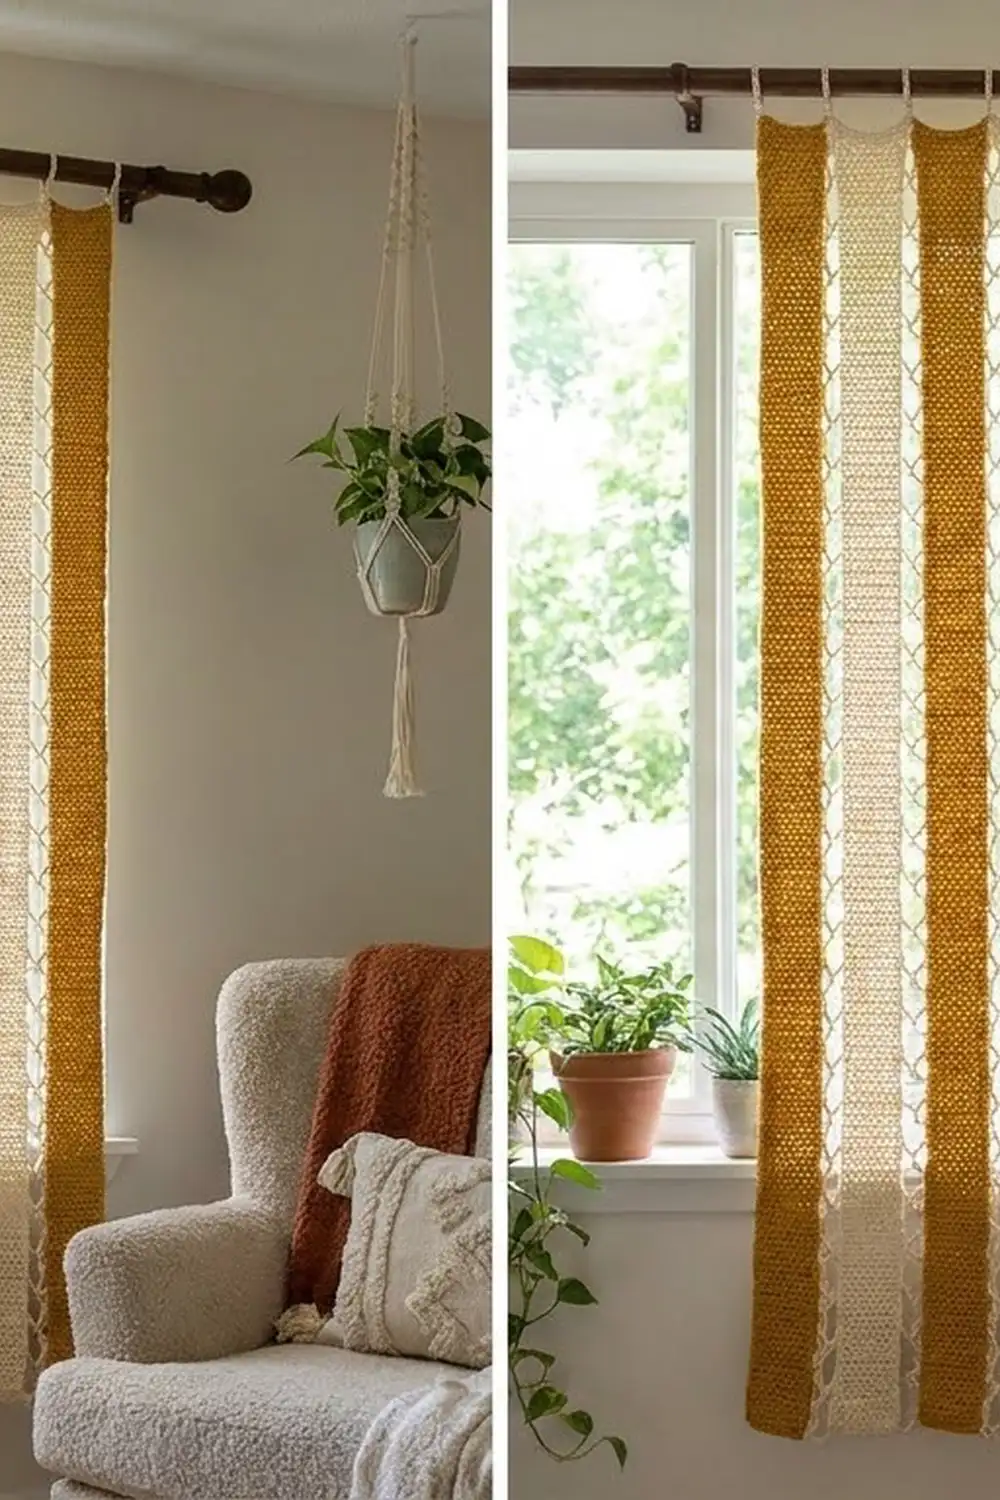
The Honey Ladder Strip Curtain is a warm boho panel made of tall, narrow strips in mustard and cream. Each strip has a pebbly, bumpy texture. Small cream chain “rungs” link the strips, so light passes through the gaps while the panel holds together as one piece.
The palette has two colors only: a rich honey mustard and a soft natural cream, alternating across the width. Mustard sits at both outer edges, so the panel looks balanced on any window. The pattern uses US crochet terms throughout.
The finished curtain measures 44 inches (111.8 cm) wide and 61 inches (154.9 cm) long after blocking.
Construction is simple and repetitive. You crochet 11 strips in short rows of griddle stitch, join them side by side with a chain-ladder join, and then work a two-round single crochet border around the whole panel. The border ties the top and bottom edges together and gives the clip rings a firm edge to grip.
Finished Size and Construction
- Finished size: 44 in × 61 in (111.8 cm × 154.9 cm)
- Skill level: Easy / Advanced Beginner
- Terminology: US crochet terms
- Yarn weight: Worsted (#4), cotton or cotton blend
- Hook: 5.0 mm (H-8)
- Number of pieces: 11 strips (6 mustard, 5 cream)
- Layout: 11 strips side by side in one row, alternating mustard / cream / mustard, with mustard on both outer edges
- Strip size: 3 in × 60 in (7.6 cm × 152.4 cm)
- Gap between strips: 1 in (2.5 cm), bridged by chain rungs
- Size before border: 43 in × 60 in (109.2 cm × 152.4 cm)
- Border depth: 0.5 in (1.3 cm) on each side
Materials
Yarn advice: Choose a smooth, mercerized or combed cotton in worsted weight. Cotton shows off the griddle texture, hangs straight, and does not stretch much under its own weight. Avoid fuzzy or very soft acrylic, which blurs the bumps and can droop over a 60 in (152.4 cm) length. The amounts below assume about 155 m per 100 g.
- Mustard (Color A): 1,400 g / about 2,170 m (6 strips plus the border)
- Cream (Color B): 1,200 g / about 1,860 m (5 strips plus all joining rungs)
Tools:
- 5.0 mm (H-8) crochet hook
- Tapestry needle
- Stitch markers (at least 4)
- Measuring tape
- Blocking mats or a large clean towel and rust-proof pins
- Spray bottle
- 11 curtain clip rings and a curtain rod at least 48 in (121.9 cm) long
These quantities include a safety margin of about 10%. Buy all of each color in a single dye lot.
Abbreviations (US Terms)
- ch – chain
- sl st – slip stitch
- sc – single crochet
- dc – double crochet
- st(s) – stitch(es)
- RS – right side
- rnd – round
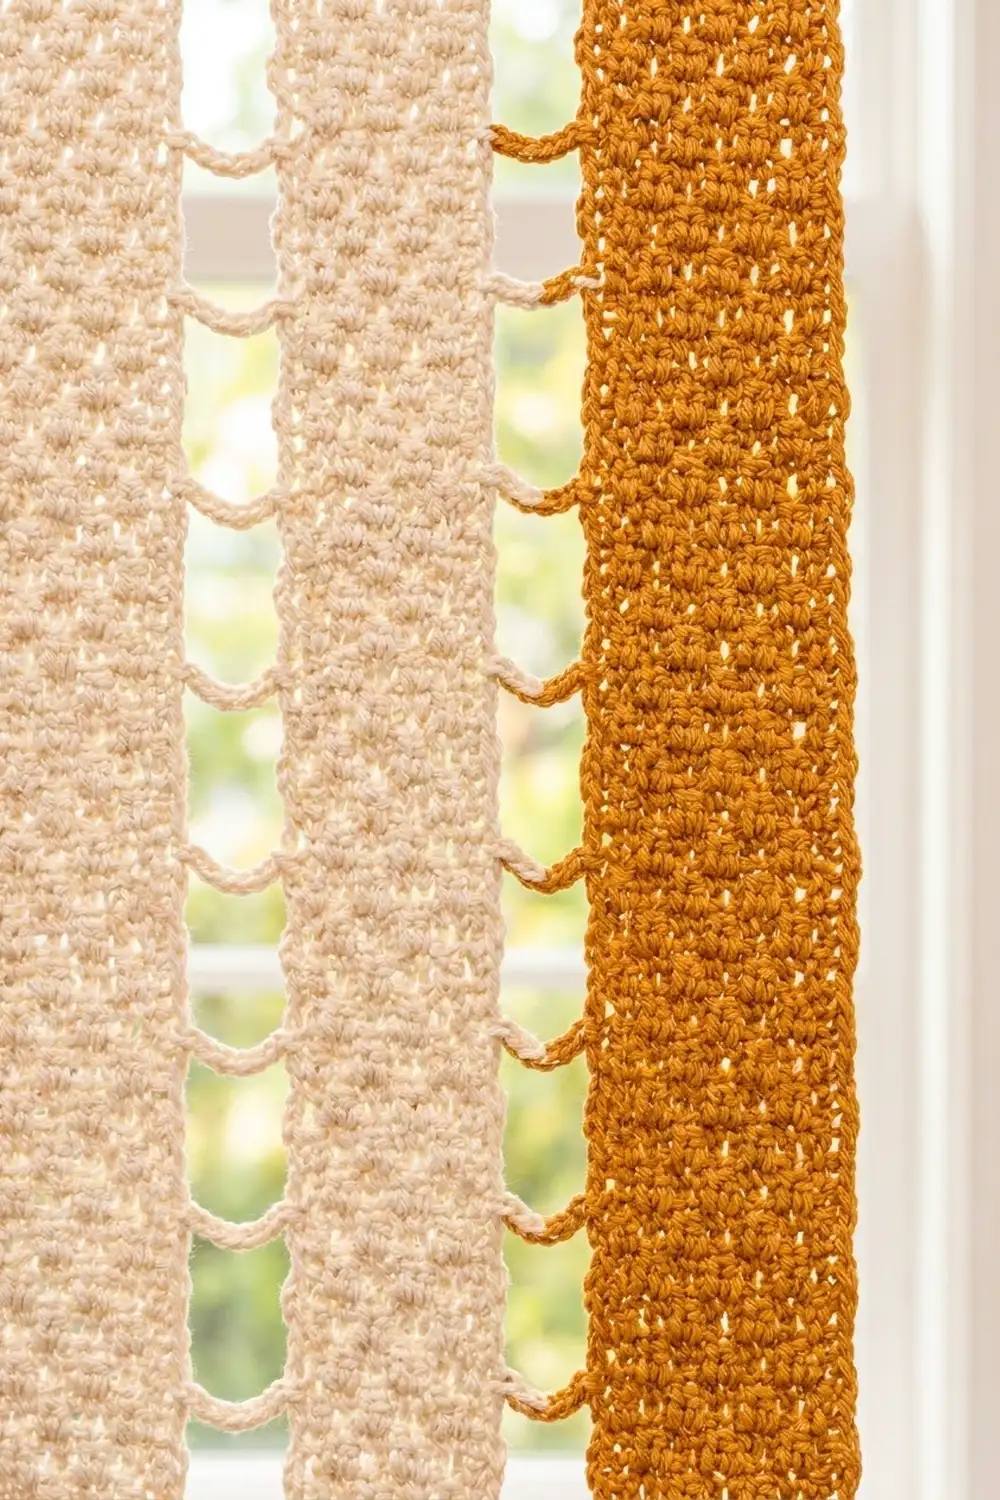
Special stitch – Griddle Stitch: Work sc and dc alternately across the row. On each following row, work a sc into each dc and a dc into each sc. The short and tall stitches stagger from row to row and push up the small bumps you can see in the photo.
Gauge and Checkpoints
Gauge: 16 sts and 16 rows = 4 in (10.2 cm) in griddle stitch, after blocking.
Make one complete test section before you commit to 11 full strips:
- Ch 13 and work 16 rows of the strip pattern below.
- Block it lightly and let it dry.
- Measure. It should be 3 in (7.6 cm) wide and 4 in (10.2 cm) long.
Checkpoints for each strip:
- After Row 1: 12 sts, 3 in (7.6 cm) wide
- After Row 16: 4 in (10.2 cm) long
- After Row 120: 30 in (76.2 cm) long
- After Row 240: 60 in (152.4 cm) long
If your strip is too big: go down to a 4.5 mm hook.
If your strip is too small: go up to a 5.5 mm hook.
Do not change the stitch count. The border math depends on exactly 12 sts per strip and 240 rows per strip.
Strip Pattern (Make 11)
Every strip is worked the same way. Only the color changes.
Foundation: Ch 13.
Row 1 (RS): Sc in 2nd ch from hook, dc in next ch, *sc in next ch, dc in next ch; repeat from * across. Turn. (12 sts: 6 sc, 6 dc)
Row 2: Ch 1 (does not count as a st). Sc in first dc, dc in next sc, *sc in next dc, dc in next sc; repeat from * across. Turn. (12 sts)
Row 3: Repeat Row 2. (12 sts)
Every row now starts by working a sc into the dc of the row below, so the bumps stay offset in a tidy checkerboard.
Rows 4–240: Repeat Row 2. Count 12 sts at the end of every row. (12 sts per row; 240 rows total)
Fasten off and leave a 6 in (15.2 cm) tail. Weave in both tails along the short edges only. Keep the long edges clean, because the joining rungs attach there.
Edge tip: Keep the ch-1 turning chain snug. Each row end becomes one attachment point for the joining and one sc in the border, so the long edges need to be even and countable.
Make All Pieces
- Color A (mustard): 6 strips
- Color B (cream): 5 strips
Lay the strips out in this order, RS facing up, with every foundation edge at the bottom:
| A | B | A | B | A | B | A | B | A | B | A |
  1   2   3   4   5   6   7   8   9  10  11
Strips 1 and 11 are mustard and form the outer edges. That gives 10 seams in total, and every seam has one mustard and one cream strip.
Check before joining: each strip should measure 3 in × 60 in (7.6 cm × 152.4 cm). If any strip is off by more than 0.5 in (1.3 cm) in length, block that strip on its own first.
Joining: Chain-Ladder Join
Work each of the 10 seams in cream (Color B). The rungs then disappear into the cream strip and show only as neat loops reaching across to the mustard strip, as in the photo.
Stitch-to-stitch logic: Each strip has 240 row ends per long edge. You place one rung every 4 rows, at Rows 2, 6, 10 … 238. That gives 60 rungs per seam, evenly spaced about 1 in (2.5 cm) apart vertically.
Join one seam:
- Lay the two strips side by side, RS up, with their bottoms aligned and a 1 in (2.5 cm) gap between them.
- With cream, sl st into the row end of Row 2 on the cream strip.
- Ch 3, sl st into the row end of Row 2 on the mustard strip.
- Ch 3, sl st back into the same Row 2 row end on the cream strip. One rung is complete.
- Sl st up the cream edge into the row ends of Rows 3, 4 and 5 (3 sl sts).
- Sl st into the row end of Row 6, then repeat steps 3–5.
- Continue until you have made the rung at Row 238. Sl st up the last 2 row ends (Rows 239 and 240) and fasten off.
Seam count: 60 rungs per seam × 10 seams = 600 rungs.
Tension advice: Keep the ch-3 legs loose enough that each rung spans the gap without pulling, but not so loose that it sags. A useful habit is to pause every 10 rungs and lay the work flat. The strips should sit parallel with the gap unchanged. If the gap narrows, your chains are too tight.
Size checkpoint after joining: 11 strips × 3 in + 10 gaps × 1 in = 43 in wide (109.2 cm). The length should still be 60 in (152.4 cm). Measure across the middle of the panel and across the top. The two measurements should match within 0.5 in (1.3 cm).
Border
The border is worked in mustard (Color A) and gauged in sc at 16 sts = 4 in (10.2 cm), which matches the strip gauge.
In this border, each side count covers only the stitches between the corners. The ch-2 corner spaces are separate and are not included in any side count.
Rnd 1: With RS facing, join mustard in the top right corner, in the first st of the last row of Strip 11.
- Top edge: Sc in each of the 12 sts across Strip 11. Ch 4 across the gap, sc in each of the 12 sts of the next strip; repeat from * to the end of Strip 1. That is 11 strips × 12 sc = 132 sc, plus 10 gaps × 4 ch = 40 ch, for 172 sts*.
- Corner: Ch 2.
- Left side: Work 1 sc in each row end down Strip 1, for 240 sc.
- Corner: Ch 2.
- Bottom edge: Work into the free loops of the foundation chains. Sc in each of the 12 free loops of a strip and ch 4 across each gap, for 132 sc + 40 ch = 172 sts.
- Corner: Ch 2.
- Right side: Work 1 sc in each row end up Strip 11, for 240 sc.
- Corner: Ch 2. Sl st to the first sc.
Rnd 1 total: 172 + 240 + 172 + 240 = 824 sts, plus 4 ch-2 corner spaces.
Rnd 2: Ch 1. Sc in each st and in each ch around. In each ch-2 corner space work (sc, ch 2, sc). Sl st to the first sc.
- Top and bottom: 172 + 2 = 174 sts each
- Sides: 240 + 2 = 242 sts each
- Total: 174 + 242 + 174 + 242 = 832 sts, plus 4 ch-2 corner spaces
Fasten off and weave in the ends.
Why the math works: The top edge has 172 sts. At 4 sts per inch, that is exactly 43 in (109.2 cm), the joined width. The 132 strip sts give 33 in (83.8 cm) and the 40 gap chains give 10 in (25.4 cm). The sides have 240 sc for 240 rows. At 4 rows per inch and 4 sc per inch, that is exactly 60 in (152.4 cm), so the edges neither ruffle nor pull in. The two border rounds add 0.25 in (0.6 cm) each, which is 0.5 in (1.3 cm) per side. The final size is 44 in × 61 in (111.8 cm × 154.9 cm).
Final Blocking
- Lay the curtain flat on blocking mats or a large towel, RS up.
- Mist it evenly with water until it is damp but not soaked.
- Pin the four corners to 44 in × 61 in (111.8 cm × 154.9 cm).
- Pin along the top border every 4 in (10.2 cm), keeping it straight.
- Straighten each strip so it is 3 in (7.6 cm) wide and runs exactly vertical.
- Ease each gap to 1 in (2.5 cm), with every rung lying flat and level.
- Pin the bottom border to match the top.
- Leave it until completely dry, usually 24 hours.
- Unpin it and attach the 11 clip rings to the top border, one centered above each strip.
Final Quality-Control Checklist
- [ ] 11 strips in the order A–B–A–B–A–B–A–B–A–B–A
- [ ] Every strip has 12 sts per row and 240 rows
- [ ] Each strip measures 3 in × 60 in (7.6 cm × 152.4 cm)
- [ ] 10 seams with 60 rungs each, all in cream
- [ ] Every gap measures 1 in (2.5 cm)
- [ ] Border Rnd 1: 172 / 240 / 172 / 240 sts
- [ ] Border Rnd 2: 174 / 242 / 174 / 242 sts
- [ ] Finished size 44 in × 61 in (111.8 cm × 154.9 cm)
- [ ] All tails woven in securely
- [ ] Clip rings centered above each strip
Troubleshooting
The griddle bumps line up in columns instead of staggering. You worked a sc into a sc. Every row must start with a sc into the dc below.
A strip is getting narrower. You are missing the last st of the row. Place a marker in the last st of each row and count to 12.
The strips are different lengths. Count the rows in groups of 16 and place a marker at every 4 in (10.2 cm). Add or remove rows to match 240.
The curtain puckers at the seams. The rungs are too tight. Redo the seam with looser chains, or go up a hook size for joining only.
The side borders ruffle. You worked more than one sc per row end. Use exactly 240 sc per side.
The top edge pulls inward across the gaps. The gap chains are too tight. Use ch 4 loosely, or measure a ch 4 against the 1 in (2.5 cm) gap.
The curtain stretches when hung. Cotton relaxes over time. Rewet it and block it again flat, and avoid heavy blends next time.
Care
Hand wash or machine wash gently in cool water, then lay flat to dry and reshape to 44 in × 61 in (111.8 cm × 154.9 cm). Never hang the curtain while it is wet, because the weight of the water will stretch the strips.
Final Notes
The measurement chain runs like this:
- Gauge is 16 sts and 16 rows = 4 in (10.2 cm).
- Each strip is 12 sts × 240 rows = 3 in × 60 in (7.6 cm × 152.4 cm).
- Eleven strips plus ten 1 in (2.5 cm) gaps give 43 in × 60 in (109.2 cm × 152.4 cm).
- The 172-stitch top and bottom edges and the 240-stitch sides lock that size in.
- Two border rounds bring the panel to 44 in × 61 in (111.8 cm × 154.9 cm).
Check each link in the chain, and the curtain will hang straight and even.
Happy crocheting!