

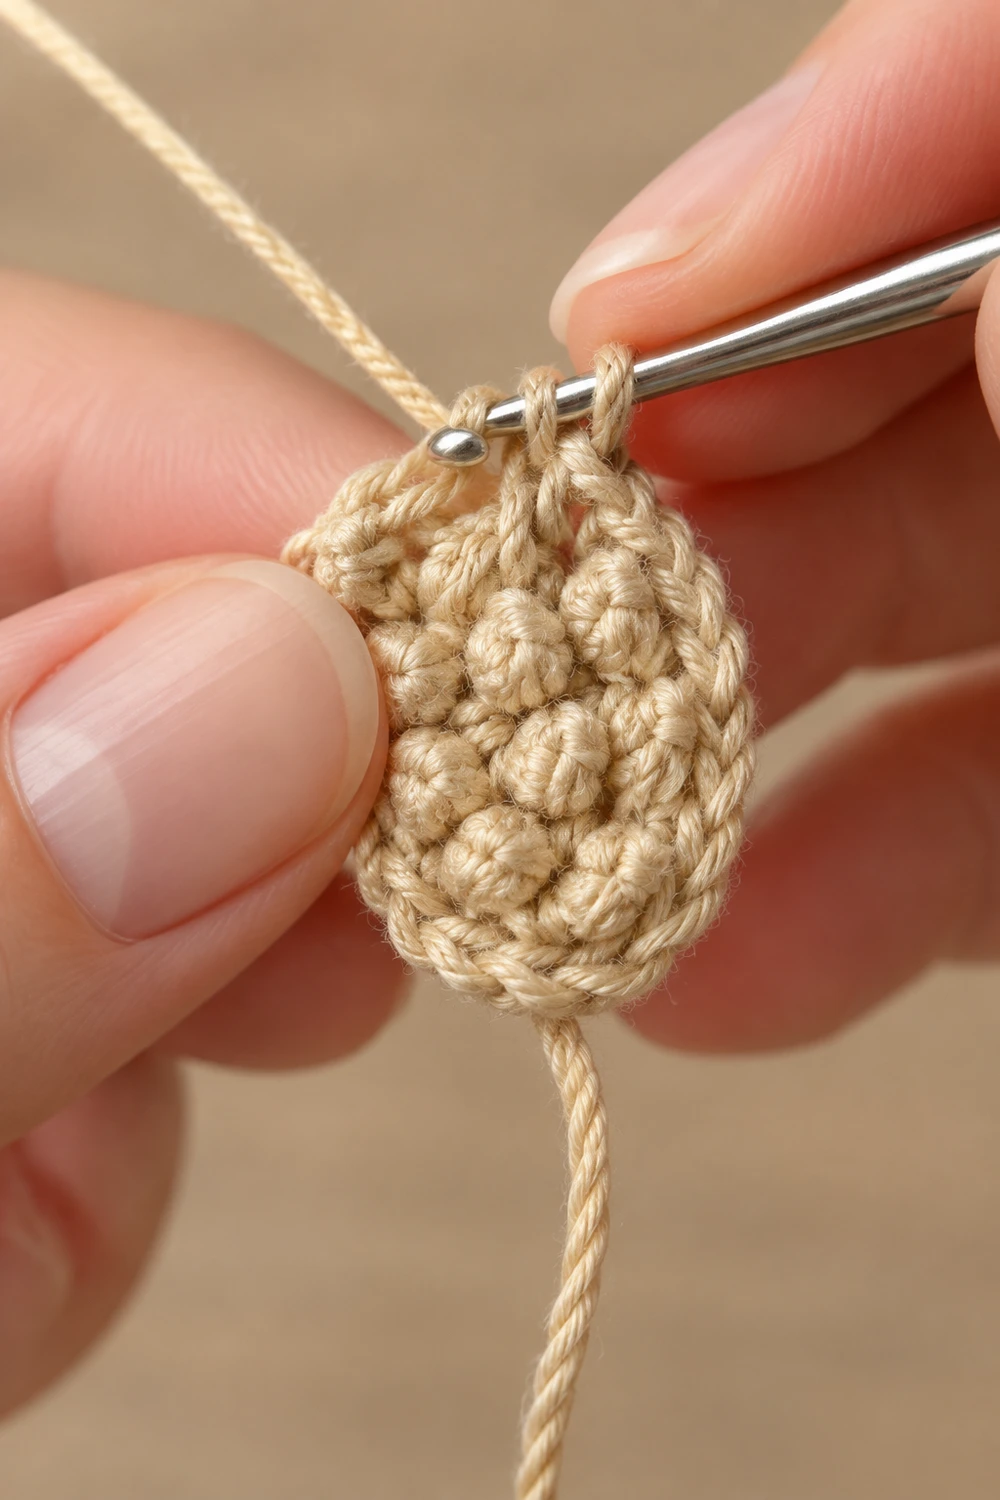
The Honey Pebble is a tiny, chunky little motif made of tight, raised bobbles. It’s small enough to sit on a fingertip, and it has a bumpy, tactile surface that catches the light. It feels a bit like a smooth river pebble that has been covered in knots.
It is worked in a single natural beige or cream thread. One color keeps the focus on texture rather than contrast. The finished motif is compact and slightly rounded, cupping gently instead of lying perfectly flat. That makes it a natural fit as a charm, an appliqué, or a small component within a larger crochet assembly.
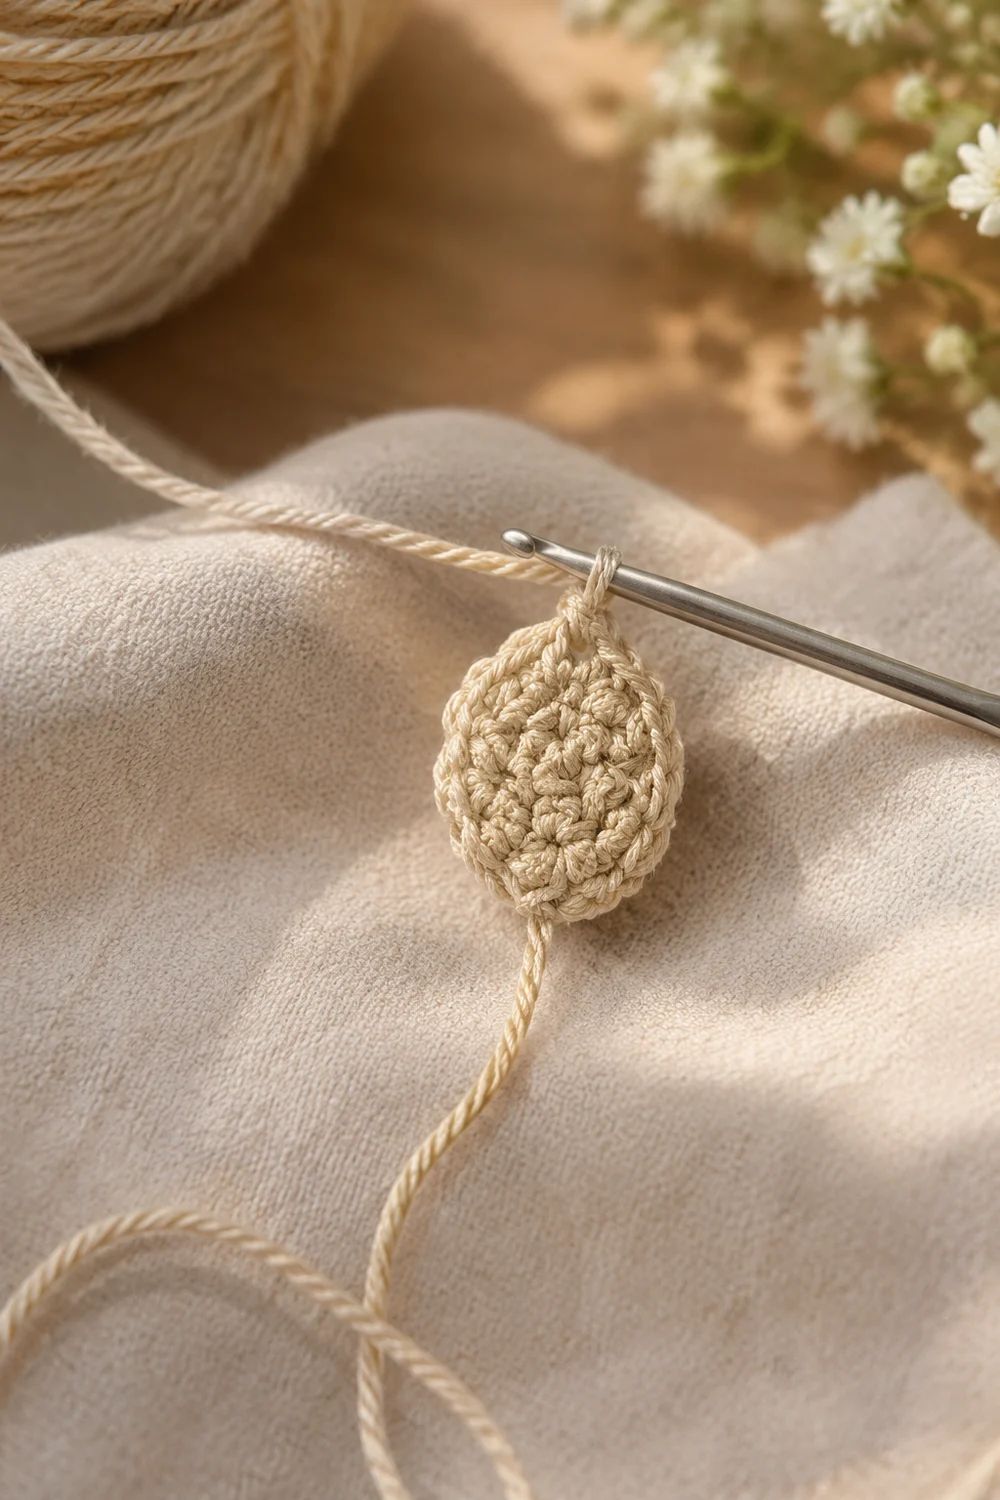
This pattern uses US crochet terms throughout. The finished motif measures 1.25 in (3.2 cm) across, within the 1–1.5 in (2.5–3.8 cm) range of the piece in the photo.
The motif is a single piece worked in the round from a magic ring. It alternates bobble rounds with plain single crochet rounds, then ends with one smooth single crochet border round. You leave a long working tail at the end, so the motif stays attached to a length of thread ready for sewing or hanging, just like the work-in-progress piece shown.
Finished Size and Construction
- Finished size: 1.25 in (3.2 cm) diameter
- Skill level: Advanced beginner (fine thread, bobbles)
- Terminology: US crochet terms
- Yarn weight: Lace (0), size 3 cotton crochet thread
- Hook: 1.75 mm steel hook
- Number of pieces: 1
- Layout: Single motif, no assembly
- Piece size: 1.25 in (3.2 cm)
- Size before border (after Round 4): 1 in (2.5 cm)
- Border depth: 1/8 in (0.3 cm) on each side, one round of sc
- Rounds: 5 total
Materials
Yarn advice: Choose a smooth, tightly plied mercerized cotton thread in size 3. Mercerized cotton gives crisp, well-defined bobbles and a soft sheen, similar to the piece in the photo. Avoid fuzzy or loosely spun threads, because they blur the bobble texture and are hard to pull through cluster loops.
- Natural beige / cream: 2 g, about 8 m
This quantity includes a margin for a gauge swatch, a 12 in (30.5 cm) finishing tail, and the starting tail. The motif itself uses roughly 5 m.
Tools:
- 1.75 mm steel crochet hook
- Fine tapestry needle with an eye large enough for size 3 thread
- Small sharp scissors
- 1 locking stitch marker
- Ruler or small measuring tape marked in inches and cm
- Spray bottle with water (for blocking)
- Rust-proof pins and a small foam pad
- Optional: light spray starch
Abbreviations (US Terms)
- MR: magic ring
- ch: chain
- sl st: slip stitch
- sc: single crochet
- dc: double crochet
- yo: yarn over
- st(s): stitch(es)
- rnd: round
- bob: bobble (see below)
- RS / WS: right side / wrong side
Special stitch – Bobble (bob): Work a 4-dc cluster in one st:
- Yo, insert hook in the st, yo and pull up a loop, yo and draw through 2 loops (2 loops remain on hook).
- Repeat step 1 three more times in the same st (5 loops on hook).
- Yo and draw through all 5 loops.
The bobble counts as 1 stitch in every count below. You do not need a closing chain. The sc that follows locks it in place.
Bobble direction: Bobbles worked from the front naturally bulge toward the back of the work. As you complete each one, gently push it through to the front with a fingertip. Keep the same side facing you throughout, and treat that side as the RS.
Gauge and Checkpoints
Test one motif first. Because this is a single small piece, your first motif is your gauge swatch. Work it completely, measure it, and adjust before making any more.
Exact stitch gauge matters less here than the diameter at each round. Measure across the center, edge to edge, with the work lying relaxed. Do not stretch it.
Checkpoints:
| After round | Stitch count | Diameter |
|---|---|---|
| Rnd 1 | 8 sc | 0.25 in (0.6 cm) |
| Rnd 2 | 16 sts | 0.5 in (1.3 cm) |
| Rnd 3 | 24 sc | 0.75 in (1.9 cm) |
| Rnd 4 | 32 sts | 1 in (2.5 cm) |
| Rnd 5 | 32 sc | 1.25 in (3.2 cm) |
Each round adds about 1/4 in (0.6 cm) to the diameter. That means each round adds about 1/8 in (0.3 cm) to every edge.
Body gauge reference: At the edge of Round 4, the body works out to about 10 sts per inch (3.9 per cm) around the circumference.
If your motif is too big (over 1.38 in / 3.5 cm after Rnd 5): Go down to a 1.5 mm hook. Also check that you are fully closing each bobble and not leaving loose loops.
If your motif is too small (under 1.13 in / 2.9 cm after Rnd 5): Go up to a 2.0 mm hook. Loosen the pull-up loops inside each bobble slightly so each dc reaches full height.
Either result still sits within the 1–1.5 in (2.5–3.8 cm) intended range. Adjust only if you need a specific size for an assembly.
Pattern
Leave a 4 in (10.2 cm) starting tail. You will weave it in at the end.
Round 1 (foundation)
Make a MR. Ch 1 (does not count as a st), work 8 sc into the ring. Pull the tail firmly to close the ring completely. Sl st to the first sc to join.
Stitch count: 8 sc.
Checkpoint: 0.25 in (0.6 cm) across. The center should be fully closed with no hole.
Round 2 (first bobble round – growth round)
Ch 1 (does not count as a st). *(Sc, bob) in next st; repeat from * around (8 times). Sl st to the first sc to join.
Stitch count: 16 sts (8 sc + 8 bob).
This is a growth round. Each of the 8 original stitches now holds 2 new stitches, so the round has 16 sts of its own. Push every bobble to the RS as you go.
Checkpoint: 0.5 in (1.3 cm) across.
Round 3 (sc round – conversion round with increases)
Ch 1 (does not count as a st). *Sc in next sc, 2 sc in next bob; repeat from * around (8 times). Sl st to the first sc to join.
Stitch count: 24 sc = 16 sc worked one into each existing st + 8 extra sc (the second sc worked into each bobble).
This plain round locks the bobbles in place and keeps them crisp. Insert your hook under both loops at the top of each bobble. The top can be easy to miss, so place a marker in the first sc if needed.
Checkpoint: 0.75 in (1.9 cm) across.
Round 4 (second bobble round – growth round)
Ch 1 (does not count as a st). *Sc in next st, (bob, sc) in next st, bob in next st; repeat from * around (8 times). Sl st to the first sc to join.
Stitch count: 32 sts (16 sc + 16 bob).
Each 3-stitch repeat from Round 3 becomes 4 stitches: sc, bob, sc, bob. Bobbles and sc alternate all the way around. The round ends on a bobble, which sits right beside the first sc at the join, so the alternation continues across the join with no gap.
This is the outer textured band. It gives the motif its dense, bumpy surface. Push each bobble to the RS.
Checkpoint: 1 in (2.5 cm) across. This is your size before the border. The edges may already begin to curve very slightly toward the WS. That is the start of the rounded shape.
Round 5 – see Border, below
Border
The border is one round of plain sc. It gives a smooth, clean edge that frames the bobbles and makes the motif easy to sew or attach.
Border gauge: The border is worked at a deliberately looser density than the body. It has 32 sc around a 1.25 in (3.2 cm) circle, which is a circumference of about 3.9 in (10 cm). That works out to about 8 sc per inch (3.1 per cm), compared with about 10 sts per inch (3.9 per cm) at the body edge.
Because the outer edge has fewer stitches than a flat circle would need, it draws in slightly. That creates the gentle cup that gives the motif its slightly rounded shape.
Round 5 (border – conversion round, no increases)
Ch 1 (does not count as a st). Sc in each st around. Sl st to the first sc to join.
Stitch count: 32 sc = 32 sc worked one into each existing st (16 into sc + 16 into bob) + 0 extra stitches.
Counts per quarter: A round motif has no corners. For even tension, think of the edge as 4 quarters of 8 sc each (8 × 4 = 32). Place your marker at the start and check that 8 sc covers about one quarter of the circle.
Why the math works:
- Round 4 has 32 sts.
- Round 5 works exactly one sc into each, for 32 sc.
- No increases are added. Since the diameter grows by 1/4 in (0.6 cm) without added stitches, the border edge pulls inward slightly.
- 32 divides evenly into 4 quarters of 8, so the draw-in is even all the way around. You get a smooth dome instead of a wavy or lopsided edge.
Checkpoint: 1.25 in (3.2 cm) across, measured across the top of the dome without flattening it.
Fasten off
Cut the thread, leaving a 12 in (30.5 cm) tail, and pull it through the last loop. This long tail is the trailing working thread seen in the photo. Use it to sew the motif as an appliqué, tie it on as a charm, or attach it to a larger piece.
Weave in the 4 in (10.2 cm) starting tail on the WS, through the backs of the Round 1 and Round 2 stitches. Leave the long tail unwoven until you know how the motif will be used.
Final Blocking
Blocking sets the dome and evens out the bobbles.
- Check the shape. Look at the motif from the RS. Push any bobble that has slipped back toward the WS forward with a fingertip.
- Dampen. Lightly mist the motif with water until it is evenly damp, not dripping.
- Shape the dome. Rest the motif, RS up, over a rounded form about 1 in (2.5 cm) wide. A marble, the end of a wooden spoon handle, or a fingertip-sized ball of plastic wrap all work. This encourages the slightly rounded profile.
- Even the edge. Gently nudge the border so all 4 quarters look equal. Use 2–4 pins into the foam pad around the edge if the motif shifts. Do not stretch it.
- Optional starch. For a charm that must hold its shape, apply a light mist of spray starch at this point.
- Dry fully. Leave it untouched until completely dry, usually 2–4 hours for size 3 cotton.
- Measure. Confirm 1.25 in (3.2 cm) across the dome.
Final Quality-Control Checklist
- Center ring is fully closed with no visible hole.
- Round counts are correct: 8, 16, 24, 32, 32.
- Round 2 has 8 bobbles and Round 4 has 16 bobbles, all facing the RS.
- No bobble has loose or partially closed loops.
- Joins line up in a neat, barely visible column.
- Border is smooth plain sc, with 8 sc per quarter.
- Motif is gently rounded, not flat, wavy, or ruffled.
- Diameter is 1.25 in (3.2 cm), within 1/8 in (0.3 cm).
- Starting tail is woven in, and the 12 in (30.5 cm) working tail is left free.
Troubleshooting
Bobbles sink to the back. Push each one through to the RS right after closing it. Keep the same side facing you every round, and never turn the work.
Motif ruffles or waves. You have probably added extra stitches. Recount Round 4 (32 sts) and Round 5 (32 sc), and frog back to the round that is off.
Motif cups too deeply, like a bowl. Your border is too tight. Redo Round 5 with a 2.0 mm hook, or ease up on the yarn tension for that round only.
Motif lies completely flat. Your border is too loose. Redo Round 5 with a 1.5 mm hook. Then block it over a rounded form.
Can’t find the top of a bobble. The top is the closing loop at the very peak of the cluster. Tilt the work toward you and insert the hook under both top loops. Don’t go into the side of the cluster.
Center hole won’t close. The ring tail was pulled too late or too gently. Tug it firmly before weaving in, and anchor it with two backstitches on the WS.
Bobbles look uneven in height. Pull up each loop to the same height before the yo-through-2. Consistent loops matter more than tight tension.
Care
Hand wash in cool water with mild soap, press out the water in a towel, and reshape over a rounded form to dry. Re-starch if the motif was starched originally.
Final Notes
The Honey Pebble grows in steady quarter-inch steps:
- 0.25 in (0.6 cm) after Round 1
- 0.5 in (1.3 cm) after Round 2
- 0.75 in (1.9 cm) after Round 3
- 1 in (2.5 cm) after Round 4
- 1.25 in (3.2 cm) after the Round 5 border
The stitch counts run 8, 16, 24, 32, 32. The border is worked one sc into each stitch with no increases, at about 8 sc per inch against the body’s 10. That gentle difference is what gives the motif its compact, slightly rounded shape.
Check each round against the table and leave that long working tail. You’ll have a tidy, textured little motif ready to become a charm, an appliqué, or part of something bigger.
Happy crocheting!