

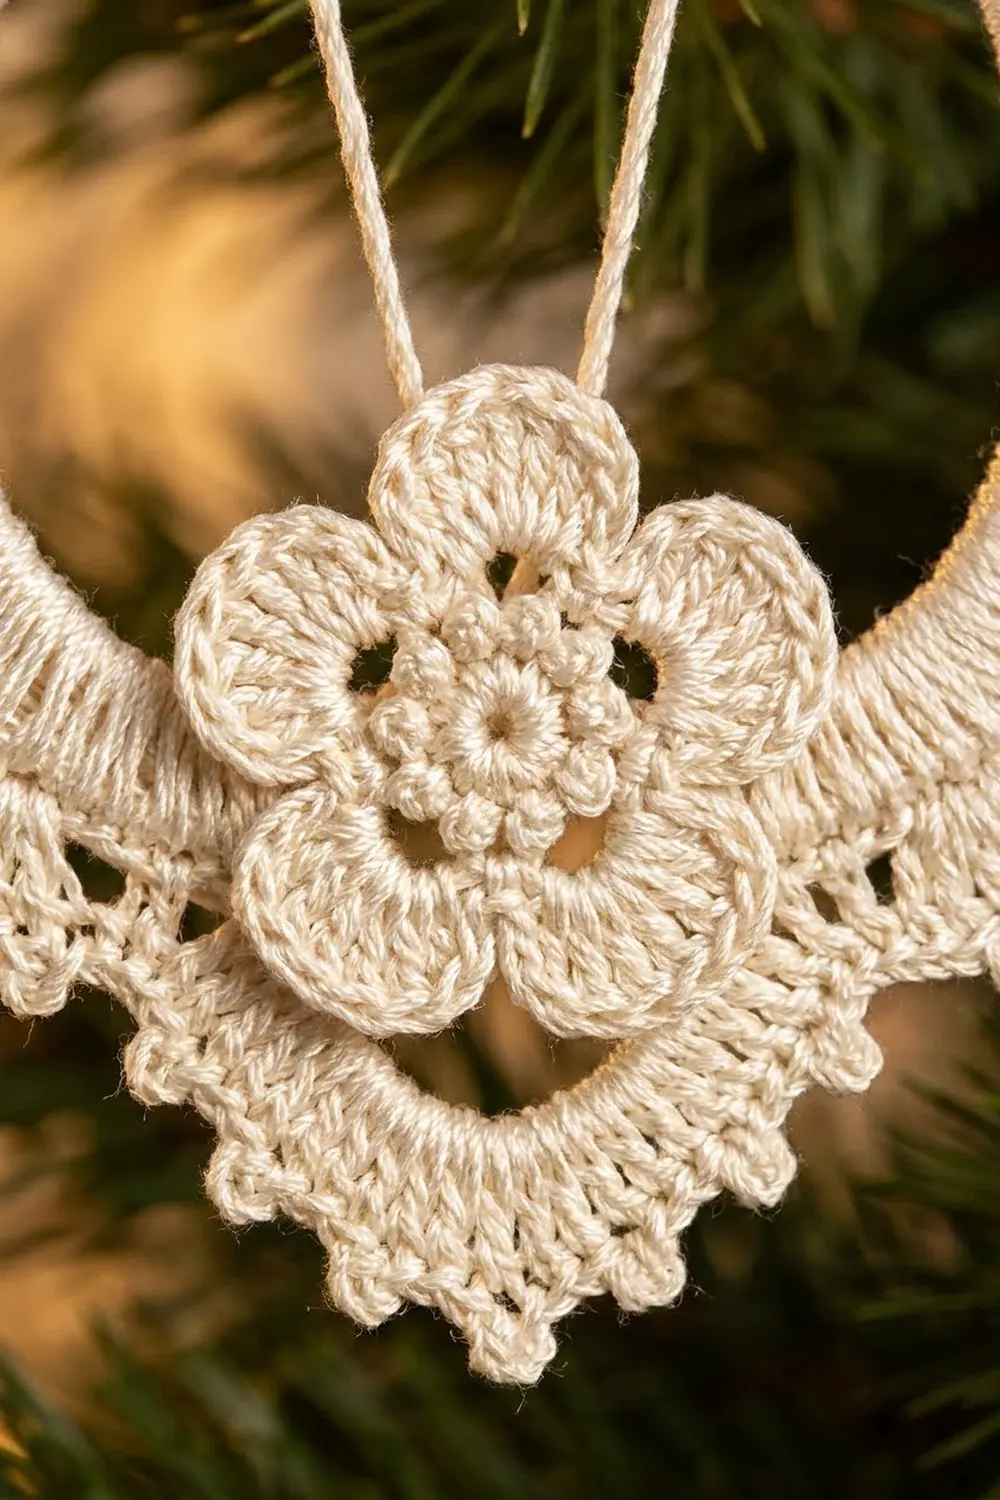
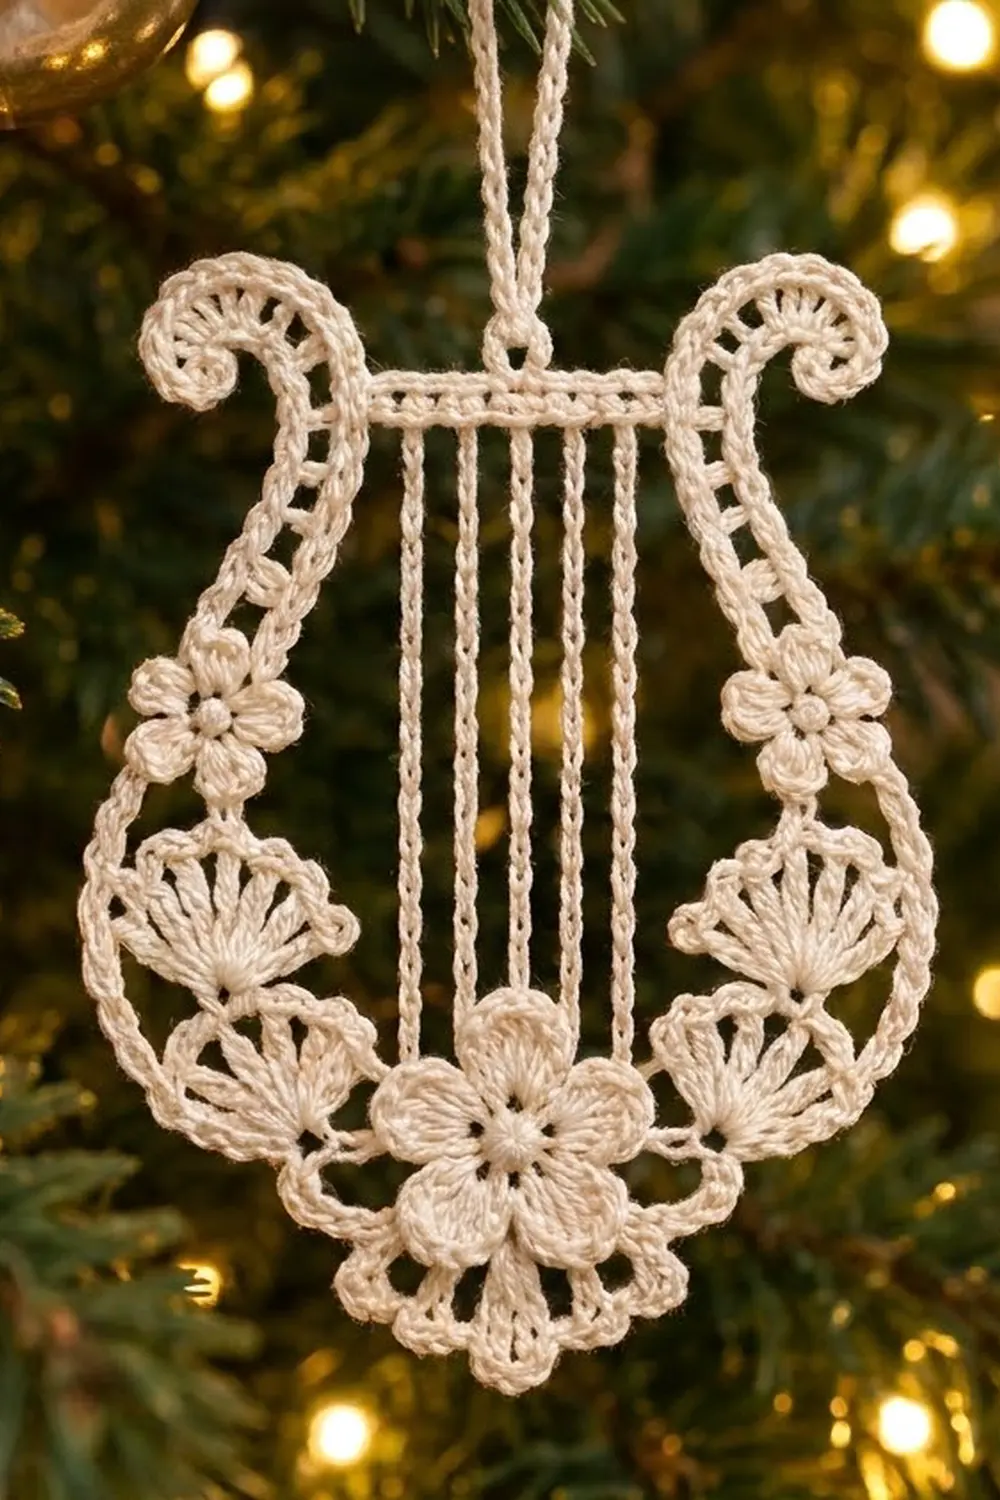
The Ivory Carol Lyre is a delicate thread-crochet ornament shaped like a classic lyre. Two curved arms rise from a five-petal flower at the base and end in scrolls that curl outward. A slim crossbar joins the arms at the top, five fine strings run down to the flower, and a hanging loop sits at the center of the crossbar.
The whole ornament is worked in one soft ivory or cream thread. Lace details fill the bowl of the lyre: a small open fan on each lower side, a larger fan and a tiny flower worked into each arm, and a pointed scallop under the center flower. The outer edges of the arms have tiny picots that give them a beaded look. It suits a Victorian, heirloom, or music-themed Christmas tree.
This pattern uses US crochet terms. The finished ornament measures 4 in (10.2 cm) wide by 5 in (12.7 cm) tall, not counting the hanging loop, which adds 1.25 in (3.2 cm).
The ornament is a single piece. You start with the center flower, then add the bottom point and the two lower fans. Next you chain each arm up and work back down it. The crossbar, hanging loop, strings, and picot edging come last, and starching sets the final shape.
Finished Size and Construction
- Finished size: 4 in (10.2 cm) wide x 5 in (12.7 cm) tall, plus a 1.25 in (3.2 cm) hanging loop
- Skill level: Intermediate (thread crochet, working into free chain loops)
- Terminology: US
- Yarn weight: Size 10 cotton crochet thread (Lace, 0)
- Hook: 1.75 mm steel hook
- Number of pieces: 1
- Layout: One lyre-shaped ornament, no joining
- Piece size: 4 in (10.2 cm) x 5 in (12.7 cm)
- Size before border: 3.8 in (9.7 cm) wide x 5 in (12.7 cm) tall
- Border depth: 0.1 in (0.3 cm) along each outer arm edge
Materials
Mercerized size 10 cotton thread works best. It holds a crisp shape after starching and shows the stitches clearly. Avoid fuzzy or very soft thread, because the strings and scrolls will not hold their shape.
- Ivory / cream: 6 g, about 25 m (27 yd)
This amount includes a margin of about 30 percent for your gauge test and thread tails. One standard ball of size 10 thread is enough for many ornaments.
Tools:
- 1.75 mm steel crochet hook
- Fine tapestry needle or small-eye beading needle for weaving in ends
- Small sharp scissors
- Stitch markers (2–3 small locking markers)
- Fabric stiffener, liquid starch, or a sugar-water solution
- Foam blocking board, rustproof pins, and plastic wrap
- A printed or hand-drawn lyre outline, 4 in (10.2 cm) x 5 in (12.7 cm), to use as a blocking template
Abbreviations (US Terms)
- ch – chain
- sl st – slip stitch
- sc – single crochet
- hdc – half double crochet
- dc – double crochet
- tr – treble crochet
- st(s) – stitch(es)
- sp – space
- free loop – the unused loop on the underside of a foundation chain after the first row has been worked into it
Special stitch – picot: Ch 3, sl st in the 3rd ch from the hook.
Gauge and Checkpoints
Gauge: 10 sc = 1 in (2.5 cm) in size 10 thread with a 1.75 mm hook. Make your chains loose enough that 10 ch also measure 1 in (2.5 cm). The arms are worked straight into long chains, so your chain gauge matters as much as your stitch gauge.
Test piece: Make the center flower (Rnds 1–3) and measure it before you go on, with the flower lying flat and unstretched. This checks your gauge on a real part of the ornament.
Checkpoints:
- After Rnd 1: the ring is about 0.4 in (1.0 cm) across.
- After Rnd 3: the flower is 1.25 in (3.2 cm) across from petal tip to petal tip.
- Arm foundation chain (48 ch): 4.8 in (12.2 cm) long.
- Straight part of the arm after Row 1 (39 sc): 3.9 in (9.9 cm). The scroll is about 0.5 in (1.3 cm) across.
- Side flower: about 0.8 in (2.0 cm) across.
- Crossbar (25 sc): 2.5 in (6.4 cm).
- Strings (25 ch each): 2.5 in (6.4 cm).
If your flower is too big, switch to a 1.5 mm hook. If it is too small, switch to a 2.0 mm hook. If your stitches match the gauge but your chains are tight, make the foundation chains with a hook one size larger, then go back to your main hook.
Pattern
Part 1: Center Flower
Ch 5, sl st in the first ch to form a ring.
Rnd 1: Ch 1, 10 sc in the ring, sl st in the first sc. (10 sts)
Rnd 2: (Ch 3, skip 1 sc, sl st in the next sc) 5 times. The last sl st lands in the first sc of Rnd 1. (5 ch-3 loops)
Rnd 3: Sl st into the first ch-3 loop. In each ch-3 loop work (sc, hdc, 3 dc, hdc, sc). Sl st in the first sc. (35 sts: 5 petals of 7 sts)
Turn the flower so one petal points straight down. This is Petal 1 (bottom). Going counterclockwise, name the others Petal 2 (lower right), Petal 3 (upper right), Petal 4 (upper left), and Petal 5 (lower left). Place a marker in Petal 1.
Rnd 4 (backing loops): Working behind the petals, sl st around the Rnd 2 sl st directly behind your hook. (Ch 5, sl st around the next Rnd 2 sl st) 5 times. (5 ch-5 loops, one behind each petal)
These loops add body to the flower and lift the petals. Loop 1 sits behind Petal 1, Loop 2 behind Petal 2, and so on.
Part 2: Bottom Point
Sl st over to Loop 1, behind the bottom petal.
Point: In Loop 1 work (sc, hdc, 2 dc, tr, ch 3, tr, 2 dc, hdc, sc). (10 sts plus 1 ch-3 tip)
Fasten off. The point should hang about 0.5 in (1.3 cm) below the bottom petal.
Part 3: Lower Fans (make 2)
Work the left fan in Loop 5 and the right fan in Loop 2. Join at the end of the loop farthest from the bottom point. That way Row 2 ends at the upper outer tip of the fan, which is where the arm starts.
Row 1: Join with a sl st, ch 3 (counts as a dc), 6 dc in the same loop. (7 dc)
Row 2: Ch 1, turn, sc in the first dc, (ch 3, sc in the next dc) 6 times. (7 sc, 6 ch-3 loops)
Do not fasten off. Each fan measures about 0.6 in (1.5 cm) across. Go straight on to the arm on that side.
Part 4: Arms (make 2)
Work the left arm from the left fan and the right arm from the right fan. Both arms use the same instructions.
Foundation: Ch 48 loosely. (4.8 in / 12.2 cm) Make sure the chain is not twisted before you work back along it.
Row 1 (scroll and outer edge): 3 hdc in the 2nd ch from the hook and in each of the next 7 ch. Sc in each of the remaining 39 ch. Sl st in the last sc of the fan. (63 sts: 24 hdc + 39 sc)
Chain check: 1 skipped ch + 8 scroll ch + 39 frame ch = 48 ch.
Packing 24 hdc into just 8 chains makes the top of the arm curl into a tight scroll. Push the scroll so it curls outward, away from the center of the lyre.
Row 2 (inner edge): Do not turn. Rotate the arm and work into the free loops of the 39 frame ch, moving from the fan up toward the scroll:
- Sc in each of the first 6 free loops. (6 sc)
- Side fan: Skip 3 free loops. In the next free loop work (dc, ch 1) 8 times, then 1 more dc. Skip 3 free loops. (9 dc, 8 ch-1 sps; uses 7 free loops)
- Sc in each of the next 6 free loops. (6 sc)
- Side flower: Sc in the next free loop. Ch 8, then sl st in the 6th ch from the hook to form a ring. The first 2 ch you made form the stem.
- Ch 1, 10 sc in the ring, sl st in the first sc. (10 sc)
- (Ch 3, skip 1 sc, sl st in the next sc) 5 times. (5 ch-3 loops)
- In each ch-3 loop work (sc, 3 dc, sc). Sl st in the first sc. (25 sts)
- Sl st in each of the 2 stem ch, then sl st in the same free loop as the last sc you made on the arm.
- Sc in each of the remaining 19 free loops. (19 sc)
Row 2 count: 6 + 9 + 6 + 1 + 19 = 41 sts along the arm, plus the 25-st side flower. Free loops used: 6 + 7 + 6 + 1 + 19 = 39.
Fasten off at the base of the scroll. The side fan opens into the bowl of the lyre and is about 0.7 in (1.8 cm) across. The side flower sits higher up, near the crossbar.
Repeat Parts 3 and 4 on the other side. Because each fan starts at the end farthest from the bottom point, the two arms come out as mirror images.
Part 5: Crossbar
Foundation: Join with a sl st in the last sc of Row 2 on the left arm, at the base of the scroll. Ch 25. Sl st in the last sc of Row 2 on the right arm. (25 ch)
Row A: Ch 1, turn, sc in each ch across. Sl st in the next st of the left arm. (25 sc)
Row B: Ch 1, turn, sc in each sc across. Sl st in the next st of the right arm. (25 sc)
Fasten off. The crossbar should measure 2.5 in (6.4 cm). The free loops of its foundation chain are on the underside, facing the flower.
Part 6: Hanging Loop
Join in the 13th (center) sc of Row B. Ch 26, sl st in the same sc. Work 30 sc into the ch-26 loop, then sl st in the first sc. (30 sc)
Fasten off. The loop stands about 1.25 in (3.2 cm) tall.
Part 7: Strings
The strings hang from the free loops at crossbar ch 7, 10, 13, 16, and 19. That leaves 6 free loops at each end and 2 between neighboring strings, so the strings are evenly spaced 0.3 in (0.8 cm) apart.
Join with a sl st in free loop 7.
String 1: Ch 25, sl st in the middle dc of Petal 4. Sl st in each ch back up (25 sl st), then sl st in the same free loop.
Move: Sl st in each of the next 3 free loops.
Repeat String and Move for the remaining strings, attaching each one to the flower as follows:
- String 2: last hdc of Petal 4
- String 3: the sc where Petals 4 and 3 meet
- String 4: first hdc of Petal 3
- String 5: middle dc of Petal 3
After String 5, fasten off. The strings narrow slightly toward the flower, and blocking straightens them so they look parallel. Keep the sl sts even on the way back up so each string stays a firm, even cord.
Outer Picot Border
Border gauge: 1 picot every 4 sc, or about 1 picot every 0.4 in (1.0 cm).
This border is worked separately on each arm, into the 39 sc of Row 1 (the outer edge). Do not work into the 24 hdc of the scroll.
Border Row (each arm): Join in the first sc after the scroll. Sc in the same sc and in the next 2 sc. (Picot, sc in the next 4 sc) 9 times. Sl st in the fan. (39 sc and 9 picots per side)
Why the math works: 3 + (9 x 4) = 39, which matches the 39 sc of Row 1 exactly. You work one sc into each existing stitch, so the edge does not ruffle or pull in. The picots add about 0.1 in (0.3 cm) on each side, which brings the width from 3.8 in (9.7 cm) to 4 in (10.2 cm).
Weave in all ends along the backs of the sc rows.
Final Blocking
- Draw or print a lyre template 4 in (10.2 cm) wide x 5 in (12.7 cm) tall and cover it with plastic wrap on a blocking board.
- Soak the ornament in stiffener or starch, then press out the excess in a towel. It should be damp, not dripping.
- Pin the crossbar straight across at 2.5 in (6.4 cm).
- Pin the center flower so the tip of the bottom point is 5 in (12.7 cm) below the tops of the scrolls.
- Shape each arm into a smooth outward curve, pinning at the side fan and side flower.
- Pull each string taut and straight, and pin it at the top and bottom.
- Curl each scroll outward, roll it around a pin, and pin the center.
- Open every fan and petal and pin out each picot.
- Let the ornament dry completely (12–24 hours) before removing the pins.
Final Quality-Control Checklist
- The ornament measures 4 in (10.2 cm) x 5 in (12.7 cm).
- The center flower has 5 even petals (35 sts).
- The bottom point hangs centered below Petal 1.
- Both lower fans have 7 dc and 6 ch-3 loops.
- The arms are mirror images with matching scrolls.
- Each arm has 1 side fan (9 dc) and 1 side flower (25 sts).
- The crossbar is 25 sc wide and level.
- All five strings are straight, firm, and evenly spaced.
- Each outer edge has 9 picots.
- The hanging loop is centered and firm.
- All ends are hidden and trimmed.
Troubleshooting
- Scroll won’t curl: Work the hdc more tightly, or put 4 hdc in each of the last 2 scroll ch.
- Arms ruffle or bow: Your chain was too loose for your sc. Make the chain with a smaller hook.
- Arms pucker or curve inward: Your chain was too tight. Make the chain with a larger hook.
- Strings sag after drying: Re-wet them and pin them tighter, or take 1–2 ch out of each string.
- Crossbar is wider than the arms: Check that you have exactly 25 ch, and pin the arms closer together when blocking.
- Flower cups: The Rnd 4 loops are too tight. Use ch 6 instead of ch 5.
- Lyre leans to one side: One fan was probably started at the wrong end. Rework it, starting at the end farthest from the point.
Care
Hand wash in cool water with mild soap, press flat in a towel, and block again with starch. Store the ornament flat or hanging, away from heavier ornaments that could crush it.
Final Notes
Each measurement builds on the one before it. With 10 sc = 1 in (2.5 cm), the flower is 1.25 in (3.2 cm) across. Each 48-ch arm gives 39 sc of straight arm, or 3.9 in (9.9 cm). The 25-st crossbar and the strings are each 2.5 in (6.4 cm). The picot border brings the lyre from 3.8 in (9.7 cm) to 4 in (10.2 cm) wide, at 5 in (12.7 cm) tall. If the flower matches the gauge, the rest of the ornament will come out to size.
Happy crocheting!