

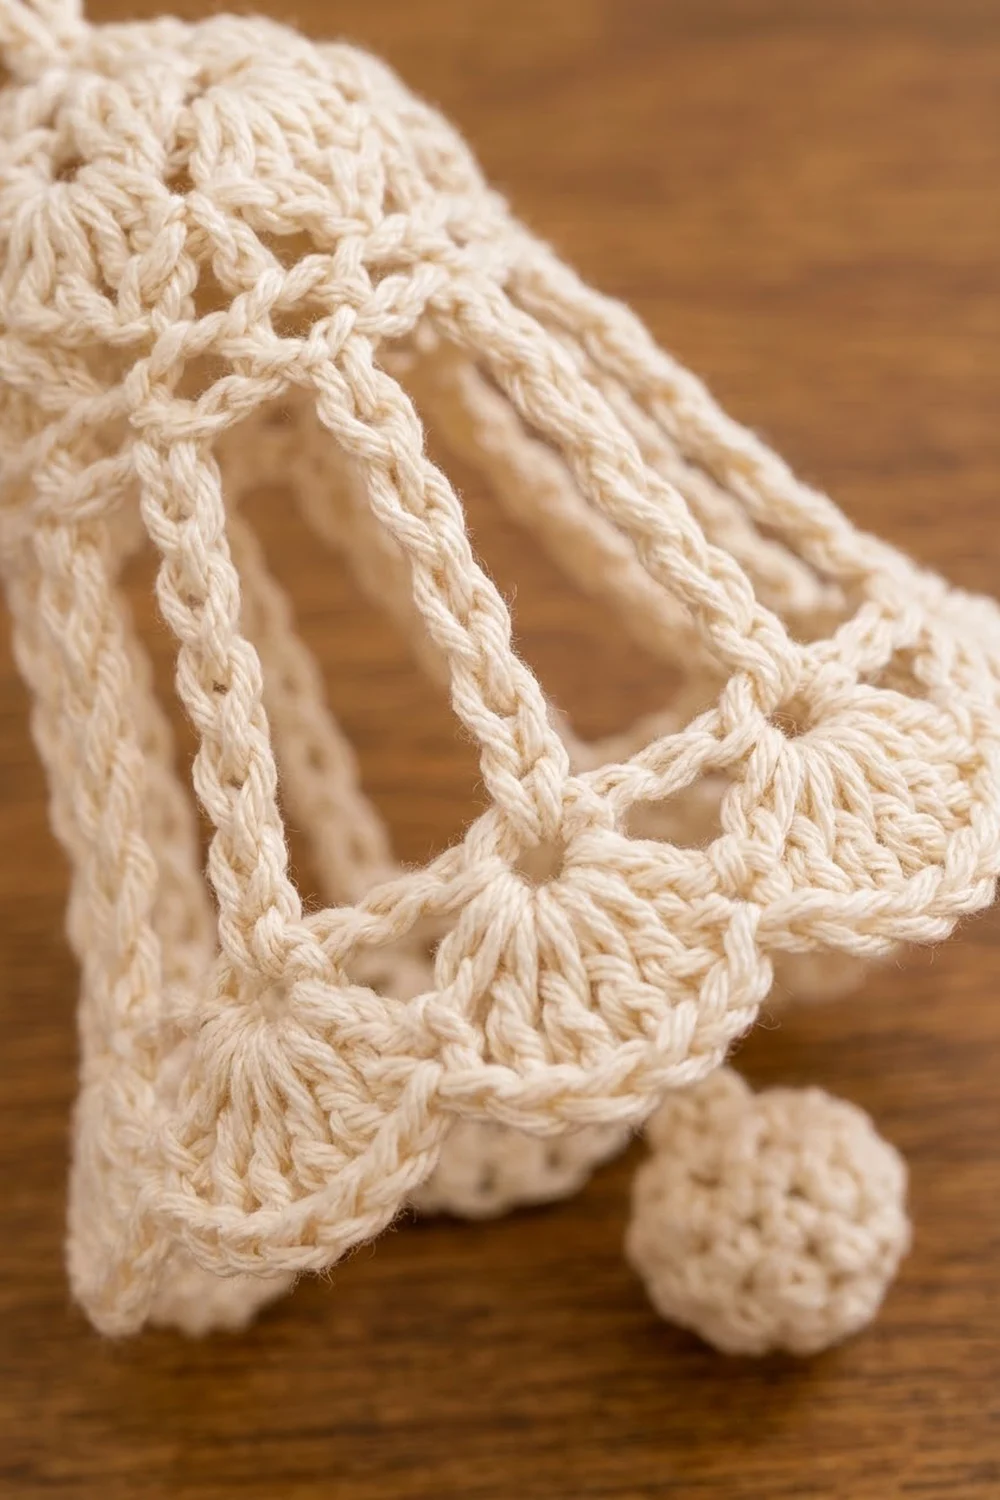
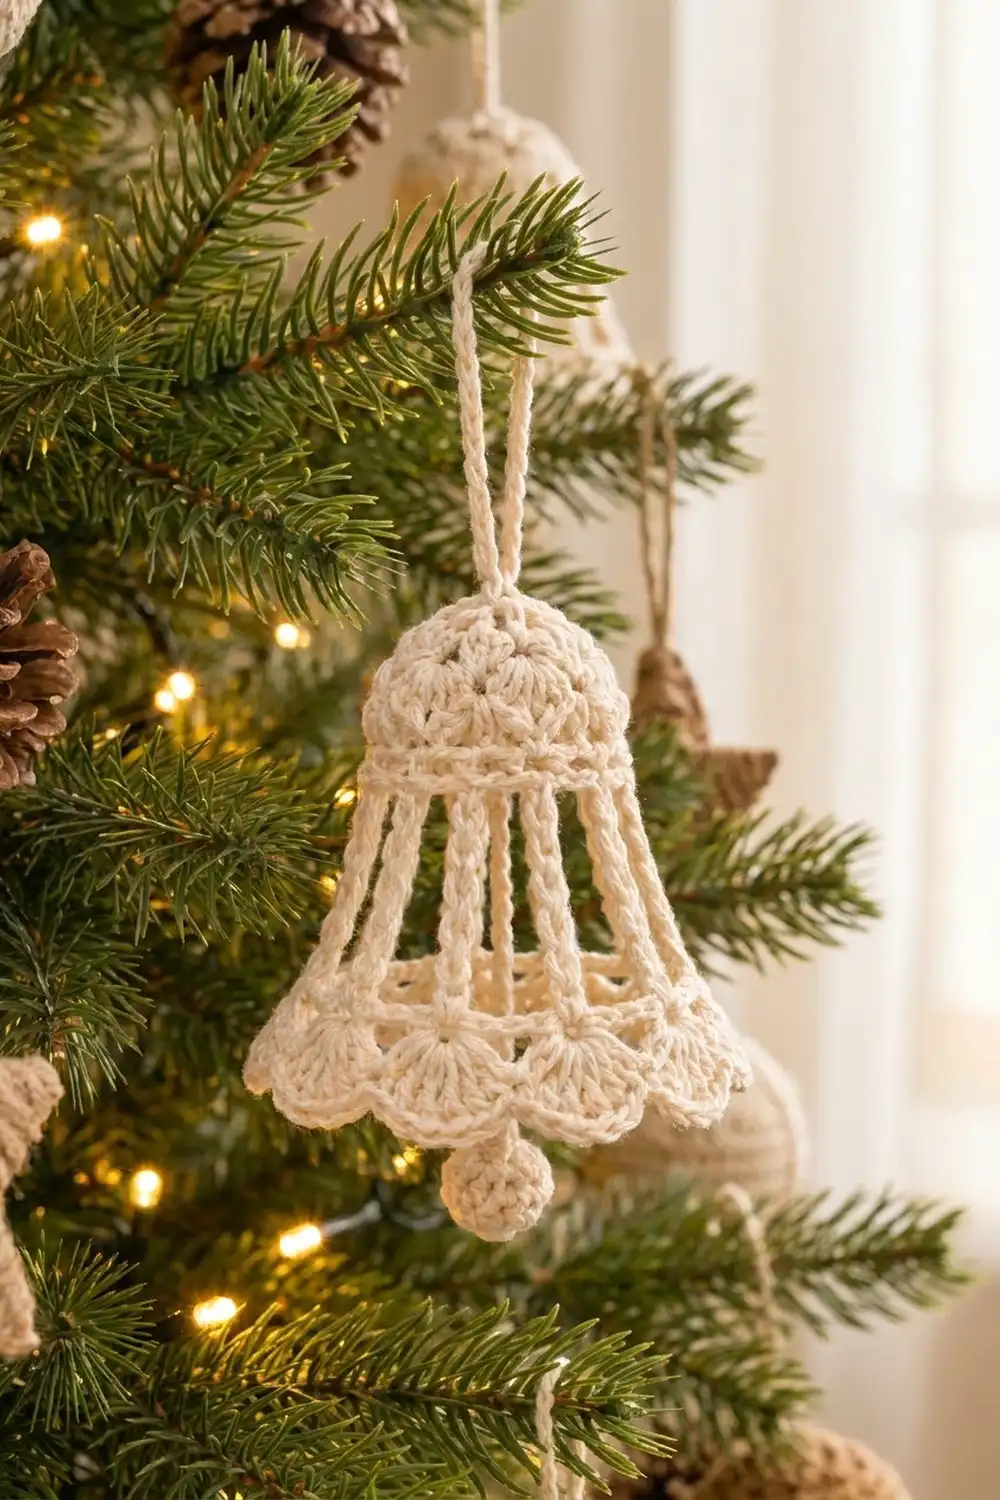
The Ivory Lantern Bell is a small, three-dimensional Christmas bell made in one cream cotton. It has a textured shell dome on top, an open cage of cord-like treble columns in the middle, and a softly scalloped hem. A tiny crocheted ball clapper hangs just below the edge, and a corded chain loop at the top makes it ready for the tree.
The style is vintage and lacy, but the construction is simple. Every round uses the same color, so the texture does all the work. Hang one bell on a gift or doorknob, or make several in the same ivory shade for a matching tree.
This pattern uses US crochet terms throughout. The finished bell is about 3.25 in (8.3 cm) tall from the top of the dome to the scallop tips and about 3.75 in (9.5 cm) wide across the hem when flattened. With the loop and clapper, the whole ornament hangs about 6 in (15.2 cm) long.
You’ll work the bell top-down in joined rounds. First comes a shell-textured dome, then a two-round band, then three rounds of treble columns that flare outward. A lower band with a scalloped edge finishes the bell. The clapper is a tiny stuffed ball on a chain cord, threaded up through the top and tied off with the hanging loop.
Finished Size and Construction
- Finished size: 3.25 in (8.3 cm) tall x 3.75 in (9.5 cm) wide at the hem, flattened
- Total hanging length: about 6 in (15.2 cm), including loop and clapper
- Skill level: Easy-intermediate
- Terminology: US crochet terms
- Yarn weight: Sport / fine (#2) cotton
- Hook: 2.5 mm (US B/1–C/2)
- Number of pieces: 1 bell body + 1 small clapper ball (attached)
- Layout: Single ornament, worked top-down in the round
- Height before hem border (Rounds 1–9): 2.5 in (6.4 cm)
- Hem border depth (Rounds 10–12): 0.75 in (1.9 cm)
- Loop height: 1.75 in (4.4 cm)
- Clapper diameter: 0.6 in (1.5 cm)
Materials
Choose a smooth, tightly plied cotton. Cotton holds the shell texture crisply and takes starch well, which keeps the treble columns straight. Acrylic will work, but the cage section will sag more.
- Cream / ivory cotton, sport weight (#2): 10 g, about 31 m (34 yd) per bell
- 2.5 mm crochet hook
- Tapestry needle
- Scissors
- Stitch marker
- A pinch of fiberfill or yarn scraps for the clapper
- Fabric stiffener or spray starch
- A bell-shaped drying form, such as a small plastic cup or an egg-shaped ornament
The yarn amount includes about 20% extra for the test bell, tails, and the loop. If you’re making a set, multiply by the number of bells and buy everything from one dye lot.
Abbreviations (US Terms)
- ch: chain
- sl st: slip stitch
- sc: single crochet
- dc: double crochet
- tr: treble crochet
- sc2tog: single crochet 2 together
- BLO: back loop only
- MR: magic ring
- sp: space
- st(s): stitch(es)
Special stitches
- Shell: 5 dc in the same stitch (used on the dome).
- Scallop: 7 dc in the same stitch (used on the hem).
- Corded chain: a chain, then a row of sl sts worked back into the back bumps of that chain (used for the hanging loop).
Gauge and Checkpoints
Gauge: 6 sc and 7 sc rows = 1 in (2.5 cm) with a 2.5 mm hook. Gauge matters here because the bell is three-dimensional, so small differences add up around the circumference.
Make one test bell before you start a set, and check it at each stage:
- After Round 2: the flat disc measures 1.25 in (3.2 cm) across.
- After Round 4: the dome is 1 in (2.5 cm) tall and has started to cup.
- After Round 6: the band measures 5 in (12.7 cm) around.
- After Round 9: the bell measures 2.5 in (6.4 cm) from top center to the top of the last treble round.
- After Round 10: the lower band measures about 6.6 in (16.8 cm) around.
- Finished: 3.25 in (8.3 cm) tall and 3.75 in (9.5 cm) wide when flattened.
If your bell comes out too big, go down to a 2.25 mm hook. If it’s too small, or the dome feels stiff and puckered, go up to a 2.75 mm hook. If only the columns are off (too short or floppy), keep the same hook and adjust your tension on the trebles. Pull each loop up to the full height of the beginning ch-4.
Dome
Leave a 6 in (15.2 cm) tail at the start. You’ll use it later to tie off the clapper cord.
Round 1: MR, ch 3 (counts as dc), 9 dc in ring, sl st to top of beg ch-3. Pull the ring fully closed. (10 dc)
Round 2: Ch 3 (counts as dc), dc in same st, 2 dc in each st around, sl st to top of beg ch-3. (20 dc)
Round 3: Ch 1, sc in first st, skip 1 st, shell in next st, skip 1 st, sc in next st, skip 1 st, shell in next st, skip 1 st; repeat from * 3 more times, sl st to first sc. (5 shells + 5 sc = 30 sts)
Each repeat uses 4 stitches. 5 repeats x 4 = 20 stitches, which is all of Round 2.
Round 4: Sl st in next 3 sts, which puts you in the center dc of the first shell. Ch 1, sc in same st, shell in next sc, sc in center dc of next shell; repeat from * 3 more times, shell in last sc, sl st to first sc. (5 shells + 5 sc = 30 sts)
The new shells sit between the shells of Round 3. Keeping the count at 30 makes the work curve down into a dome. Check: the dome should be 1 in (2.5 cm) tall.
Top Band
Round 5 (conversion round): Ch 1, sc in each st around (including every dc of each shell), sl st to first sc. (30 sts worked 1 per st + 0 extra = 30 sc)
Round 6: Ch 1, sc BLO in each st around, sl st to first sc. (30 sc)
The unworked front loops form a raised horizontal ridge on the outside. Together with Round 5, this gives the double-line band under the dome. Check: the band measures 5 in (12.7 cm) around.
Cage Columns
The columns are stacked trebles. Each new tr goes into the top of the tr below, so the posts line up into straight, cord-like bars. The chains between them get longer each round, which flares the cage into a bell shape.
Round 7: Ch 4 (counts as tr), ch 2, skip next 2 sts, tr in next st, ch 2, skip next 2 sts; repeat from * 8 more times, sl st to 4th ch of beg ch-4. (10 tr + 10 ch-2 sps)
Check: 10 repeats x 3 stitches = 30 stitches, which is all of Round 6.
Round 8: Ch 4 (counts as tr), ch 3, tr in next tr, ch 3; repeat from * 8 more times, sl st to 4th ch of beg ch-4. (10 tr + 10 ch-3 sps)
Round 9: Ch 4 (counts as tr), ch 4, tr in next tr, ch 4; repeat from * 8 more times, sl st to 4th ch of beg ch-4. (10 tr + 10 ch-4 sps)
Always work each tr into the top two loops of the tr below, never into the chain space. Check: the bell should now measure 2.5 in (6.4 cm) from the top center to the top of Round 9. The ch-4 spaces will look loose, and Round 10 firms them up.
Hem Border
The lower band and scalloped edge are the bell’s border. The border uses the main gauge: 6 sc = 1 in (2.5 cm).
Round 10 (conversion round): Ch 1, sc in same st, 3 sc in next ch-4 sp, sc in next tr, 3 sc in next ch-4 sp; repeat from * 8 more times, sl st to first sc. (10 sc worked 1 per tr + 30 sc added into the 10 spaces = 40 sc)
Working only 3 sc into each ch-4 space pulls the chains in slightly, so the bars stay straight instead of bowing. Check: the band measures about 6.6 in (16.8 cm) around (40 sc ÷ 6 sc per in = 6.67 in).
Round 11: Ch 1, sc BLO in each st around, sl st to first sc. (40 sc)
This makes the second ridge line, matching the top band.
Round 12 (scallops): Ch 1, sc in first st, skip 1 st, scallop in next st, skip 1 st, sc in next st, skip 1 st, scallop in next st, skip 1 st; repeat from * 8 more times, sl st to first sc. Fasten off. (10 scallops + 10 sc = 80 sts)
Why the math works: In Round 10, each column repeat makes 4 stitches (1 sc above the tr + 3 sc in the space). In Round 12, each scallop repeat uses exactly 4 stitches (sc, skip, scallop, skip). So 10 columns x 4 = 40 = 10 scallops x 4. Because the first sc of Round 12 sits right above the first tr, every anchoring sc lines up under a column and every fan is centered between two columns. Check: the hem measures 0.75 in (1.9 cm) from Round 10 to the scallop tips.
Hanging Loop
Turn the bell right side up. Join yarn with a sl st through the center of the magic ring from the outside.
Ch 22 (about 3.75 in / 9.5 cm of chain). Sl st into the same center point to form a loop. Sl st into the back bump of each of the 22 ch, working back around the loop, then sl st into the center point again. Fasten off and bring both tails to the inside.
The sl st pass turns the loop into a firm, round cord. Check: the folded loop stands 1.75 in (4.4 cm) above the dome.
Clapper
Round 1: MR, 6 sc in ring. (6 sc)
Round 2: 2 sc in each st around. (12 sc)
Rounds 3–4: Sc in each st around. (12 sc)
Stuff firmly with fiberfill or scraps.
Round 5: Sc2tog 6 times. (6 sts)
Don’t fasten off. Ch 24 (about 4 in / 10.2 cm) for the cord. Cut the yarn, leaving an 8 in (20.3 cm) tail, and pull it through the last ch.
Attach: Thread the tail onto a needle and pass it from inside the bell up through the center of the magic ring. Adjust it so the top of the ball hangs 0.4 in (1.0 cm) below the scallop tips. Knot it to the starting tail and the loop tails, then weave all the ends into the dome. The bottom of the ball should sit about 1 in (2.5 cm) below the hem.
Final Blocking
- Weave any remaining tails into the inside of the dome, where they won’t show through the open columns.
- Mix the fabric stiffener as directed, or get your spray starch ready.
- Dip the bell (not the clapper), squeeze out the excess, and blot it in a towel. It should be damp, not dripping.
- Slip the bell over your drying form so the dome fits snugly and the hem flares out.
- Straighten each treble column with your fingers until all 10 are vertical and evenly spaced.
- Open each scallop into a smooth fan, pinning if needed.
- Let it dry completely, about 24 hours.
- Take it off the form and confirm the size: 3.25 in (8.3 cm) tall and 3.75 in (9.5 cm) wide at the hem.
Final Quality-Control Checklist
- Magic ring fully closed, with no hole at the top
- 5 shells in Round 3 and 5 offset shells in Round 4
- Two clean ridge lines in the top band (Rounds 5–6)
- 10 straight, evenly spaced treble columns, each 3 tr tall
- Two ridge lines in the lower band (Rounds 10–11)
- 10 scallops, each centered between two columns
- Loop corded, centered, and 1.75 in (4.4 cm) tall
- Clapper hangs straight down the center, below the hem
- All tails hidden inside the dome
- Bell holds its shape when hung
Troubleshooting
Dome lies flat instead of cupping: Your shells are too loose. Tighten your dc or go down a hook size for Rounds 3–4.
Dome ruffles: Make sure you skipped 1 st on each side of every shell in Round 3.
Columns lean or spiral: You’re working into the chain space or the joins are drifting. Work each tr into the top of the tr directly below, and join to the 4th ch of the beginning ch-4 every round.
Columns too short: Pull each loop up fully, or use a 2.75 mm hook for Rounds 7–9 only.
Hem pulls in: Your Round 10 sc are too tight. Keep 3 sc per space, but work them more loosely.
Scallops don’t line up with columns: Recount Round 10. It must be exactly 40 sc, and the first sc of Round 12 must sit above a tr.
Clapper hangs crooked: Thread the cord again, exactly through the center of the magic ring.
Care
Spot clean with a damp cloth and lay flat to dry. If the bell softens over time, starch it again and dry it on the form.
Final Notes
The measurement chain is short and easy to check. Gauge is 6 sc = 1 in (2.5 cm), and the dome reaches 1 in (2.5 cm) tall by Round 4. The top band is 30 sc, or 5 in (12.7 cm) around. Ten treble columns bring the height to 2.5 in (6.4 cm). The lower band is 40 sc, about 6.6 in (16.8 cm) around. The 0.75 in (1.9 cm) scalloped hem finishes the bell at 3.25 in (8.3 cm) tall and 3.75 in (9.5 cm) wide. If each checkpoint matches, your bell will too.
Happy crocheting!