

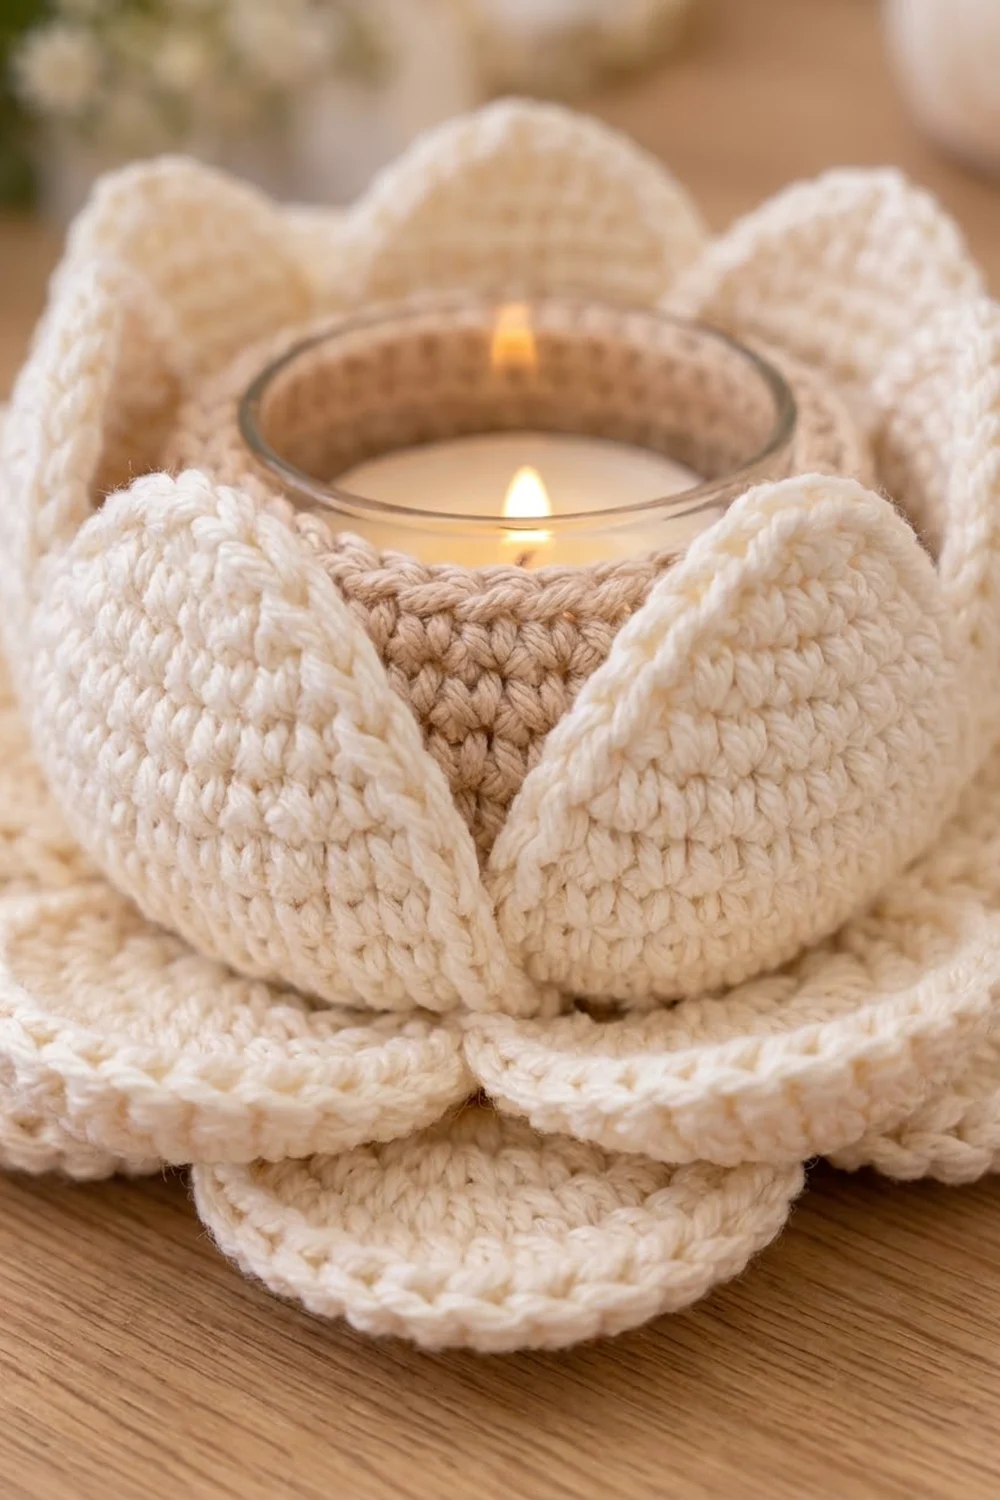
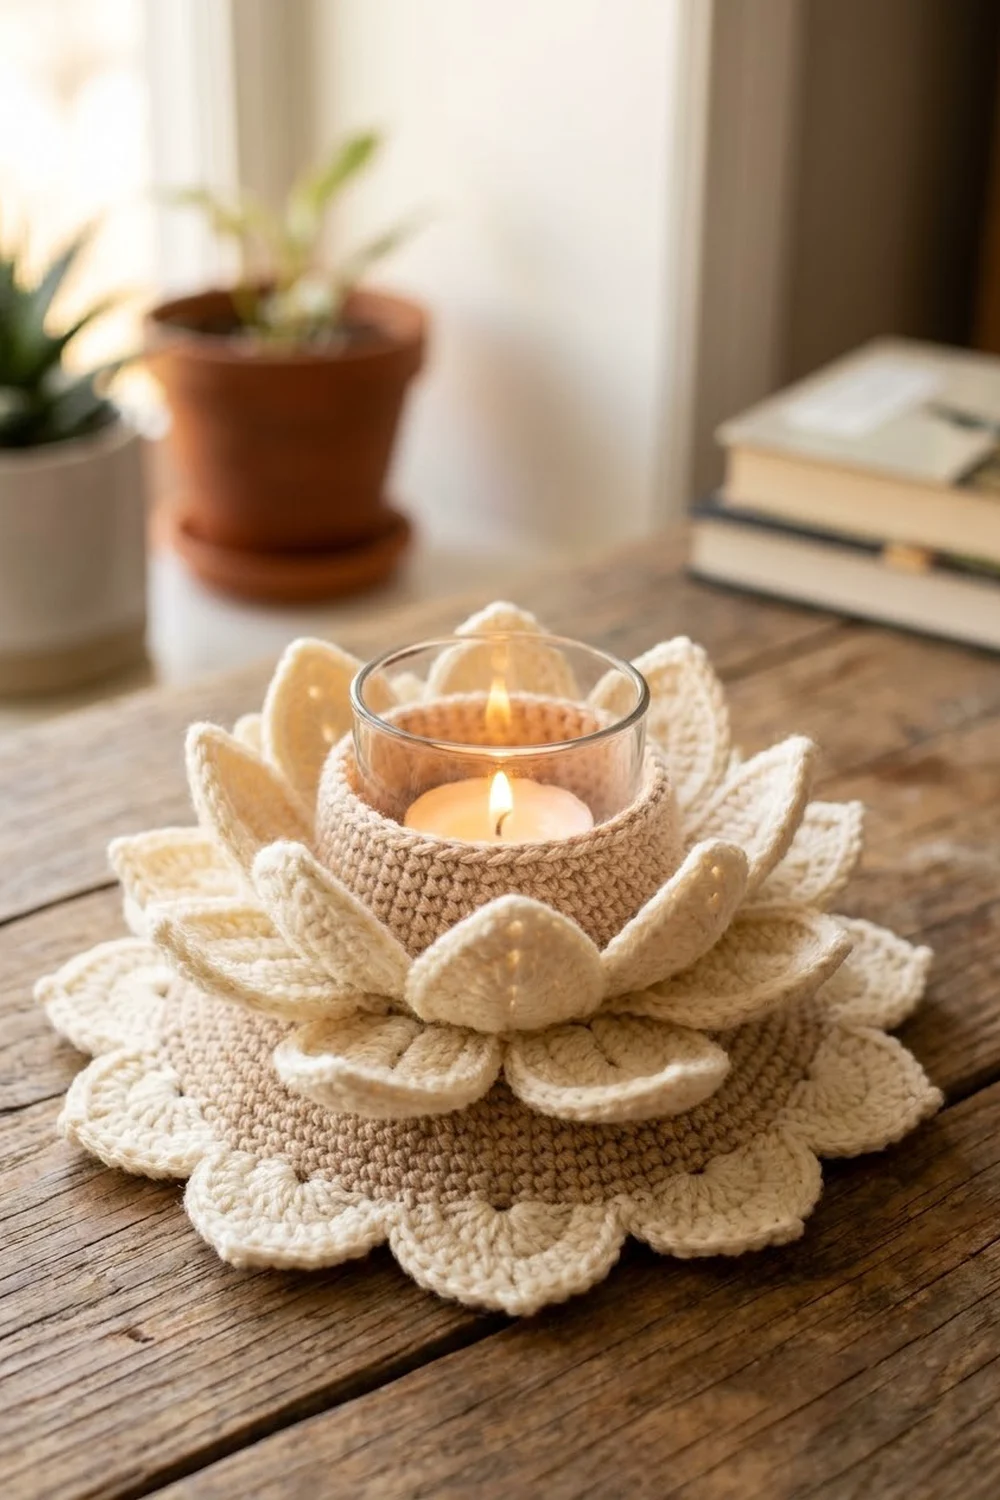
This lotus candle holder is a calm, soft design. A ring of rounded cream scallops lies flat on the table. Above it, two tiers of pointed cream petals open around a small beige cup that holds a glass votive. When lit, the beige cup glows warmly through the gaps between the petals.
The palette is just two colors: ivory cream for every petal and scallop, and light latte beige for the base center and the cup. Tight single crochet keeps the cup firm, and the petals are worked around a foundation chain so they come out naturally cupped.
The pattern uses US crochet terms. The finished holder is about 6.5 in (16.5 cm) across and 3.5 in (8.9 cm) tall. It fits a glass votive up to about 3.25 in (8.3 cm) wide.
Construction is simple. You crochet a flat base plate with a scalloped cream ring, a separate beige cup, and 16 petals. Then you sew the cup to the plate, sew the petals around the cup, and finish with a scallop edging.
Finished Size and Construction
- Finished size: 6.5 in (16.5 cm) diameter × about 3.5 in (8.9 cm) tall
- Skill level: Easy-intermediate
- Terminology: US crochet terms
- Yarn weight: Worsted (#4) cotton
- Hook: 4.0 mm (G-6)
- Number of pieces: 18 (1 base plate, 1 cup, 8 large petals, 8 medium petals)
- Layout: Cup centered on the plate; 8 large petals in the lower tier; 8 medium petals staggered above them
- Piece sizes: Cup 3.75 in (9.5 cm) wide × 2.25 in (5.7 cm) tall; large petal 3.25 in (8.3 cm) × 1.75 in (4.4 cm); medium petal 2.75 in (7.0 cm) × 1.5 in (3.8 cm)
- Base plate before border: 6 in (15.2 cm)
- Border depth: 0.25 in (0.6 cm) per side
Materials
Use a smooth, mercerized or matte worsted cotton. Cotton holds the petal shapes, does not fuzz, and blocks crisply. Avoid acrylic and wool, which are softer and more flammable near heat.
- Color A, latte beige: 40 g / 80 m
- Color B, ivory cream: 55 g / 110 m
Tools:
– 4.0 mm (G-6) crochet hook
– Tapestry needle
– Stitch markers (at least 16)
– Scissors
– Pins
– Spray bottle and a blocking mat
– A glass votive up to 3.25 in (8.3 cm) wide
– An LED (flameless) tea light
The quantities include a margin of about 20% for gauge swatches and sewing tails.
Safety note: Only use an LED tea light. Never put an open flame near crocheted fabric.
Abbreviations (US Terms)
- ch – chain
- sl st – slip stitch
- sc – single crochet
- hdc – half double crochet
- dc – double crochet
- inc – 2 sc in the same stitch
- BLO – back loop only
- MR – magic ring
- st(s) – stitch(es)
- sk – skip
- rep – repeat
Special stitch – Scallop: sk 2 sts, 7 dc in next st, sk 2 sts, sl st in next st. One scallop uses 6 stitches.
Unless stated otherwise, every round is joined with a sl st to the first st. The beginning ch 1 does not count as a stitch.
Gauge and Checkpoints
Gauge: 16 sc × 18 rounds = 4 in (10.2 cm) in single crochet.
Make the cup first. It is the piece where gauge matters most, because the votive must fit inside it. Measure at each stage:
- After Rnd 4 (24 sts): about 1.75 in (4.4 cm) across
- After Rnd 8 (48 sts): 3.75 in (9.5 cm) across
- After cup Rnd 18: wall about 2.25 in (5.7 cm) tall
- After plate Rnd 10: 4.5 in (11.4 cm)
- After plate Rnd 11: 5 in (12.7 cm)
- After plate Rnd 12 (scallops): 6 in (15.2 cm)
If your piece is too big, go down to a 3.75 mm hook. If it is too small, go up to a 4.5 mm hook. Change the hook, not the stitch counts: all the joining depends on the plate and cup having matching counts.
Base Plate
With Color A:
Rnd 1: 6 sc in MR. (6 sts)
Rnd 2: inc in each st around. (12 sts)
Rnd 3: (sc 1, inc) × 6. (18 sts)
Rnd 4: (sc 2, inc) × 6. (24 sts)
Rnd 5: (sc 3, inc) × 6. (30 sts)
Rnd 6: (sc 4, inc) × 6. (36 sts)
Rnd 7: (sc 5, inc) × 6. (42 sts)
Rnd 8: (sc 6, inc) × 6. (48 sts)
Place a marker in any stitch of Rnd 8. You will use this round later as the sewing line for the cup.
Rnd 9: (sc 7, inc) × 6. (54 sts)
Rnd 10: (sc 8, inc) × 6. (60 sts)
Fasten off Color A. The plate should measure 4.5 in (11.4 cm).
Join Color B in any stitch.
Rnd 11: ch 1, (sc 9, inc) × 6. (66 sts)
Rnd 12 (scallops): sl st in the first st. Sk 2 sts, 7 dc in next st, sk 2 sts, sl st in next st. Rep from * 10 more times. The last sl st lands in the first sl st.
That gives 11 scallops: 77 dc plus 11 sl sts. The math works because 11 scallops × 6 sts = 66 sts. Do not fasten off yet. Pull up a long loop, remove the hook, and secure the loop with a marker. You will work the border from here after assembly.
Cup
With Color A, work Rnds 1–8 exactly as for the Base Plate. (48 sts)
Rnd 9 (turning round): ch 1, sc BLO in each st around. This is 48 sts worked one per existing stitch, plus 0 added, for 48 sts. The unworked front loops make a ridge, and the work turns upward to form the wall.
Rnds 10–18: ch 1, sc in each st around. (48 sts)
At the end of Rnd 18, sl st loosely in the next st and fasten off. Leave a 12 in (30.5 cm) tail.
Checkpoint: The cup is 3.75 in (9.5 cm) across and 2.25 in (5.7 cm) tall. The votive should slide in easily.
Large Petal
With Color B:
Foundation: ch 12.
Rnd 1: Work the first side of the chain:
– sc in the 2nd ch from the hook
– hdc in the next ch
– dc in the next 7 ch
– hdc in the next ch
– 4 hdc in the last ch (this is the base end)
Rotate and work along the opposite side of the chain:
– hdc in the next ch
– dc in the next 7 ch
– hdc in the next ch
– sc in the last ch
Sl st to the first sc. (24 sts: 10 on side one, 4 at the base, 10 on side two)
Rnd 2: ch 1, then:
– (sc, ch 2, sc) in the first st (this forms the tip)
– sc in the next 9 sts
– 2 sc in each of the next 4 sts
– sc in the next 10 sts
Sl st to the first sc. The total is 24 sts worked one per stitch, plus 4 extra at the base, plus 1 extra at the tip: 29 sc and 1 ch-2 tip.
Fasten off and leave a 12 in (30.5 cm) tail. The petal should be 3.25 in (8.3 cm) long × 1.75 in (4.4 cm) wide, with a sharp ch-2 point.
Medium Petal
With Color B:
Foundation: ch 10.
Rnd 1: Work the first side of the chain:
– sc in the 2nd ch from the hook
– hdc in the next ch
– dc in the next 5 ch
– hdc in the next ch
– 4 hdc in the last ch
Rotate and work along the opposite side of the chain:
– hdc in the next ch
– dc in the next 5 ch
– hdc in the next ch
– sc in the last ch
Sl st to the first sc. (20 sts)
Rnd 2: ch 1, then:
– (sc, ch 2, sc) in the first st
– sc in the next 7 sts
– 2 sc in each of the next 4 sts
– sc in the next 8 sts
Sl st to the first sc. The total is 20 + 4 + 1 = 25 sc and 1 ch-2 tip.
Fasten off and leave a 12 in (30.5 cm) tail. The petal should be 2.75 in (7.0 cm) × 1.5 in (3.8 cm).
Make All Pieces
- Color A: 1 base center (Rnds 1–10) and 1 cup
- Color B: base plate Rnds 11–12, 8 large petals, 8 medium petals
Layout around the cup, as seen from above. The cup’s 48 stitches are divided into 8 sections of 6 stitches each:
Cup st:   3    6    9   12   15   18   21   24
Tier:     L    M    L    M    L    M    L    M
Cup st:  27   30   33   36   39   42   45   48
Tier:     L    M    L    M    L    M    L    M
L = large petal, lower tier (its base sits on wall Rnds 9–11).
M = medium petal, upper tier (its base sits on wall Rnds 12–14).
Mark the 16 stitches listed above on the cup with stitch markers before you sew anything.
Joining
Cup to plate: Set the cup on the plate so its Rnd 9 front-loop ridge lines up with the marked Rnd 8 of the plate. Both rounds have 48 sts, so join them one-to-one. Use the cup’s tail to whipstitch each front loop of the ridge to the matching stitch on plate Rnd 8.
Plate Rnds 9–10 stay visible as a 0.375 in (1.0 cm) beige ring around the cup.
Large petals: Pin each large petal with its base centered on an “L” marker. The 8 base sc of Rnd 2 cover about 1.25 in (3.2 cm), so they overlap the neighboring section slightly. Whipstitch across those 8 sc into wall Rnds 9–11, working 8 sewing stitches into 6 cup stitches. Fold the petal outward so it rests on the scallops.
Medium petals: Pin each medium petal on an “M” marker, between two large petals. Whipstitch its 8 base sc to wall Rnds 12–14 so it stands upright. Tack one side edge of each medium petal to the cup wall at Rnd 16 so it leans slightly inward.
Tension: Sew firmly but don’t pull. Tight seams pucker the cup wall and make the votive fit too snugly.
Checkpoint: The tips of the medium petals reach about 3.5 in (8.9 cm) above the table.
Border
The border is a single-crochet edging around the scallops of the base plate. It uses the same gauge as the rest of the piece: 16 sc = 4 in (10.2 cm).
Put the live Color B loop back on your hook.
Border Rnd: sc in the next 3 dc, 3 sc in the next (center) dc, sc in the next 3 dc, sl st in the next sl st. Rep from * 10 more times.
Per scallop: 7 dc worked one per stitch, plus 2 extra at the center, gives 9 sc and 1 sl st.
Total: 77 sc worked one per stitch + 22 extra = 99 sc, plus 11 sl sts, for 110 sts.
Why the math works: Each 7-dc fan curves like a half-circle, so its outer edge is longer than its base. The 2 extra sc at the apex make room for that extra length, which keeps the scallop round and flat instead of cupping. The sl sts sink into the valleys and keep the dips sharp. The border adds 0.25 in (0.6 cm) on each side: 6 in + 0.25 in + 0.25 in = 6.5 in (16.5 cm).
Fasten off and weave in all ends.
Final Blocking
- Mist the whole holder until it is damp, but not soaked.
- Put the votive inside the cup to support the walls.
- Lay the scallops flat and pin each apex out to a 6.5 in (16.5 cm) circle.
- Pinch each petal tip into a point and gently curve the petal body with your fingers.
- Stuff small balls of plastic wrap between the upper petals and the cup to hold their inward curve.
- Let it dry completely, for 12–24 hours.
- Remove the pins and the plastic wrap.
Final Quality-Control Checklist
- Plate is 6.5 in (16.5 cm) across and lies flat
- 11 even scallops, each with 9 sc and a center apex
- Cup is 3.75 in (9.5 cm) wide and 2.25 in (5.7 cm) tall, with no leaning
- 8 large and 8 medium petals, alternating evenly
- All tips are sharp; no seams show from the front
- Votive goes in and comes out easily
- All ends are woven in securely
Troubleshooting
- Plate ruffles: Your tension is loose in the increase rounds. Redo them with a smaller hook.
- Plate cups upward: Your tension is tight. Go up a hook size for Rnds 9–12.
- Cup wall flares out: Work Rnds 10–18 more firmly, or use a 3.75 mm hook.
- Petals flop: Block again with starch, or add a second tacking stitch.
- Gaps between petals: Center each petal exactly on its marker.
- Scallops are lopsided: Check that you skip exactly 2 sts on each side.
Care
Spot clean or hand wash cold, press out the water in a towel, and reshape while damp. Dry flat with the votive inside to support the cup.
Final Notes
The measurement chain is the whole design:
– Gauge of 16 sc = 4 in (10.2 cm)
– Cup base of 3.75 in (9.5 cm), matching plate Rnd 8 stitch for stitch
– Plate of 6 in (15.2 cm) before the border
– Border of 0.25 in (0.6 cm) per side, for a 6.5 in (16.5 cm) finished diameter
If each checkpoint matches, the petals will fall into place.
Happy crocheting!