

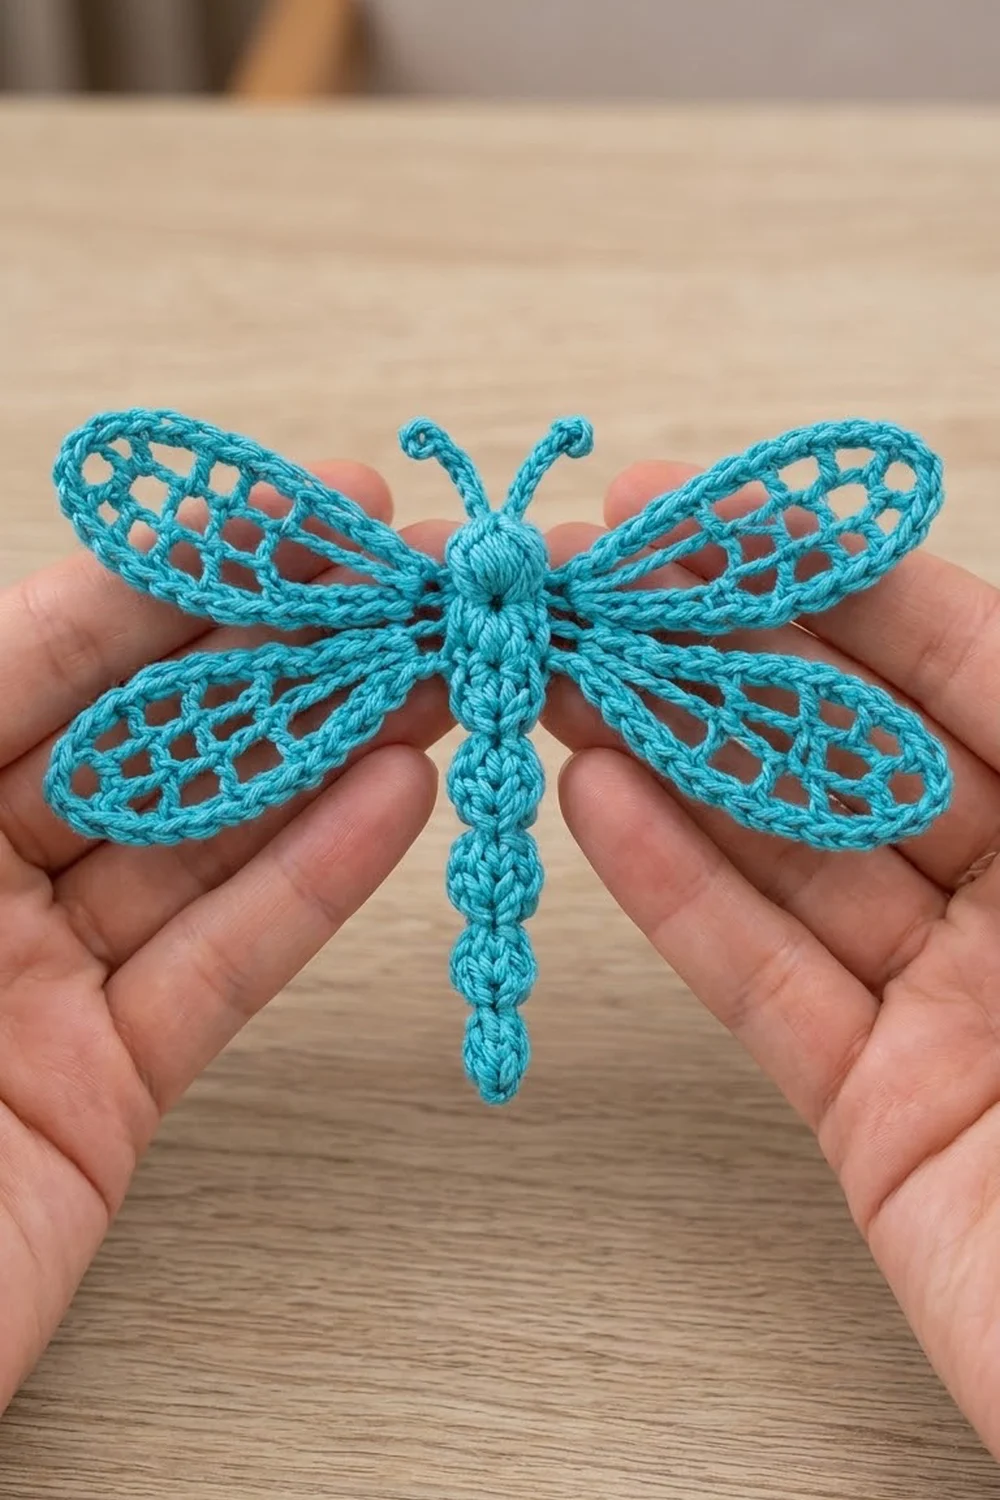
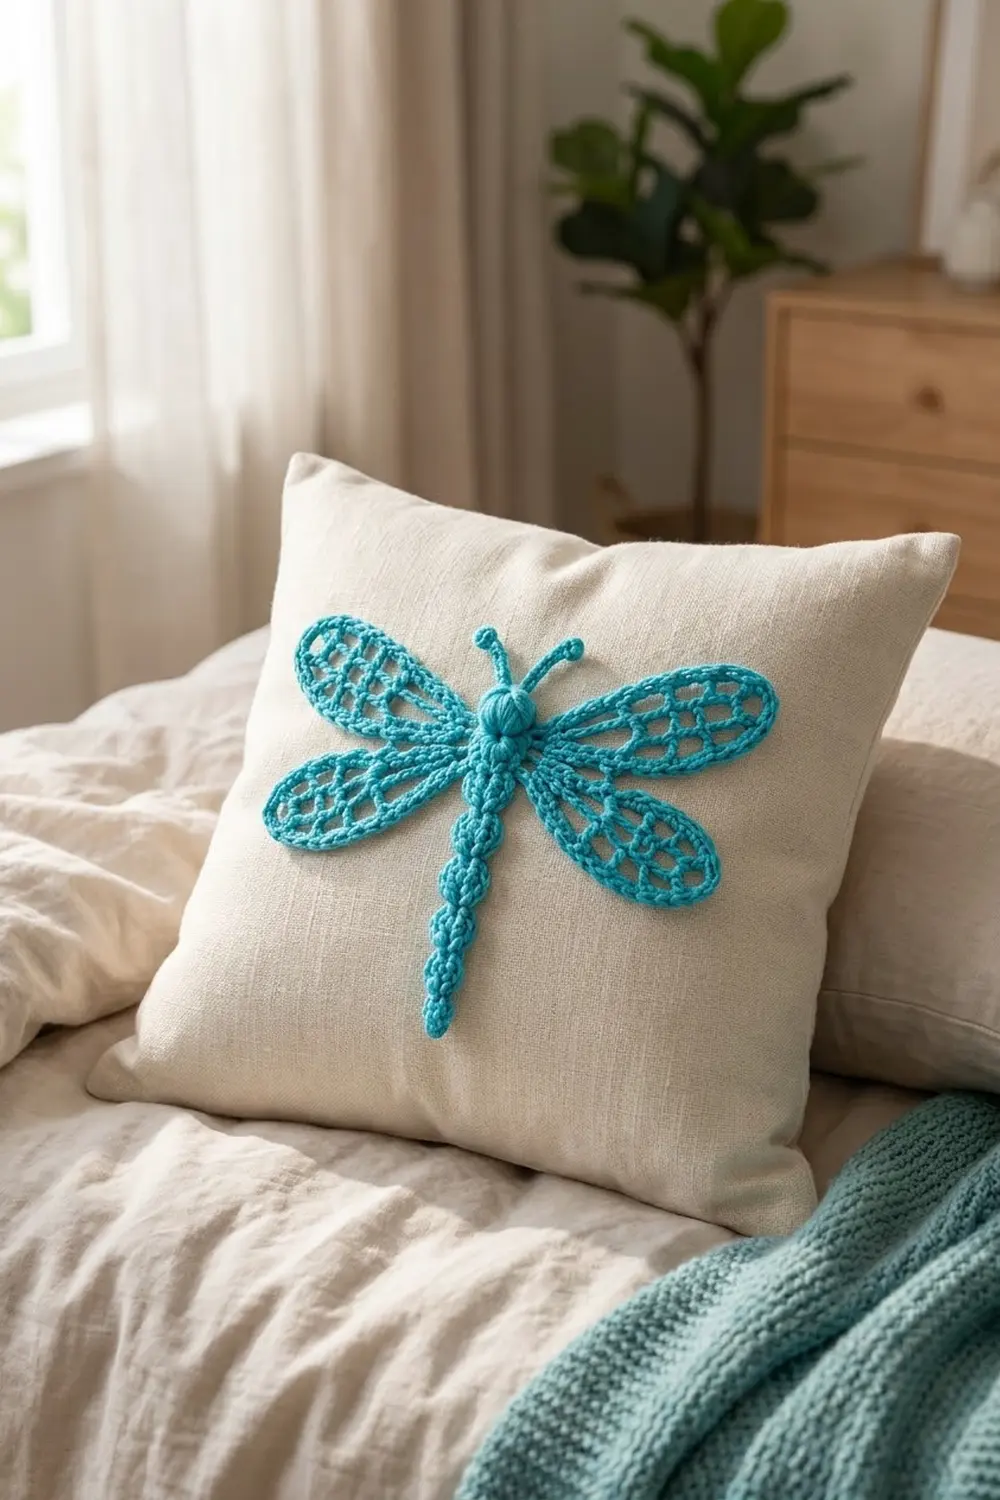
This dragonfly is a light, lacy appliqué worked in one bright turquoise. It has a segmented beaded body, a round head with two curled antennae, and four open-mesh wings edged with a raised, rope-like outline. The upper wings are a little longer than the lower ones, which gives it a natural, balanced shape.
The whole motif is made in one solid color using sport-weight cotton, so the stitch texture and the open cells do all the work. Cotton keeps the lattice crisp and the edges sharp after blocking. The pattern uses US crochet terms throughout.
The finished dragonfly measures 7 in (17.8 cm) from wing tip to wing tip and 4.5 in (11.4 cm) from head to tail, not counting the antennae. With antennae, the total length is 5.25 in (13.3 cm).
Everything is worked in one continuous piece with no sewing. You start with the head and antennae, then make the thorax and abdomen as a chain of clustered beads. Next you slip stitch back up the spine and work the four wings directly off the thorax, one at a time. Each wing starts on a foundation chain, gets two rounds of mesh cells, and finishes with a single crochet round and a reverse single crochet edge.
Finished Size and Construction
- Finished size: 7 in (17.8 cm) wingspan x 4.5 in (11.4 cm) body length
- Skill level: Intermediate
- Terminology: US crochet terms
- Yarn weight: Sport (#2), mercerized cotton
- Hook: 2.75 mm (US C-2)
- Number of pieces: 1, worked continuously
- Layout: Single motif, laid flat; 2 upper wings and 2 lower wings branching from the thorax
- Upper wing size: 3.25 in (8.3 cm) long x 1.4 in (3.6 cm) wide
- Lower wing size: 2.75 in (7.0 cm) long x 1.25 in (3.2 cm) wide
- Size before border (after wing Rnd 2): upper wing 3.1 in (7.9 cm) x 1.1 in (2.8 cm); lower wing 2.6 in (6.6 cm) x 0.95 in (2.4 cm)
- Border depth: 0.15 in (0.4 cm) on each long edge and at the tip
Materials
Pick a smooth, mercerized sport-weight cotton or cotton blend. Lace looks best with high stitch definition, so avoid fuzzy or loosely plied yarn. A ball of about 150 m per 50 g fits this gauge.
- Turquoise: 15 g (about 45 m)
The quantity includes a margin of roughly 25% so you have room for a gauge swatch and some ripping back.
Tools:
- 2.75 mm (US C-2) crochet hook
- Tapestry needle
- Small, sharp scissors
- Stitch markers (2 or 3)
- Ruler or tape measure
- Blocking mat and rust-proof pins
- Spray bottle with water, or a steamer
Abbreviations (US Terms)
- ch – chain
- sl st – slip stitch
- sc – single crochet
- hdc – half double crochet
- dc – double crochet
- tr – treble crochet
- sk – skip
- sp – space
- st(s) – stitch(es)
- rnd – round
- rev sc – reverse single crochet (crab stitch)
Special stitches
- 5-tr cluster: *Yarn over twice, insert hook in the indicated st, pull up a loop, [yarn over, pull through 2 loops] twice; repeat from * 4 more times in the same st (6 loops on hook), yarn over, pull through all 6 loops.
- 4-dc cluster: *Yarn over, insert hook in the indicated st, pull up a loop, yarn over, pull through 2 loops; repeat from * 3 more times in the same st (5 loops on hook), yarn over, pull through all 5 loops.
- 3-dc cluster: Work like the 4-dc cluster, but repeat only 3 times in total (4 loops on hook), then yarn over and pull through all 4 loops.
- Bead: Ch 3, work the stated cluster in the 3rd ch from hook, ch 1 to lock. Each bead folds back along its own chain and becomes one rounded body segment.
- rev sc: Working from left to right (right-handers), insert hook in the next st to the right, pull up a loop, yarn over, pull through both loops.
Gauge and Checkpoints
Chain gauge: 16 ch = 2 in (5.1 cm), measured relaxed.
This motif is small, so the best swatch is the motif itself. Make the head and body first and measure them before starting the wings.
Checkpoints:
- Head: 0.6 in (1.5 cm) across.
- Body (head to tail tip): 4.5 in (11.4 cm).
- Upper wing after Rnd 1: 3 in (7.6 cm) x 0.75 in (1.9 cm).
- Upper wing after Rnd 2: 3.1 in (7.9 cm) x 1.1 in (2.8 cm).
- Lower wing after Rnd 1: 2.5 in (6.4 cm) x 0.65 in (1.7 cm).
- Lower wing after Rnd 2: 2.6 in (6.6 cm) x 0.95 in (2.4 cm).
- Finished wingspan: 7 in (17.8 cm).
If your piece is too big, go down to a 2.5 mm hook and work the wing foundation chains a little tighter. If it’s too small, go up to a 3 mm hook. Keep the stitch counts as written. Changing counts will throw off the wing edging math.
Pattern
Head
Make a magic ring.
Rnd 1: Ch 2 (does not count as a st), 10 dc in ring, pull the ring tight, and sl st in the first dc to join. (10 dc)
Mark the joining dc as dc 1. The head should be a firm disc 0.6 in (1.5 cm) across.
Antennae
Sl st in dc 2.
Antenna 1: Ch 7, sl st in 2nd ch from hook and in each of the next 5 ch, sl st in dc 2. (6 sl sts along the antenna)
Sl st in dc 3.
Antenna 2: Ch 7, sl st in 2nd ch from hook and in each of the next 5 ch, sl st in dc 3. (6 sl sts along the antenna)
The two antennae sit side by side at the top of the head, each 0.75 in (1.9 cm) long. You’ll curl the tips during blocking.
Sl st in dc 4, 5, 6, and 7. (4 sl sts) Your hook is now at the bottom of the head, opposite the antennae.
Thorax
Ch 4, work a 5-tr cluster in the 4th ch from hook, ch 1 to lock. (1 thorax bead)
The thorax is the widest part of the body, about 0.6 in (1.5 cm) long and 0.5 in (1.3 cm) wide.
Abdomen
Beads 1–5: Work 5 beads using the 4-dc cluster. (5 beads)
Beads 6–7: Work 2 beads using the 3-dc cluster. (2 beads, 7 abdomen beads total)
Tail tip: Ch 3, sl st in 2nd ch from hook and in the next ch. (2 sl sts)
The smaller beads at the end taper the abdomen. Check that the body measures 4.5 in (11.4 cm) from the top of the head to the tail tip.
Spine
Working back up the body, sl st in the locking ch-1 of beads 6, 5, 4, 3, 2, and 1, then sl st in the locking ch-1 of the thorax. (7 sl sts)
This slip-stitch spine firms up the body and gets your yarn back to the thorax without cutting it.
Wing Anchor Points
The thorax has 4 anchor points, two on each side. The lower anchors sit in the lower half of the thorax bead and the upper anchors in the upper half. To anchor, insert your hook under 2 strands at the side of the thorax cluster.
Sl st up the left side of the thorax to the lower-left anchor. (1 sl st)
Lower Wing (make 2)
Foundation: Ch 22. The last ch made is the tip. Counting from the hook, chs 2–22 are the working chains, and ch 22 sits next to the thorax.
Rnd 1 (first mesh tier):
Side A (tip to base): Sc in 2nd ch from hook, [ch 2, sk 2 ch, hdc in next ch], [ch 2, sk 2 ch, dc in next ch] 3 times, [ch 2, sk 2 ch, hdc in next ch], [ch 2, sk 2 ch, sc in next ch]. Posts are now in chs 2, 5, 8, 11, 14, 17, and 20. Ch 2, sk chs 21–22, sl st in the anchor point.
Side B (base to tip, in the remaining loops of the same chains): Ch 2, sc in ch 20, ch 2, hdc in ch 17, [ch 2, dc in next post ch] 3 times (chs 14, 11, 8), ch 2, hdc in ch 5, ch 2, sc in ch 2, ch 2, sl st in the first sc of Side A.
(14 posts, 15 ch-2 sps: 7 on each side + 1 at the tip)
Rnd 2 (second mesh tier): Sl st in the tip ch-2 sp, ch 1, sc in the same sp, [ch 2, sc in next ch-2 sp] 7 times along Side A (the last sc goes in the base sp), sl st in the anchor point, sc in the first ch-2 sp of Side B, [ch 2, sc in next ch-2 sp] 6 times, ch 2, sl st in the first sc.
(15 sc, 14 ch-2 sps)
Check: 2.6 in (6.6 cm) x 0.95 in (2.4 cm). Continue straight to the wing border, Rnds 3–4 below.
Upper Wing (make 2)
Foundation: Ch 25. The last ch made is the tip. Counting from the hook, chs 2–25 are the working chains, and ch 25 sits next to the thorax.
Rnd 1 (first mesh tier):
Side A (tip to base): Sc in 2nd ch from hook, [ch 2, sk 2 ch, hdc in next ch], [ch 2, sk 2 ch, dc in next ch] 4 times, [ch 2, sk 2 ch, hdc in next ch], [ch 2, sk 2 ch, sc in next ch]. Posts are now in chs 2, 5, 8, 11, 14, 17, 20, and 23. Ch 2, sk chs 24–25, sl st in the anchor point.
Side B (base to tip): Ch 2, sc in ch 23, ch 2, hdc in ch 20, [ch 2, dc in next post ch] 4 times (chs 17, 14, 11, 8), ch 2, hdc in ch 5, ch 2, sc in ch 2, ch 2, sl st in the first sc of Side A.
(16 posts, 17 ch-2 sps: 8 on each side + 1 at the tip)
Rnd 2 (second mesh tier): Sl st in the tip ch-2 sp, ch 1, sc in the same sp, [ch 2, sc in next ch-2 sp] 8 times along Side A, sl st in the anchor point, sc in the first ch-2 sp of Side B, [ch 2, sc in next ch-2 sp] 7 times, ch 2, sl st in the first sc.
(17 sc, 16 ch-2 sps)
Check: 3.1 in (7.9 cm) x 1.1 in (2.8 cm). Continue to the wing border.
Wing Order
Work the wings in this order, finishing each one with its border before moving on:
- Lower-left wing, then sl st up to the upper-left anchor (1 sl st)
- Upper-left wing, then sl st across the top of the thorax to the upper-right anchor (2 sl sts)
- Upper-right wing, then sl st down to the lower-right anchor (1 sl st)
- Lower-right wing, then fasten off and weave in the ends through the spine.
Wing Border
The border is the raised rope outline around each wing. It’s worked as Rnds 3–4 of every wing.
Border gauge: 3 sc fill one ch-2 sp, and 6 rev sc = 1 in (2.5 cm) along the edge.
Rnd 3: Sl st in the next ch-2 sp, ch 1, 3 sc in each ch-2 sp around. Where you pass the base, sl st in the anchor point between the last Side A sp and the first Side B sp. Sl st in the first sc to join.
– Lower wing: 14 sps x 3 = 42 sc (18 sc along Side A, 18 sc along Side B, 6 sc in the 2 tip-side sps)
– Upper wing: 16 sps x 3 = 48 sc (21 sc along Side A, 21 sc along Side B, 6 sc in the 2 tip-side sps)
Rnd 4: Ch 1, rev sc in each sc around, sl st in the anchor point at the base, then sl st in the first rev sc.
– Lower wing: 42 rev sc
– Upper wing: 48 rev sc
Why the math works: Rnd 2 leaves a fixed number of ch-2 spaces on each wing (14 or 16). Each space takes exactly 3 sc, so the outer edge gets 1.5 sts per chain worked in Rnd 2. That’s enough to go around the curve without cupping, but not so many that it ruffles. Rnd 4 works 1 rev sc into each sc, so the count never changes, and the rope edge sits flat with a depth of 0.15 in (0.4 cm). The base is never edged, because each wing sits against the thorax there.
Final wing sizes: upper 3.25 in (8.3 cm) x 1.4 in (3.6 cm), lower 2.75 in (7.0 cm) x 1.25 in (3.2 cm).
Final Blocking
- Weave in all ends before blocking, and trim them only after the piece is dry.
- Spray the dragonfly until it’s evenly damp, or soak it briefly in cool water and press it in a towel.
- Lay it face up on the blocking mat.
- Pin the body straight. It should measure 4.5 in (11.4 cm) from head to tail.
- Pin each upper-wing tip so the wingspan is 7 in (17.8 cm), angling the upper wings slightly upward.
- Pin the lower wings angled slightly downward, keeping a small gap between each upper and lower wing.
- Pin the middle of each long wing edge to open the mesh cells evenly.
- Shape the antennae into small outward curls with your fingers or a pin.
- Let it dry completely, at least 12 hours. Then remove the pins.
Final Quality-Control Checklist
- Head has 10 dc and both antennae sit at the top.
- Body has 1 thorax bead, 7 abdomen beads, and a tail tip, for 4.5 in (11.4 cm) total.
- Each upper wing has 16 posts in Rnd 1, 17 sc in Rnd 2, and 48 sc/48 rev sc in its border.
- Each lower wing has 14 posts in Rnd 1, 15 sc in Rnd 2, and 42 sc/42 rev sc in its border.
- Left and right wings mirror each other in length and width.
- Mesh cells are open and evenly sized.
- Wingspan is 7 in (17.8 cm).
- All ends are hidden in the spine or the solid edges.
Troubleshooting
Wings cup or curl up: Your Rnd 3 is too tight. Rework it a little looser, or go up one hook size for Rnds 3–4 only.
Wing edges ruffle: Work only 2 sc in the two ch-2 sps next to the base. Note the new count and repeat it on the matching wing.
Body beads look flat: Pull each cluster fully closed and tighten the ch-1 lock firmly.
Mesh cells collapse: Make sure you skip exactly 2 chains between posts, and don’t pull the ch-2 too tight.
Left and right wings differ: Count the foundation chains again. One extra chain changes the length by 0.125 in (0.3 cm).
Antennae won’t curl: Dampen them again, twist each one gently around a pin, and let it dry in place.
Care
Hand wash in cool water with mild soap, press out the water in a towel, and dry flat, pinning the wings back into shape if needed. Avoid ironing directly on the rope edge.
Final Notes
The measurement chain goes like this. The chain gauge of 16 ch to 2 in (5.1 cm) sets the wing foundations. Rnds 1–2 build the mesh to 3.1 in (7.9 cm) and 2.6 in (6.6 cm). The 3-sc-per-space border adds 0.15 in (0.4 cm) and brings the wings to 3.25 in (8.3 cm) and 2.75 in (7.0 cm). Those wings, plus the 0.5 in (1.3 cm) thorax, give the 7 in (17.8 cm) wingspan. If every checkpoint matches, your dragonfly will block out flat, open, and symmetrical.
Happy crocheting!